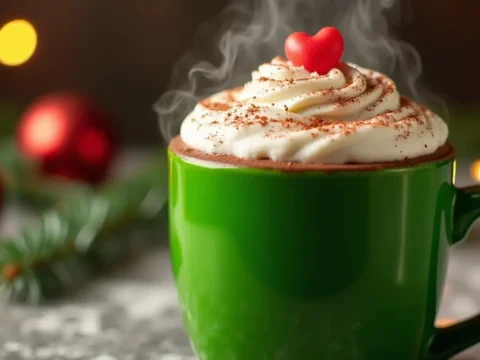
There’s nothing quite like the magic of a cozy cup of hot chocolate, especially when it’s served in a fun and indulgent way. Imagine biting into a rich, chocolatey shell that melts away as you pour in hot cocoa, creating the perfect sweet treat. Hot chocolate cups are not only a treat for your taste buds but also a delightful experience to share with family and friends. Whether you’re hosting a gathering, looking for a unique gift idea, or just craving something sweet, these cups are sure to impress. Plus, they’re incredibly versatile—fill them with your favorite hot cocoa, top with whipped cream, and add a dash of sprinkles or marshmallows to make them even more irresistible. Ready to dive into the world of hot chocolate cups? Let’s get started!
Table of Contents
Key Benefits of Hot Chocolate Cups: Why You Need to Try Them
If you’re looking to elevate your hot chocolate experience, hot chocolate cups are the way to go. These indulgent treats bring the cozy comfort of a classic winter drink into a fun, dessert-like form. Here’s why you’ll want to make them a part of your next chilly evening or holiday gathering.
[adinserter block=”3″]1. The Ultimate Winter Comfort
There’s nothing like sipping on a warm, creamy drink to soothe the soul during the colder months. But what if you could enjoy that comfort in a fun, edible cup? Hot chocolate cups combine the best of both worlds—rich, velvety chocolate inside and a delicious chocolate shell outside. It’s like a double dose of warmth and happiness in every bite.
2. Perfect for Personalization
One of the best parts about making hot chocolate cups is how customizable they are. You can choose your favorite chocolate variety—dark, milk, or even white chocolate—to create a unique flavor profile. Plus, the fillings and toppings are up to you! Want marshmallows? Crushed peppermint? A drizzle of caramel or a sprinkle of sea salt? The sky’s the limit when it comes to making your hot chocolate cups your own.
3. A Fun and Memorable Treat
Making hot chocolate cups is not just a delicious activity—it’s a memorable one. Whether you’re cooking with friends, hosting a holiday party, or creating a special treat for your family, these cups are sure to be a hit. They make the perfect centerpiece for your dessert table or a sweet homemade gift for loved ones. Imagine handing someone a beautifully crafted hot chocolate cup filled with rich, hot cocoa—it’s guaranteed to bring a smile.
4. Easy to Make and Enjoy
You don’t need to be a master chef to make hot chocolate cups. With a few simple ingredients and minimal steps, you can create these treats at home. The process of melting chocolate, pouring it into molds, and chilling it is simple and satisfying. Plus, once you’ve made the cups, they can be filled and enjoyed in minutes!
5. The Ultimate Comfort Drink with a Twist
What sets hot chocolate cups apart from traditional hot cocoa is the added indulgence of eating the cup itself. When you take that first sip, you’re greeted with not just a rich hot chocolate but a melt-in-your-mouth chocolate cup. It’s an extra layer of decadence that makes your drink feel like a true dessert experience.
Ingredients: What You’ll Need to Make Hot Chocolate Cups
Before we dive into the fun part of making your hot chocolate cups, let’s gather everything you’ll need. The beauty of this recipe is its simplicity, so you don’t need a long list of exotic ingredients—just a few key items, and you’re all set. Here’s what you’ll need to create your perfect cup of chocolatey goodness.
[adinserter block=”3″]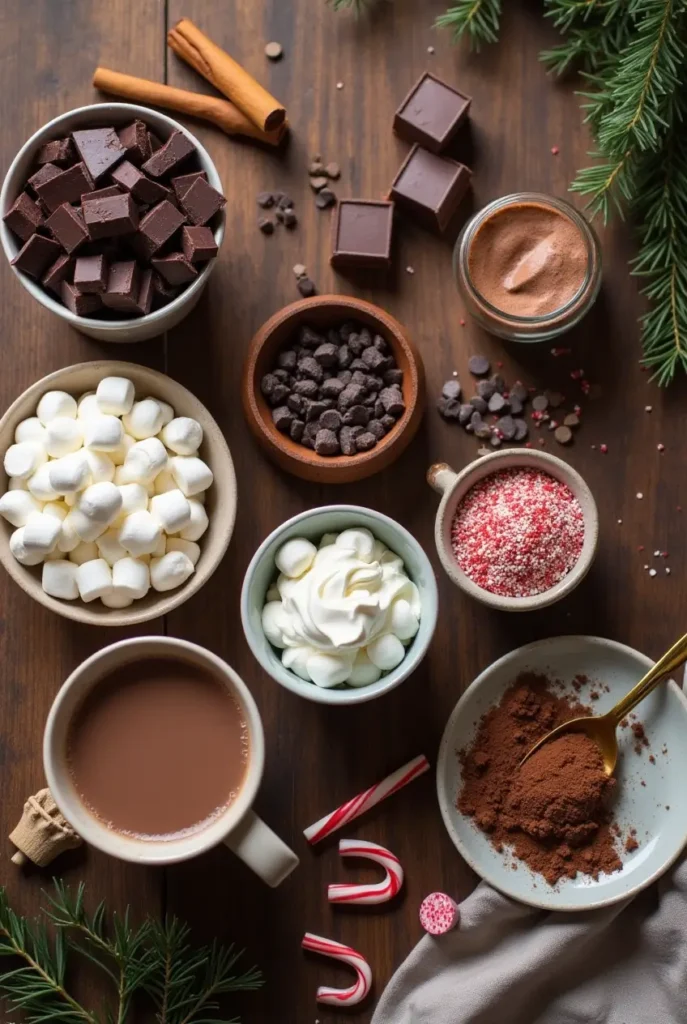
Basic Ingredients:
- Chocolate (for the cups):
- Choose your favorite type of chocolate! Milk chocolate is a crowd-pleaser, but dark chocolate offers a more intense flavor. You can also use white chocolate for a creamy, sweet base.
- You’ll need about 8 oz (225g) of chocolate to create the shells.
- Heavy Cream (for the filling):
- The heavy cream is what gives your hot chocolate its rich, velvety texture. You’ll want 1 cup of heavy cream to ensure your drink is as creamy as possible.
- Milk:
- For that perfect hot chocolate base, 2 cups of milk (whole or your preferred dairy or non-dairy alternative) will do the trick. The milk adds smoothness and balances out the richness of the chocolate.
- Marshmallows (optional, but recommended):
- Mini marshmallows or large marshmallows are great for filling your hot chocolate cups. Add as many as you like for a chewy, fun bite. ¼ cup of mini marshmallows works well.
- Toppings (optional but oh-so-delicious):
- Whipped cream, crushed candy canes, a drizzle of caramel sauce, or even a sprinkle of cinnamon—all these add that perfect finishing touch to your hot chocolate cups. Choose your favorites based on what you’re craving!
Optional Variations:
- Flavored Syrups:
Want to give your hot chocolate cups a special twist? Add a dash of flavored syrup, like vanilla, peppermint, or hazelnut, to your hot chocolate mix for extra flavor depth. - Vegan/Dairy-Free Options:
For a dairy-free version, simply swap out the milk for your favorite non-dairy alternative (like almond, oat, or coconut milk) and choose dairy-free chocolate chips. - Spices:
If you like a bit of spice, add a pinch of cinnamon or nutmeg to the chocolate mixture. These warm spices can give your hot chocolate a cozy, comforting aroma.
Molds and Tools:
- Silicone Molds or Muffin Tin:
To create the perfect hot chocolate cups, silicone molds work best. You can also use a muffin tin lined with cupcake liners. Either way, make sure the molds are flexible to allow easy removal after the chocolate sets. - Microwave-Safe Bowl or Double Boiler:
You’ll need a heatproof bowl to melt the chocolate. A microwave-safe bowl or a double boiler will do the job perfectly. If using a microwave, heat the chocolate in 20-30 second intervals to avoid burning.
Now that you have your ingredients ready, you’re all set to create these delicious hot chocolate cups! Gather your items, and let’s move on to the fun part—making these irresistible treats.
[adinserter block=”3″]How to Make Hot Chocolate Cups: Step-by-Step Guide
Making hot chocolate cups is as fun as it sounds—and it’s easier than you might think! In just a few simple steps, you’ll be indulging in rich, creamy hot cocoa served in a decadent chocolate cup. Ready to get started? Let’s dive in!
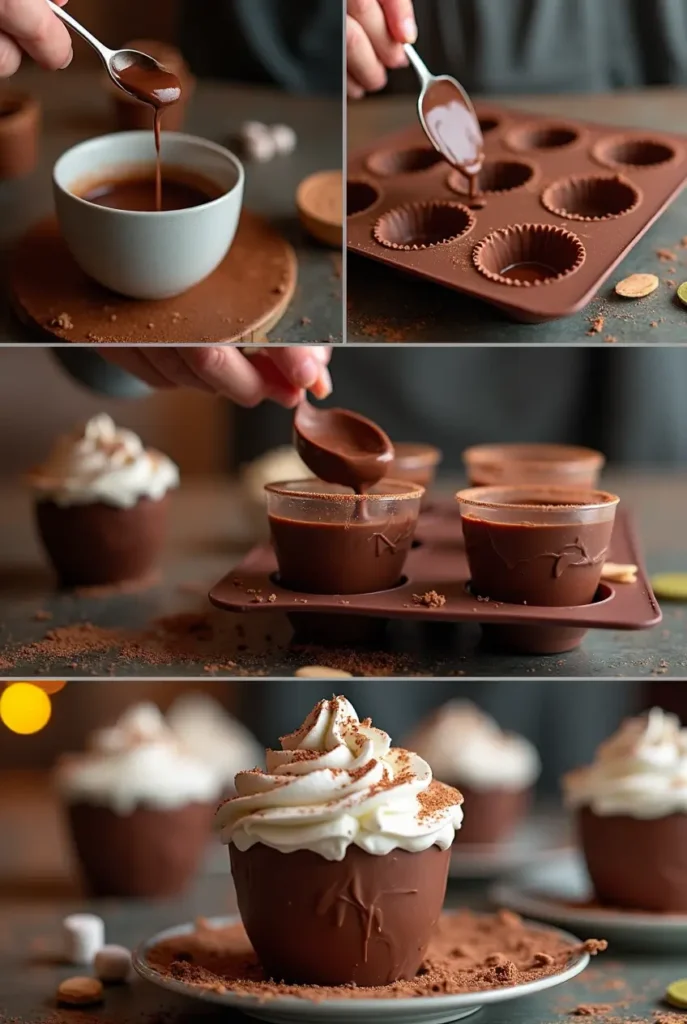
Step 1: Melt the Chocolate
- What You’ll Need: Your chosen chocolate (milk, dark, or white), and a microwave-safe bowl or double boiler.
- How to Do It:
Break your chocolate into small pieces and place it in the microwave-safe bowl.- If you’re using the microwave: Heat the chocolate in 20-30 second intervals, stirring in between to avoid burning. It should be smooth and fully melted after about 1-2 minutes.
- If you’re using a double boiler: Place the bowl over a pot of simmering water and stir gently until the chocolate melts.
- Tip: Be patient! Stirring often will ensure your chocolate melts evenly without becoming too thick or clumpy.
Step 2: Coat the Molds
- What You’ll Need: Silicone molds (or muffin tin), a spoon, and the melted chocolate.
- How to Do It:
Once your chocolate is smooth and melted, use a spoon to carefully fill the bottom of your molds, coating the sides to create the shell.- Make sure to coat the inside edges well—this is what will form the “cup” of your hot chocolate.
- For a thicker shell, you can let the first layer of chocolate set in the fridge for 5-10 minutes before adding a second layer. This will ensure the cup holds up without cracking when filled.
- Tip: For a professional finish, tap the mold gently on the counter to remove air bubbles and ensure the chocolate is evenly distributed.
Step 3: Chill and Set
- What You’ll Need: Your molds, a refrigerator, and patience!
- How to Do It:
Once your molds are filled, place them in the fridge for about 20-30 minutes or until the chocolate has completely set. The longer you leave them, the firmer and more stable your cups will be.
Tip: If you’re in a rush, a freezer will work, but don’t leave them in too long—about 10-15 minutes should do the trick.
Step 4: Carefully Remove the Cups
- What You’ll Need: Your set chocolate cups and some gentle hands!
- How to Do It:
Once the chocolate has firmed up, gently remove the cups from the molds. If you’re using a muffin tin, carefully pull away the edges of the cupcake liners to release the chocolate shell.- If you’re using silicone molds, simply push the bottom of the mold to pop the chocolate cups out.
- Tip: If you’re having trouble removing the cups, try placing the molds in the freezer for a few minutes to help them come out more easily.
Step 5: Prepare the Filling
- What You’ll Need: Hot chocolate mix, milk, and any additional flavorings (like vanilla or spices).
- How to Do It:
While the cups are chilling, heat your milk in a saucepan over medium heat until it’s hot but not boiling. Add your favorite hot cocoa mix or a homemade cocoa blend, and stir until smooth and creamy.- For a richer flavor, consider adding a splash of vanilla extract or a pinch of cinnamon.
- Tip: For an extra creamy cup, whisk in a little heavy cream along with the milk.
Step 6: Fill the Cups
- What You’ll Need: Your melted hot chocolate and a spoon.
- How to Do It:
Carefully pour the hot chocolate into the chocolate cups. Fill them just shy of the top so you have room for toppings (and less mess to clean up later).
Tip: If you want to get extra fancy, swirl the chocolate around the inside of the cup with a spoon to create a gorgeous, glossy finish.
Step 7: Add Toppings
- What You’ll Need: Whipped cream, marshmallows, chocolate shavings, caramel sauce, or anything else your heart desires!
- How to Do It:
Top your hot chocolate cups with your favorite garnishes. A dollop of whipped cream, a few mini marshmallows, or a sprinkle of crushed candy canes will make these treats even more indulgent.
Tip: Don’t be afraid to get creative! Add a drizzle of caramel, a few chocolate shavings, or a pinch of sea salt for a unique twist.
Pro Tips and Variations: Elevate Your Hot Chocolate Cups
Making hot chocolate cups is fun and simple, but there are plenty of ways to level up your creations with a few clever tips and creative variations. Whether you’re looking for a unique twist or need some troubleshooting advice, this section has you covered. Let’s dive into some expert suggestions for making these treats even more irresistible!
1. Get the Perfect Chocolate Shell
- Tip: If you’re aiming for a smooth, even chocolate shell, make sure your melted chocolate is thoroughly mixed and free of any lumps. You can strain it through a fine mesh sieve to ensure the texture is silky and smooth.
- Pro Tip: For extra thick chocolate cups, apply a second layer of melted chocolate after the first one has set. This will give your cups a sturdier structure, perfect for holding a generous serving of hot cocoa.
2. Customize the Hot Chocolate Base
- Variation: Try different types of chocolate for your hot cocoa filling!
- Dark chocolate makes a rich, slightly bitter cocoa that balances the sweetness of the chocolate cup.
- Milk chocolate is a classic choice for those who prefer a creamy, sweet drink.
- White chocolate can create a luscious, ultra-creamy hot cocoa with a sweet finish.
- Bonus Tip: Want to kick up the flavor? Add a splash of vanilla extract or a pinch of ground cinnamon to the hot cocoa mix. It adds a comforting depth of flavor that pairs perfectly with the chocolate cups.
3. Experiment with Toppings
Toppings are the fun part! Here are some ideas to elevate the presentation and flavor:
- Whipped cream is a must for any decadent hot chocolate—light, fluffy, and delicious.
- Crushed candy canes give a refreshing, minty kick that’s perfect for the holiday season.
- Toffee bits, crushed graham crackers, or caramel drizzle can add delightful texture and a sweet contrast to the rich chocolate.
- Mini marshmallows are always a hit, but you can even use giant marshmallows for a more dramatic presentation.
Pro Tip: For a more indulgent treat, drizzle a bit of chocolate syrup or hazelnut spread on top. It’s a game-changer for anyone with a serious sweet tooth!
4. Make Them Dairy-Free or Vegan
If you’re catering to dietary preferences, don’t worry—these hot chocolate cups can easily be made dairy-free or vegan.
- Non-dairy milk options like almond milk, oat milk, or coconut milk can be substituted for regular milk in the filling.
- For vegan chocolate cups, swap regular milk chocolate for vegan chocolate chips. They melt beautifully and still give that rich, indulgent flavor.
Tip for Vegan Versions: Make sure to choose vegan-friendly marshmallows (as most traditional ones contain gelatin). There are plenty of delicious options available that will still give you that gooey marshmallow texture.
5. Serve Them at Your Next Party
Hot chocolate cups aren’t just for cozy nights by the fire—they’re perfect for parties and gatherings too! Try these fun ideas:
- Make a Hot Chocolate Bar: Set up a station where guests can fill their chocolate cups with hot cocoa and top them with their choice of add-ins. It’s interactive, fun, and guaranteed to impress.
- Gift Them as Treats: Want to give something extra special? Package your hot chocolate cups in cute little gift boxes or bags with some homemade hot cocoa mix. It’s the perfect DIY gift for friends, family, or coworkers.
6. Troubleshooting Tips
- Problem: My chocolate cups are too thin and fragile.
Solution: Make sure you’ve applied enough layers of chocolate to the mold, allowing each layer to set properly before adding the next. A second layer will give you a stronger, thicker cup. - Problem: The chocolate is cracking when I try to remove the cup from the mold.
Solution: Try letting the chocolate cool slightly in the fridge before removing it, or use silicone molds that are more flexible and easier to work with. If needed, place the mold in the freezer for 5 minutes to make removal smoother.
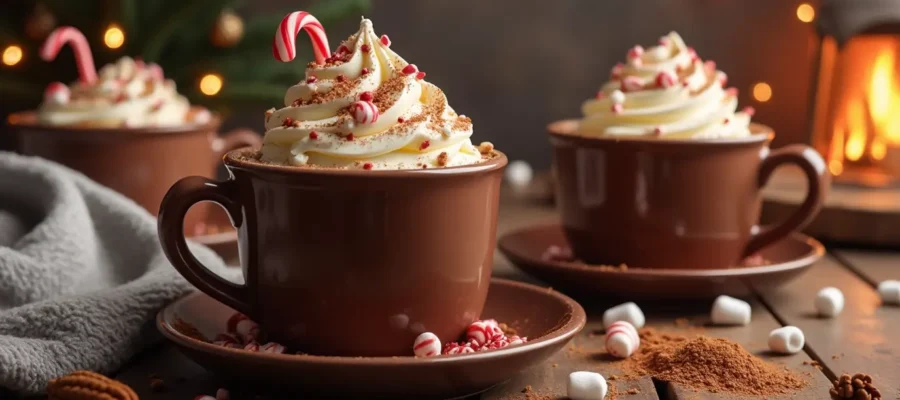
Serving Suggestions: How to Enjoy Your Hot Chocolate Cups
Once your hot chocolate cups are ready, it’s time to enjoy them! These delightful treats are perfect for cozy nights, family gatherings, and even festive occasions. But how can you serve them to make the experience even more special? Let’s explore some creative ways to present and enjoy your chocolate cups, so they’re as fun to eat as they are to make!
1. Classic Hot Chocolate Experience
- How to Serve:
The simplest and most satisfying way to enjoy your hot chocolate cups is to fill them with hot cocoa and top with whipped cream and marshmallows. The warm cocoa will melt the chocolate cup slightly, adding an extra layer of indulgence.
Tip: For a truly decadent experience, drizzle a bit of chocolate syrup inside the cup before adding the hot cocoa. This will give every sip an extra dose of chocolatey goodness.
2. Hot Chocolate Bar
- How to Serve:
If you’re hosting a party or holiday gathering, a hot chocolate bar is a fun and interactive way to serve your hot chocolate cups. Set up a station with different toppings like crushed peppermint, chocolate shavings, marshmallows, caramel sauce, and sprinkles. Let guests fill their cups with hot cocoa and customize their drink to their liking.
Tip: Keep the hot cocoa warm in a slow cooker or thermos for easy serving. You can also offer a variety of hot chocolate flavors—dark, milk, or even white chocolate—for a personalized experience.
3. Perfect for Gifting
- How to Serve:
Hot chocolate cups make an adorable and thoughtful homemade gift, especially around the holidays. Package them individually in gift boxes or cellophane bags with a ribbon for a cute presentation. You can even add a small packet of hot cocoa mix or some extra marshmallows to make the gift complete.
Tip: Personalize the gift by adding a handwritten note or a festive tag that says “Enjoy the warmest hug in a cup!”
4. Themed Events or Movie Nights
- How to Serve:
Hot chocolate cups are a fantastic addition to themed events or movie nights, especially during colder months. Pair them with cozy blankets, a fireplace, and a feel-good movie for the perfect relaxing night in.
Tip: For a fun twist, serve your hot chocolate cups with some chocolate-dipped spoons for stirring. Guests will love the extra touch, and the spoons can double as a chocolate treat once the drink is finished.
5. Pairing with Other Desserts
- How to Serve:
Hot chocolate cups are rich and indulgent, so they pair beautifully with lighter desserts. Consider serving them alongside:- Shortbread cookies or biscuits for a buttery contrast.
- Fruit like strawberries, raspberries, or orange slices for a refreshing touch.
- Chocolate truffles or brownies to double down on the chocolate goodness!
- Tip: For a more festive flair, add a pinch of cinnamon or nutmeg to the hot cocoa before serving. These spices not only add a warming flavor but also make your cups look even more festive.
6. For the Ultimate Treat: DIY Hot Chocolate Flight
- How to Serve:
If you want to take your hot chocolate cups to the next level, why not create a DIY hot chocolate flight? Offer a selection of different hot chocolates (like salted caramel, spicy Mexican hot chocolate, or classic cocoa) in small cups alongside your hot chocolate cups. It’s a fun way to taste-test and find your favorite combo.
Tip: Serve a variety of toppings or add-ins on the side so guests can mix and match their flavors, making the experience even more customizable.
FAQs: Everything You Need to Know About Hot Chocolate Cups
If you’re new to making hot chocolate cups, you may have a few questions. Don’t worry—we’ve got you covered! Here are some of the most frequently asked questions, along with helpful tips and answers to ensure your hot chocolate cup experience goes smoothly.
1. Can I make hot chocolate cups in advance?
Yes, you can! In fact, hot chocolate cups are perfect for making ahead of time.
- How to Store: After the cups have set and are fully removed from the molds, store them in an airtight container at room temperature for up to one week. If you’re not planning to serve them right away, you can also freeze them for longer storage—just make sure they’re wrapped tightly.
Tip: If you plan on storing them for a while, you can add a layer of wax paper between the cups to keep them from sticking together.
2. Can I use chocolate chips for the shells?
Yes, chocolate chips work just fine, but they may not melt as smoothly as chocolate bars or couverture chocolate.
- Tip: To achieve a silky, smooth texture, you can try melting your chocolate chips with a small amount of vegetable oil or coconut oil. This will help achieve that glossy finish and prevent the chocolate from becoming too thick.
3. How do I avoid cracking my chocolate cups?
Cracking can happen if the chocolate shell is too thin or if the cups aren’t set long enough.
- Solution:
- Make sure to apply enough layers of chocolate, allowing each layer to fully set before adding the next.
- Chill the cups for an adequate amount of time, especially if you’re working with a thicker shell.
- Gently pop the chocolate out of the molds once it’s completely set, ensuring the cups have hardened sufficiently.
4. Can I make these cups dairy-free or vegan?
Absolutely! Making vegan hot chocolate cups is easy.
- For the Chocolate Cups: Use dairy-free chocolate chips or any vegan-friendly chocolate.
- For the Hot Chocolate Filling: Substitute regular milk with almond milk, oat milk, or coconut milk.
- For a creamy, dairy-free hot cocoa, add a bit of coconut cream or non-dairy whipped cream as a topping.
- Tip: Make sure the marshmallows are also vegan-friendly. There are plenty of plant-based marshmallow options available that are gelatin-free.
5. How do I fix a runny hot chocolate filling?
If your hot cocoa mixture is too runny, there’s a simple fix.
- Solution:
- Gradually add more cocoa powder or cornstarch to thicken it. If you’re using cornstarch, mix it with a little cold milk before adding it to the hot cocoa to prevent lumps.
- Alternatively, you can use a little more whipped cream to achieve a creamier, thicker consistency.
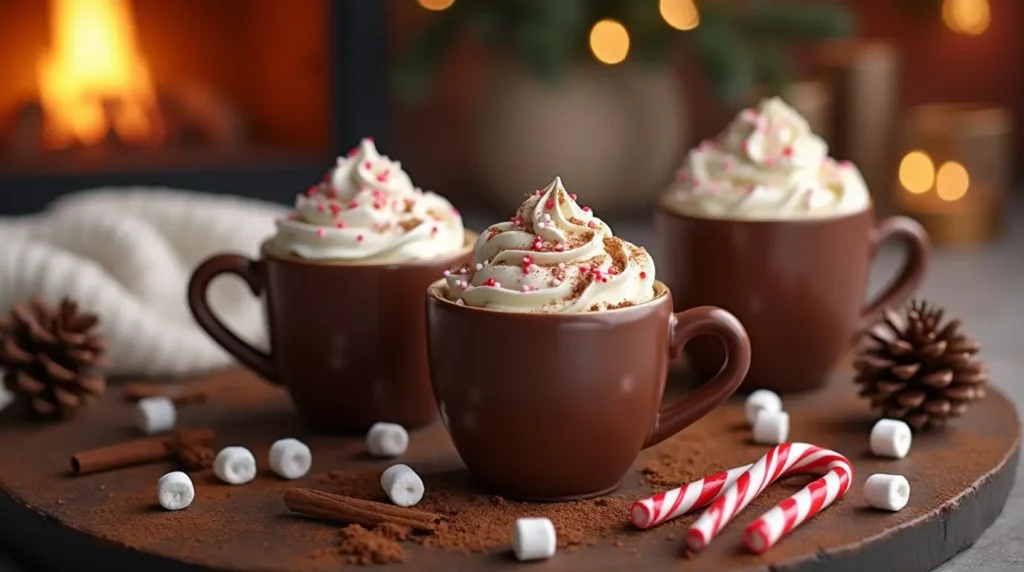
Conclusion: Why Hot Chocolate Cups Are the Ultimate Treat
If you’ve made it this far, it’s clear you’re ready to take your hot chocolate cups to the next level! Whether you’re enjoying them solo on a cozy evening or sharing them with friends at a festive gathering, these indulgent treats are guaranteed to bring warmth, comfort, and joy.
Why You’ll Love Hot Chocolate Cups
- Endless Customization: With so many ways to personalize your hot chocolate cups, the possibilities are endless! From the type of chocolate to your choice of toppings, you can make them your own.
- Perfect for Any Occasion: Whether it’s a special holiday, a family movie night, or a sweet gift, hot chocolate cups are a fun and delicious way to celebrate. They’re easy to make and look impressive, making them a hit at any gathering.
- Indulgent Yet Simple: These cups offer all the richness of a decadent dessert with none of the complicated steps. Even if you’re not a seasoned baker, you’ll find these a breeze to prepare!
Time to Make Your Own Hot Chocolate Cups!
Now that you’re armed with all the tips, tricks, and variations, it’s time to get in the kitchen and create your own batch of hot chocolate cups. Don’t forget to experiment and have fun with the process—you can’t go wrong with chocolate! Whether you stick to the classic flavors or try something new, these cups are sure to bring smiles all around.Enjoy the warmth, sweetness, and joy that only a homemade hot chocolate cup can bring. Happy sipping!