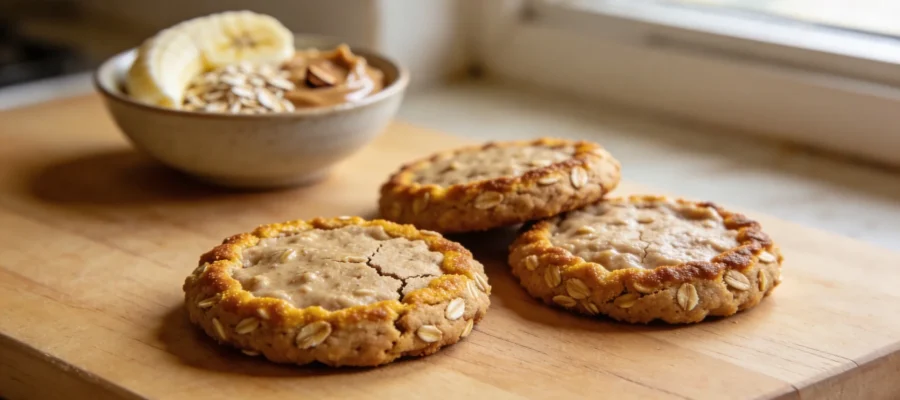
I’ve been making these 3 ingredient cookies for years, and honestly? They’ve saved my butt more times than I can count. Last-minute playdate? School bake sale you forgot about until 9pm? Just desperate for something sweet but the pantry’s looking sad? These cookies are the answer. They take literally 15 minutes from “hmm, I want cookies” to actually eating warm cookies, and you probably already have everything you need.
Table of Contents
How I Discovered These Simple Cookies
Look, I’m not usually one to fall for those “too good to be true” recipes all over Pinterest. Most of them are garbage. The first time I saw a 3-ingredient cookie recipe, I rolled my eyes so hard they nearly fell out of my head. But then my kid had three friends coming over in an hour, and I had exactly zero snacks prepared and no time to run to the store.
That first batch was… educational. I burned the bottoms while the tops stayed raw because I hadn’t flattened them properly. Rookie mistake. The second time I made them too flat and ended up with one giant cookie puddle. But by the third try? I figured out the sweet spot. My neighbor actually texted to ask what I was baking because she could smell them from her porch. When I told her it was just banana, oats, and peanut butter, she didn’t believe me until I showed her the empty mixing bowl.
Ingredients for 3 ingredient cookies
Here’s the thing about these cookies—you need to start with the right ingredients or they’ll fall apart. The proportions matter, and so does the ripeness of your banana. I’ve tried fancy versions with add-ins, but honestly, the basic version still wins for me when I need something fast and foolproof.
These cookies are naturally gluten-free (as long as you use certified GF oats) and vegan, but that’s just a bonus. I make them because they’re legitimately good and ridiculously easy. And because my pantry always has these three items, even when I’m overdue for a grocery run.
Ripe Bananas (2 medium, very ripe)
This is non-negotiable—your bananas MUST be spotty. I’m talking brown spots covering at least 50% of the peel. Those perfectly yellow bananas from the store? Way too starchy and not sweet enough. The mushy ones that make you think “I should probably throw these out”? PERFECT. They provide all the sweetness and help bind everything together. No eggs needed.
Old-Fashioned Rolled Oats (1 cup)
Don’t use instant oats here—they’ll turn to mush. And steel-cut won’t soften enough in the short baking time. Regular old-fashioned rolled oats give the perfect texture: slightly chewy with some structure. I’ve tried the fancy organic ones and the store brand, and honestly can’t tell much difference in the finished cookies, so save your money.
Peanut Butter (1/2 cup)
The natural kind works best—just peanuts and salt. That processed stuff with added sugar and oils changes the texture in a weird way. If you have a peanut allergy, almond butter or sunflower seed butter work great too. I’ve tried both creamy and crunchy, and while I prefer creamy for a uniform texture, the crunchy adds little peanut surprises that my kids actually love.
Instructions for 3 ingredient cookies
These cookies are basically fool-proof, but there are still a couple of ways things can go sideways. The entire process takes about 15 minutes if you’re organized, 20 if you’re like me and keep stopping to lick the spoon. The actual hands-on time is maybe 5 minutes, which is why I love making these when I’m in a rush or just feeling lazy.
Don’t expect these to look like traditional butter-flour-sugar cookies—they have a different appearance and texture. They won’t spread much in the oven, so however you shape them is pretty much how they’ll come out. And they don’t get super crispy unless you really flatten them, which is why I usually go for a middle-ground thickness.
STEP 1: Preheat your oven to 350°F (175°C).
Do this first! I can’t tell you how many times I’ve mixed everything up and then had to wait around for the oven to heat. Line a baking sheet with parchment paper or a silicone mat. Don’t skip this—these cookies will stick to an unlined pan, and you’ll end up with cookie crumbles instead of actual cookies. Trust me, I learned this the hard way while making them at my sister’s house.
STEP 2: Mash those bananas into submission.
Grab a fork and a medium bowl and go to town on those spotty bananas. You want them completely mashed—no chunks or lumps. If there are still little banana bits, the cookies won’t hold together as well. I sometimes use the back of a wooden spoon if the bananas are super ripe. The mushier the bananas, the easier this step is, which is another reason to use the really ripe ones.
STEP 3: Add the peanut butter and mix thoroughly.
Measure your peanut butter using a dry measuring cup. Here’s a pro tip I discovered by accident: spray the measuring cup with a tiny bit of cooking spray first, and the peanut butter will slide right out instead of sticking. Stir until the banana and peanut butter are completely combined. The mixture should be pretty smooth and uniform in color—no streaks of banana or peanut butter visible.
STEP 4: Fold in the oats.
Add your cup of rolled oats and stir until everything is well combined. At first, it’ll seem like too many oats for the wet mixture, but keep folding—it’ll come together. The dough will be sticky and wet, nothing like traditional cookie dough. Don’t panic! That’s exactly how it should be. If it seems too wet, you can add another tablespoon or two of oats, but don’t go overboard or they’ll be too dry.
STEP 5: Shape the cookies.
Using a tablespoon or a small cookie scoop, drop dollops of dough onto your prepared baking sheet. You should get about 12-15 cookies depending on size. Now here’s the crucial part I messed up the first time: use the back of a spoon or your fingers (slightly wet them first to prevent sticking) to gently flatten each cookie to about 1/2-inch thickness. They won’t spread much during baking, so whatever shape you make now is pretty much what you’ll end up with.
STEP 6: Bake until golden.
Pop the tray in your preheated oven and bake for 12-15 minutes. The edges should be getting golden brown, and the tops should be set but still a bit soft when you touch them gently. My oven runs hot, so I check at 10 minutes to be safe. Don’t overbake these—they go from perfect to hockey pucks really quickly. That said, underbaking leaves them too soft and they’ll fall apart, so look for that golden edge as your indicator.
STEP 7: Cool (briefly) and enjoy.
Let the cookies cool on the baking sheet for about 5 minutes—they’re fragile when hot and will firm up as they cool. Transfer them to a wire rack if you have one, or just directly to your mouth if you’re like my family. These are best eaten while still warm, when the edges are slightly crisp and the centers are soft and chewy. You’ll hear that satisfying little crunch from the oats with each bite.
Tips & Variations for 3 ingredient cookies
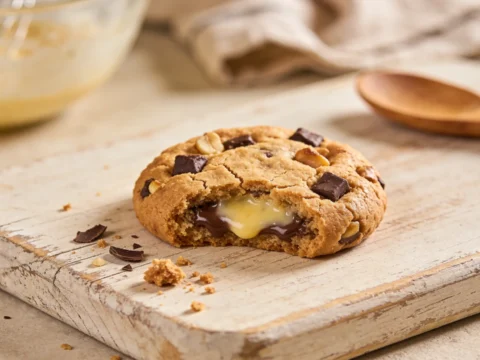
These cookies keep at room temperature in an airtight container for 2-3 days, but they rarely last that long in my house. They tend to soften over time because of the banana, so if you like them crispy, you might want to pop them in the toaster oven for a minute to revive that just-baked texture. If you want to fancy them up a bit, a handful of chocolate chips, raisins, dried cranberries, or chopped nuts make great additions. A sprinkle of cinnamon or a drop of vanilla extract takes them to the next level, but that technically makes them 4 or 5 ingredient cookies, so I’m breaking my own rules here.
For a more dessert-like version, try drizzling melted chocolate over the top after baking. And if yours don’t look like those perfect food blog photos? Who cares! They’ll still taste amazing. My last batch looked like little cookie islands because I was too lazy to form them properly, and they disappeared just as quickly as the pretty ones.
Final Thoughts on 3 ingredient cookies
Look, these aren’t going to win any fancy baking competitions. They’re not the cookies you bring to impress your food snob friend (we all have one). But they’re the cookies that have saved me countless times when I needed something homemade but had zero time or energy. The fact that they’re actually nutritious enough to qualify as breakfast? That’s just a bonus that lets me feel less guilty when my kids inevitably eat them before 8am.
If you try these, please let me know how they turn out. I’m especially curious about different nut butter variations—I’ve been meaning to try cashew butter but haven’t gotten around to it. And honestly, I just love hearing that other people’s kitchens get as chaotic as mine sometimes, and that these little miracle cookies saved the day for you too.
3 Ingredient Cookies
These 3 ingredient cookies are easy, healthy, and ready in just 15 minutes. Made with ripe bananas, oats, and peanut butter, they're perfect for a quick treat.