
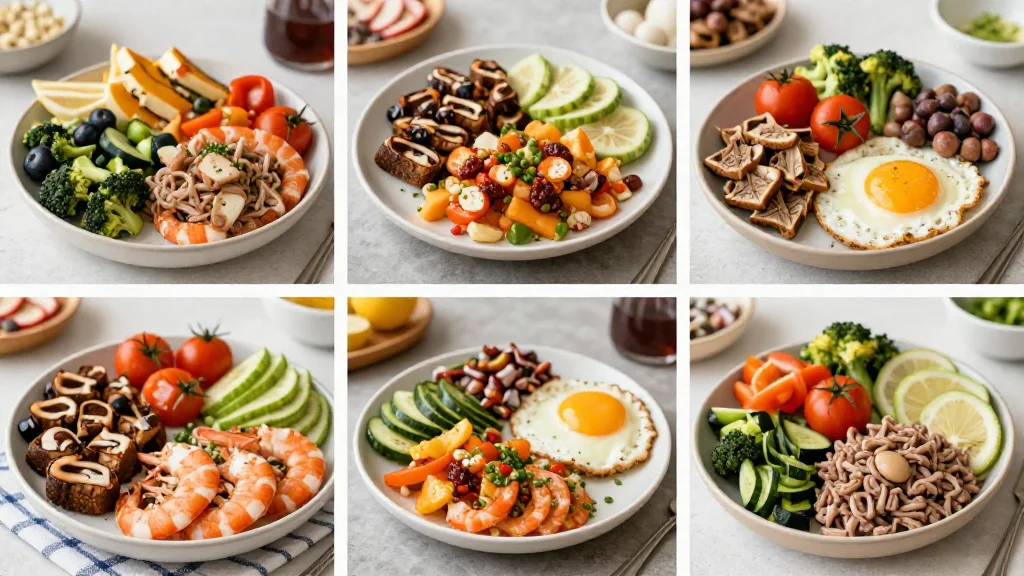
Okay, I’ll be honest—I’ve packed sad desk salads for way too many years, only to find myself starving by 2 PM and raiding the office vending machine. These easy high protein lunches for work changed everything for me. No more hangry afternoon meetings or spending $15 on whatever’s left at the cafeteria.
Look, I’m not promising Instagram-perfect bento boxes here. These are real recipes for real people who meal prep on Sunday in their pajamas and need something that’ll actually keep them full until dinner. Most of these can be made ahead, reheated without turning into rubber, and eaten with one hand while answering emails. Because that’s life, right?
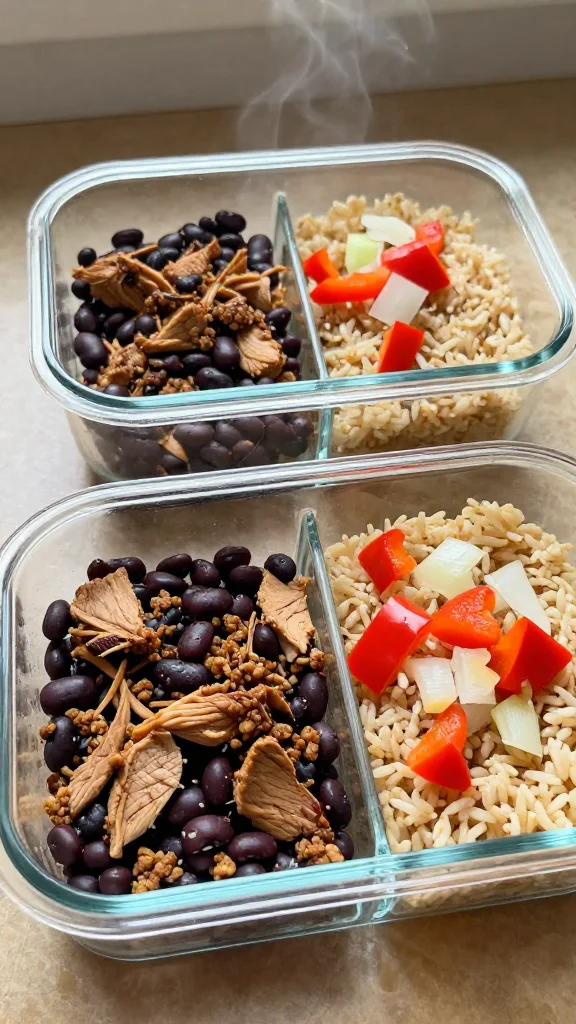
1. Make-Ahead Turkey and Black Bean Burrito Bowls
I started making these after my coworker brought the most amazing-smelling lunch to our team meeting. Turns out she’d been meal prepping these bowls every Sunday, and they were keeping her full through our crazy 12-hour days. The third time I asked for the recipe, she finally wrote it down for me on a sticky note.
Why It’s Amazing
Each bowl packs about 35 grams of protein and tastes better on day three than day one—the flavors just meld together beautifully. Plus, you can customize each container differently if you’re feeding picky eaters or just want variety throughout the week.
Ingredients
- 2 pounds ground turkey, 93% lean — the higher fat content makes it more flavorful
- 2 cans black beans, drained and rinsed — I buy the low-sodium kind
- 2 cups brown rice, cooked — or cauliflower rice if you’re doing low-carb
- 1 packet taco seasoning — homemade is great, but let’s be realistic here
- 1 bell pepper, diced — any color works, red is prettiest
- 1 onion, diced — I always cry, even wearing sunglasses
- 1 cup corn kernels — frozen is totally fine
- 2 cups shredded cheese — Mexican blend or whatever you have
- 1 container Greek yogurt — this is your sour cream substitute with extra protein
- Salsa of choice — I go for medium heat
Instructions
- Brown the ground turkey in a large skillet over medium-high heat, breaking it up as it cooks. This takes about 8-10 minutes, and you’ll know it’s done when there’s no pink left and it smells amazing. Don’t drain the fat—that’s flavor right there.
- Add the diced onion and bell pepper to the turkey and cook for another 5 minutes until they start to soften. The onions should be translucent and everything should smell incredible. If it starts sticking, add a splash of water.
- Stir in the taco seasoning and corn, then add the black beans. Let everything simmer together for about 5 minutes so the flavors can get acquainted. Taste and add salt if needed—the seasoning packet usually covers it, but every brand is different.
- Divide the cooked rice between 6-8 meal prep containers, then top with the turkey mixture. Let everything cool completely before adding the cheese, yogurt, and salsa on top. Trust me, hot food plus dairy equals weird texture when you reheat it.
Tips & Chaos Notes
These keep in the fridge for 5 days easily. I like to pack the toppings separately in little containers—keeps the rice from getting soggy. My kids love these too, though they pick out all the peppers like tiny food critics. You can add avocado right before eating, but don’t meal prep it unless you enjoy brown guacamole.
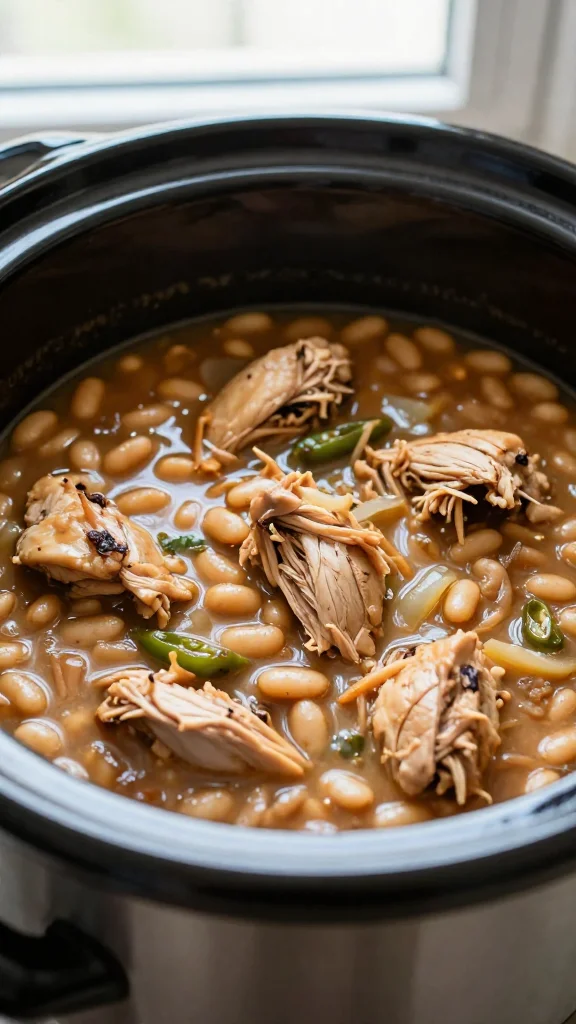
2. Slow Cooker Chicken and White Bean Chili
Last winter during that awful cold snap, I threw this together before work and came home to the most comforting smell ever. My neighbor actually knocked on the door to ask what I was cooking. It’s become my go-to for Sunday meal prep because it makes enough for lunch all week.
Why It’s Amazing
This delivers 28 grams of protein per serving and tastes like you spent hours on it, but it’s literally dump-and-go. The chicken gets fall-apart tender after 6 hours, and the beans add this creamy, hearty texture that’s so satisfying.
Ingredients
- 2 pounds boneless chicken thighs — don’t use breasts, they’ll get dry
- 2 cans white beans, drained — cannellini or great northern both work
- 1 onion, diced — rough chop is fine, it all breaks down anyway
- 3 cloves garlic, minced — or that jarred stuff if you’re in a hurry
- 4 cups chicken broth — low sodium preferred
- 1 can diced green chiles — mild or hot, your choice
- 1 teaspoon cumin — this makes the whole thing smell amazing
- 1 teaspoon chili powder — not the spicy kind, the earthy kind
- Salt and pepper to taste
- 1 cup shredded cheese for serving — optional but recommended
Instructions
- Toss the chicken thighs, onion, garlic, and drained beans into your slow cooker. Don’t worry about arranging them perfectly—everything will cook evenly over the long haul. Season with salt, pepper, cumin, and chili powder.
- Pour in the chicken broth and add the green chiles. The liquid should just cover everything. If it doesn’t, add a bit more broth or water. Put the lid on and set to LOW for 6-7 hours, or HIGH for 3-4 hours if you forgot to start it early.
- About 30 minutes before serving, remove the chicken and shred it with two forks. It should fall apart easily—if it doesn’t, give it another hour. Return the shredded chicken to the pot and let everything simmer together.
- Taste and adjust seasonings. Sometimes I add a squeeze of lime juice at the end for brightness. Serve hot with cheese on top, or let it cool completely for meal prep containers.
Tips & Chaos Notes
This freezes beautifully for up to 3 months. I portion it into single servings and reheat straight from frozen in the microwave. The texture won’t be crispy or golden since it’s slow-cooked, but the meat will be incredibly tender and the flavors are amazing. Add fresh cilantro when reheating if you have it.
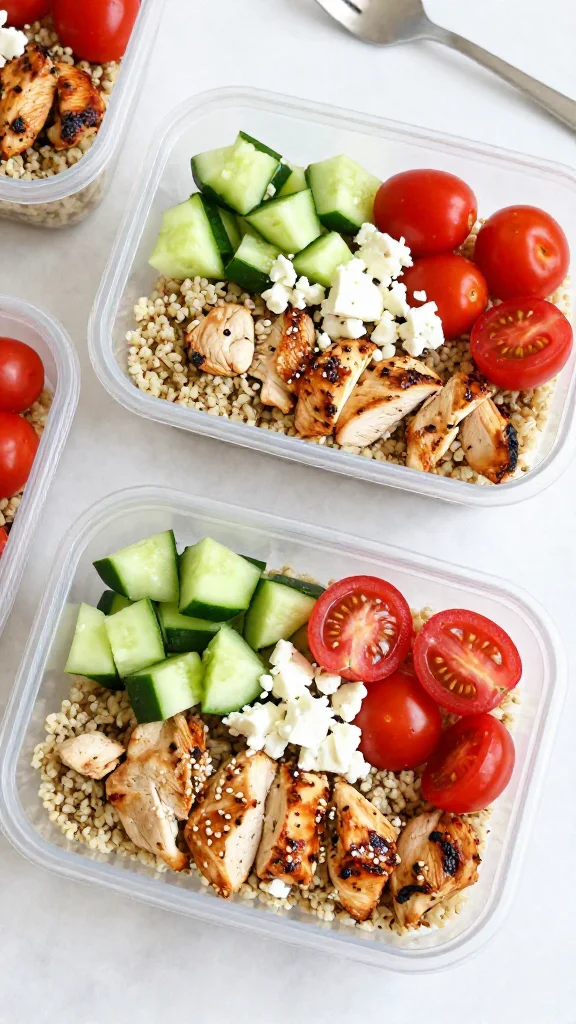
3. Greek Chicken Quinoa Bowls
My sister brought these to a potluck last summer, and I literally asked for the recipe before I finished eating. She laughed and said it was just “whatever she had in the fridge,” but it tasted like something from a fancy Mediterranean restaurant. Turns out the secret is marinating the chicken overnight.
Why It’s Amazing
These pack 32 grams of protein per serving and actually taste fresh even after sitting in the fridge for days. The lemon keeps everything bright, and the quinoa makes it filling without being heavy. Plus, they’re naturally gluten-free if that matters to you.
Ingredients
- 2 pounds chicken breasts, cut into bite-sized pieces — thighs work too if you prefer them
- 2 cups quinoa, cooked — rinse it first or it tastes bitter
- 1 cucumber, diced — English cucumbers have fewer seeds
- 1 pint cherry tomatoes, halved — or regular tomatoes if that’s what you have
- 1/2 red onion, thinly sliced — soak in cold water for 10 minutes to mellow the bite
- 1 cup feta cheese, crumbled — get the good stuff, it makes a difference
- 1/4 cup olive oil — extra virgin for the marinade
- 2 lemons, juiced — about 1/4 cup juice
- 3 cloves garlic, minced — fresh is best here
- 1 teaspoon dried oregano — or 1 tablespoon fresh if you have it
- Salt and pepper to taste
Instructions
- Whisk together olive oil, lemon juice, minced garlic, oregano, salt, and pepper in a large bowl. Add the chicken pieces and toss to coat completely. Cover and refrigerate for at least 2 hours, but overnight is even better—the flavors really penetrate the meat.
- Heat a large skillet over medium-high heat and cook the marinated chicken in batches, about 6-8 minutes per batch until golden brown and cooked through. Don’t overcrowd the pan or it’ll steam instead of sear. The internal temperature should hit 165°F.
- While the chicken cooks, prepare your quinoa according to package directions and let it cool. Dice the cucumber and tomatoes, slice the red onion, and crumble the feta. Everything can be prepped while the chicken marinates if you’re organized.
- Divide the cooled quinoa between meal prep containers, then top with chicken, vegetables, and feta. Drizzle any leftover marinade over everything, or make a simple lemon vinaigrette with olive oil, lemon juice, salt, and pepper.
Tips & Chaos Notes
These stay fresh for 4-5 days in the fridge. The key is letting everything cool completely before assembling—warm quinoa makes the feta melt and the vegetables wilt. I sometimes add Kalamata olives if I have them, and my kids actually eat these if I leave off the red onion. The chicken gets better as it sits in the dressing.
4. Tuna and White Bean Salad with Hard-Boiled Eggs
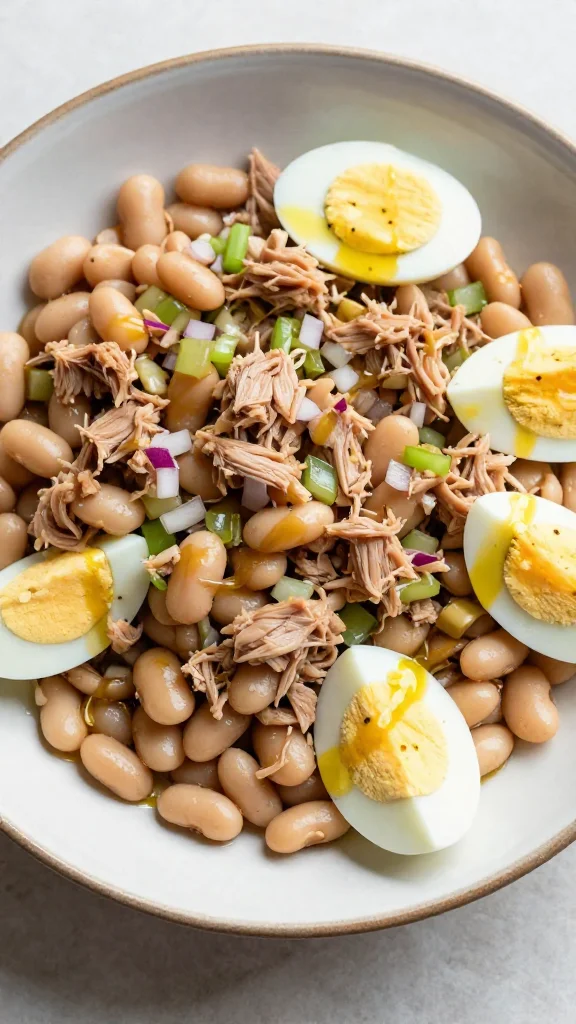
I discovered this combination during a particularly chaotic week when I forgot to meal prep and had exactly three ingredients in my fridge. Turns out, sometimes the best recipes happen when you’re just trying to avoid eating cereal for lunch again. My coworkers started asking what smelled so good when I heated this up.
Why It’s Amazing
This gives you 30 grams of protein per serving and requires zero cooking beyond boiling eggs. It’s ready in 15 minutes, costs about $2 per serving, and actually tastes better the next day when all the flavors have mingled together.
Ingredients
- 2 cans tuna in water, drained — I use the chunk light kind
- 1 can white beans, drained and rinsed — cannellini beans are perfect here
- 6 hard-boiled eggs, chopped — make these ahead or buy them pre-cooked
- 1/2 red onion, finely diced — soak in cold water to tame the sharpness
- 2 celery stalks, diced — adds the perfect crunch
- 1/4 cup capers — these little bursts of flavor make everything better
- 1/4 cup olive oil — good quality makes a difference here
- 2 tablespoons red wine vinegar — or lemon juice if you prefer
- 1 teaspoon Dijon mustard — the grainy kind is nice but regular works
- 2 tablespoons fresh parsley, chopped — or 1 tablespoon dried
- Salt and pepper to taste
Instructions
- If you’re making your own hard-boiled eggs, get them started first. Bring water to a boil, gently add eggs, cook for 10 minutes, then transfer to ice water. They’ll peel easier if you use eggs that are at least a week old—fresh eggs are a nightmare to peel.
- While the eggs cook, drain and rinse the white beans and tuna. Dice the red onion and celery, and chop the parsley. If you’re using the red onion raw, soak those diced pieces in cold water for 10 minutes to mellow them out.
- Whisk together olive oil, red wine vinegar, and Dijon mustard in a large bowl. This creates a simple vinaigrette that ties everything together. Season with salt and pepper—taste as you go because the capers and tuna add saltiness too.
- Add the beans, tuna, chopped eggs, drained onion, celery, capers, and parsley to the bowl. Toss gently so you don’t completely mash the eggs and beans. Taste and adjust seasoning—sometimes it needs more vinegar or a pinch more salt.
Tips & Chaos Notes
This keeps for 3-4 days in the fridge and actually improves as it sits. I like to serve it over greens or with crackers, but it’s perfectly good eaten straight from the container. Don’t add the eggs until you’re ready to eat if you’re making it more than 2 days ahead—they can get a weird texture.
5. Sheet Pan Salmon and Sweet Potato
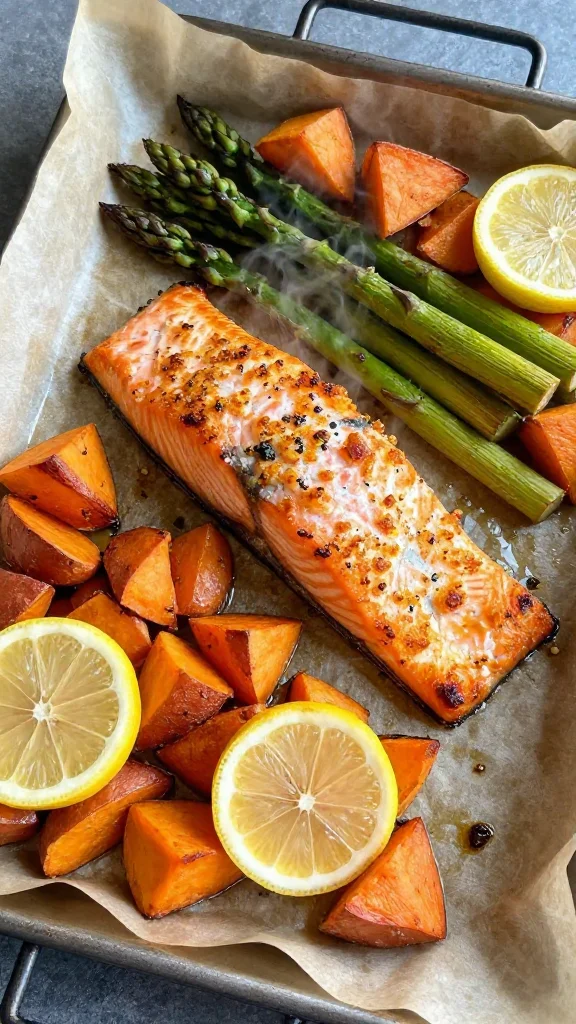
The first time I made this, I was convinced I’d mess up the salmon timing and end up with either rubber fish or raw potatoes. But my mom always said sheet pan dinners were foolproof, and she was right. Everything comes out perfectly cooked, and cleanup is just one pan. Game changer for busy weeknights.
Why It’s Amazing
You get 28 grams of protein per serving, plus the sweet potatoes add fiber and natural sweetness that pairs beautifully with the salmon. The best part? Everything roasts together, so you get crispy-edged vegetables and flaky fish with minimal effort.
Ingredients
- 4 salmon fillets, about 6 oz each — skin-on or skinless, both work
- 2 large sweet potatoes, cubed — leave the skin on for extra nutrients
- 1 bunch asparagus, trimmed — snap off the woody ends
- 3 tablespoons olive oil — divided between vegetables and fish
- 2 lemons, one sliced and one juiced — the slices roast beautifully
- 2 cloves garlic, minced — or garlic powder if you’re in a rush
- 1 teaspoon paprika — adds color and mild smoky flavor
- 1/2 teaspoon dried thyme — or any herb you like
- Salt and pepper to taste
Instructions
- Preheat your oven to 425°F and line a large sheet pan with parchment paper—trust me, cleanup will thank you later. Cut sweet potatoes into 1-inch cubes so they cook evenly. Smaller pieces burn, bigger pieces stay raw in the middle.
- Toss the cubed sweet potatoes with 2 tablespoons olive oil, salt, pepper, and half the minced garlic. Spread them in a single layer on one side of the sheet pan. Roast for 15 minutes to give them a head start—they take longer than the salmon.
- While the potatoes roast, trim the asparagus and pat the salmon fillets dry. Season the salmon with salt, pepper, paprika, and thyme. Drizzle with the remaining olive oil and lemon juice. The fish should look glossy and smell amazing.
- After 15 minutes, add the asparagus and salmon to the sheet pan. Scatter lemon slices around everything—they’ll caramelize and look gorgeous. Roast for another 12-15 minutes until the salmon flakes easily and the vegetables are golden-brown on the edges.
Tips & Chaos Notes
The key is cutting everything the same size so it cooks evenly. These reheat well for 2-3 days, though the salmon is best eaten fresh. I sometimes add cherry tomatoes in the last 10 minutes for extra color. If your sweet potatoes aren’t getting crispy, crank the heat to 450°F for the last 5 minutes.
6. Mason Jar Chicken Caesar Salads
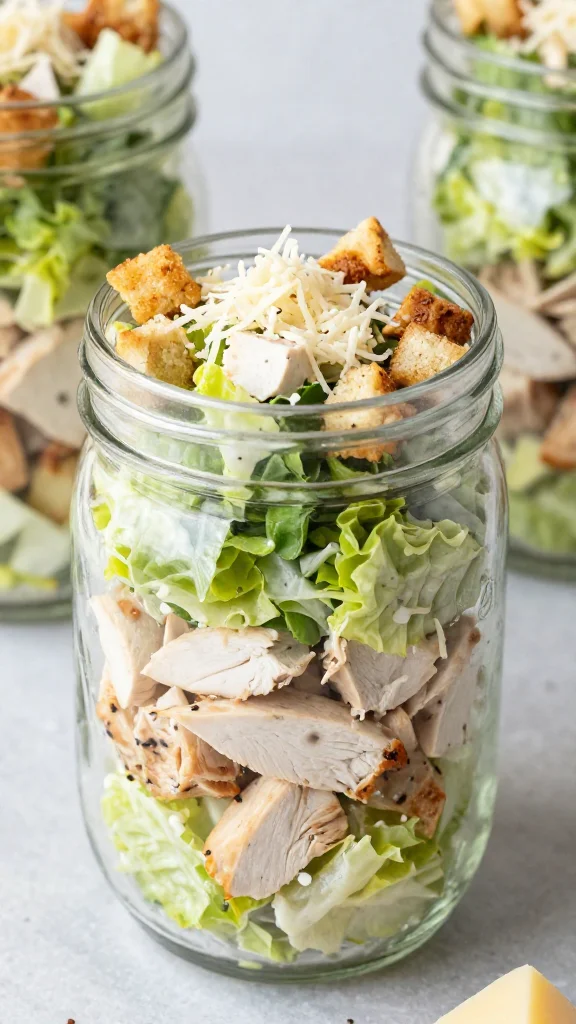
I was skeptical about the whole mason jar salad trend until my friend brought one to our hiking trip. The lettuce stayed crisp for three days, and she could just shake it up and eat. Now I make five every Sunday and have lunch sorted for the week. The trick is layering everything in the right order.
Why It’s Amazing
Each jar packs 25 grams of protein and stays fresh for up to 5 days when layered properly. You can grab one from the fridge and go, and the dressing doesn’t make everything soggy like regular salads. Plus, shaking it up is oddly satisfying.
Ingredients
- 2 pounds chicken breasts, cooked and diced — rotisserie chicken works great here
- 1 cup Caesar dressing — store-bought is fine, homemade if you’re ambitious
- 1/2 cup parmesan cheese, grated — the real stuff, not the powdered kind
- 1 cup croutons — make your own or buy them, whatever
- 2 romaine hearts, chopped — wash and dry thoroughly
- 1/4 cup red onion, thinly sliced — optional but adds nice bite
- 5 wide-mouth mason jars — regular mouth jars are too narrow
Instructions
- Start by cooking your chicken if you’re not using rotisserie. Season with salt and pepper, then pan-sear in a hot skillet for 6-7 minutes per side until golden brown and cooked through. Let it cool completely before dicing—warm chicken will wilt your lettuce.
- Layer the ingredients in this exact order in each jar: 3 tablespoons Caesar dressing on the bottom, then diced chicken, red onion if using, parmesan cheese, croutons, and finally the chopped romaine packed loosely on top. The dressing stays at the bottom so it doesn’t touch the lettuce.
- Press the lettuce down gently but don’t pack it too tight—it needs room to breathe. The jar should be full but not bursting. Seal with the lid and refrigerate immediately. They’ll keep for up to 5 days this way.
- When you’re ready to eat, just shake the jar vigorously to distribute the dressing, then dump it into a bowl or eat straight from the jar if you’re feeling fancy. The whole thing takes maybe 2 minutes to prepare for eating.
Tips & Chaos Notes
The key is keeping wet ingredients away from the lettuce until you’re ready to eat. I sometimes add cherry tomatoes or cucumber, but they go in the middle layers, never touching the dressing or lettuce. These are perfect for taking to work—just grab and go. My coworkers are always impressed when I shake up my lunch like a cocktail.
7. Protein-Packed Lentil and Sausage Soup

My grandmother used to make something similar when I was little, but hers took all day and involved way more chopping than I have patience for. This version gives you the same comforting, stick-to-your-ribs feeling but comes together in about 45 minutes. Perfect for when you want something warm and filling that’ll last all week.
Why It’s Amazing
This soup delivers 22 grams of protein per serving and gets better every day it sits in the fridge. The lentils break down slightly and thicken the broth naturally, while the sausage adds richness and flavor that makes it feel like a complete meal.
Ingredients
- 1 pound Italian chicken sausage, casings removed — turkey sausage works too
- 1 1/2 cups green lentils, rinsed — red lentils get too mushy for this
- 6 cups chicken broth — low sodium preferred
- 1 onion, diced — yellow or white, whatever you have
- 2 carrots, diced — I don’t even peel them anymore
- 2 celery stalks, diced — leaves and all
- 3 cloves garlic, minced — or that jarred stuff if you’re being practical
- 1 can diced tomatoes — don’t drain them
- 2 bay leaves — remove before serving or someone will bite into one
- 1 teaspoon dried thyme — or Italian seasoning
- 2 tablespoons olive oil
- Salt and pepper to taste
Instructions
- Heat olive oil in a large pot over medium-high heat. Remove sausage from casings and brown it, breaking it up with a spoon as it cooks. This takes about 8 minutes, and you want some nice brown bits on the bottom of the pot—that’s flavor gold.
- Add the diced onion, carrots, and celery to the pot with the sausage. Cook for about 5 minutes until the vegetables start to soften and smell amazing. The onions should be translucent, and everything should be sizzling nicely.
- Stir in the garlic and thyme, cooking for another minute until fragrant. Add the lentils, diced tomatoes with their juice, bay leaves, and chicken broth. Bring everything to a boil, then reduce heat and simmer for 25-30 minutes until the lentils are tender.
- Remove the bay leaves and taste for seasoning—it usually needs salt and pepper. The soup should be thick but not paste-like. If it’s too thick, add more broth. If it’s too thin, simmer uncovered for another 10 minutes to concentrate the flavors.
Tips & Chaos Notes
This freezes beautifully for up to 3 months and reheats perfectly in the microwave. The texture is hearty and warming, not crispy or golden, but incredibly satisfying on cold days. I sometimes add a handful of spinach in the last 5 minutes of cooking for extra nutrition. Serve with crusty bread if you want to feel fancy.
Look, not every recipe here is going to win Instagram awards, but every single one will keep you full, satisfied, and away from the vending machine. I’ve made all of these multiple times, tweaked them when they didn’t work, and can honestly say they’ve changed how I think about work lunches. No more sad desk salads or expensive takeout guilt.
The best part? Most of these actually taste better on day three than day one, which means your Wednesday lunch might be even better than your Monday lunch. Start with whichever recipe sounds most appealing to you—I’m genuinely curious which one becomes your go-to. Happy cooking, and may your lunch breaks actually give you energy instead of leaving you hangry 🥘✨