
Okay, so I’ve made approximately 47 dozen basketball cookies in the past two months, and honestly? I’m not even mad about it. My kid’s on the team, there’s been approximately eight different game day parties, and apparently I became “the cookie mom” without anyone officially telling me. But here we are.
Look, I’m not gonna lie—the first batch was a disaster. Like, actually tragic. I tried to freehand the lines on basketball cookies with a toothpick and they ended up looking like sad, lumpy oranges having an identity crisis. My daughter looked at them and went “Mom… what are those?” in that tone that only a pre-teen can master. BRUTAL.
But after way too many YouTube videos at 11 PM and three different frosting techniques later, I’ve actually figured out some basketball cookies ideas that look legit without requiring a culinary degree. These are the ones that made the other parents ask if I bought them from a bakery (best compliment ever, by the way), and they’re way easier than they look.
Whether you’re doing basketball cookies for senior night, need basketball cookies birthday ideas, or just want to impress people at the next game day party, I’ve got you. These basketball cookies decorated options range from super simple to “okay this takes some patience but it’s worth it.”
Table of Contents :
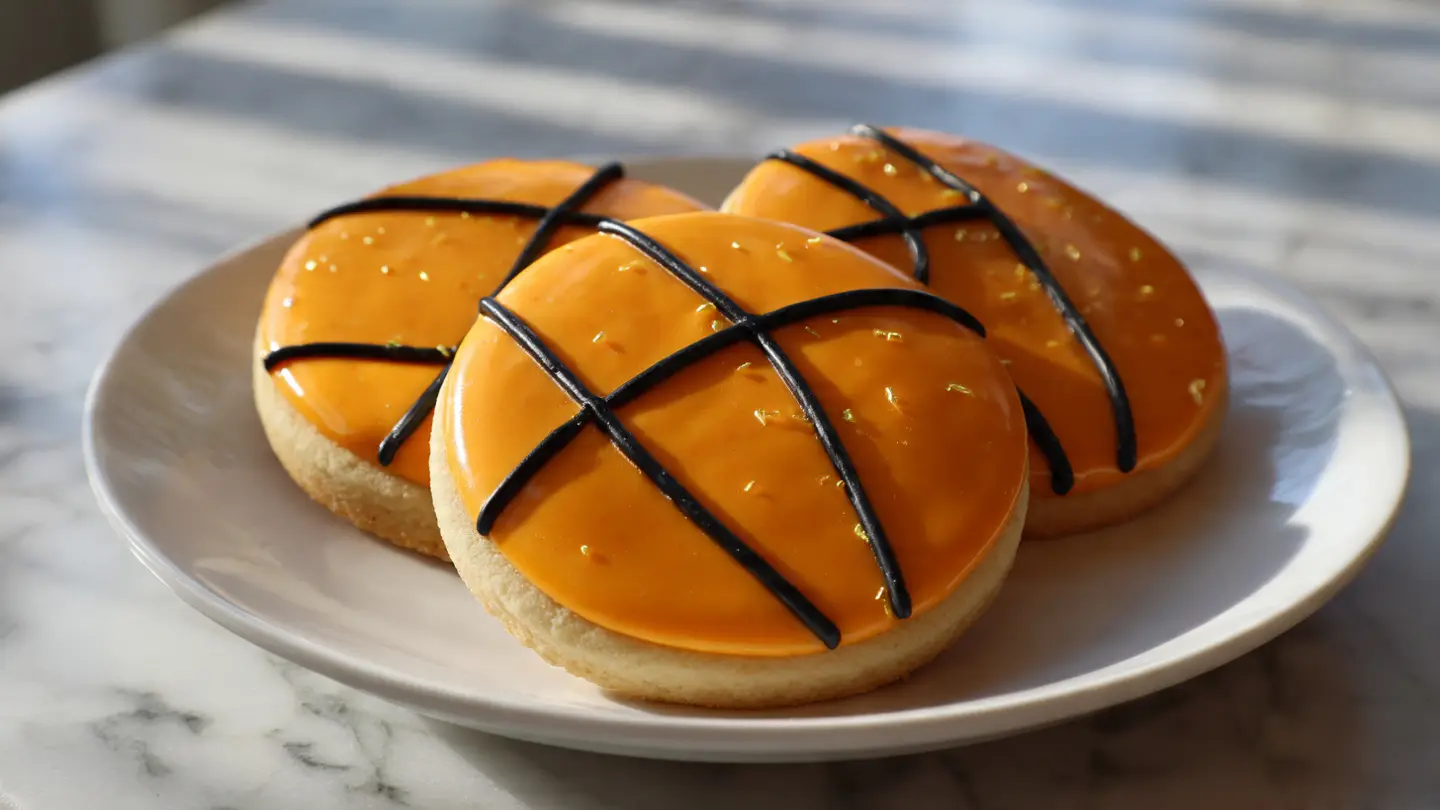
1. Classic Basketball Cookies with Royal Icing (The One That Started It All)
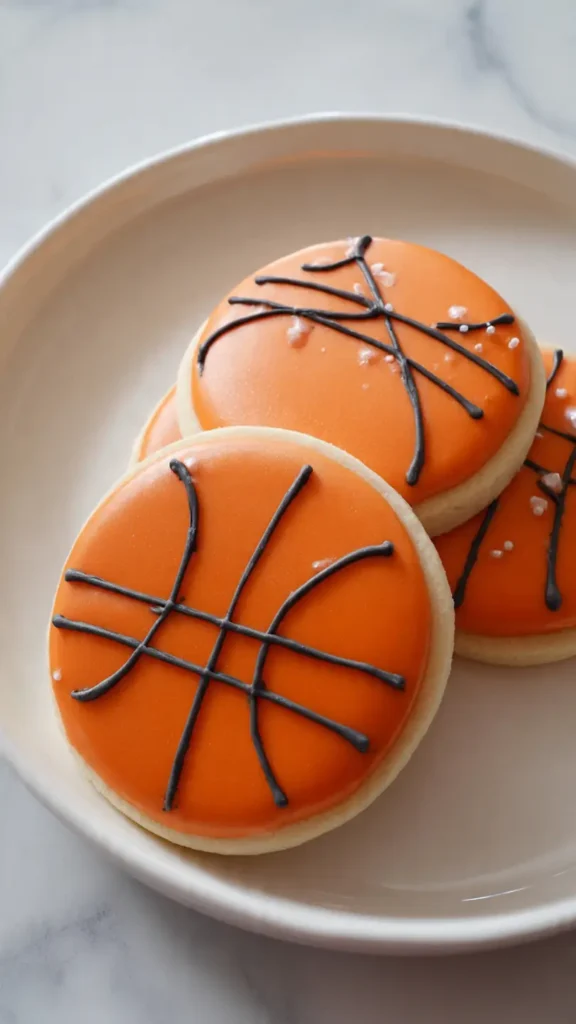
So this is THE basketball cookie. The iconic one. The one you see on Pinterest and think “I could never make that” but actually you totally can.
I’ll be honest—royal icing intimidated me for YEARS. It seemed like something only professional bakers could handle. Then I watched one tutorial, gave it a shot, and realized it’s basically just powdered sugar, meringue powder, and water. That’s it. That’s the magic.
Why This One’s Amazing:
The royal icing dries hard, which means you can stack these cookies, package them up, hand them out to the team, whatever. They travel well. They look professional. And once you nail the orange color (more on that disaster in a second), they’re genuinely stunning. These basketball cookies royal icing versions are perfect for basketball cookies with names or basketball cookies with numbers because the icing creates a smooth, perfect surface for writing.
What You Need:
- Sugar cookie dough (homemade or store-bought—I use store-bought half the time and I’m not sorry)
- Circle cookie cutter (3-4 inches works great)
- Royal icing ingredients:
- 4 cups powdered sugar
- 3 tablespoons meringue powder (find it at any craft store or Amazon)
- 5-6 tablespoons warm water
- Orange gel food coloring (DO NOT use liquid food coloring unless you want sadness)
- Black gel food coloring
- Piping bags or squeeze bottles
- Toothpicks (for fixing mistakes, and there will be mistakes)
Let’s Make These:
- Bake your cookies according to whatever recipe you’re using. Let them cool COMPLETELY. I cannot stress this enough. Put them on a cooling rack and walk away. Go fold laundry. Watch an episode of something. If you try to decorate warm cookies, the icing will slide right off and you’ll be sad.
- Make the royal icing. Mix powdered sugar and meringue powder in a stand mixer. Add water slowly while mixing on low speed. You want it thick—like, when you lift the beater, it should hold a peak for about 10 seconds before melting back down. This is “stiff” consistency for outlining.
- Divide your icing. Take about 1/4 of it and put it in a separate bowl. This is your outlining icing. The rest is for flooding (filling in the cookie).
- Make the flooding consistency. Add water to the bigger portion of icing, like a teaspoon at a time. You want it to flow but not be watery. The test: drizzle some back into the bowl. If the lines disappear within 10-15 seconds, you’re good.
- COLOR TIME. Here’s where I messed up originally—I used regular orange food coloring and it looked like Halloween vomit. You need GEL coloring, specifically in “orange” or mix red and yellow gel. Start with less than you think. Mix it in. Add more if needed. The color darkens as it dries, so go a shade lighter than your goal.
- Outline your cookies with the thicker icing in a piping bag. Just trace around the edge of each cookie. This creates a dam to hold the flooding icing.
- Wait 15 minutes. Seriously. Let the outline dry a bit or everything will blend together in a messy way.
- Flood the center with the thinner icing. Use a squeeze bottle or another piping bag with a larger tip. Fill it in, use a toothpick to spread it to the edges and pop any air bubbles.
- Let these dry for at least 4-6 hours. I usually do them overnight because I lack patience for waiting.
- Now the fun part—the lines! Mix a tiny bit of black royal icing (stiff consistency). Use a piping bag with a small round tip or just a regular piping bag with the tip cut small. Pipe the curved basketball lines. There’s one horizontal line across the middle and two curved lines on either side. Look at a real basketball if you need reference. I definitely did.
Real Talk Tips:
- Your first one will probably look weird. That’s fine. By cookie number three, you’ll have it down.
- If you mess up the lines, wet a paper towel and gently wipe it off before it dries. You have about 30 seconds to fix mistakes.
- These basketball cookies easy version: skip the outlining step and just spread thinned royal icing with a knife. It won’t be as perfectly smooth, but it still looks great.
- Store these in an airtight container for up to a week. They actually taste better after a day or two when the cookie softens slightly.
2. Basketball Cookies Decorated Buttercream (For the Frosting Lovers)

Okay, confession time: I actually prefer eating buttercream over royal icing. Royal icing looks prettier, sure, but buttercream TASTES better. Fight me.
These basketball cookies buttercream versions are softer, creamier, and honestly easier to make if you’re not worried about them being perfectly smooth. They’re more “rustic” which is code for “looks homemade in a good way.”
Why These Work:
Buttercream is more forgiving. You can fix mistakes easier, it pipes smoother if you’re doing basketball cookies with numbers or names, and people genuinely enjoy eating them more. The downside? They don’t stack well and they’re a bit messier to transport. But for a game day party where you’re serving them right away? Perfect.
Ingredients You’ll Need:
- Same sugar cookies as before (cooled completely, we’ve learned our lesson)
- American buttercream frosting:
- 1 cup (2 sticks) unsalted butter, softened (and I mean SOFT, not melted, not cold)
- 4 cups powdered sugar
- 2 teaspoons vanilla extract
- 2-3 tablespoons heavy cream or milk
- Orange gel food coloring
- Black gel food coloring
- Offset spatula or butter knife
- Piping bag with small round tip
How to Make Them:
- Make the buttercream. Beat softened butter for like 3-4 minutes until it’s fluffy and pale. This step matters—don’t skip the beating time.
- Add powdered sugar one cup at a time, mixing on low speed. It’ll look dry and crumbly. That’s normal.
- Add vanilla and 2 tablespoons of cream. Beat on medium-high for another 2-3 minutes. If it’s too thick, add more cream a teaspoon at a time.
- Add orange gel coloring. Again, start small. You can always add more. I usually do a good squeeze of gel and mix, then adjust.
- Spread the buttercream on cooled cookies using an offset spatula or just a butter knife. I do a thick layer because why not, life is short.
- Smooth it out as best you can. It doesn’t have to be perfect—that’s the beauty of buttercream.
- Let them sit for like 30 minutes so the frosting sets up a little bit.
- Pipe the basketball lines with black buttercream using a piping bag with a small round tip. Same pattern as before—one horizontal line, two curved lines on the sides.
My Messy Kitchen Wisdom:
- If your buttercream is too soft and sliding off the cookies, stick the bowl in the fridge for 10 minutes. If it’s too stiff and tearing when you spread it, add a bit more cream.
- These basketball cookies decorated buttercream versions taste amazing with chocolate cookies instead of sugar cookies. Just saying.
- You can add a tiny bit of orange extract or orange zest to the buttercream for extra flavor. I did this once by accident (long story) and everyone loved it.
- Keep these refrigerated if it’s warm out. Buttercream melts, and melted basketball cookies are sad basketball cookies.
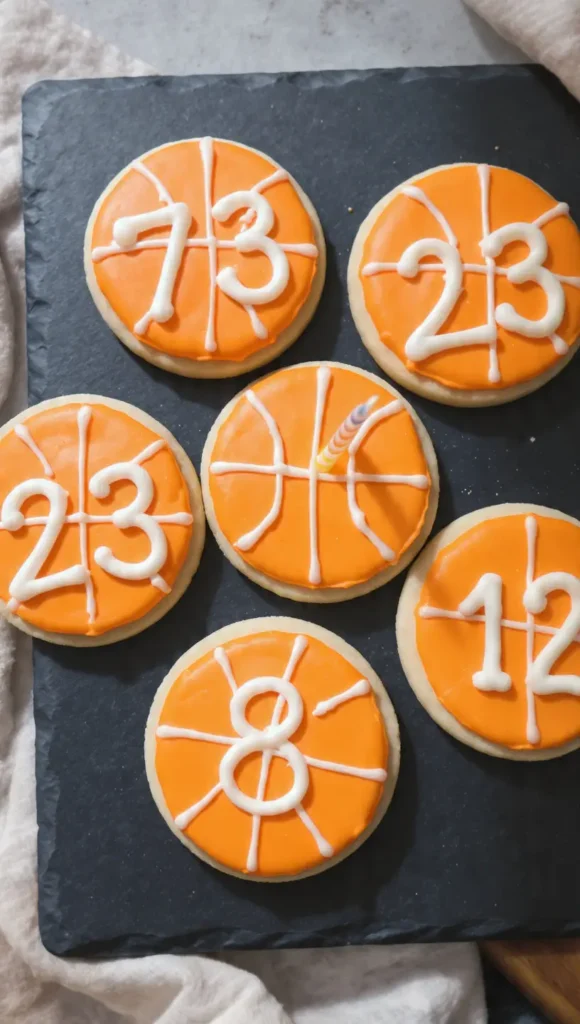
3. Basketball Cookies Birthday Style with Player Numbers
This one’s special. When my nephew turned 9, his whole party was basketball-themed, and his mom asked if I could make cookies with his jersey number. CHALLENGE ACCEPTED.
These basketball cookies birthday versions with numbers are actually showstoppers. Kids lose their minds when they see their number on a cookie. Adults pretend to be cool about it but they’re also impressed.
Why You’ll Love These:
They’re personalized without being complicated. You use the same base basketball cookie technique from #1 or #2, but then you add numbers on top. Perfect for basketball cookies for senior night too—imagine making these with each senior’s number. I’m tearing up just thinking about it.
What You’re Working With:
- Decorated basketball cookies (using either royal icing or buttercream method from above)
- White royal icing or white buttercream for the numbers
- Small piping bag with writing tip (or just a regular bag with a tiny hole cut)
- Edible marker (alternative method—easier but less impressive)
The Process:
- Make your base basketball cookies using either the royal icing or buttercream method. Let them dry/set completely.
- Decide on your numbers. Are you doing everyone’s jersey number? Just the birthday kid’s age? Your team’s ranking? (We were #3 in the league and I made cookies to celebrate. Yes, I’m that mom now.)
- If using royal icing for numbers: Mix up a small batch of white royal icing at stiff consistency. Put it in a piping bag with a small writing tip (I use Wilton #2 or #3).
- Pipe the numbers carefully. Start in the center of the cookie and work outward. Numbers like 1, 4, and 7 are easy. Number 8 is secretly the hardest. Number 3 is medium difficulty.
- If you mess up, wet a Q-tip and carefully wipe away the mistake. You have like 20 seconds max before royal icing sets.
- Alternative method for the nervous: Use an edible marker. Let your cookies dry completely (like overnight), then just write the numbers with an edible food marker. It’s not as fancy-looking, but it’s WAY easier and still looks great.
Things I’ve Learned the Hard Way:
- Practice piping numbers on parchment paper first. Seriously. I wasted three cookies before I got smart about this.
- If you’re making these basketball cookies with names AND numbers, do the numbers first. Names are harder and you’ll want the practice from doing numbers.
- Make extras. Someone will drop one. A number will come out wonky. Kids will want seconds. Always make extras.
- These are perfect for basketball cookies for senior night if you add each player’s number and maybe their name or jersey year on the back. I’m not crying, you’re crying.
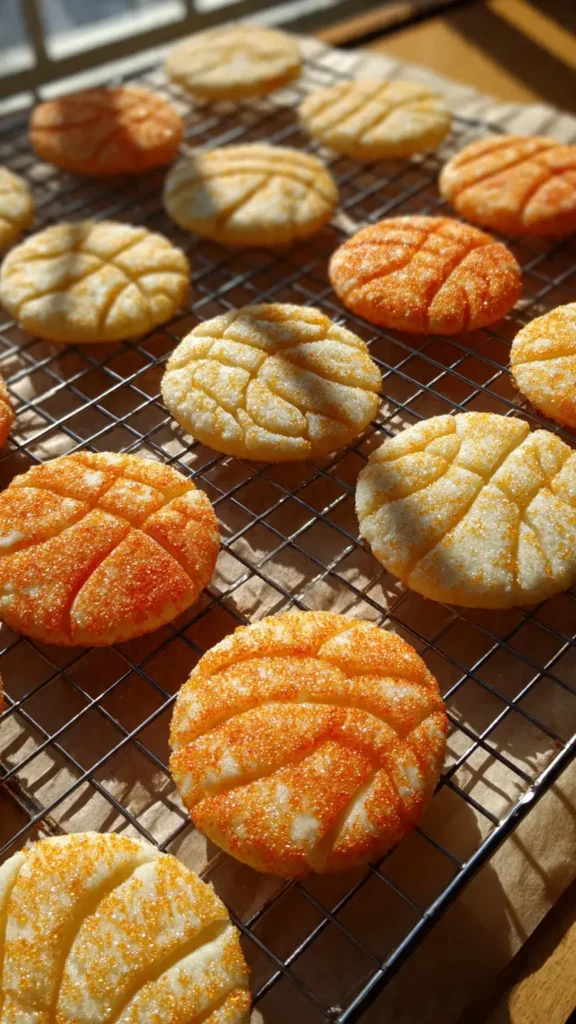
4. Easy Basketball Cookies with Cookie Stamps
OKAY. Let’s talk about the lazy genius method. Because sometimes you want cute basketball cookies but you absolutely do not have the energy for piping lines.
I discovered cookie stamps at a craft store when I was shopping for something completely different (still don’t remember what I originally needed), and they changed my LIFE. These basketball cookies easy versions are perfect when you’re making a ton of cookies and just need them to look good without the time investment.
Why This Method Rocks:
Speed. That’s it. That’s the reason. You can make 4 dozen of these in the time it takes to pipe perfect lines on one dozen regular ones. They’re great for last-minute game day parties, team events, or when you have approximately 30 minutes of free time and need to produce cookies.
Supply List:
- Sugar cookie dough (I use the refrigerated kind in a tube for these—not sorry)
- Basketball cookie stamp (available on Amazon, Etsy, or craft stores)
- Orange sanding sugar or orange sprinkles
- Food coloring (optional)
- Regular cookie cutters (circles)
How to Do This:
- Make your cookie dough or open that tube of store-bought dough. If making from scratch, chill it well—it needs to be firm.
- Roll out dough to about 1/4 inch thick. Cut circles with your cookie cutter.
- BEFORE BAKING: Press your basketball cookie stamp firmly into each cookie. This creates the basketball texture and lines right in the dough. Wipe the stamp clean between each cookie or it’ll stick.
- If you want extra flair, brush the cookies with a tiny bit of water and sprinkle orange sanding sugar on top.
- Bake according to your recipe. The stamped design will puff up a bit but stay visible.
- Let them cool and admire how easy that was.
Alternative version if you don’t have stamps:
Use a regular circle cookie cutter, bake the cookies, and once they’re cooled, brush them with a thin layer of light corn syrup. Sprinkle orange sanding sugar all over. Use black icing or an edible marker to add the basketball lines. Still way easier than full piping.
Real Talk:
- These are PERFECT for kids’ parties because they’re fast and kids don’t actually care about perfect royal icing. They care about sugar. Mission accomplished.
- If you can’t find a basketball stamp, use a fork to create a criss-cross pattern before baking. It’s not exactly basketball lines, but it adds texture and looks intentional.
- These keep well in an airtight container for days. The sanding sugar doesn’t really go anywhere once it’s baked on.
- I’ve made these at 10 PM the night before a game day party more times than I’ll admit. They’re my emergency backup plan.
5. Basketball Cookies with Names (The Ultimate Personalization)
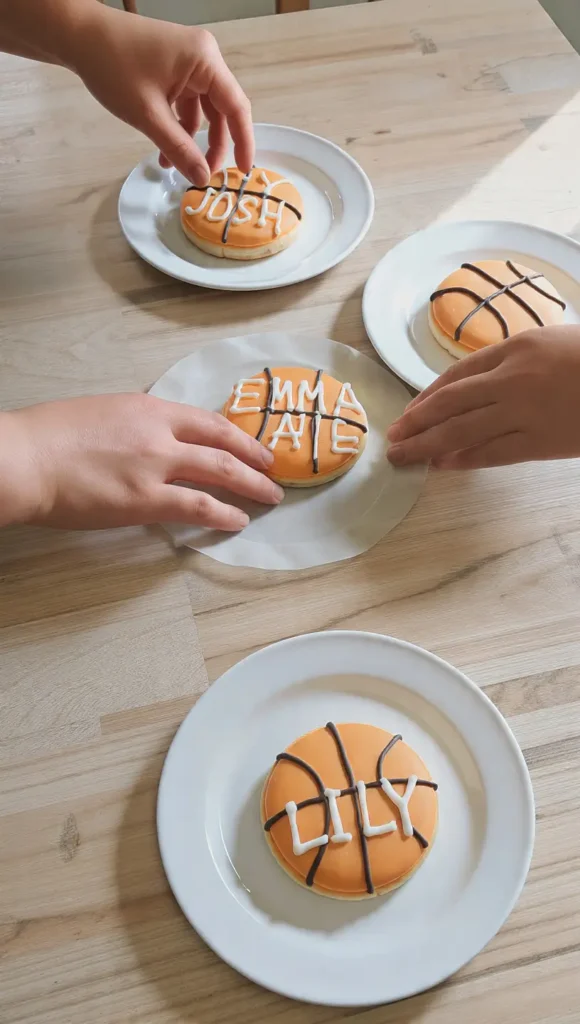
Last but definitely not least: personalized basketball cookies with names. These are the cookies that make you look like a professional baker even though you’re just a regular person with access to Google and determination.
I made these for my daughter’s entire basketball team at the end of the season. Twelve cookies, twelve names, and approximately seven hours of my life. But when those girls saw cookies with their actual names on them? Worth every minute. Three of them cried. Their coach cried. I might have cried a little too.
Why These Are Special:
Personal touches matter. These basketball cookies with names show that you put in effort, that you care, that each person matters. They’re perfect for senior night, end-of-season parties, birthday celebrations, or just because you want to make someone feel seen.
What You Need:
- Decorated basketball cookies (base layer—use royal icing method for best results because you need a smooth surface)
- White royal icing or contrasting color icing for names
- Piping bag with small writing tip
- Steady hands (or coffee, lots of coffee)
- List of names spelled correctly (DOUBLE CHECK THIS)
Step by Step:
- Make your base basketball cookies using the royal icing method from recipe #1. Let them dry overnight. This is non-negotiable—you need a completely dry surface to write names on.
- Print out the names in the font/size you want. This is your reference. Put the list where you can see it clearly.
- Mix up a small batch of white royal icing at stiff consistency. You don’t need much—maybe 1/2 cup of finished icing for a dozen cookies.
- Fill a piping bag fitted with a small writing tip. I use Wilton #2 for most names.
- Practice writing on parchment paper. Seriously. Do a few practice runs of each name before you touch the actual cookies.
- Write the names on cookies. I usually do them across the middle of the cookie, horizontal. Start with the middle letter and work outward so it’s centered.
- Let them dry for at least an hour before handling.
The Wisdom I’ve Accumulated:
- VERIFY SPELLING. Text the parent. Check the roster. Don’t be the person who spells someone’s name wrong on their cookie. I’ve been that person. It’s awful.
- Longer names = smaller letters. Plan accordingly. “Joe” is easy. “Alexandria” requires strategy.
- If your hand shakes (mine does), rest your piping hand on your other hand for stability. Or prop your wrist against the counter.
- Have a wet paper towel nearby for immediate mistake removal. You have approximately 15 seconds to fix errors before royal icing starts setting.
- Alternative method for the terrified: Use edible markers once cookies are completely dry. Takes longer but way less scary.
- Make at least two extras. Mistakes happen. Names get smudged. Someone always wants another one.
Time-Saving Trick:
If you’re doing a whole team and don’t want to handwrite every name, you can use edible image transfers. Print names on edible paper with edible ink, cut them out, and press them onto your dried royal icing base with a tiny bit of corn syrup as “glue.” It’s cheating but it looks professional and I won’t tell anyone.
Wrapping This Up
Look, I never thought I’d be the person making basketball cookies at midnight or explaining royal icing consistency to other parents at games. But here we are. And honestly? These basketball cookies ideas have brought more joy than I expected.
The first time someone asked if I’d made cookies professionally, I laughed so hard I snorted. Professional? I literally burned three dozen cookies last month because I got distracted by a show. But I’ve learned a lot through trial and error (emphasis on ERROR), and these five methods are the ones that actually work.
Whether you go for the classic basketball cookies royal icing method, the easier basketball cookies buttercream version, personalized basketball cookies with numbers or names, the super-fast stamped cookies, or some combination of all of them—you’re gonna make people happy. And isn’t that kind of the point?
Not every cookie needs to be perfect. Some of mine have wonky lines. Some have names that are slightly off-center. One time I spelled “defense” wrong on a cookie and had to carefully scrape it off and start over (it’s spelled with an S, not a C—learned that the hard way). But people don’t remember the imperfections. They remember that you made them something special.
So grab your cookie cutters, your food coloring, and maybe an extra bag of powdered sugar (you’ll probably need it), and make some basketball cookies. Try one method or try all five. Make a mess. Burn a batch. Start over. That’s what baking is.
And seriously, if I can figure out basketball cookies decorated enough to fool people into thinking I know what I’m doing, literally anyone can do this.
Let me know which basketball cookies ideas you try first—I’m genuinely curious which method people gravitate toward. And if you have tips or tricks I haven’t discovered yet, please share. I’m always learning.
Happy baking!
(And may your royal icing be the right consistency on the first try, because mine never is.)