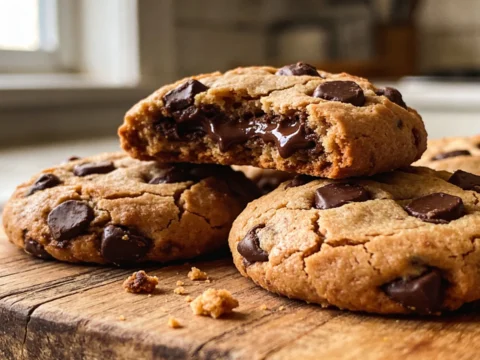
After testing dozens of chocolate chip cookie recipes over the years, I’m finally sharing my ultimate version that delivers those Instagram-worthy cookies with perfectly crispy edges and that gooey center everyone fights over. This chocolate chip cookie recipe isn’t some fancy, complicated process – it’s actually ridiculously simple. The secret is in a few specific techniques and ingredient ratios that transform ordinary ingredients into cookies that make people wonder if you secretly went to culinary school.
Table of Contents
Why This Cookie Recipe Actually Works
Let me tell you about my cookie journey. Five years ago, I made cookies for my partner’s family Christmas and they turned out like sad little hockey pucks. Completely flat, burned bottoms, with centers so hard they could’ve chipped a tooth. Everyone politely nibbled the edges and later I found half-eaten cookies hidden under napkins. Not my proudest moment.
I was determined to figure out what went wrong. Was it my ancient baking sheets? Too much flour? Not enough chilling time? I spent months testing variables one at a time. One batch I forgot about in the oven while answering the door (total disaster), and another time I accidentally used powdered sugar instead of flour (don’t ask how – it was late and they looked similar enough in my sleep-deprived state).
What I eventually discovered changed everything: most online recipes are missing critical details about temperature, mixing time, and ingredient quality. They’ll tell you to “cream butter and sugar” but not explain that over-creaming creates those sad flat cookies, or that your butter temperature is literally make-or-break for the texture. Anyway, after approximately 30 batches and a notable increase in my grocery bill, I cracked the code.
Ingredients for this chocolate chip cookie recipe
Here’s the thing about chocolate chip cookie ingredients – they’re deceptively simple. Everyone has them in their pantry, but how you select and handle each one makes the difference between “these are nice” and “WHERE DID YOU BUY THESE?!” reactions. I’m pretty flexible with most things in life, but for these cookies, a few elements are absolutely non-negotiable.
I’m not going to insist you buy some obscure European butter (though it’s amazing if you can), but I will gently push you to get the best chocolate you can afford. It’s where most of the flavor comes from, after all.
Unsalted Butter (1 cup/2 sticks, slightly cooler than room temperature)
The foundation of any good cookie. By “slightly cooler than room temperature,” I mean you should be able to press your finger into it and leave an indentation, but it shouldn’t be so soft it’s shiny or greasy. If it’s too warm, you’ll get flat cookies. Too cold, and you’ll overwork your mixer trying to cream it. I once microwaved cold butter for too long and ended up with a melted puddle – those cookies spread like pancakes.
Granulated Sugar (3/4 cup)
Plain white sugar creates those crispy edges we’re after. It also helps cookies spread properly. I’ve tried reducing it significantly and ended up with cakey little mounds instead of cookies. You need this exact balance of white to brown sugar for the crispy-to-chewy ratio to work.
Brown Sugar (1 cup, packed)
This is your gooey center insurance. The molasses in brown sugar adds moisture, chewiness, and that caramel undertone that makes cookies irresistible. Dark brown sugar works if that’s what you have – it’ll just give a slightly more pronounced molasses flavor. And always pack it in your measuring cup or you’ll shortchange yourself on sweetness.
Large Eggs (2, at room temperature)
Room temperature eggs incorporate much better than cold ones. If you forget to take them out early (I always do), place them in a bowl of warm water for 5-10 minutes. I’ve tried recipes with an extra yolk, and while it makes cookies richer, it also makes them cakier, which defeats our crispy edge goal.
Vanilla Extract (2 teaspoons)
Please, for the love of cookies, use real vanilla extract. The imitation stuff won’t ruin everything, but real vanilla has complexity that makes a noticeable difference. I splurged on a fancy bottle once, and while it was definitely better, a mid-range pure vanilla extract works perfectly fine. This is not where I’d recommend cutting corners, though.
All-Purpose Flour (2 1/4 cups)
Just regular flour is fine here – no need for cake or bread flour blends that some recipes call for. The measuring technique matters though: spoon flour into your measuring cup and level it off rather than scooping directly from the bag. I learned the hard way that scooping packs in too much flour, leading to dry, cakey cookies. Been there, regretted that.
Baking Soda (1 teaspoon)
The leavening agent that gives cookies their rise and helps create those crinkly tops. Make sure yours is fresh – if it’s been in your pantry for years, do the vinegar test (add a pinch to vinegar – it should fizz). I once used old baking soda and wondered why my cookies looked like sad, flat discs.
Salt (1 teaspoon)
More than just a flavor enhancer – salt balances sweetness and makes the chocolate taste more chocolatey. I prefer fine sea salt in the dough, but any fine salt works. Don’t skip this or reduce it – I tried once and the cookies tasted oddly flat and one-dimensional, even though they had the same texture.
Chocolate Chips or Chunks (2 cups)
This is where I get opinionated. If possible, chop your own chocolate from a bar instead of using chips. Chips have stabilizers that prevent them from melting into puddles of gooey chocolate. I like using a mix of semi-sweet and bittersweet chocolate. For brands, Ghirardelli is my go-to when I’m not splurging on Valrhona. And always add more than you think you need – there’s no such thing as too much chocolate.
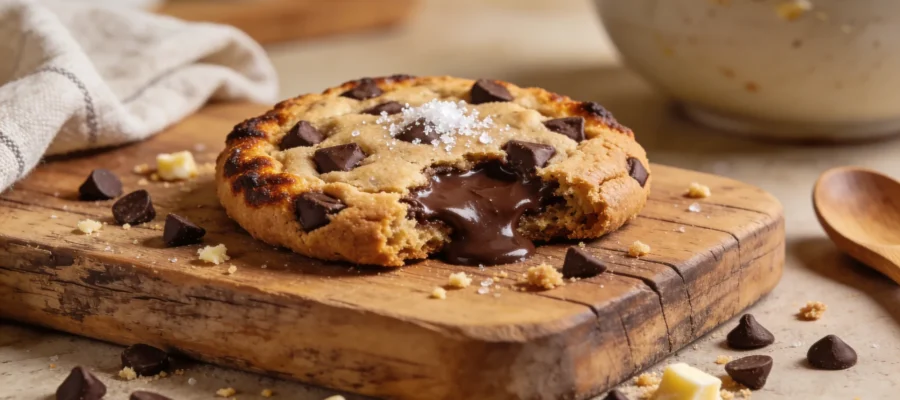
Flaky Sea Salt (for topping, optional but recommended)
A final sprinkle just after baking takes these cookies to bakery-level status. It creates that sweet-salty contrast that makes people’s eyes roll back when they take a bite. Maldon is my favorite, but any flaky sea salt works. Table salt is NOT a substitute here – it would be too intense and evenly distributed.
Instructions for this chocolate chip cookie recipe
Let’s be real about the process – making these cookies isn’t complicated, but there are a few places where things can go sideways if you’re not paying attention. The good news is that even my “failures” during testing were still totally edible (my neighbors never complained about getting the experimental batches). The entire process takes about 20 minutes of active time, then some chilling time, and finally 10-12 minutes of baking per batch.
You can absolutely make the dough ahead of time – it actually improves with an overnight rest in the fridge, allowing the flavors to develop and the flour to fully hydrate. I often make a double batch and freeze half the shaped dough balls for cookie emergencies (which happen more often than you’d think).
STEP 1: Prep your ingredients properly.
Set butter and eggs out about an hour before baking. Measure everything before starting – it seems fussy but prevents that panic when you realize you’re low on flour halfway through mixing. Chop chocolate if using bars instead of chips (highly recommend). Line baking sheets with parchment paper, not wax paper (I made that mistake once and had to chisel cookies off the sheet – the wax melts and sticks).
STEP 2: Cream butter and sugars – but don’t overdo it.
In a large bowl with an electric mixer (or stand mixer with paddle attachment), beat butter, brown sugar, and white sugar for EXACTLY 2 minutes on medium speed. Not 5 minutes, not 10 minutes. This is where I went wrong for years – over-creaming incorporates too much air and causes flat cookies. You want it just combined and slightly fluffy, but not increasing significantly in volume or turning very pale.
STEP 3: Add eggs and vanilla with restraint.
Add eggs one at a time, beating for about 15 seconds after each – just until incorporated. Scrape down the bowl with a spatula (don’t skip this!). Add vanilla and mix for 5-10 seconds. The mixture might look slightly curdled – that’s perfectly fine. I used to panic and keep mixing until it looked smooth, which was another path to flat cookies.
STEP 4: Add dry ingredients correctly.
In a separate bowl, whisk together flour, baking soda, and salt. Add this to the wet ingredients all at once (not gradually). Mix on low speed JUST until no dry flour remains – about 15-20 seconds. Stop the mixer the SECOND the flour disappears. Seriously. Put your hand on that off switch. Over-mixing develops gluten which makes tough cookies. I’ve set timers to prevent myself from absentmindedly mixing too long.
STEP 5: Fold in the chocolate by hand.
Remove the bowl from the mixer and fold in chocolate chips/chunks with a spatula. This should take about 10 folds – you want the chocolate evenly distributed but don’t want to work the dough more than necessary. The dough should be slightly tacky but not sticky enough to coat your fingers completely. If it’s too sticky, your butter might have been too warm – chill it for 30 minutes before proceeding.
STEP 6: Chill the dough – don’t you dare skip this.
Cover the bowl and refrigerate for AT LEAST 2 hours, preferably 24 hours. I know it’s torturous to wait, but this is non-negotiable. The chilling time allows the flour to hydrate and the flavors to develop. The cookies will taste noticeably better and hold their shape properly. I once did a side-by-side test of unchilled vs. chilled – the difference was dramatic enough that I’ll never skip this step again.
STEP 7: Portion and bake with precision.
Preheat oven to 350°F. Using a 3-tablespoon cookie scoop or 1/4 cup measure (for bakery-sized cookies), portion dough onto parchment-lined baking sheets, leaving 3 inches between cookies. They WILL spread. Don’t flatten the balls – they’ll do that naturally in the oven. If the dough has been chilling longer than 24 hours, let it sit at room temperature for 10 minutes so it’s scoopable.
STEP 8: Watch the bake time like a hawk.
Bake for 10-12 minutes until the edges are set and golden but the centers still look slightly underbaked and puffy. The cookies will continue cooking on the hot baking sheet. Trust me on the timing – even if they look underdone in the middle. My batches always look too soft at 11 minutes, but they set up perfectly after cooling. If you wait until they look completely done in the oven, they’ll end up overbaked and crunchy throughout.
STEP 9: Perfect the finish with a pro move.
As soon as the cookies come out of the oven, sprinkle with flaky sea salt (if using). For perfectly round cookies, use a large round cookie cutter or the rim of a glass to gently swirl around each hot cookie – this corrects any irregular edges. Let them cool on the baking sheet for exactly 5 minutes – enough time to set up slightly but not so long that they stick. Then transfer to a wire rack to cool completely.
Tips & Variations for this chocolate chip cookie recipe
These cookies stay fresh in an airtight container for 3-4 days, though they rarely last that long in my house. For the best texture after day one, pop them in the microwave for 10 seconds to restore that fresh-baked gooeyness. The dough freezes beautifully – scoop into balls, freeze on a baking sheet, then transfer to a freezer bag. You can bake straight from frozen – just add 2 minutes to the baking time.
If you want to experiment, try swapping 1/2 cup of chocolate for toasted nuts, toffee bits, or even potato chips for a sweet-salty combo. For a more grown-up version, add 1/2 teaspoon of espresso powder to the dry ingredients – it intensifies the chocolate flavor without tasting like coffee.
Remember that everyone’s oven is different. If your cookies spread too much, your oven might run hot – try increasing the temperature by 25°F and reducing the bake time by a minute. If they’re not spreading enough, your oven might run cool. And honestly, if your cookies don’t look exactly like the perfect ones on Instagram, that’s completely normal. They’ll still taste amazing.
Final Thoughts on this chocolate chip cookie recipe
Look, I’m not going to claim these are the greatest cookies ever created in the history of baking. But I will say that when I bring these to gatherings, people always ask for the recipe, and my neighbor’s kid now calls me “the cookie lady” – which I consider a serious accomplishment.
If you try these, please let me know how they turn out! I’m genuinely curious how this recipe performs in different kitchens with different ovens and mixing methods. And I’d love to hear what modifications you make – the best recipes evolve when they’re shared. Just promise me you won’t skip the chilling step, okay?
The Best Chocolate Chip Cookie Recipe: Crispy Edges, Gooey Center
This chocolate chip cookie recipe delivers perfectly crispy edges and a gooey center, a simple and foolproof method to create irresistible cookies.