
Okay, so Cheese Ball Snowman creations have basically taken over my kitchen this December. Not gonna lie, my first attempt looked more like a melting snow monster than anything cute. But here’s the thing—once you get the hang of stacking these cheese balls, it’s actually ridiculously fun.
I stumbled onto this whole snowman cheese ball thing when my sister-in-law made one last year and everyone went nuts over it. I thought, “How hard can it be?” Spoiler: harder than it looks when you’re working with cream cheese that’s too soft. Learn from my mistakes, people.
Table of Contents :
Why Everyone’s Obsessed with Cheese Ball Snowman Appetizers
Look, I’ve tried the reindeer cheese ball (cute but complicated), the christmas tree cheese ball (fell over twice), and even attempted one of those fancy snowman cheese board arrangements. But this classic Cheese Ball Snowman recipe? It’s the winner. The taste of home snowman cheese ball version inspired me, but I’ve tweaked it because… well, I can never leave well enough alone.
My neighbor Sarah keeps asking for this recipe. Her exact words: “I need that snowman thing you made.” So here we go.
What Makes This Snowman Cheese Ball Recipe Actually Work
Most snowman cheese ball recipes online tell you to use plain cream cheese and call it a day. Boring. I experimented with a snowman cheese ball with boursin cheese once—game changer. The herbs add this amazing flavor that makes people actually want to eat it, not just Instagram it.
Also? The key is—oh wait, I forgot to mention—you need THREE different sized balls. I tried making just two once (thinking I was being clever) and it looked like a cheese snowman that skipped leg day. Not cute.
Cheese Ball Snowman Ingredients (and My Shopping Disasters)
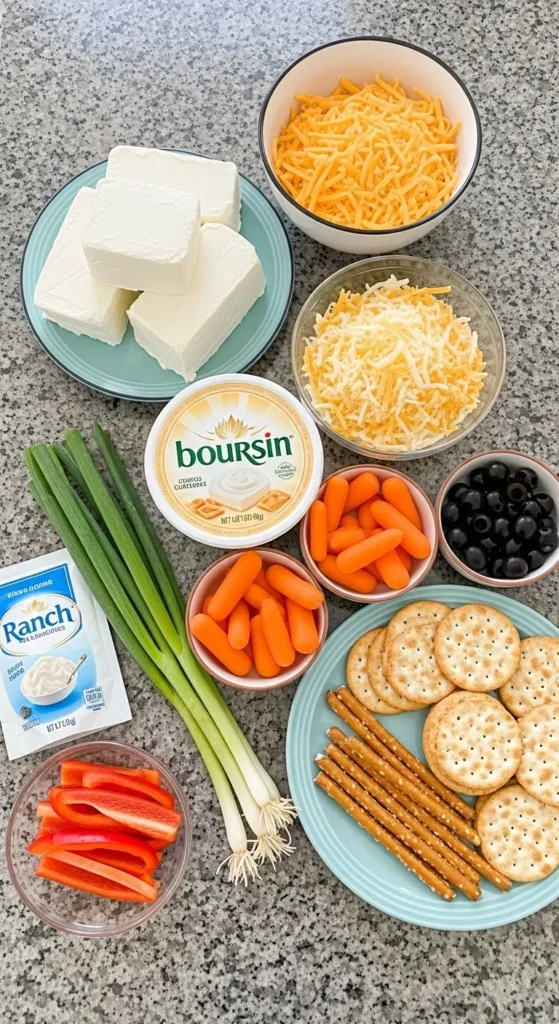
Here’s what you actually need. Don’t skimp on the good stuff:
For the snowman:
- 16 oz cream cheese (full fat, don’t even think about low-fat)
- 8 oz shredded sharp cheddar cheese
- 5 oz Boursin cheese (garlic & herb flavor—trust me)
- 2 tablespoons ranch seasoning mix
- 1/4 cup green onions, finely chopped
- 1/4 teaspoon garlic powder
- Pinch of black pepper
For decorating (the fun part):
- Baby carrots (for the nose—I use ONE)
- Black olives (sliced for buttons and eyes)
- Pretzel sticks (for arms—they WILL break, buy extras)
- Small red bell pepper or cherry tomato (for a scarf accent)
- Fresh rosemary or herbs (optional hat decoration)
- Crackers for serving (I’m obsessed with Ritz but whatever works)
Shopping tip: Last Tuesday I completely forgot the baby carrots and had to use a regular carrot cut down. Worked fine but looked a little… aggressive? Just get baby carrots.
How to Make Your Cheese Ball Snowman (Step-by-Step Chaos)
Step 1: Mix the cheese base
Let your cream cheese sit out for like 30 minutes. Room temperature is KEY. Cold cream cheese will give you an arm workout you didn’t sign up for.
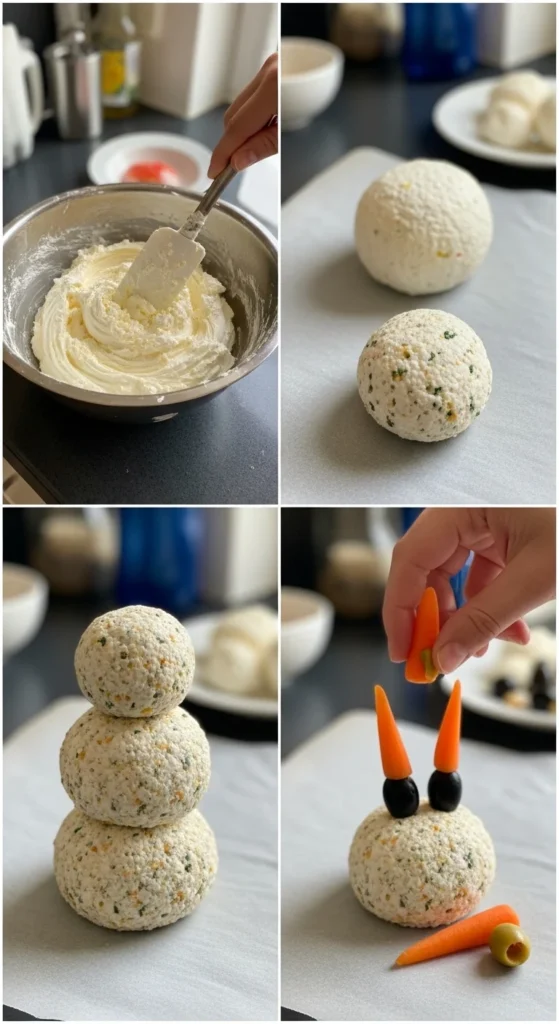
In a big bowl, combine cream cheese, shredded cheddar, Boursin cheese, ranch seasoning, green onions, garlic powder, and pepper. Mix with a spatula (NOT a whisk—learned this the hard way). It’ll look kinda weird and lumpy at first. That’s normal. Keep going.
Step 2: Divide and conquer
Okay, here’s where my first three attempts failed. You need to divide the mixture into three UNEQUAL portions:
- Large ball (bottom): about 60% of mixture
- Medium ball (middle): about 30% of mixture
- Small ball (head): remaining 10%
I eyeball it now, but the first time I made them all the same size. Disaster. Complete disaster.
Step 3: Shape and chill
Form each portion into a ball. This is messy. Your hands will be covered in cheese. Embrace it. Place them on a parchment-lined plate and refrigerate for at least 2 hours. I usually do overnight because I have zero patience the day-of.
Step 4: Assembly time
This is where it gets fun (and slightly stressful). Take your chilled balls out. Stack them carefully—largest on bottom, smallest on top. Press down GENTLY to stick them together. If your cheese is too cold, they won’t stick. Too warm? Everything slides. It’s a delicate balance and honestly, I’ve had to restart this step before.
Step 5: Decorate
Now you’re basically doing snowman cheese ball arts and crafts:
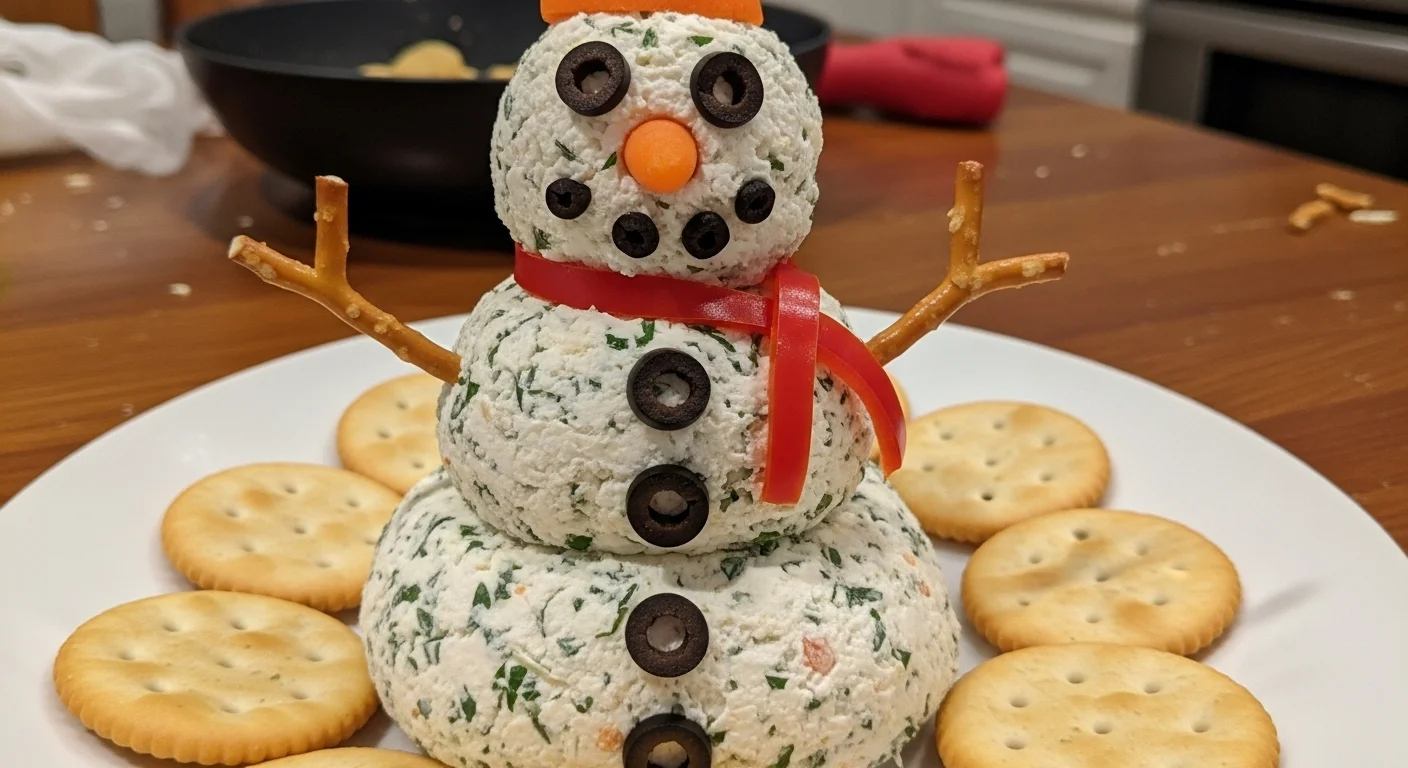
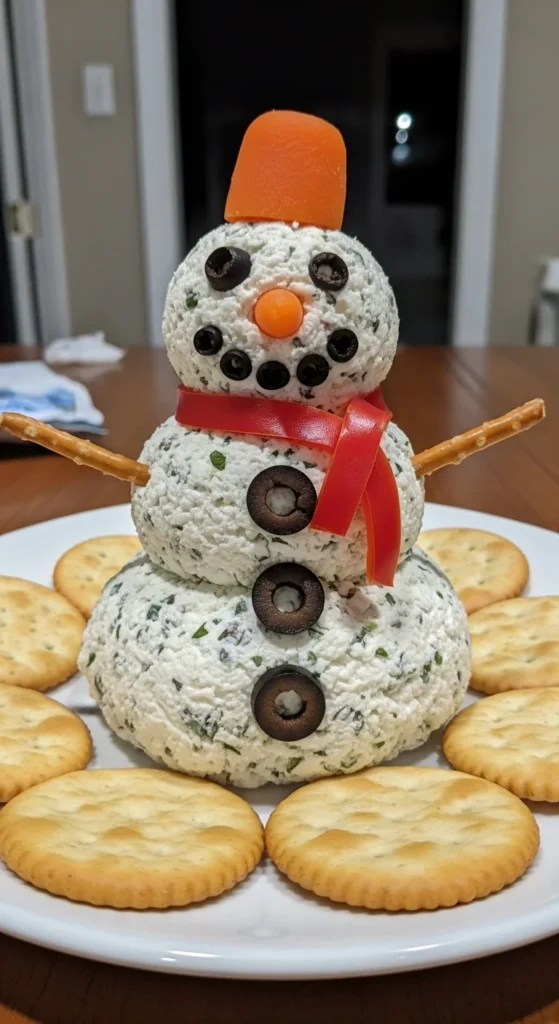
- Push baby carrot into the face for nose (angle it slightly up—looks cuter)
- Slice black olives and press them in for eyes and buttons down the front
- Stick pretzel sticks into the sides for arms (they’ll snap, it’s fine, use the pieces)
- Add a little scarf using thin strips of red pepper
- Optional: stick some rosemary on top like a hat
Have you ever tried decorating one of these? Let me know in the comments because I’m curious if everyone else struggles with the pretzel arms as much as I do.
Tips I Wish Someone Told Me Before
Temperature matters: If your kitchen is warm (looking at you, holiday baking oven heat), your snowman will start to sag. I learned this when mine slowly melted into a cheese puddle during a party. Now I keep it in the fridge until the last possible second.
Make it ahead: This is actually BETTER made the day before. The flavors blend together and the whole thing firms up nicely. (Trust me on this one.)
Sauce situation: Some people serve this with a cheese ball snowman sauce on the side. I usually just do crackers because honestly, it’s flavorful enough. But if you want to add a side of ranch or a cranberry dip? Go for it.
The Italian twist: I tried making a snowman cheese italian version once with Italian herbs and sun-dried tomatoes mixed in. It was… okay? I prefer this recipe though.
Serving Suggestions (Real Talk)
Put this on a snowman cheese platter surrounded by crackers, veggies, and maybe some salami. I’ve seen people do whole snowman cheese board arrangements with multiple cheese balls shaped like snowmen. Way too much work for me, but if you’re feeling ambitious, go wild.
This makes enough for about 15-20 people as an appetizer. My 6-year-old nephew tried to eat the entire bottom ball by himself last Christmas. Had to cut him off.
What If It Goes Wrong?
If your snowman tips over during transport (been there), just reshape it. If the cheese mixture is too soft to hold shape, add more shredded cheese. If it’s too dry and crumbly, mix in a tablespoon of sour cream or mayo.
Actually, you know what? I’ve messed this up so many times that nothing phases me anymore. One year the head fell off right as guests arrived. I just stuck it back on and called it a “rustic snowman.” Everyone laughed and it was fine.
Why This Cheese Ball Snowman Recipe Works for Parties
It’s make-ahead (lifesaver), it feeds a crowd, looks impressive without being impossible, and honestly? People go CRAZY for anything shaped like a snowman at Christmas parties. I’ve seen grown adults take photos with this thing.
Plus, unlike some of those complicated snowman cheese ball recipes floating around, this one actually tastes good. The Boursin cheese makes such a difference. I don’t care what anyone says, plain cream cheese snowmen are boring.
Final Thoughts
Is this recipe perfect? No. Will your first one probably look a little wonky? Probably. But that’s what makes it fun. My snowman cheese creations have gotten progressively better (or at least more stable), and now people request them.
If I can make this without my cheese balls sliding apart halfway through a party, anyone can.
Seriously, try this and tell me what you think. And may your pretzel arms stay intact longer than mine ever do!
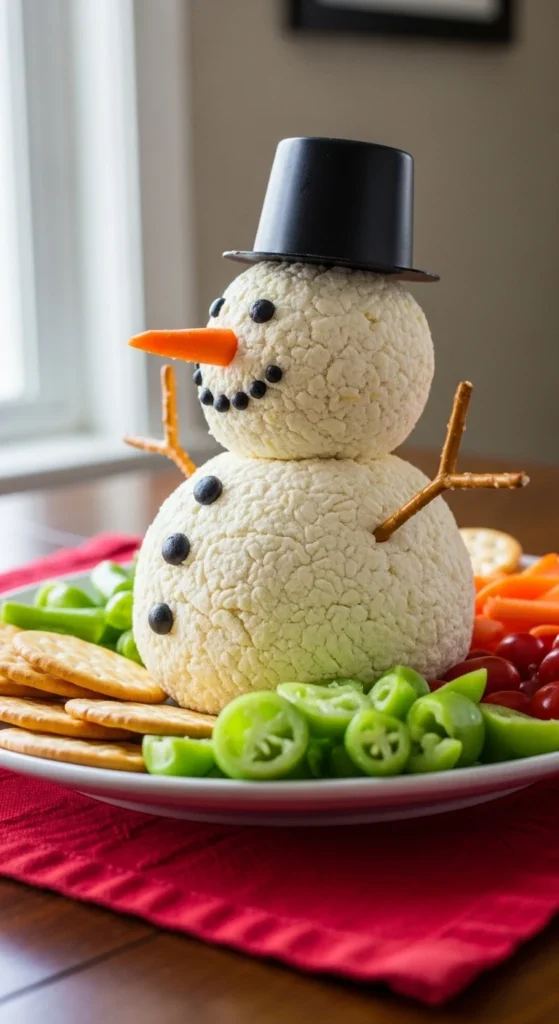
Adorable Cheese Ball Snowman – A Fun and Easy Christmas Party Appetizer
Make this adorable Cheese Ball Snowman for your holiday party! Easy recipe with cream cheese, Boursin cheese, and festive decorations that guests will love.
Ingredients
- 16 oz cream cheese, room temperature
- 8 oz shredded sharp cheddar cheese
- 5 oz Boursin cheese (garlic & herb flavor)
- 2 tablespoons ranch seasoning mix
- 1/4 cup green onions, finely chopped
- 1/4 teaspoon garlic powder
- Pinch of black pepper
- Baby carrots (for nose)
- Black olives, sliced (for eyes and buttons)
- Pretzel sticks (for arms)
- Small red bell pepper or cherry tomato (for scarf)
- Fresh rosemary or herbs (optional, for hat)
- Crackers for serving
Instructions
- Step 1Let cream cheese sit at room temperature for 30 minutes. In a large bowl, combine cream cheese, shredded cheddar cheese, Boursin cheese, ranch seasoning, green onions, garlic powder, and black pepper. Mix with a spatula until well combined and smooth.
- Step 2Divide the cheese mixture into three unequal portions: large ball (60% of mixture for bottom), medium ball (30% for middle), and small ball (10% for head).
- Step 3Form each portion into a smooth ball shape. Place all three balls on a parchment-lined plate and refrigerate for at least 2 hours or overnight until firm.
- Step 4Remove chilled cheese balls from refrigerator. Carefully stack them with largest ball on bottom, medium in middle, and smallest on top. Gently press down to help them stick together.
- Step 5Push baby carrot into the face for nose. Add sliced black olive pieces for eyes and buttons down the front. Insert pretzel sticks into sides for arms. Add thin strips of red pepper for a scarf. Optionally, add fresh rosemary on top as a hat.
- Step 6Keep refrigerated until ready to serve. Place on a serving platter surrounded by crackers and vegetables. Serve immediately.