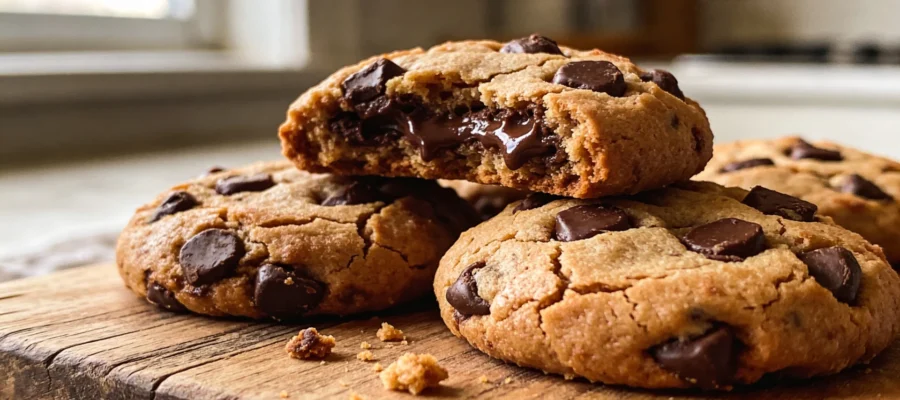
Chewy chocolate chip cookies have been my white whale for years. I’d try recipe after recipe, always ending up with either crispy discs that shattered on impact or cakey puffs that dried out by morning. It took me literally dozens of failed batches (and one memorable kitchen meltdown) to finally crack the code. The secret? It’s not just one thing – it’s a specific combination of ingredients, mixing technique, and even how you shape the dough. I’ve been using this method for the past three years, and I’ve never looked back. These cookies stay chewy for days – if they last that long.
Table of Contents :
Why I’m Obsessed With Chewy Chocolate Chip Cookies
Let me be totally honest here – I’m not a professional baker. I’m just someone who got tired of disappointing cookies. My journey to perfect chewy chocolate chip cookies started after bringing store-bought cookies to my nephew’s birthday. My sister-in-law (tactfully) mentioned her preference for homemade treats, and I took that personally. Like, way too personally.
My first attempts were disasters. I followed recipes exactly but still ended up with cookies that were crispy around the edges and barely soft in the middle – not the thick, chewy texture I was after. I burned entire batches by forgetting them in the oven. I underbaked others to the point of raw dough centers. There was the infamous “Salt Incident” where I mistook tablespoons for teaspoons (don’t ask). But each failure taught me something, and gradually, I pieced together what actually matters for achieving that perfect chewy texture.
The turning point came when I brought a batch to work after finally getting it right. Three people asked for the recipe, and one colleague – who claimed to hate chocolate chip cookies – ate four in one sitting. That’s when I knew I’d nailed it. And now I’m sharing everything I’ve learned with you.
Ingredients for Chewy Chocolate Chip Cookies
Here’s the thing about cookie ingredients – some are absolutely non-negotiable for chewiness, while others have wiggle room. I’ve tested enough substitutions to know what works and what doesn’t. The most critical element? The ratio of brown to white sugar. This is not the place to improvise if you want that perfect chewy texture. Trust me, I’ve gone down that experimental rabbit hole so you don’t have to.
Quality matters for some ingredients (vanilla, chocolate) but is less important for others. I’ll note where you can save money and where it’s worth splurging. And yes, I’ve included my favorite brands because that generic “use high-quality ingredients” advice never helped me when I was standing confused in the grocery aisle.
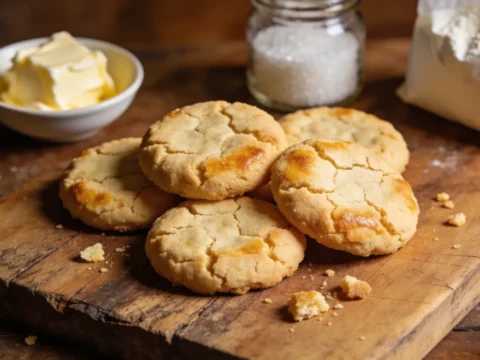
Melted Butter (1 cup/2 sticks)
Melted, not softened. This is crucial. Melting the butter creates a denser, chewier cookie because it coats the flour proteins before they can form gluten. I use salted butter because I like the flavor contrast, but unsalted works too – just add an extra ¼ teaspoon of salt. Let it cool slightly before mixing or you’ll scramble the eggs.
Brown Sugar (1 cup, packed)
The higher molasses content in brown sugar is what gives these cookies their chewy texture and deeper flavor. Dark brown sugar makes them even chewier with a more pronounced molasses flavor. I’ve tried reducing this to make “healthier” cookies, and they were terrible – hard little discs that nobody wanted. Don’t mess with this measurement.
White Granulated Sugar (½ cup)
This creates those slightly crispy edges while helping the cookies spread. The balance between white and brown sugar is everything – I experimented with different ratios for weeks before landing on this 2:1 brown-to-white ratio. Store brand is totally fine here; save your money for good chocolate.
Large Eggs (2)
Room temperature eggs incorporate much better than cold ones. If you forget to take them out ahead of time (I always do), place them in warm water for 5-10 minutes. The protein in eggs provides structure, and the fat in the yolks adds richness. I’ve tried using just yolks for extra chewiness – it works but makes the cookies too dense.
Pure Vanilla Extract (2 teaspoons)
This is where I recommend spending a bit more. The artificial stuff has a weird aftertaste that ruins the whole cookie. I use Nielsen-Massey when I’m feeling fancy, but the Costco vanilla is actually amazing too. In a pinch, you can use 1 teaspoon of vanilla bean paste, which adds those pretty flecks.
All-Purpose Flour (2¼ cups)
I’ve tested bread flour (too chewy, almost tough), cake flour (too soft), and gluten-free blends (hit or miss). Regular all-purpose gives the best balance. Measuring correctly is crucial – I fluff the flour, spoon it into the measuring cup, and level it off. Scooping directly from the bag packs it down and you’ll end up with dry cookies.
Baking Soda (1 teaspoon)
This reacts with the acidic brown sugar to help the cookies rise slightly while still staying chewy. Baking powder would make them too cakey. Make sure yours is fresh – old baking soda leads to flat, dense cookies. I learned this the hard way after using a box that had been open in my fridge for…longer than I care to admit.
Salt (1 teaspoon)
Regular table salt is fine, though I prefer kosher salt for its less aggressive saltiness. This amount might seem high, but it balances the sweetness and enhances the chocolate flavor. Once I accidentally used only ¼ teaspoon and the cookies tasted flat and one-dimensional. Salt matters, people!
Semi-Sweet Chocolate Chips (2 cups)
I like Ghirardelli or Guittard chips for their balanced flavor and how they hold their shape without completely melting away. For an upgrade, chop a good chocolate bar instead – the irregular chunks and shards create gorgeous texture variation. I sometimes mix dark and milk chocolate for complexity. And yes, I’ve tried using less than 2 cups. It was sad. Don’t do it.
Instructions for Chewy Chocolate Chip Cookies
Alright, let’s get to the actual baking. This process takes about 20 minutes of active work, plus chilling time (which is non-negotiable, I’ve learned the hard way), and then 10-12 minutes of baking per batch. The first time you make these, give yourself a solid hour from start to finish. I’ve streamlined my process over time, but rushing leads to mistakes – like the time I forgot the eggs completely and wondered why my “dough” resembled wet sand.
The biggest game-changer in my cookie technique was realizing that the mixing method actually matters. Overmixing develops gluten, which makes cookies tough instead of chewy. And that dough-chilling step that I used to impatiently skip? Turns out it’s absolutely critical for getting that perfect texture. Also worth noting – these cookies won’t look done when they actually are. If you wait until they look completely baked, they’ll end up crispy, not chewy.
STEP 1: Melt the butter.
Place 2 sticks of butter in a microwave-safe bowl and heat in 30-second intervals until just melted. You don’t want it bubbling hot – aim for completely liquid but not simmering. Let it cool for about 5 minutes. If it’s too hot when you add the eggs, you’ll end up with scrambled egg pieces in your cookie dough, which I have absolutely done before. Not appetizing.
STEP 2: Mix the wet ingredients.
Pour the melted butter into a large mixing bowl and add both sugars. Whisk vigorously for about 1-2 minutes until the mixture looks like wet sand and the sugar is starting to dissolve. This is building your texture foundation – don’t rush this step! Add eggs one at a time, whisking well after each addition until fully incorporated. The mixture should look glossy and slightly thickened. Stir in the vanilla extract.
STEP 3: Combine the dry ingredients.
In a separate bowl, whisk together the flour, baking soda, and salt until evenly distributed. This ensures you don’t get weird pockets of salt or baking soda in your cookies. I used to skip this step and mix everything directly into the wet ingredients – the results were inconsistent at best, with some cookies rising perfectly and others staying flat.
STEP 4: Combine wet and dry ingredients.
Add the dry ingredients to the wet mixture in three batches, gently folding with a spatula or wooden spoon after each addition. STOP mixing as soon as you no longer see dry flour – this is critical! Overmixing at this stage develops gluten, which will make your cookies tough instead of chewy. The dough should look slightly lumpy but cohesive, not perfectly smooth.
STEP 5: Add the chocolate chips.
Gently fold in the chocolate chips until evenly distributed. If the dough seems too loose at this point, don’t worry – it will firm up during chilling. For extra chocolate flavor, I sometimes add 2 tablespoons of cocoa powder to the dry ingredients. And if you’re feeling fancy, reserve a handful of chips to press into the tops of the cookies just before baking for that bakery-style look.
STEP 6: Chill the dough.
Cover the bowl with plastic wrap and refrigerate for AT LEAST 1 hour, preferably 2-3 hours, or up to 24 hours. I know it’s tempting to skip this step (I’ve done it when desperate), but the difference is night and day. Chilling allows the flour to fully hydrate and the butter to solidify, which prevents excessive spreading and creates that perfect chewy texture. The flavor also improves dramatically as the dough rests.
STEP 7: Prepare for baking.
Preheat your oven to 350°F and line two baking sheets with parchment paper. Don’t use cooking spray – it causes too much spreading. Take the dough out of the refrigerator. If it’s been chilling for more than 3 hours, let it sit at room temperature for 10 minutes to soften slightly. Rock-hard dough is impossible to scoop and will lead to uneven baking.
STEP 8: Form and bake the cookies.
Use a cookie scoop or spoon to portion the dough into 2-tablespoon balls. Don’t make them too small or you’ll lose that chewy center. Place them about 2 inches apart on the baking sheets. For bakery-style cookies, gently pull each ball apart and put it back together with the rough sides facing out. This creates that beautiful crackled top. Bake for 10-12 minutes until the edges are set and lightly golden but the centers still look slightly underdone and puffy.
STEP 9: The cooling process.
This is where patience really matters. Let the cookies cool on the baking sheet for 5 minutes – they’re finishing cooking from residual heat. They’ll look puffy and underdone when you take them out, but will collapse slightly and set up during cooling. After 5 minutes, transfer to a wire rack to cool completely. The texture continues developing as they cool – eating them too soon means missing out on that perfect chewiness.
Tips & Variations for Chewy Chocolate Chip Cookies
These cookies stay chewy for 3-4 days when stored in an airtight container. Add a slice of bread to the container to maintain moisture even longer. To freeze the dough, portion it into balls first, freeze on a tray, then transfer to a freezer bag – bake straight from frozen, just add 1-2 minutes to the time. For variations, try adding ½ cup of toasted nuts, swapping ¼ cup of flour for cocoa powder for a double-chocolate version, or browning the butter first for a deeper, toffee-like flavor (though you’ll need to add 1-2 tablespoons of milk to compensate for moisture loss).
If your cookies spread too much, your butter might have been too warm or you didn’t chill the dough long enough. If they don’t spread at all, your oven might be running cool or you measured too much flour. And remember – homemade cookies will never look exactly like those perfectly uniform bakery cookies, and that’s perfectly okay. Those little imperfections are how people know they’re getting the real deal.
Final Thoughts on Chewy Chocolate Chip Cookies
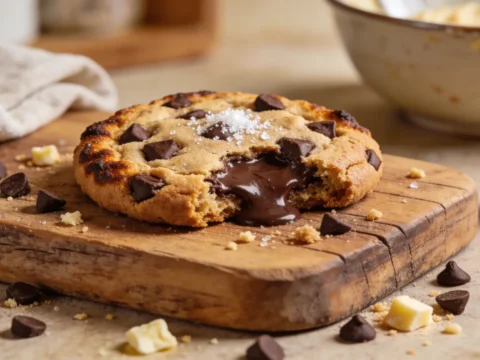
Look, I’m not claiming these are the world’s greatest chocolate chip cookies – but they are reliably chewy every single time, which is the one thing I couldn’t figure out for years. The combination of melted butter, higher brown sugar ratio, proper mixing technique, and adequate chilling time creates a cookie that stays soft and chewy even days later (though let’s be real, they rarely last that long in my house).
If you try this recipe, drop a comment below about how yours turned out. I’m especially curious if the texture holds up in different climates – I live in a relatively humid area, and I’ve heard from friends in drier regions that they sometimes need to adjust the flour slightly. And please share any creative additions you try! I’m always looking to upgrade my cookie game even further.
Chewy Chocolate Chip Cookies
These chewy chocolate chip cookies are perfect, staying soft and chewy for days. The combination of ingredients, mixing technique, and chilling time guarantees a delicious result.