

I’ve made more Pinterest-fail Christmas sugar cookies than I’d like to admit. Like, remember those perfectly decorated snowflakes you see everywhere? Yeah, mine looked like sad blobs with icing dripping everywhere. But after years of trial and error (and one minor kitchen meltdown), I finally have a collection of christmas sugar cookies decorated recipes that actually work for real humans with real kitchens.
Not gonna lie, some of these are easier than others. Some require patience I don’t always have. But every single one has made it to my actual Christmas cookie plate, which is saying something because I’m brutally honest about food fails.
So here we go—15 christmas sugar cookies recipes that range from “I made these with my toddler” to “okay I got a little fancy with the royal icing.” Your kitchen, your rules.
Table of Contents :
1. Classic Rolled Christmas Sugar Cookies (The Foundation Recipe)
This is THE recipe. The one I come back to every single year.
Started making these with my grandma, who—bless her—never measured anything. Took me three Christmases to figure out the actual measurements because “just add flour until it feels right” is NOT helpful when you’re 23 and panicking.
Why it’s amazing: These hold their shape perfectly. No spreading, no puffing up weird. Just clean edges that actually look like the cookie cutter shape.
Ingredients:
- 3 cups all-purpose flour (don’t use self-rising, learned that mistake the hard way)
- 1 cup butter, softened (not melted! Room temperature = key)
- 1 cup sugar (white, regular, nothing fancy)
- 1 egg (large, or just whatever’s in your fridge honestly)
- 2 teaspoons vanilla extract (the real stuff if you have it)
- 1 teaspoon baking powder
- 1/2 teaspoon salt (I forget this sometimes and the cookies taste flat)
Instructions:
- Cream butter and sugar together until it’s fluffy. Like actually fluffy, not just mixed. This takes a few minutes.
- Beat in the egg and vanilla. Should look smooth and pale yellow.
- Mix the dry stuff separately—flour, baking powder, salt. Dump it into the wet stuff gradually.
- Here’s where it gets real: the dough will be crumbly at first. Keep mixing. It comes together, I promise.
- Split dough in half, flatten into discs, wrap in plastic wrap. Refrigerate for at least 1 hour. (I’ve done 30 minutes when desperate. Not ideal but survivable.)
- Roll out on floured surface to 1/4 inch thick. Cut shapes. Transfer to cookie sheet.
- Bake at 350°F for 8-10 minutes. They should NOT be brown. Barely golden edges = perfect.
- Cool completely before decorating or the icing will melt everywhere. Trust me.
Chaos notes: Don’t skip the chilling step. Warm dough = spreading cookies = sadness. Also, re-roll scraps only once or twice max. After that the cookies get tough from overworking the dough.
2. No-Chill Christmas Sugar Cookies (For the Impatient)
Developed this recipe after a “we need cookies for school TOMORROW” emergency.
Why it’s amazing: Zero chilling time. Like, literally mix and bake. Game changer when you forgot about the cookie exchange until 10 PM.
Ingredients:
- 2 3/4 cups flour
- 1 teaspoon baking soda (NOT baking powder, they’re different!)
- 1/2 teaspoon salt
- 1 cup butter, softened
- 1 1/2 cups powdered sugar (yes, powdered, not granulated)
- 1 egg
- 1 teaspoon vanilla
- 1 teaspoon almond extract (makes them taste fancy)
Instructions:
- Mix dry ingredients in one bowl. Set aside.
- Beat butter and powdered sugar until combined. Doesn’t need to be super fluffy for this one.
- Add egg, vanilla, and almond extract. Mix well.
- Gradually add flour mixture. Dough will be soft but workable.
- Roll out immediately on floured surface. Yeah, immediately. No waiting.
- Cut shapes, bake at 375°F for 7-9 minutes.
- They’ll look underdone. They’re not. Take them out anyway.
Chaos notes: These spread slightly more than traditional rolled cookies, so leave space between them. Also they’re softer and more delicate, so let them cool on the pan for a few minutes before moving.
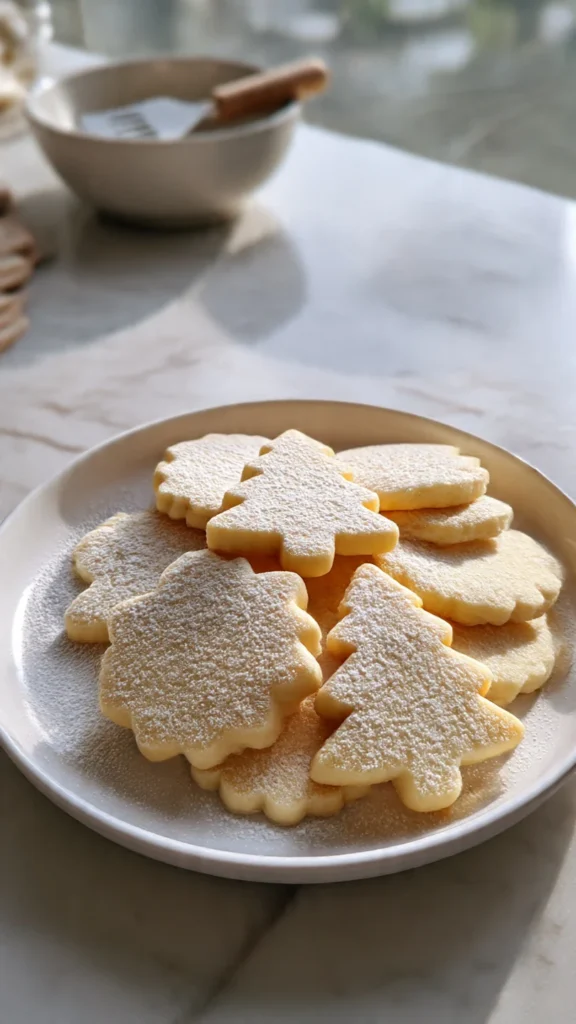
3. Soft Christmas Sugar Cookies (Cloud-Like Texture)
My husband’s favorite. He complains regular sugar cookies are “too crunchy.” Sir, that’s literally what cookies are, but okay.
Why it’s amazing: Thick, soft, almost cake-like. Holds frosting beautifully because there’s more surface area. Kids love these.
Ingredients:
- 3 cups flour
- 1 teaspoon baking powder
- 1/2 teaspoon baking soda (both! Yes!)
- 1/2 teaspoon salt
- 1 cup butter, softened
- 1 1/2 cups sugar
- 2 eggs
- 2 teaspoons vanilla
- 1/2 cup sour cream (secret ingredient!)
Instructions:
- Cream butter and sugar until mega fluffy. Like, your arm gets tired fluffy.
- Beat in eggs one at a time, then vanilla.
- Mix in sour cream. Will look a little weird and curdled. That’s fine.
- Combine dry ingredients separately, then gradually add to wet mixture.
- Dough will be VERY soft. Refrigerate for 2 hours minimum. (I know, I know, but necessary.)
- Roll to 1/2 inch thick—thicker than usual! This is important for the soft texture.
- Bake at 350°F for 10-12 minutes. Should be barely colored.
- Cool completely. These are delicate when warm.
Chaos notes: Don’t overbake. Seriously. Even one minute too long and they lose that soft texture. I set like three timers because I’m paranoid.
4. Brown Sugar Christmas Cookies (Warm & Cozy Vibes)
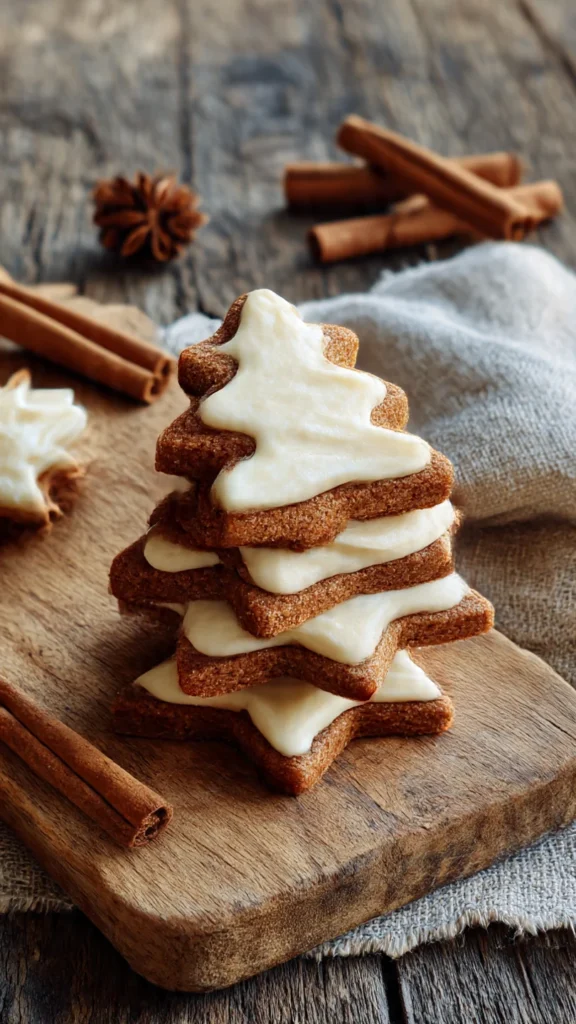
Made these by accident once when I ran out of white sugar. Turned out AMAZING.
Why it’s amazing: Brown sugar adds this caramel-y, molasses-y flavor that’s different from regular sugar cookies. Feels more rustic and homey.
Ingredients:
- 2 1/2 cups flour
- 1 teaspoon baking powder
- 1/4 teaspoon salt
- 3/4 cup butter, softened
- 1 1/4 cups packed brown sugar (light or dark, your call)
- 1 egg
- 2 teaspoons vanilla
- 1/2 teaspoon cinnamon (optional but recommended)
Instructions:
- Cream butter and brown sugar. Takes longer than white sugar to get fluffy.
- Beat in egg and vanilla.
- Mix dry ingredients, add to wet.
- Chill dough for 1 hour.
- Roll, cut, bake at 350°F for 8-10 minutes.
- These will be slightly darker than regular sugar cookies—that’s normal!
Chaos notes: Brown sugar makes these slightly chewier. If you want them crispy, bake an extra minute or two. Also pairs REALLY well with cream cheese frosting instead of regular icing.
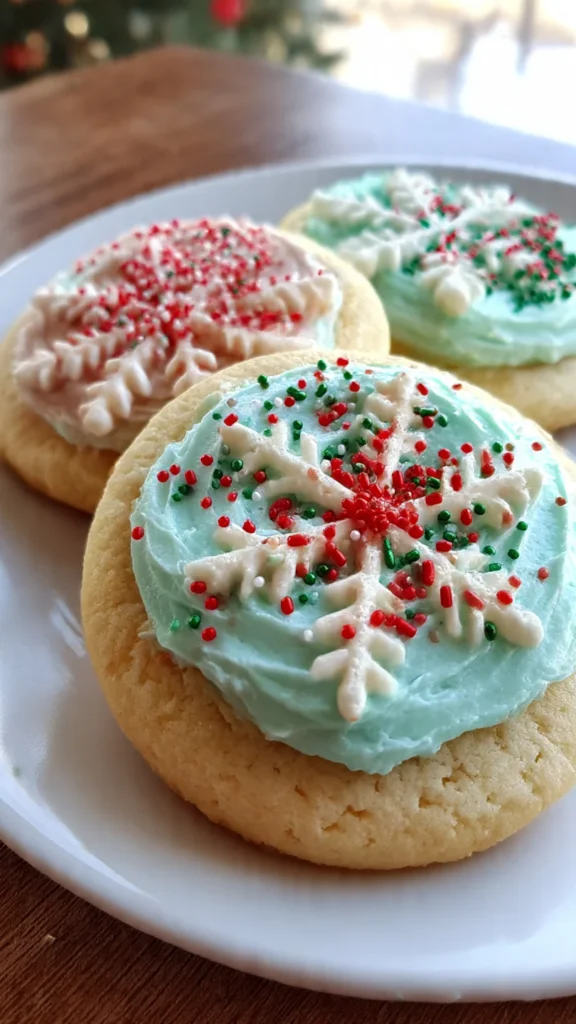
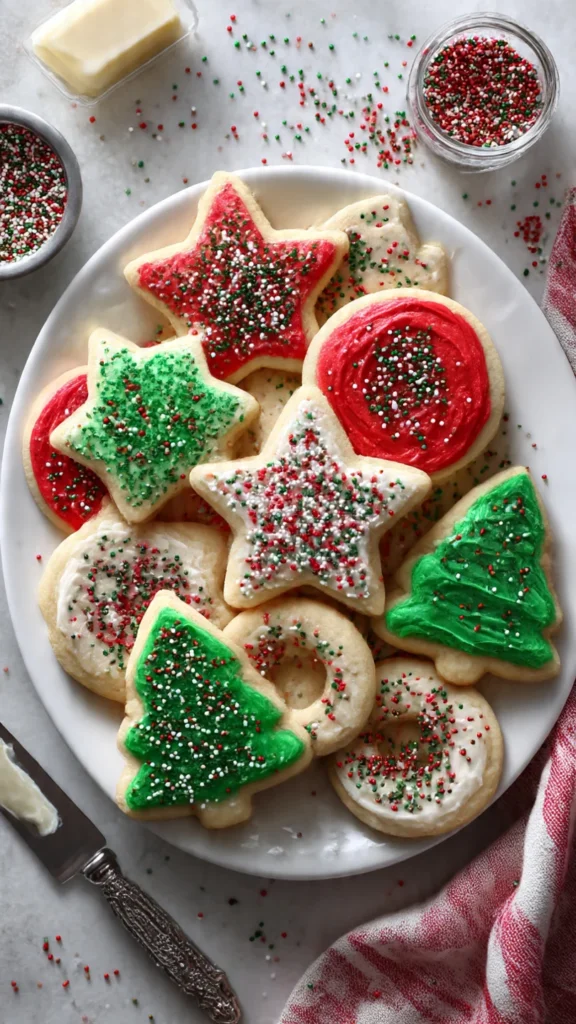
5. Christmas Sugar Cookies with Royal Icing (The Fancy Ones)

This is where I pretend to be a professional baker. Results vary.
Why it’s amazing: Royal icing dries hard and smooth. Perfect for stacking, gifting, or making those Instagram-worthy decorated cookies (if you’re more coordinated than me).
Cookie base: Use the classic rolled recipe from #1.
Royal Icing Ingredients:
- 4 cups powdered sugar
- 3 tablespoons meringue powder (find it in the baking aisle)
- 5-6 tablespoons water (add gradually!)
- Food coloring (gel colors work best)
Icing Instructions:
- Beat powdered sugar and meringue powder together.
- Add water slowly while mixing. Start with 5 tablespoons.
- Beat on high for 7-10 minutes until stiff peaks form.
- This is “outline consistency.” For flooding (filling in), add more water drop by drop until it’s thinner.
Decorating process:
- Outline cookie with stiff royal icing. Let dry 15 minutes.
- Fill (flood) with thinned icing. Use toothpick to spread.
- Let dry completely—like, overnight. Don’t rush this.
Chaos notes: Royal icing is FINICKY. Too thick = won’t spread. Too thin = runs everywhere. Keep a spray bottle of water handy to adjust. Also, it dries fast, so work quickly or cover your bowls with damp paper towels.
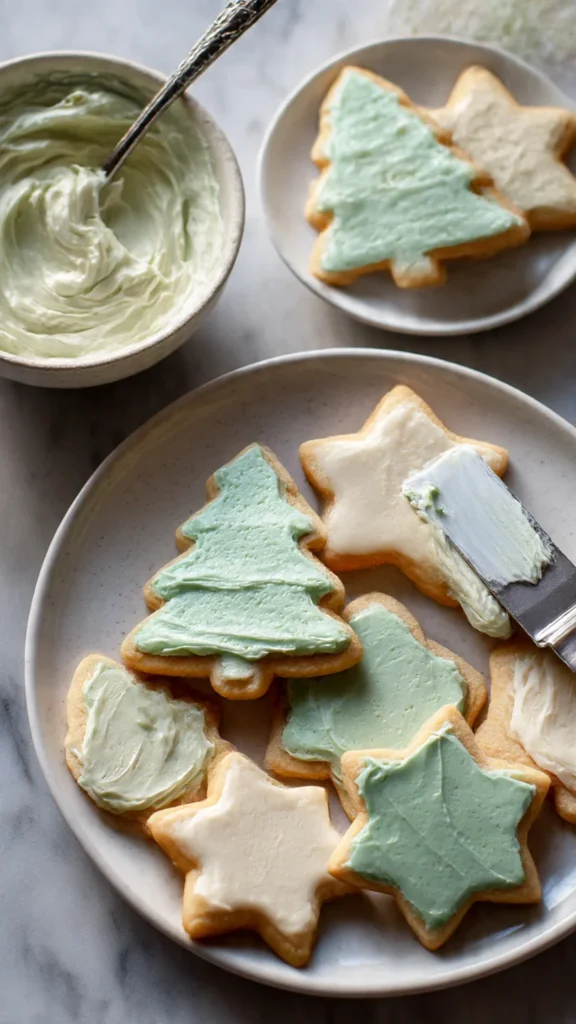
6. Easy Decorated Christmas Sugar Cookies (Minimal Effort, Maximum Impact)
For when you want them to look nice but you’re not trying to be a perfectionist.
Why it’s amazing: Uses basic buttercream frosting that’s way more forgiving than royal icing. Still looks festive, way less stress.
Cookie base: Any recipe from above works.
Simple Buttercream Frosting:
- 1/2 cup butter, softened
- 3 cups powdered sugar
- 2-3 tablespoons milk
- 1 teaspoon vanilla
- Food coloring
- Sprinkles (all the sprinkles)
Instructions:
- Beat butter until creamy.
- Add powdered sugar gradually. Will be super thick.
- Add milk one tablespoon at a time until spreadable.
- Add vanilla and food coloring.
- Spread on cooled cookies with a knife or offset spatula.
- Immediately add sprinkles before frosting sets.
Chaos notes: This frosting doesn’t harden like royal icing, so cookies will be slightly sticky. Store between layers of parchment paper. Kids LOVE decorating with this method because it’s basically impossible to mess up.
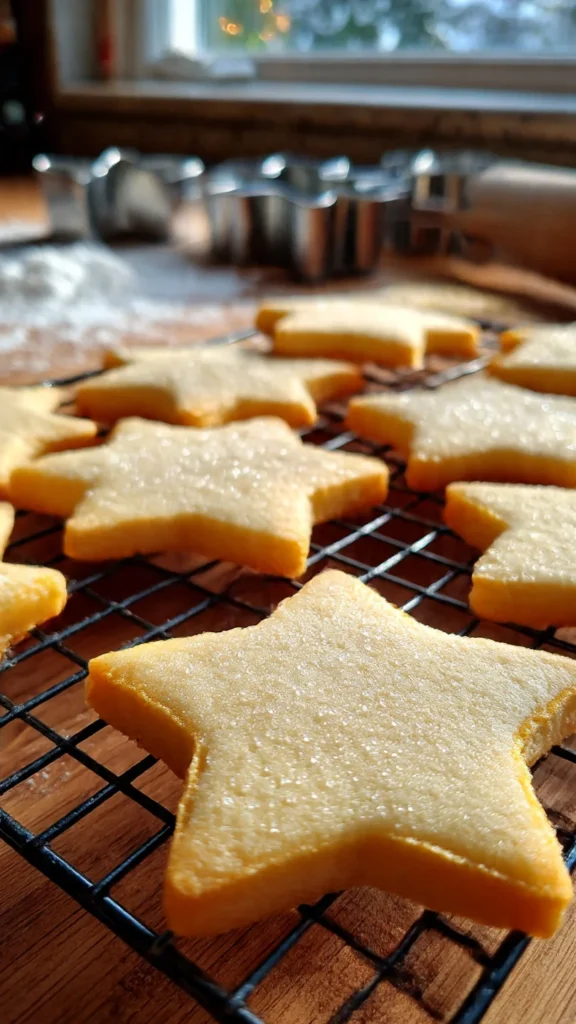
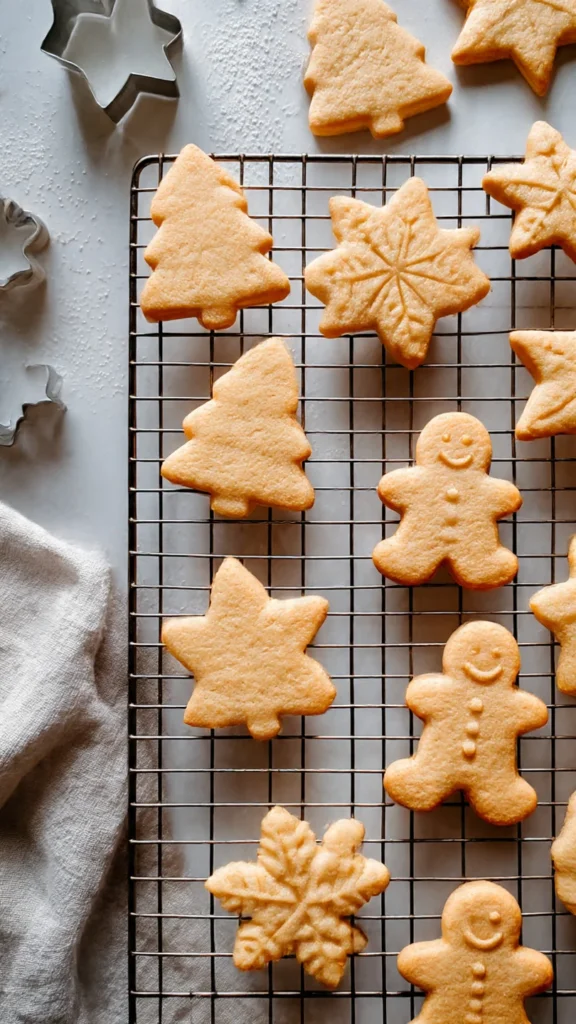
7. Christmas Cut-Out Sugar Cookies (Perfect Shapes Every Time)
Took me forever to figure out why my cookie cutters never worked properly. The secret? It’s all in the dough temperature and rolling technique.
Why it’s amazing: Clean edges, perfect shapes, no distortion. These are the ones that actually look like Christmas trees and stars.
Use the classic recipe from #1, but here are the REAL tips:
- Chill dough properly (at least 1 hour, 2 is better)
- Roll between parchment paper—less mess, easier to handle
- Work in batches, keep unused dough cold
- Dip cookie cutter in flour between cuts
- Use a thin spatula to transfer shapes to baking sheet
- Freeze cut shapes on the baking sheet for 10 minutes before baking (this is the SECRET to keeping shapes!)
Chaos notes: If dough gets too warm while rolling, stick it back in the fridge for 15 minutes. Warm dough = spreading cookies = shapes that look nothing like what you cut. Also, simpler shapes work better than super detailed ones. Those intricate snowflakes? Forget it.
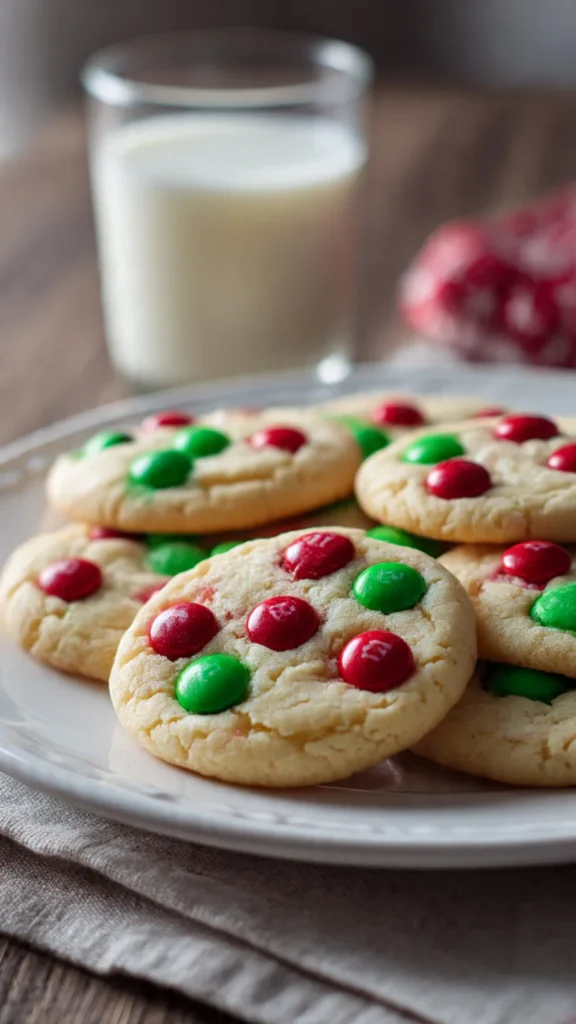
8. M&M Christmas Sugar Cookies (Kids Go Crazy For These)
Because sometimes you just need to throw candy on cookies and call it decorating.
Why it’s amazing: Zero decorating skills required. Press M&Ms into dough, bake, done. Plus they’re colorful and festive.
Ingredients (makes drop cookies, not cut-outs):
- 2 3/4 cups flour
- 1 teaspoon baking soda
- 1/2 teaspoon baking powder
- 1 cup butter, softened
- 1 1/2 cups sugar
- 1 egg
- 1 teaspoon vanilla
- Red and green M&Ms (holiday colors!)
Instructions:
- Mix dry ingredients together.
- Cream butter and sugar, add egg and vanilla.
- Gradually add flour mixture.
- Scoop dough into balls (about 2 tablespoons each).
- Press 5-6 M&Ms into top of each cookie.
- Bake at 375°F for 8-10 minutes.
Chaos notes: Don’t overbake or the M&Ms get weird and the colors bleed slightly. Also, my kids fight over the cookies with the most M&Ms, so I’ve learned to count and distribute evenly. Parenting is glamorous.
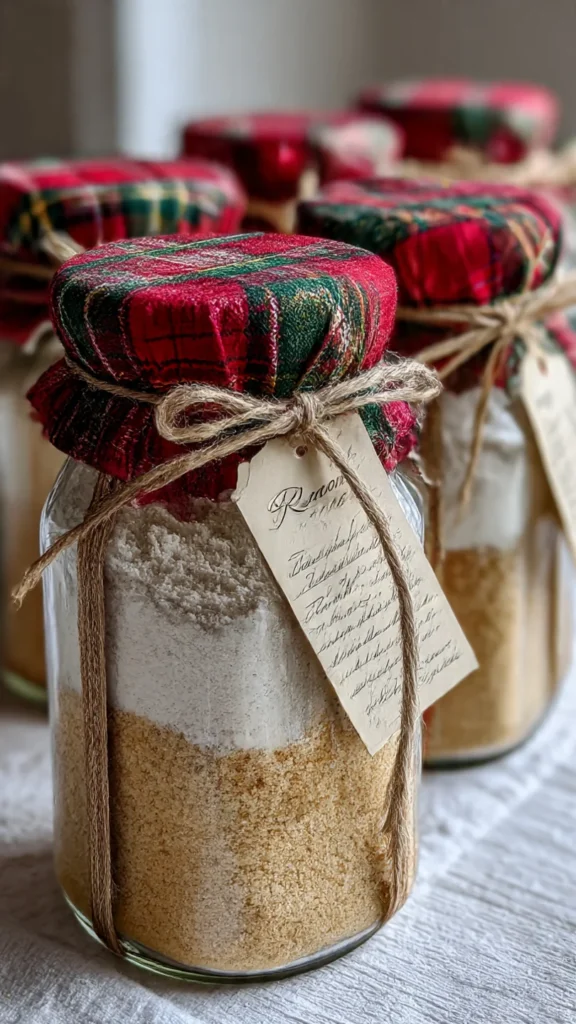
9. Sugar Cookies in a Jar (DIY Christmas Gifts)
Made these as gifts last year. People acted like I was some kind of domestic goddess. Little did they know it took 20 minutes.
Why it’s amazing: Thoughtful gift that costs like $3 per jar. Looks impressive, actually useful, people genuinely appreciate it.
What you need:
- Mason jars (quart-size)
- Recipe card
- Ribbon
Layer in jar:
- 2 cups flour mixed with 1 tsp baking powder and 1/2 tsp salt (bottom layer)
- 3/4 cup brown sugar (middle layer)
- 1/2 cup white sugar (top layer)
- Optional: add festive sprinkles or mini chocolate chips on top
Instructions to include on card: “Add: 3/4 cup softened butter, 1 egg, 1 tsp vanilla. Mix well, chill 1 hour, roll out, cut shapes, bake at 350°F for 8-10 minutes.”
Chaos notes: Pack layers down firmly or everything shifts during transport. Tie a cookie cutter to the ribbon for extra charm. Write “Made with love by [your name]” on the tag because apparently that makes it even better.
10. Christmas Sugar Cookies with Cream Cheese Frosting
Game changer frosting situation. Cream cheese makes EVERYTHING better.
Why it’s amazing: Tangy sweetness that’s not as cloying as regular frosting. Spreads like a dream. Tastes more “grown-up” than regular buttercream.
Cookie base: Use any recipe above.
Cream Cheese Frosting:
- 4 oz cream cheese, softened (MUST be room temperature)
- 1/4 cup butter, softened
- 2 cups powdered sugar
- 1 teaspoon vanilla
- Pinch of salt
- Food coloring if desired
Instructions:
- Beat cream cheese and butter until smooth and fluffy.
- Gradually add powdered sugar.
- Mix in vanilla and salt.
- Add milk one teaspoon at a time if too thick.
- Spread on completely cooled cookies.
Chaos notes: If cream cheese is too cold, you’ll get lumps. If it’s too warm, frosting will be too soft. Room temperature is crucial. Also, this frosting needs to be refrigerated if you’re not eating cookies immediately, so not ideal for gifting unless kept cold.
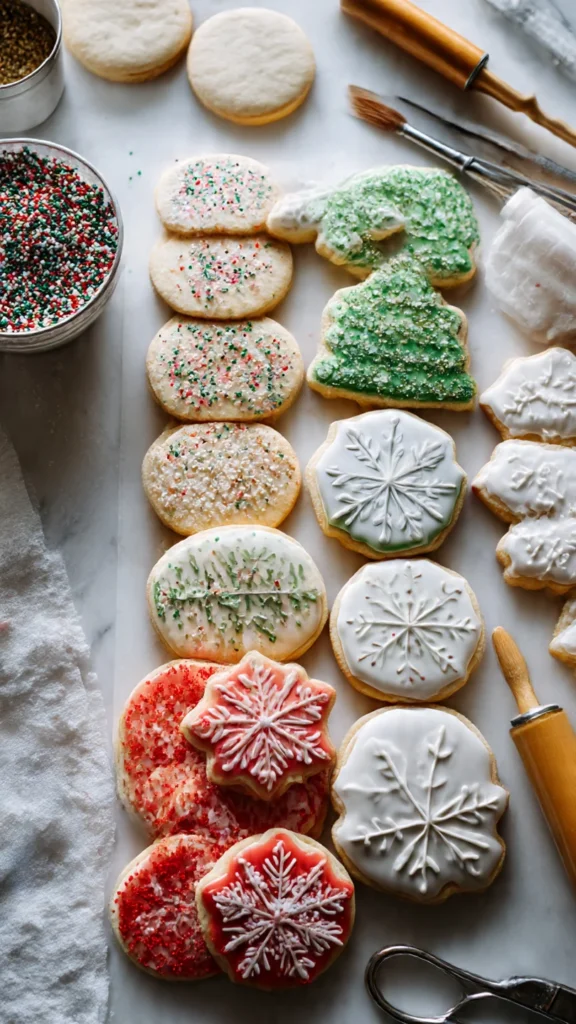
11. Iced Christmas Sugar Cookies (Thin Glaze Style)

For when you want the look of fancy decorated cookies but don’t want to spend three hours on it.
Why it’s amazing: Simple glaze that dries smooth and shiny. Looks polished with minimal effort. Can add sprinkles while wet for extra festiveness.
Cookie base: Classic recipe.
Simple Glaze:
- 2 cups powdered sugar
- 3-4 tablespoons milk
- 1/2 teaspoon vanilla or almond extract
- Food coloring
Instructions:
- Whisk powdered sugar and 3 tablespoons milk.
- Add more milk drop by drop until it’s thin enough to drizzle but thick enough to coat.
- Divide into bowls, add different colors.
- Dip cookies face-down into glaze OR drizzle with spoon.
- Let excess drip off, place on cooling rack.
- Add sprinkles immediately before glaze sets (like, within 30 seconds).
- Let dry completely, about 2 hours.
Chaos notes: This glaze is thinner than royal icing, so it might pool in weird spots. Just go with it. Also dries faster than royal icing, which is both good and bad—good because you’re not waiting forever, bad because you have less time to add sprinkles.
12. Christmas Sugar Cookie Designs That Actually Work

Let’s be real—not all decorating ideas are created equal. Here are the designs that worked for me (and which ones were complete disasters).
What worked:
- Simple stripes (just drag a toothpick through wet icing)
- Dots (poke with a chopstick or straw)
- Snowflakes (white royal icing lines on blue base—easier than it looks!)
- Christmas trees (green icing, drag upward with toothpick for branches)
- Ornaments (circle cookies with a “cap” at top in different color)
What failed spectacularly:
- Detailed gingerbread men faces (looked creepy)
- Cursive writing (just… no)
- Plaid patterns (too many colors, got muddy)
- Anything requiring steady hands after coffee #3
Chaos notes: Sometimes the “mistakes” look artsy. Lean into it. Tell people it’s “rustic” or “abstract.” No one needs to know you sneezed while piping.
13. Christmas Sugar Cookies Royal Icing (Chocolate Version)
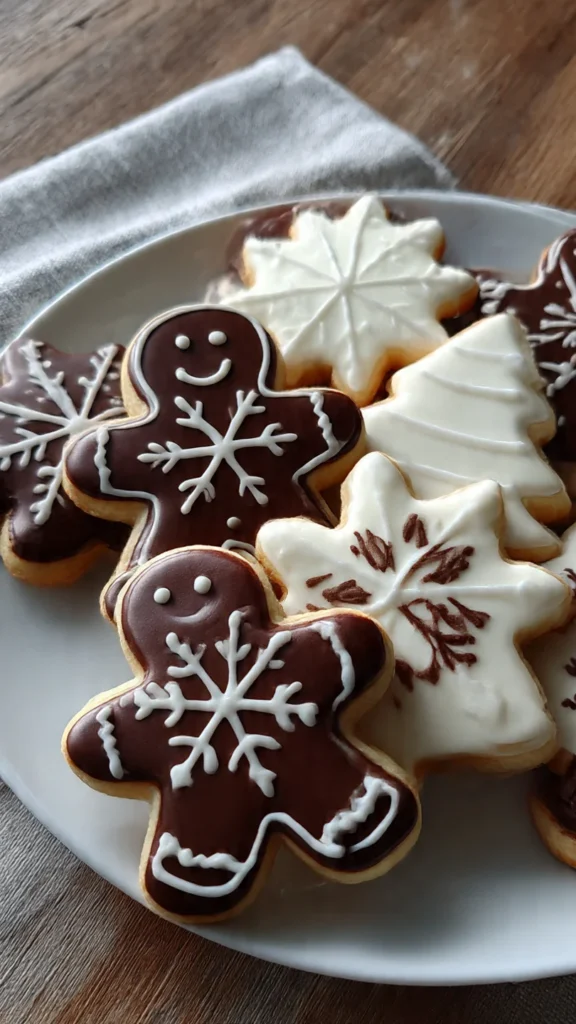
Because sometimes you want chocolate but you’re committed to the sugar cookie aesthetic.
Why it’s amazing: Chocolate royal icing! Looks fancy, tastes amazing, perfect for gingerbread men or any cookie that needs contrast.
Chocolate Royal Icing:
- 3 cups powdered sugar
- 3 tablespoons meringue powder
- 1/4 cup cocoa powder (unsweetened!)
- 5-6 tablespoons water
Instructions:
- Sift powdered sugar and cocoa powder together (IMPORTANT—lumpy cocoa = lumpy icing).
- Add meringue powder.
- Add water gradually while beating.
- Beat on high until stiff peaks form.
- Thin with more water for flooding consistency.
Chaos notes: Cocoa powder makes this slightly more temperamental than regular royal icing. You might need an extra tablespoon of water. Also, the chocolate flavor is subtle, not super intense. If you want stronger chocolate, add 1/2 teaspoon espresso powder (makes chocolate taste more chocolate-y, weird but true).
14. Christmas Sugar Cookie Ideas for Every Skill Level
Beginner Level:
- Round cookies with sprinkles (literally just circles)
- Stars dusted with colored sugar before baking
- Trees with green icing and a star sprinkle on top
Intermediate Level:
- Snowflakes with simple royal icing designs
- Ornaments with multiple colors
- Stockings with piped details
Advanced (or just really patient) Level:
- Detailed Santa faces
- Intricate snowflake patterns
- Stacked 3D cookie structures
My actual skill level: Somewhere between beginner and intermediate on a good day. Between beginner and “why did I even try” on a bad day.
Chaos notes: Don’t compare your cookies to professional bakers on Instagram. Those people have piping bags that cost more than my entire kitchen. Your wonky cookies taste just as good.
15. Christmas Sugar Cookies Decorated Ideas (Theme It Out)

Last year I made like six different batches because I couldn’t decide on a theme. Here’s what I learned:
Classic Christmas: Red, green, white. Trees, stars, stockings. Timeless, always works.
Winter Wonderland: Blue, white, silver. Snowflakes, mittens, snowmen. Very Frozen-themed, kids loved it.
Rustic Farmhouse: Cream, brown, natural. Simple designs, minimal icing. Looked fancy but was actually the easiest.
Candy Cane: Red and white stripes on everything. Got tedious but looked cohesive.
Gold & Glam: White cookies with gold luster dust. Felt very fancy for approximately five minutes.
Chaos notes: Pick ONE theme and stick with it. Mixing themes looks messy unless you’re going for an eclectic vibe (which can also work, don’t let anyone tell you otherwise).
Wrapping This Up Before My Timer Goes Off
Look, are all these cookies going to look bakery-perfect? Probably not. Mine never do. But every single one of these recipes has been through my actual kitchen, with real results, and they all taste amazing even when they look a little wonky.
My personal favorites? The classic rolled for cutting shapes, the no-chill for emergencies, and the cream cheese frosting on literally anything. But honestly, you can’t go wrong with any of these christmas sugar cookies recipes.
The secret nobody tells you: Imperfect cookies taste exactly the same as perfect ones. Sometimes better, because you’re not stressed about them looking magazine-worthy.
So grab your cookie cutters, put on some Christmas music, maybe pour yourself some wine (it’s festive!), and just go for it. Worst case scenario, you eat the “mistakes” and nobody has to know.
Let me know which recipe you’re trying first—I’m genuinely curious what everyone gravitates toward. And if your cookies turn out better than mine, just… don’t tell me. I’m fragile.
Happy baking! (and may your royal icing not crack like mine did last Thursday)