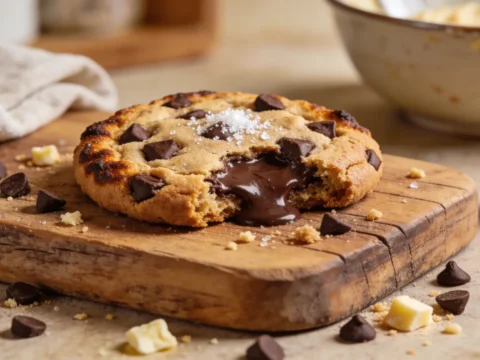
Let’s be honest—we’ve all been there, sneaking spoonfuls of raw cookie dough while making cookies despite all those warnings about raw eggs and flour. My safe-to-eat cookie dough recipe solves this forbidden pleasure problem once and for all. After years of experimenting (and yes, risking salmonella more times than I care to admit), I’ve perfected an edible cookie dough that tastes exactly like the real thing without any of the danger. And the best part? You don’t have to pretend you’re making actual cookies—this is made specifically for eating straight from the bowl.
Table of Contents
Why I Created This Edible Cookie Dough Recipe
So here’s the deal—my cookie dough obsession started when I was about eight years old, standing on a kitchen chair helping my mom make chocolate chip cookies. She’d always warn me about the raw eggs, but that didn’t stop me from licking the beaters clean when she wasn’t looking. Fast forward twenty-something years, and I’m still sneaking cookie dough, only now I know better.
I tried those store-bought edible cookie dough products, but let’s be real—they taste like someone tried to make cookie dough while looking at a picture of cookie dough. Too sweet, weird texture, and always missing that homemade quality. The first time I tried making my own safe version, I completely messed it up. I just left out the eggs and called it a day. The result was this grainy, oddly-flavored mess that my husband politely called “interesting.” Three batches later, I realized that both the raw flour problem AND the moisture/binding issue needed solving.
What makes this recipe different is that I heat-treat the flour (which sounds fancy but is super simple) and use a combination of milk and a little cream cheese for that perfect dough-like texture. My sister-in-law, who’s brutally honest about my cooking experiments, actually asked if I was sure this wasn’t regular cookie dough when I served it at our last game night. That’s when I knew I’d nailed it.
Ingredients for this Cookie Dough Recipe
The secret to great edible cookie dough isn’t just removing the raw eggs—it’s about recreating that perfect cookie dough texture and flavor without compromising safety. You’ll notice I use a couple unexpected ingredients that make all the difference between “this is pretty good” and “I can’t believe this isn’t regular cookie dough.”
I’m pretty flexible with most ingredients, but don’t skip heat-treating your flour. I learned this the hard way when I read about people getting E. coli from raw flour. Not exactly the kind of exciting kitchen adventure I was looking for. Also, the cream cheese might seem odd, but trust me on this one—it’s the texture game-changer.
All-Purpose Flour (1 cup)
Regular all-purpose flour works perfectly, but you MUST heat-treat it first. Raw flour can contain E. coli, which is just as bad as salmonella from eggs. I spread mine on a baking sheet and bake at 350°F for about 5 minutes, then let it cool completely. You can substitute gluten-free flour blend if needed—I’ve used Bob’s Red Mill 1-to-1 with great results.
Unsalted Butter (1/2 cup, softened)
Use room temperature butter, not melted. I’ve made the melted butter mistake and ended up with greasy dough that never quite set right. In a pinch, salted butter works, but reduce the added salt in the recipe. And yes, real butter matters here—margarine creates a different flavor and mouthfeel that’s just not the same.
Cream Cheese (2 tablespoons, softened)
This is my secret weapon. Just a little cream cheese adds that slight tang and creamy texture that mimics what egg does in regular cookie dough. Full-fat works best, but light cream cheese is acceptable if you must. Don’t use non-fat—it contains stabilizers that affect the texture. And no, you can’t taste it specifically in the finished dough.
Brown Sugar (1/2 cup, packed)
Brown sugar provides that classic cookie dough flavor with its molasses notes. Dark or light brown both work, though dark gives a slightly deeper, more caramel-like flavor. If you’re out of brown sugar, you can substitute white sugar with a tablespoon of molasses mixed in, or just use all white sugar, though you’ll miss some of that classic cookie dough depth.
Granulated Sugar (1/4 cup)
The combination of both sugars creates that authentic cookie texture. I’ve tried all brown sugar, and while good, it wasn’t quite right. Don’t substitute artificial sweeteners here—they create an odd aftertaste and won’t dissolve properly, leaving you with gritty dough.
Vanilla Extract (1 teaspoon)
Real vanilla extract makes a noticeable difference. I once used imitation vanilla (it was all I had), and my husband immediately commented that something tasted “off.” If you have vanilla bean paste, even better—use the same amount and enjoy those little flecks of vanilla throughout the dough.
Salt (1/4 teaspoon)
Don’t skip this! Salt balances the sweetness and enhances the flavor. I prefer fine sea salt, but table salt works fine. If you want that sweet-salty cookie dough experience, you can increase to 1/2 teaspoon or sprinkle a little flaky sea salt on top before serving.
Milk (2-3 tablespoons)
Any kind works—dairy, almond, oat, whatever you have. This replaces the moisture that eggs would normally provide. Start with 2 tablespoons and add more if needed to get that perfect cookie dough consistency. The exact amount depends on your flour and humidity levels in your kitchen.
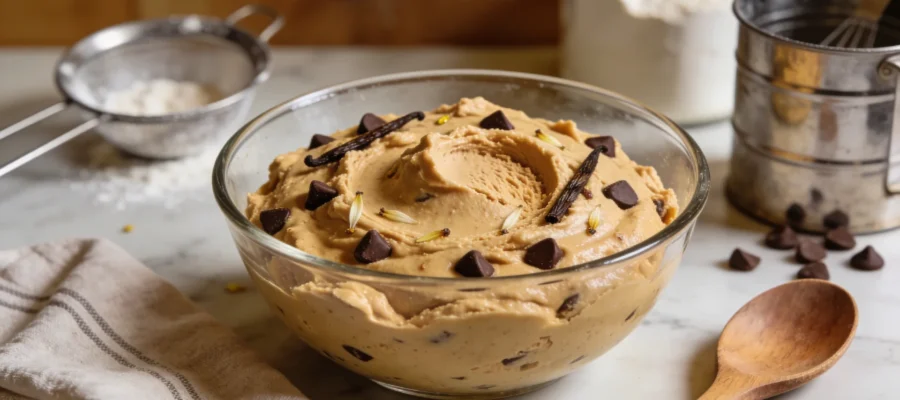
Chocolate Chips (1/2 cup)
Semi-sweet is traditional, but this is where you can get creative. I’ve used milk chocolate, dark chocolate, white chocolate, or even those fancy chocolate chunks. Mini chips distribute more evenly, but I like the big chocolate hits from regular-sized chips. Butterscotch chips or peanut butter chips are amazing alternatives.
Instructions for this Cookie Dough Recipe
Making edible cookie dough is actually faster than regular cookie dough since you’re skipping the whole baking part. From start to finish, you’re looking at about 15 minutes, plus cooling time for the flour. The process is pretty straightforward, but there are a few spots where things can go sideways if you’re not paying attention (like the time I was watching Netflix while making this and added a tablespoon of salt instead of a teaspoon—not recommended).
The only part that takes patience is waiting for the heat-treated flour to cool completely. I’ve tried to rush this step before and ended up with partially melted butter and a weird texture. Learn from my mistakes and just let it cool. If you’re in a hurry, spread the flour thinner on the baking sheet and it’ll cool faster.
STEP 1: Heat-treat the flour.
Preheat your oven to 350°F. Spread the flour evenly on a baking sheet—don’t just dump it in a pile or it won’t heat evenly. Bake for 5-7 minutes until it reaches 165°F (use a food thermometer if you have one). It should smell slightly toasty but not browned. Let it cool COMPLETELY before using. I usually spread it out more after baking to speed cooling. If you’re impatient like me, you can also microwave the flour in 30-second intervals, stirring between each, until it reaches 165°F.
STEP 2: Cream the butter, cream cheese, and sugars.
In a medium bowl, beat the softened butter, cream cheese, brown sugar, and granulated sugar until light and fluffy, about 2-3 minutes. Don’t rush this step! The first time I made this, I only mixed for about 30 seconds and wondered why the texture wasn’t right. The mixture should lighten in color and look creamy. If your butter isn’t properly softened, you’ll get lumps—microwave it for 10 seconds if needed, but don’t melt it.
STEP 3: Add the vanilla and salt.
Mix in the vanilla extract and salt until well combined. Take a second to scrape down the sides of the bowl with a spatula—those butter and sugar bits stuck to the side need to join the party. This is where the flavor foundation builds, so make sure everything is evenly incorporated.
STEP 4: Incorporate the heat-treated flour.
Add the cooled heat-treated flour and mix on low speed (or by hand) until just combined. Over-mixing at this stage can make the dough tough and develop too much gluten. The mixture will look crumbly at first—that’s normal! Don’t panic and add extra liquid right away. Keep mixing gently until it starts to come together. If after fully incorporating the flour it still seems too dry, then move on to the next step.
STEP 5: Add milk to achieve perfect consistency.
Add 2 tablespoons of milk and stir until incorporated. The dough should be soft and scoopable but not sticky or wet. Add the additional tablespoon of milk if needed, but go slow—you can always add more, but you can’t take it away. One time I got distracted and added too much milk, creating cookie dough soup. I had to add more flour, which threw off the sugar balance and made it less sweet than intended. The perfect consistency should mimic regular cookie dough—holds its shape when scooped but smooshes easily between your fingers.
STEP 6: Fold in the chocolate chips.
Gently fold in the chocolate chips with a spatula until evenly distributed. Don’t use the mixer for this unless you want broken chocolate bits throughout (which actually isn’t terrible, just different). For an Instagram-worthy presentation, save a few chips to press into the top of your cookie dough before serving. The warmth from your hands will slightly melt the chips on contact, creating those perfect gooey spots.
STEP 7: Chill and serve.
The dough can be eaten immediately, but I think it’s best when chilled for at least 30 minutes. This allows the flavors to meld and the texture to firm up slightly. If you’re serving it to guests, try scooping it with a cookie scoop for individual portions. My kids love when I roll it into little balls and put them on popsicle sticks—cookie dough pops that don’t drip down your hand like ice cream.
Tips & Variations for this Cookie Dough Recipe
This cookie dough keeps in the refrigerator for up to 5 days in an airtight container, though it never lasts that long in my house. It firms up considerably when cold, so let it sit at room temperature for 10-15 minutes before serving if you want that just-made texture. For fun variations, try adding 1/4 cup of sprinkles for funfetti cookie dough, or swap the chocolate chips for chopped Oreos. My husband’s favorite is adding 2 tablespoons of peanut butter and using peanut butter chips instead of chocolate.
Don’t worry if your dough looks a little different from professional food blog photos. Those are often made with special lighting, food styling tricks, and sometimes not even the actual recipe ingredients. Real cookie dough has a slightly uneven texture and doesn’t always look picture-perfect, but it tastes amazing.
If you’re serving this at a party, try making a cookie dough bar. Set out different mix-ins like various chocolate chips, chopped candy bars, sprinkles, and nuts, and let people customize their own portions. I did this for my daughter’s 12th birthday, and it was a massive hit—way easier than an ice cream sundae bar and less messy too.
Final Thoughts on this Cookie Dough Recipe
Look, I’m not claiming this is some revolutionary culinary breakthrough—it’s just cookie dough you can eat without worrying about spending the night hugging your toilet. But in my book, that’s still a pretty significant win. The first time my kids realized they could eat as much as they wanted without me giving them the salmonella lecture, their faces lit up like I’d just told them school was cancelled forever.
If you try this recipe, drop a comment or tag me in your creations. And seriously, let me know if you come up with any amazing variations—my cookie dough obsession means I’m always looking for the next flavor combo to try. Is it sophisticated gourmet cuisine? Nope. Will it make you happy on a bad day? Absolutely. And sometimes, that’s exactly what we need from our food.
Safe-to-Eat Cookie Dough Recipe: Edible, Creamy & Irresistibly Good
This safe-to-eat cookie dough recipe offers all the flavors and textures of traditional cookie dough without the risks of raw eggs and flour.