This crepes recipe changed my life, and I’m only being slightly dramatic. After years of pancake-making (which I still love, don’t get me wrong), discovering how to make proper French crepes was a game-changer for my weekend breakfast routine. They’re impossibly thin, delicately soft, and somehow manage to be both substantial and light at the same time. Plus, they work just as beautifully with savory fillings as they do with sweet ones.
Table of Contents :
Why I Finally Mastered Crepes (After Years of Fear)
For the longest time, I avoided making crepes because I was convinced they required some magical French culinary gene I simply didn’t possess. The horror stories didn’t help—torn crepes, lumpy batter, and that dreaded first crepe that always gets sacrificed to the cooking gods. I’d watch cooking shows where chefs would effortlessly swirl perfect circles with their fancy crepe pans and think, “Yeah, not happening in my kitchen.”
My first attempt was… well, let’s just call it “character building.” I used a regular frying pan, made the batter too thick, and couldn’t flip them without creating what looked like abstract art. But something about the process was oddly addictive. I kept trying. And failing. And then one Saturday morning, after about my fifteenth attempt over several months (and switching to a blender for the batter), something clicked. The batter flowed just right. My wrist figured out the swirling motion. And I made an actual, legitimate, thin French crepe that didn’t look like it had been through a war.
Now I make them regularly, and honestly? They’re easier than pancakes once you get the hang of it. The trick isn’t special equipment or exotic ingredients—it’s just understanding the batter consistency and developing a bit of confidence with the flip. And unlike those intimidating restaurant crepes, homemade ones are charming even when slightly imperfect.
Ingredients for this Crepes Recipe
The beauty of crepes lies in their simplicity. You probably already have everything you need in your kitchen right now. That’s what makes this recipe so dangerous—once you know how easy it is, you’ll be making crepes at 10pm on a Tuesday just because you can. I’ve tested dozens of variations, and this ratio of ingredients consistently produces thin, flexible crepes that won’t tear when you fill and fold them.
One thing to note: temperature matters here. Cold milk, room temperature eggs, and melted-but-not-hot butter create the ideal batter consistency. I learned this the hard way after ruining a batch by adding scalding butter directly to cold eggs (scrambled egg bits in crepe batter? Not recommended).
All-Purpose Flour (1 cup)
Just regular flour is all you need—nothing fancy required. I’ve tried making these with cake flour thinking they’d be more delicate, but they ended up too fragile and tore when filled. I’ve also tested whole wheat flour, which works in a pinch but makes them slightly heavier and more rustic. If you’re gluten-free, a cup-for-cup replacement flour generally works well, though you might need a touch more liquid.
Large Eggs (2)
Eggs provide structure and richness. I’ve accidentally made these with just one egg when I was running low, and while they still worked, they were noticeably less pliable. If possible, let your eggs come to room temperature before mixing—cold eggs make the melted butter seize up. That said, if you’re impatient like me, just make sure your milk isn’t ice cold and you’ll be fine.
Milk (1¼ cups)
I use whole milk for the richest flavor, but any milk works here—even non-dairy options. I’ve made these with almond milk when cooking for lactose-intolerant friends and they were delicious. The higher the fat content, the more tender your crepes will be. If using skim milk, you might want to add an extra tablespoon of butter to compensate. The milk creates that crucial thin batter consistency.
Unsalted Butter (3 tablespoons, melted)
Butter is non-negotiable for that classic crepe flavor and texture. I melt it and let it cool slightly before adding to the batter. That time I added still-hot butter to my egg mixture? Scrambled egg chunks throughout. Not cute. In a pinch, you could use vegetable oil, but you’ll lose that distinctive buttery taste that makes crepes so irresistible. An extra tablespoon of butter goes into your pan for cooking.
Salt (¼ teaspoon)
Just a pinch, but it makes all the difference—even for sweet crepes. Salt balances the flavors and enhances the egginess that gives crepes their distinct taste. I use kosher salt because that’s what lives by my stove, but table salt works perfectly fine too. If you’re planning on exclusively sweet fillings, you could reduce this to ⅛ teaspoon.
Sugar (1 tablespoon)
This small amount works for both sweet AND savory crepes. It’s not enough to make them noticeably sweet, but it helps with browning and adds depth. For dessert crepes, feel free to increase to 2-3 tablespoons. I’ve forgotten the sugar before and while they were still good, they didn’t have that beautiful golden color that makes crepes so appetizing.
Vanilla Extract (1 teaspoon, optional)
I add this only when making sweet crepes. It’s completely optional but adds that little something extra when you’re planning on fruit or chocolate fillings. Leave it out entirely for savory crepes—vanilla and cheese is NOT a combination I recommend after my unfortunate ham and cheese crepe experiment with vanilla-scented batter. Learn from my mistakes.
Instructions for the Best Crepes Recipe
Making crepes isn’t difficult, but it does have a learning curve. The first one always—ALWAYS—turns out weird. It’s like a universal law of crepe-making. I call it the “sacrifice crepe” and just accept that it’s going to happen. By the second or third one, you’ll find your rhythm. The whole process takes about 20 minutes once your batter is ready, and you’ll get approximately 12-15 crepes depending on your pan size.
A few real-talk notes before we dive in: you don’t need a special crepe pan. I used one exactly once before deciding my regular non-stick skillet works perfectly well. And while traditionally you’re supposed to let the batter rest for an hour, I’ve made them after just 15 minutes of rest time when I was in a hurry, and nobody complained. The resting does improve the texture though, so do it if you can.
STEP 1: Blend the wet ingredients first.
Crack your eggs into a blender, then add the milk, melted butter (cooled slightly!), and vanilla if using. Blend for about 10 seconds until combined. You want to get the eggs fully incorporated before adding the dry ingredients. I learned the importance of this step after having flour lumps that refused to incorporate when I dumped everything in at once. The blender method changed my crepe game forever—no more lumps!
STEP 2: Add the dry ingredients and blend until smooth.
Add the flour, salt, and sugar to your wet ingredients in the blender. Blend on medium-high for about 15-20 seconds until completely smooth. The batter will look extremely thin—like heavy cream, not like pancake batter. This is exactly what you want! The first time I made crepes, I kept adding more flour because I thought it was too thin. Big mistake. That’s how you get thick, chewy crepes instead of delicate ones.
STEP 3: Rest the batter.
Transfer the batter to a bowl or just leave it in the blender container, and let it rest for at least 15 minutes, up to an hour at room temperature (or refrigerated overnight if making ahead). This resting time is crucial—it allows the flour to fully absorb the liquid and the gluten to relax. I’ve skipped this when in a rush and always regretted it when my crepes tore too easily. If the batter thickens too much while resting, add a tablespoon or two of milk to thin it back out.
STEP 4: Heat your pan and prepare for cooking.
Set a 10-inch non-stick skillet or crepe pan over medium heat. Once hot, add a small pat of butter (about half a teaspoon) and swirl to coat. I keep a small bowl of butter with a pastry brush nearby, which makes it easy to quickly add just a touch between crepes. You’ll know your pan is the right temperature when butter sizzles gently but doesn’t immediately brown. Too hot and your crepes will cook too quickly and potentially burn; too cool and they won’t develop those beautiful golden spots.
STEP 5: Pour and swirl the batter.
Pour about ¼ cup of batter into the center of your hot pan, then IMMEDIATELY pick up the pan and swirl in a circular motion to spread the batter into a thin, even layer that coats the bottom of the pan. This part takes practice—my first few attempts looked like amoebas rather than circles. The key is to work quickly but not panic. If you have holes, just add a tiny bit more batter to patch them. The batter should set almost immediately, within 15-20 seconds.
STEP 6: Cook until the edges look dry.
Let the crepe cook until the edges start to look dry and slightly curled, and the bottom is golden in spots—about 1-2 minutes. You can peek by lifting an edge with a spatula. I tend to hover anxiously during this step, especially since my stove has hot spots that make parts cook faster than others. Look for light golden spots on the surface—not uniform brownness. And yes, I’ve burned plenty by getting distracted for just 30 seconds too long. These cook FAST.
STEP 7: Flip with confidence!
Here’s the moment of truth. Slide a thin spatula under the edge of the crepe, then use your fingers (careful, it’s hot!) to gently lift and flip the crepe in one quick motion. Alternatively, once you’re feeling brave, try the wrist-flick method to flip it mid-air. I catastrophically failed at this about six times before getting it right. The crepe should land back in the pan without folding over itself. If it does fold—no panic—you can usually unfold it quickly without damage.
STEP 8: Briefly cook the second side.
The second side needs much less time—about 30 seconds to 1 minute max. It won’t get as golden as the first side, and that’s perfectly normal. Look for just a few light spots of color. Overcooking the second side makes the crepes less pliable for folding. I once got distracted by a text message during this step and ended up with a crepe so crisp it was basically a tuile cookie. Not what we’re going for here.
STEP 9: Stack and keep warm while you make the rest.
Slide the finished crepe onto a plate and continue with the remaining batter, adding that tiny bit of butter to the pan each time. I stack my crepes directly on top of each other—contrary to what you might think, they don’t stick together! The residual heat actually helps keep the whole stack warm and pliable. If you’re making a large batch, you can cover the plate with foil or keep it in a very low oven (about 200°F).
STEP 10: Fill and serve!
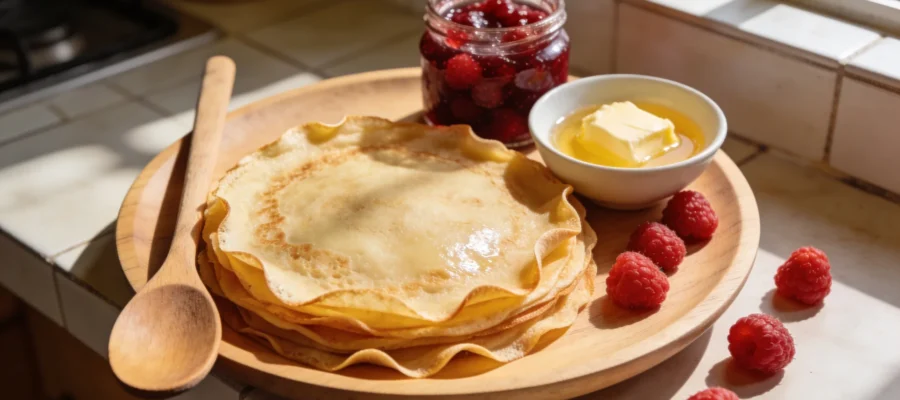
Now for the fun part! For sweet crepes, spread with Nutella, jam, lemon juice and sugar, or fresh fruit and whipped cream, then fold in half and in half again to form triangles, or roll them up. For savory crepes, fill with ham and cheese, sautéed mushrooms, or spinach and feta, then fold into squares or roll like burritos. The first time I served these to my family, I set up a “crepe bar” with different fillings and let everyone customize their own. Major hit!
Tips & Variations for this Crepes Recipe
If your crepes are tearing easily, your batter might be too thin—add a tablespoon of flour. Too thick? Add a splash of milk. Remember that the first crepe is almost always a throwaway—use it to adjust your temperature and technique.
Leftover crepes store beautifully! Stack them with small pieces of parchment or wax paper between each one, wrap in plastic, and refrigerate for up to 3 days or freeze for 1 month. To reheat, microwave for 10-15 seconds or warm briefly in a pan.
For chocolate crepes, add 2 tablespoons of cocoa powder to the dry ingredients. For herb crepes (amazing with savory fillings), add 1-2 tablespoons of finely chopped fresh herbs like chives or parsley to the batter. The basic recipe is endlessly customizable!
And listen, if your crepes don’t look Instagram-perfect, join the club. Mine still have odd shapes sometimes, especially when I’m hungry and rushing. They’ll still taste fantastic. Professional food photos are styled and perfect—real kitchen crepes have character.
Final Thoughts on this Crepes Recipe
I went from crepe disaster to crepe master in about a dozen attempts, and trust me, if I can do it, literally anyone can. There’s something deeply satisfying about the whole process once you get the hang of it—the pour, the swirl, the flip. It becomes almost meditative.
Give these crepes a try this weekend. They might not be perfect the first time, but I promise by your third or fourth attempt, you’ll be feeling like a proper French chef. Drop a comment if you make them—especially if you come up with a filling combination I should try. I’m always looking for new excuses to break out my crepe pan (aka my regular non-stick skillet that I’ve convinced myself has special crepe-making powers now).
Easy Crepes Recipe (Thin, Soft & Perfect Every Time – Sweet or Savory)
This crepes recipe changed my life, making my weekend breakfasts delightful. These impossibly thin, delicately soft crepes are perfect with both sweet and savory fillings.