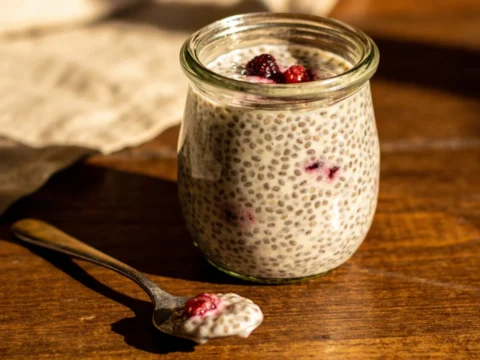
Dairy free chia pudding changed my breakfast game completely when I discovered I couldn’t tolerate lactose anymore. That first week of dairy-free living was rough—until I stumbled across the magical combination of chia seeds and coconut milk. What started as a desperate attempt to find something creamy without the cream has become my go-to breakfast several times a week. The best part? It’s ridiculously simple, takes about 5 minutes of actual work, and somehow feels both healthy and indulgent at the same time.
Table of Contents :
How I Found My Perfect Dairy-Free Breakfast
Two years ago, I reluctantly joined the dairy-free club after a doctor suggested cutting out lactose. Bye-bye, morning yogurt. So long, overnight oats with milk. I was honestly a bit devastated—breakfast is my favorite meal, and suddenly all my creamy comfort foods were off the table.
The first chia pudding I made was a complete disaster. I used almond milk (way too thin), didn’t use enough chia seeds, and ended up with what I can only describe as sad, lumpy plant milk with floating seeds. Not exactly appetizing. The next attempt with soy milk was better but still missing that luxurious mouthfeel I was craving. Then I tried full-fat coconut milk from a can, and everything changed. It was THICK. It was CREAMY. It actually satisfied that dairy craving in a way I didn’t think was possible.
After about a dozen variations and plenty of “oops, I forgot about it and now it’s too thick” moments, I’ve finally nailed down a foolproof method for making the creamiest, most delicious dairy free chia pudding that even my dairy-loving friends request when they come over for brunch.
Ingredients for dairy free chia pudding
What I love most about this recipe is that you probably have most of these ingredients in your pantry already. And if you don’t, they’re all shelf-stable (except the fresh fruit), so you can stock up and have them ready whenever the chia pudding craving strikes. Because trust me, once you start making this, that craving will definitely strike.
I’ve tested this recipe with several non-dairy milks, and while all work to some degree, the texture and richness vary dramatically. Coconut milk creates that truly decadent pudding that doesn’t make you feel like you’re compromising on anything. That said, I’ve included substitution notes for each ingredient because we all know what it’s like to suddenly realize you’re out of something mid-recipe.
Chia Seeds (¼ cup)
These little powerhouses are the magic behind the pudding’s thick, tapioca-like texture. They absorb liquid and create a gel-like coating around each seed. I use black chia seeds because they’re easier to find, but white chia seeds work exactly the same way if you want a more uniform color in your pudding. No need to grind them—whole seeds create that delightful texture I’ve come to love.
Full-Fat Coconut Milk (1 cup from a can)
This is non-negotiable for the creamiest result. The lite stuff just doesn’t create the same luxurious texture. I always keep cans of full-fat coconut milk in my pantry specifically for this purpose. Don’t worry if it’s separated when you open the can—that’s normal. Just whisk it together until smooth before adding the chia seeds. And no, the pudding doesn’t taste strongly of coconut once you add the other flavorings.
Unsweetened Almond Milk (½ cup)
I use this to cut the richness of the coconut milk slightly and get the perfect pudding consistency. You can substitute any non-dairy milk here—cashew milk, oat milk, or even more coconut milk if you want it extra rich. I’ve found that mixing milks creates the best texture, but in a pinch, you can use 1½ cups of a single type of milk.
Maple Syrup (2-3 tablespoons)
The perfect natural sweetener for this pudding because it blends seamlessly with the cold ingredients. I start with 2 tablespoons and sometimes add the third after tasting. Honey works too, but you’ll need to warm it slightly to help it incorporate. Agave is another great option if that’s what you have on hand. Just don’t use granulated sugar—it won’t dissolve properly in the cold mixture.
Vanilla Extract (1 teaspoon)
This rounds out the flavor and makes the pudding taste more dessert-like. I’ve accidentally left it out before, and the pudding definitely missed that warm, aromatic note. In a pinch, you can use the seeds from half a vanilla bean for an even more intense flavor, or substitute a quarter teaspoon of almond extract for a different but equally delicious variation.
Salt (Tiny pinch)
Just a tiny pinch, but it makes ALL the difference. Salt enhances sweetness and makes the other flavors pop. I once forgot to add it and the pudding tasted flat and one-dimensional. Don’t skip this—it’s the secret ingredient that makes people wonder why your chia pudding tastes better than theirs.
Fresh Fruit (for topping)
Berries are my go-to because their tartness balances the creamy richness of the pudding. But banana slices, diced mango, or even pomegranate seeds work beautifully. In winter when fresh berries cost approximately one million dollars, I use thawed frozen berries—they release their juices into the pudding and create a natural sauce.
Instructions dairy free chia pudding
Making chia pudding isn’t complicated, but there are a few tricks I’ve learned the hard way that make all the difference between perfect pudding and a disappointing mess. The good news is that the actual hands-on time is about 5 minutes. The hard part is just waiting for it to set up—at least 4 hours, but overnight is best.
And listen, I know recipes always say things like “whisk until thoroughly combined,” but with chia pudding, this step is CRITICAL. Those little seeds want to clump together like their lives depend on it. I cannot tell you how many times I’ve had to fish out chia clumps because I rushed this step. Take your time here. Your future self will thank you when you open the fridge to find perfectly set pudding instead of weird clumpy milk with seeds floating on top.
STEP 1: Mix your milks and sweetener.
In a medium bowl, pour in the coconut milk (making sure to scrape out all the thick cream parts from the can), almond milk, maple syrup, vanilla extract, and that tiny pinch of salt. Whisk until completely smooth and well combined. If your coconut milk has those solid cream chunks, keep whisking until they dissolve completely. This usually takes me about a minute of vigorous whisking. The mixture should look uniform with no visible coconut cream lumps—otherwise those will remain in your finished pudding.
STEP 2: Add the chia seeds gradually.
This is where I used to go wrong. Don’t dump all the seeds in at once! Sprinkle about half the chia seeds over the milk mixture while whisking constantly. Once those are incorporated, add the remaining seeds while continuing to whisk. This gradual approach prevents clumping and ensures each seed gets properly coated in liquid. The mixture will be very liquid at this point—that’s totally normal. The thickening magic happens during the refrigeration.
STEP 3: Let it sit, then whisk again.
Here’s the game-changing trick I learned after multiple failed attempts: let the mixture sit on the counter for about 10 minutes, then whisk it again thoroughly. During that 10-minute rest, the seeds start to absorb liquid and any potential clumps will be easier to spot and break up. You’ll notice the mixture has already started to thicken slightly. This second whisking ensures even distribution and prevents those annoying chia clumps from forming as it sets.
STEP 4: Transfer to serving containers.
Pour the mixture into individual jars or a large container. I prefer individual portions in small mason jars because it’s convenient for grab-and-go breakfasts. This recipe makes about 4 servings, depending on your preferred portion size. Tap the containers gently on the counter to remove any air bubbles and ensure the pudding settles evenly. If you’re feeling fancy, you can reserve a tablespoon of chia seeds to sprinkle on top for a nice visual effect.
STEP 5: Refrigerate overnight.
Cover the containers and refrigerate for at least 4 hours, but preferably overnight. The longer it sits, the thicker and creamier it becomes. I’ve found that making it before bed for breakfast the next day gives the perfect consistency. If you’re in a rush, 4 hours will work, but the texture won’t be quite as luxurious. The pudding should be thick enough that a spoon stands up in it—not quite as firm as jello, but definitely not runny.
STEP 6: Check the consistency and adjust if needed.
After refrigeration, check the texture. If it’s too thick for your liking (which can happen if you let it sit for more than 12 hours), simply stir in a splash more almond milk until you reach your desired consistency. If it’s not thick enough (rare, but possible if your ratio was off), you can add a teaspoon more chia seeds, stir, and refrigerate for another hour or so. The perfect consistency should be spoonable but not so thick that it feels solid.
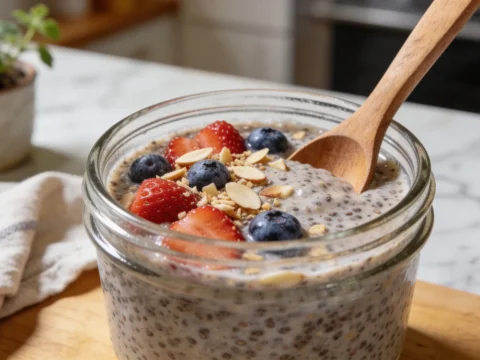
STEP 7: Add toppings and serve.
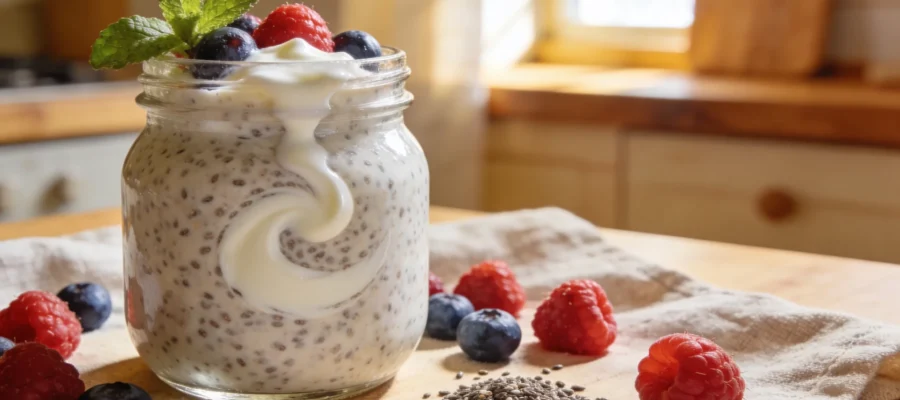
Just before serving, top with fresh fruit, a drizzle of additional maple syrup if desired, and maybe a sprinkle of toasted coconut flakes or chopped nuts for crunch. I sometimes add a dollop of coconut yogurt on top for extra creaminess. The contrast between the creamy pudding and the fresh fruit is what makes this so satisfying—don’t skip this step! The pudding itself has a neutral enough base that it works with almost any topping combination.
Tips & Variations dairy free chia pudding
This pudding keeps well in the refrigerator for up to 5 days, making it perfect for meal prep. The texture might continue to thicken slightly each day—just stir in a splash of milk if needed. For a chocolate version, add 1-2 tablespoons of cocoa powder to the milk mixture in step 1. Peanut butter lovers can swirl in 2 tablespoons of natural peanut butter. For a tropical twist, replace the vanilla with ¼ teaspoon of coconut extract and top with diced mango and toasted coconut. And if your pudding doesn’t look perfectly uniform like those Instagram photos, that’s completely normal—it still tastes amazing!
Final Thoughts dairy free chia pudding
Look, this dairy free chia pudding isn’t going to win any awards for complexity or cutting-edge culinary technique. But it’s saved my breakfast routine, satisfied my creamy texture cravings, and honestly become something I genuinely look forward to eating. Sometimes the simplest recipes become the ones we make most often.
If you try this, drop me a comment below about your favorite topping combinations. I’m always looking for new ideas, and I’m genuinely curious if other people are as obsessed with the coconut milk version as I am. And if your first batch doesn’t turn out perfect—well, now you know all my hard-learned lessons to make the next one better!
Dairy-Free Chia Pudding with Coconut Milk
Creamy and delicious dairy-free chia pudding made with coconut milk. A perfect breakfast or snack that's easy to prepare and packed with flavor.