I’ve been getting SO many messages asking for healthy spring recipes that actually taste good. Not the sad salad-and-steamed-broccoli kind, but real food that happens to be healthy. You know what I mean?
Here’s the thing, spring cooking is my favorite because everything feels lighter without being boring. Fresh vegetables are actually good again (sorry, winter carrots), the weather’s perfect for not turning on the oven for three hours, and I can trick my kids into eating green things because “look, Mom grew it!” (I bought it at the farmer’s market, but they don’t need to know that).
These healthy spring recipes are the ones I actually make on repeat. Some are weeknight saviors. Some are “company’s coming and I need to look like I have my life together” recipes. A few are desserts because balance, people. And yes, they’re all healthy-ish, but more importantly? They’re actually delicious. I promise I’m not trying to sell you on quinoa bowls that taste like sadness.
Table of Contents :
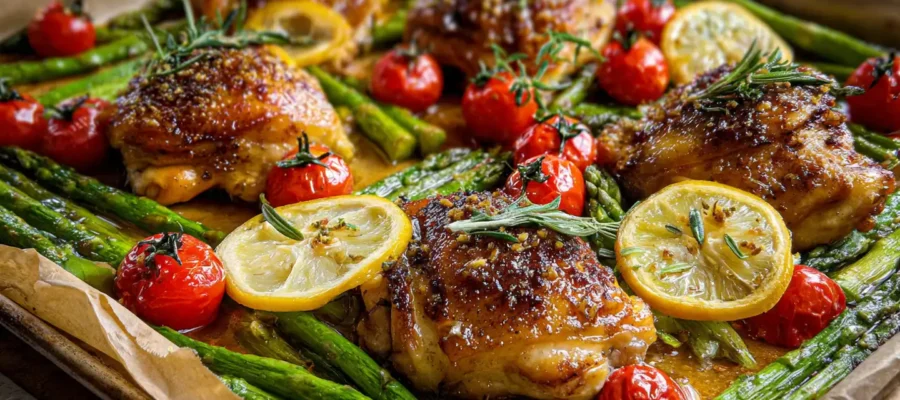
1. Lemon Herb Chicken with Spring Vegetables (The One That Converts People)
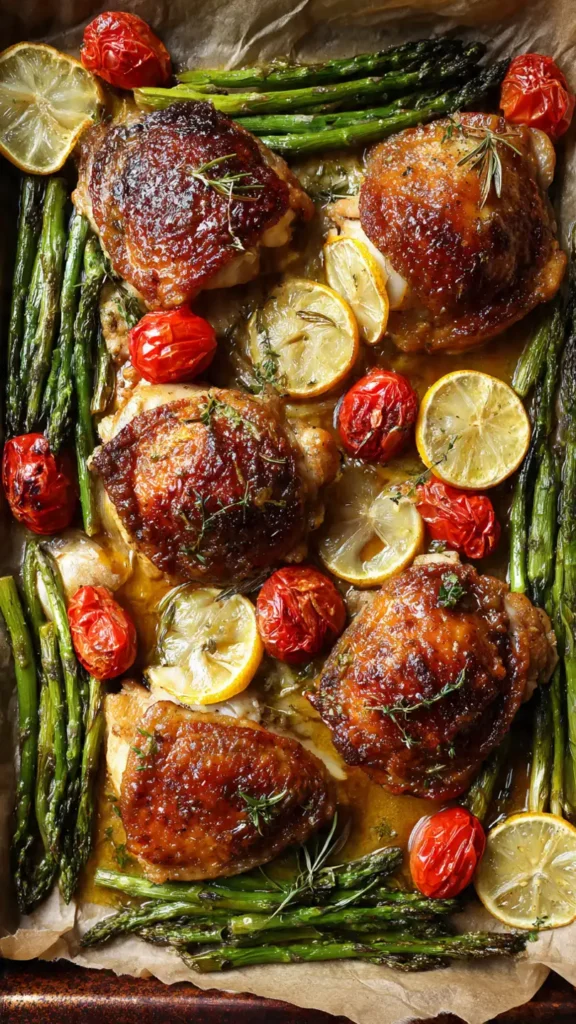
First time I made this, my husband said—and I quote—”Wait, this is HEALTHY?” It’s been in the weekly rotation ever since.
This is what I make when I need something that feels fancy but takes like 20 minutes of actual work. The chicken stays juicy (finally figured out the trick), the vegetables get these beautiful caramelized edges, and everything tastes like spring in the best way. Plus it’s one pan, which means less dishes. Win.
Ingredients:
- 4 boneless, skinless chicken breasts (I pound them to even thickness so they cook evenly—learned that after serving raw chicken once, never again)
- 1 lb asparagus, trimmed (snap off the woody ends, don’t cut them like I used to)
- 2 cups cherry tomatoes (any color, I buy whatever’s on sale)
- 3 cloves garlic, minced (or 1 tsp garlic powder if you’re lazy like me sometimes)
- 2 lemons (juice and zest from both)
- 2 tbsp olive oil
- 1 tbsp fresh thyme (or 1 tsp dried, nobody’s judging)
- 1 tbsp fresh rosemary, chopped (dried works here too)
- Salt and pepper to taste (I use way more than most people)
Instructions:
- Preheat your oven to 425°F. Get a large baking sheet and line it with parchment paper because cleaning baked-on chicken is the worst.
- Pat the chicken dry with paper towels—this actually matters for browning. Season both sides generously with salt, pepper, half the lemon zest, and half the herbs.
- In a big bowl, toss the asparagus and tomatoes with olive oil, remaining lemon zest, remaining herbs, minced garlic, salt, and pepper. Make sure everything’s coated.
- Arrange the chicken breasts on one side of the baking sheet. Spread the vegetables on the other side in a single layer (crowding makes them steam instead of roast, and we want those crispy edges).
- Roast for 20-25 minutes until the chicken hits 165°F internal temp and the asparagus has some nice brown bits. The tomatoes will burst and get jammy.
- Squeeze fresh lemon juice over everything right before serving. This step makes SUCH a difference.
Tips & Real Talk:
- The lemon zest is not optional. I skipped it once thinking “eh, lemon juice is fine” and it was so much blander.
- If your asparagus spears are really thick, give them a 5-minute head start in the oven before adding the chicken.
- Leftovers are incredible cold in a salad the next day.
- I’ve done this with bone-in thighs too (cook 35-40 minutes)—even better but takes longer.
2. Spring Pea and Mint Soup (Sounds Fancy, Is Actually Brain-Dead Easy)
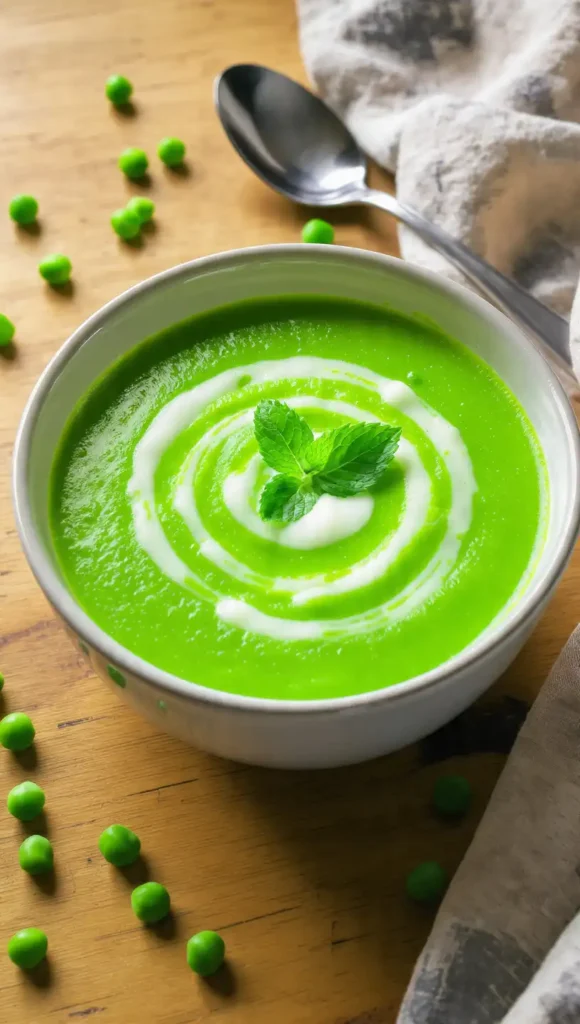
My kid saw the bright green color and said “ABSOLUTELY NOT.” Then she tried it and asked for seconds. Still not sure how that happened, but I’ll take it.
This is one of those healthy spring soup recipes that feels elegant but is secretly just vegetables and broth. The mint makes it taste fresh and spring-y without being weird, and you can make it ahead. Also it’s naturally gluten-free and vegetarian, so it covers a lot of dinner party bases.
Ingredients:
- 1 tbsp olive oil
- 1 medium onion, diced (I’ve cried every single time, just accept it)
- 2 cloves garlic, minced
- 4 cups vegetable broth (or chicken broth, whatever you have)
- 4 cups frozen peas (fresh is great too but frozen is easier and honestly tastes the same)
- 1/2 cup fresh mint leaves (yes, fresh matters here)
- 1/2 cup plain Greek yogurt (optional but makes it creamy)
- Salt and pepper to taste
- Squeeze of lemon juice (brightens everything up)
Instructions:
- Heat olive oil in a large pot over medium heat. Add the diced onion and cook for 5-7 minutes until it’s soft and translucent. Don’t rush this part.
- Toss in the garlic and cook for another minute until it smells amazing.
- Pour in the broth and bring everything to a boil. Add the peas and cook for about 5 minutes until they’re tender. They’ll turn a brighter green first, then start to dull—that’s your window.
- Turn off the heat and stir in the mint leaves. Let it sit for 2 minutes so the mint flavor gets into everything.
- Use an immersion blender to puree until smooth. If you don’t have one, carefully transfer to a regular blender in batches (and put a towel over the lid because hot soup explosions are real).
- Stir in the Greek yogurt if using. It adds this lovely creaminess and tang. Season with salt, pepper, and a squeeze of lemon juice.
- Serve warm or cold—both ways are good.
Tips & Real Talk:
- Don’t skip the lemon juice. Learned that after serving flat-tasting soup to my in-laws. Awkward.
- If you want it thicker, use less broth. Thinner? More broth. Revolutionary, I know.
- I’ve garnished with crispy prosciutto before and it was NEXT LEVEL.
- This freezes beautifully. Just add the yogurt after reheating, not before freezing.
3. Sheet Pan Salmon with Roasted Radishes and Dill (The One That Shocked Me)
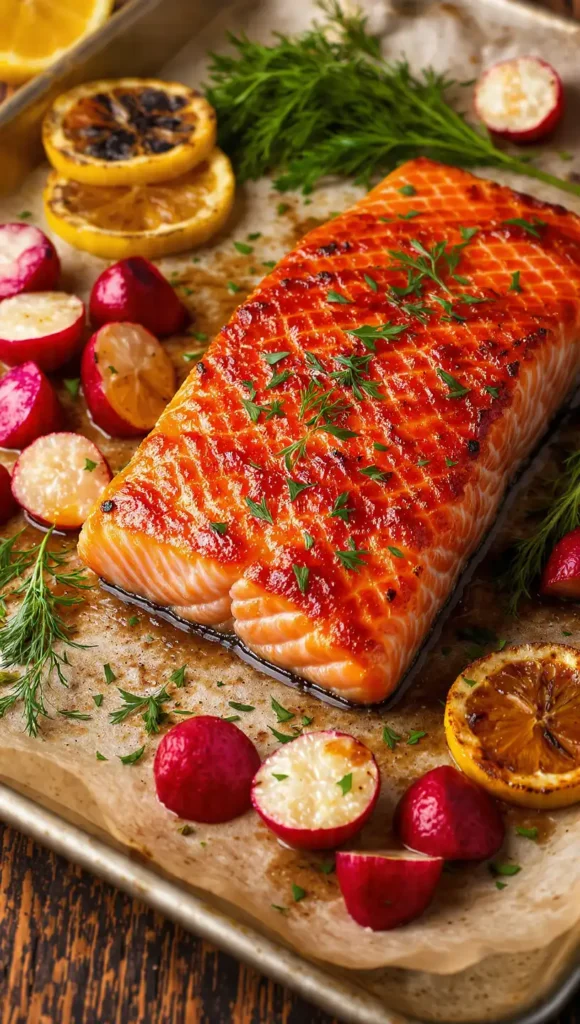
I thought I hated radishes until I roasted them. Turns out I just hated raw radishes. WHO KNEW? (Everyone but me, apparently.)
This is one of my go-to healthy spring recipes for dinner because it’s impressive enough for guests but easy enough for a Tuesday. The salmon gets this perfect crust, the radishes turn sweet and mild when roasted, and the dill ties it all together. Plus, omega-3s or whatever. We’re being healthy.
Ingredients:
- 4 salmon fillets (6 oz each, skin-on or off, your choice)
- 2 bunches radishes, quartered (about 3 cups)
- 1 lemon, sliced thin
- 3 tbsp olive oil, divided
- 3 tbsp fresh dill, chopped (dried dill is sad, don’t do it)
- 2 cloves garlic, minced
- Salt and pepper
- Optional: 1 tbsp Dijon mustard (I brush this on the salmon sometimes)
Instructions:
- Preheat oven to 400°F. Line a sheet pan with foil or parchment paper for easy cleanup.
- Toss the quartered radishes with 2 tbsp olive oil, half the dill, half the garlic, salt, and pepper. Spread them in a single layer on the pan.
- Roast the radishes for 10 minutes while you prep the salmon. This head start means everything finishes together.
- Pat salmon dry and season with salt and pepper. Mix remaining olive oil, dill, and garlic together and brush over the salmon. If you’re using mustard, mix it into this too.
- After the radishes have roasted for 10 minutes, push them to the sides and nestle the salmon fillets in the center. Tuck lemon slices around everything.
- Roast for 12-15 minutes more until the salmon flakes easily with a fork and the radishes are golden with crispy edges.
- Squeeze those roasted lemon slices over everything before serving.
Tips & Real Talk:
- If you’ve never roasted radishes, prepare to be amazed. They lose that spicy bite and get sweet and tender.
- Thicker salmon fillets need closer to 15 minutes. Thinner ones, check at 10.
- The skin crisps up beautifully if you leave it on and make sure it’s dry before cooking.
- I’ve done this with trout too. Works great.
4. Strawberry Spinach Salad with Poppy Seed Dressing (Kids Actually Eat This)

My 6-year-old picks out the spinach. My 9-year-old picks out the strawberries. But they both eat SOMETHING from this salad, so I’m calling it a win.
This is spring in a bowl. Sweet strawberries, crunchy almonds, tangy dressing—it’s one of those healthy spring recipes clean eating people love because it doesn’t taste like diet food. I bring this to potlucks and people always ask for the recipe. The homemade dressing makes all the difference.
Ingredients:
For the salad:
- 6 cups baby spinach (the prewashed kind because life’s too short)
- 2 cups strawberries, sliced
- 1/2 cup sliced almonds, toasted (or candied pecans if you’re feeling fancy)
- 1/4 red onion, thinly sliced (I soak mine in cold water for 10 minutes to mellow it out)
- 1/2 cup crumbled feta cheese (goat cheese works too)
For the dressing:
- 1/4 cup olive oil
- 2 tbsp apple cider vinegar
- 1 tbsp honey
- 1 tsp poppy seeds
- 1/2 tsp Dijon mustard
- Pinch of salt
Instructions:
- If you’re toasting almonds (do it, it’s worth it), spread them on a dry skillet over medium heat for 3-5 minutes, stirring frequently. They’ll smell nutty and turn golden. Watch them closely—they go from perfect to burned in about 30 seconds.
- For the dressing, whisk together olive oil, vinegar, honey, poppy seeds, Dijon, and salt in a small bowl until it’s emulsified. Or throw it all in a jar and shake it. That’s what I do.
- In a large bowl, combine spinach, strawberries, toasted almonds, red onion (drained if you soaked it), and feta.
- Right before serving, drizzle the dressing over the salad and toss gently. Don’t dress it too early or the spinach gets soggy.
Tips & Real Talk:
- The soaking trick for the onion is a game-changer. Makes it sweet instead of harsh.
- I’ve used balsamic vinegar instead of apple cider vinegar—also delicious.
- Add grilled chicken to make this a full meal. I do that for lunch all the time.
- Leftover dressing lasts about a week in the fridge.
5. Zucchini Noodle Primavera (For When You’re Pretending Pasta Doesn’t Exist)

Look, I love regular pasta. But sometimes I want to eat a giant bowl of something without feeling like I need a nap after. Enter: zoodles.
This is one of those healthy spring recipes easy enough for weeknights but pretty enough that you could serve it to people. All the spring vegetables, fresh herbs, a light sauce—it’s basically garden-to-table vibes without actually having a garden. (I killed my basil plant. Again.)
Ingredients:
- 4 medium zucchini, spiralized (or buy pre-spiralized, no shame)
- 1 tbsp olive oil
- 3 cloves garlic, minced
- 1 cup cherry tomatoes, halved
- 1 cup asparagus, cut into 1-inch pieces
- 1/2 cup frozen peas
- 1/4 cup vegetable broth
- Zest and juice of 1 lemon
- 1/4 cup fresh basil, chopped
- 1/4 cup grated Parmesan (the real stuff, not the shaker kind)
- Salt, pepper, red pepper flakes
- Optional: grilled shrimp or chicken
Instructions:
- If your zucchini noodles are store-bought and wet, spread them on paper towels and let them drain for 10 minutes. Wet zoodles = sad, soggy dish.
- Heat olive oil in a large skillet over medium-high heat. Add garlic and cook for 30 seconds until fragrant.
- Toss in the asparagus pieces and cook for 3-4 minutes until they’re bright green and starting to get tender. They should still have some crunch.
- Add cherry tomatoes and peas. Cook for another 2-3 minutes until tomatoes start to soften and release their juice.
- Push vegetables to the side and add zucchini noodles to the pan. Pour in the vegetable broth and lemon juice. Toss everything together and cook for just 2-3 minutes until the zoodles are slightly softened but still have texture. DON’T overcook them or they get mushy.
- Remove from heat and stir in lemon zest, fresh basil, and Parmesan. Season with salt, pepper, and red pepper flakes.
- Serve immediately. Zoodles get watery if they sit.
Tips & Real Talk:
- Seriously, don’t overcook the zucchini noodles. They release water like crazy.
- I pat them with paper towels even after cooking to soak up extra moisture.
- My husband adds grilled chicken to his bowl. I eat mine as-is.
- You can do half zoodles, half regular pasta if you’re easing into the zucchini noodle life.
6. Greek Yogurt Berry Parfaits (Breakfast or Dessert, Your Call)
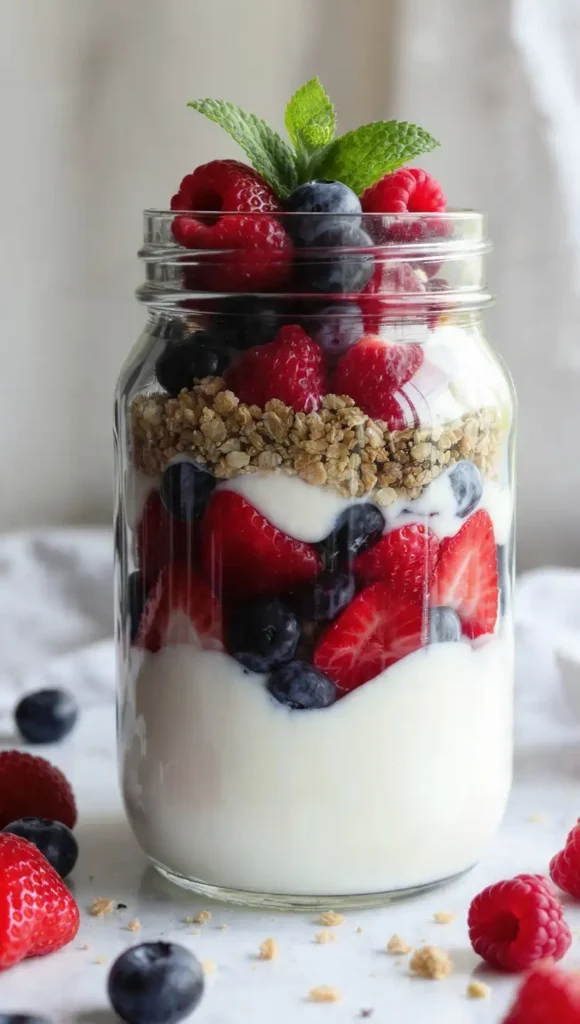
My kids fight over these. Literally fight. I’ve started making extras and hiding them in the back of the fridge.
These are one of my favorite healthy spring recipes for kids because they LOOK like dessert but are actually pretty nutritious. Fresh berries, creamy yogurt, a little granola crunch—and you can customize them however you want. I’ve served these at brunch and people act like I did something complicated. I just layered stuff in a jar, y’all.
Ingredients:
- 3 cups plain Greek yogurt (I use 2% because nonfat is sad)
- 2 tbsp honey (or maple syrup for vegan)
- 1 tsp vanilla extract
- 2 cups mixed berries (strawberries, blueberries, raspberries—whatever’s fresh)
- 1 cup granola (homemade or store-bought, I’m not here to judge)
- Fresh mint leaves for garnish (optional but pretty)
Instructions:
- In a medium bowl, mix the Greek yogurt with honey and vanilla extract. Taste it—if you want it sweeter, add more honey. This is your base.
- If you’re using strawberries, slice them. Leave the other berries whole.
- Grab 4 clear glasses or jars (mason jars work great). Start with a layer of yogurt on the bottom.
- Add a layer of mixed berries.
- Sprinkle some granola over the berries.
- Repeat the layers—yogurt, berries, granola—until you reach the top of the glass. I usually do 2-3 layers depending on glass size.
- Top with a few extra berries and a mint leaf if you’re feeling fancy.
- Serve immediately or cover and refrigerate for up to 4 hours. Don’t add granola until right before serving if you’re making these ahead, or it gets soggy.
Tips & Real Talk:
- I’ve used frozen berries when fresh ones cost a million dollars. Thaw and drain them first.
- Vanilla Greek yogurt works too, just skip the honey and vanilla extract.
- My daughter likes hers with chocolate chips mixed in. Not exactly health food but whatever gets her to eat yogurt.
- These are great for meal prep—make the yogurt mixture and prep the berries, then assemble in the morning.
7. Quinoa Spring Vegetable Bowl with Lemon Tahini Dressing (The Hippie Bowl That Tastes Amazing)
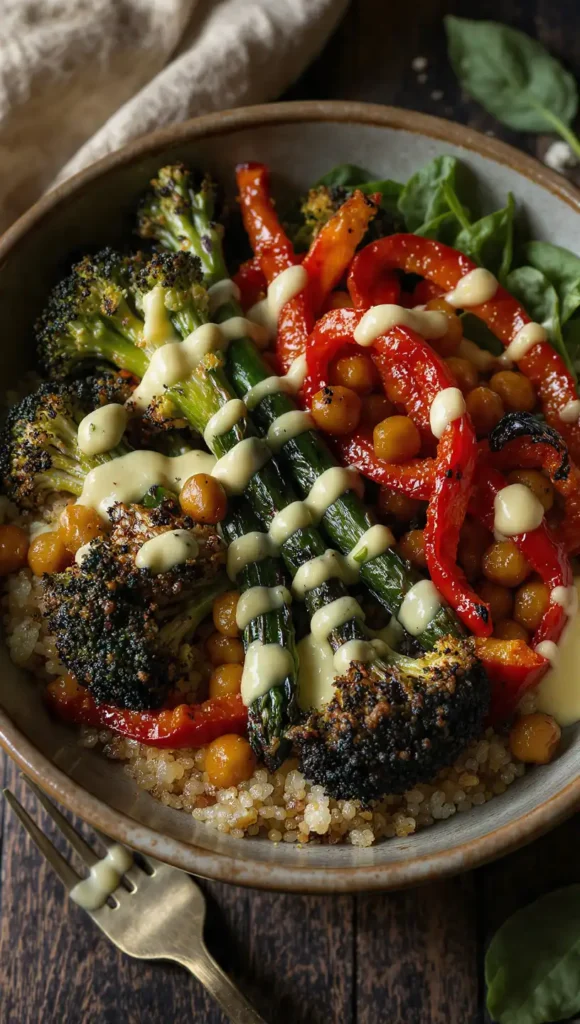
I resisted quinoa for YEARS because it seemed too trendy. Then I actually tried it and felt dumb for waiting so long.
This is my go-to healthy spring recipes vegetarian option when I need something filling that isn’t just salad. The quinoa gives you protein and keeps you full, the roasted vegetables are caramelized and delicious, and that lemon tahini dressing? I could drink it. (I haven’t. But I’ve thought about it.)
Ingredients:
For the bowl:
- 1 cup quinoa, uncooked (rinse it first or it tastes bitter)
- 2 cups vegetable broth or water
- 1 bunch asparagus, trimmed and cut into pieces
- 2 cups broccoli florets
- 1 red bell pepper, chopped
- 2 tbsp olive oil
- Salt and pepper
- 1 can chickpeas, drained and rinsed
- 2 cups baby spinach or arugula
For the dressing:
- 1/4 cup tahini
- 3 tbsp lemon juice
- 2 tbsp olive oil
- 1 clove garlic, minced
- 2-4 tbsp water (to thin it out)
- Salt to taste
Instructions:
- Preheat your oven to 425°F.
- Cook the quinoa: Combine rinsed quinoa and vegetable broth in a pot. Bring to a boil, then reduce to a simmer, cover, and cook for 15 minutes. Turn off heat and let it sit covered for 5 more minutes. Fluff with a fork.
- While quinoa cooks, toss asparagus, broccoli, bell pepper, and chickpeas with olive oil, salt, and pepper on a large baking sheet. Spread everything in a single layer.
- Roast for 20-25 minutes, stirring halfway through, until vegetables are tender with crispy browned edges and chickpeas are slightly crispy.
- Make the dressing: Whisk together tahini, lemon juice, olive oil, and garlic. Add water one tablespoon at a time until you get a pourable consistency. It’ll seem too thick at first, then suddenly it’ll thin out. Season with salt.
- To assemble: Divide quinoa among bowls. Top with roasted vegetables, chickpeas, and fresh spinach or arugula. Drizzle generously with lemon tahini dressing.
Tips & Real Talk:
- The chickpeas get crispier if you pat them dry before roasting. I forget this step half the time.
- Double the dressing recipe. You’ll want extra for everything.
- This is one of those meals that’s better at room temperature than hot, so it’s perfect for meal prep.
- I’ve added feta, avocado, and sunflower seeds to this. Basically anything works.
8. Honey Garlic Glazed Carrots (Proof That Vegetables Can Taste Like Candy)
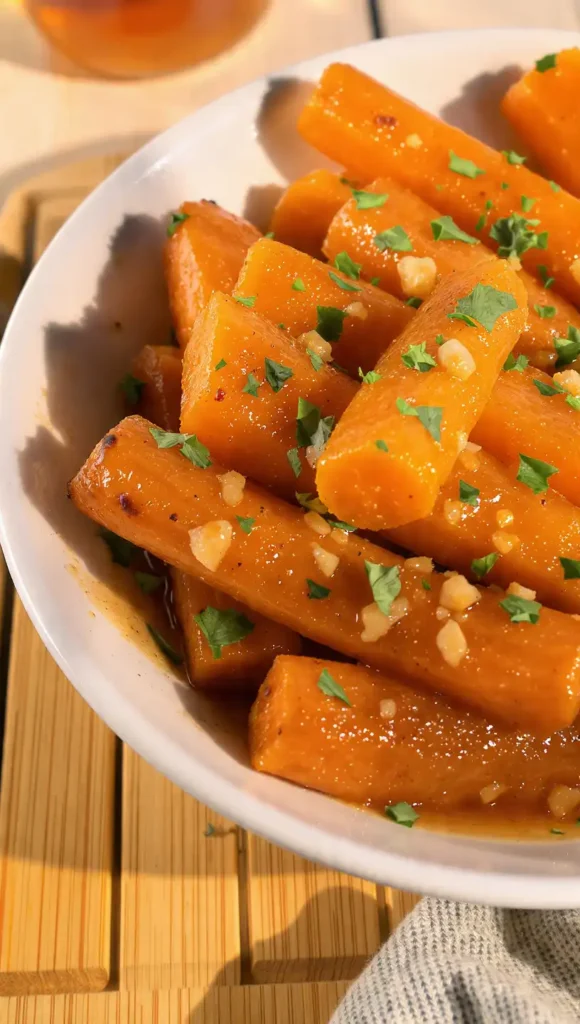
These carrots have converted more vegetable haters than any other recipe I make. My nephew ate SIX servings. His mom texted me for the recipe immediately.
People don’t expect carrots to be this good. The honey caramelizes, the garlic gets sweet and mellow, and they end up tasting almost like candy. This is one of those healthy spring recipes dinner families actually get excited about because even picky eaters will try them.
Ingredients:
- 2 lbs carrots, peeled and cut into sticks (baby carrots work too but the real ones taste better)
- 3 tbsp butter (or olive oil for dairy-free)
- 3 tbsp honey
- 4 cloves garlic, minced
- 1/2 tsp salt
- 1/4 tsp black pepper
- 2 tbsp fresh parsley, chopped
- Optional: squeeze of lemon juice at the end
Instructions:
- Bring a large pot of salted water to a boil. Add carrot sticks and cook for 5-7 minutes until they’re tender but still have a little bite. You’re not trying to cook them all the way through—they’ll finish in the pan. Drain well.
- In a large skillet, melt butter over medium heat. Add the minced garlic and cook for about 1 minute until it smells incredible but doesn’t brown.
- Add the honey to the pan and stir it into the butter and garlic. Let it bubble for a minute.
- Add the drained carrots to the skillet. Toss them in the honey-garlic mixture, making sure they’re all coated.
- Cook for 5-7 minutes, stirring occasionally, until the carrots are fully tender and the glaze thickens and coats them beautifully. They’ll develop some caramelized spots.
- Season with salt and pepper. Toss with fresh parsley. If you want, add a tiny squeeze of lemon juice to brighten everything up.
Tips & Real Talk:
- Don’t skip the parboiling step. Raw carrots take forever to cook in the pan and the glaze burns.
- If the glaze seems too thick, add a splash of water. Too thin? Cook it a bit longer.
- I’ve used maple syrup instead of honey. Works great and makes it vegan if you use oil instead of butter.
- These reheat surprisingly well, which is rare for vegetables.
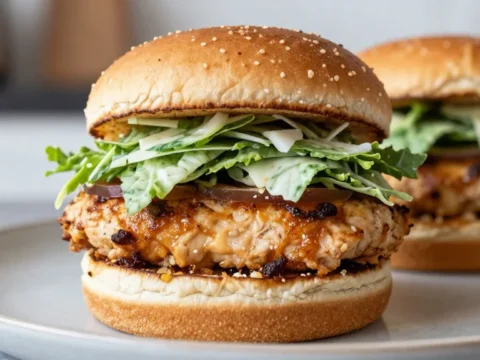
9. Caprese Stuffed Chicken (Fancy Italian Vibes, Weeknight Effort)

The first time I served this, my husband asked if I’d ordered takeout and just plated it. BEST COMPLIMENT EVER.
This is what I make when I want people to think I’m a better cook than I am. Fresh mozzarella, tomatoes, basil—classic caprese flavors stuffed inside chicken breast. It looks impressive, tastes amazing, and uses ingredients I can find at any grocery store. Perfect for healthy spring recipes dinner when you want something special.
Ingredients:
- 4 boneless, skinless chicken breasts
- 4 oz fresh mozzarella, sliced (not the shredded kind, get the ball)
- 1 large tomato, sliced thin
- 8-10 fresh basil leaves
- 2 tbsp olive oil
- 2 cloves garlic, minced
- 1 tsp Italian seasoning
- Salt and pepper
- Balsamic glaze for drizzling (optional but recommended)
Instructions:
- Preheat oven to 400°F.
- Using a sharp knife, cut a pocket into the thick side of each chicken breast. Don’t cut all the way through—you’re making a pocket, not butterflying it. This takes practice. I’ve accidentally cut through several times.
- Season the chicken inside and out with salt, pepper, and Italian seasoning.
- Stuff each pocket with mozzarella slices, tomato slices, and 2-3 basil leaves. Don’t overstuff or it’ll leak everywhere (learned that the hard way). You can use toothpicks to hold them closed if needed.
- Heat olive oil in an oven-safe skillet over medium-high heat. Add garlic and let it sizzle for 30 seconds.
- Add the stuffed chicken breasts and sear for 3-4 minutes per side until golden brown. They won’t be cooked through yet.
- Transfer the whole skillet to the oven and bake for 15-18 minutes until the chicken reaches 165°F internal temperature.
- Let rest for 5 minutes before serving. Drizzle with balsamic glaze if using.
Tips & Real Talk:
- Room temperature chicken cooks more evenly. I leave mine out for 20 minutes before cooking.
- If you don’t have an oven-safe skillet, sear in a regular pan then transfer to a baking dish.
- Some cheese will leak out. That’s okay. Scrape up the crispy cheese bits and eat them.
- This is incredible served over zucchini noodles or with roasted asparagus.
10. Mango Coconut Chia Pudding (The Breakfast That Feels Like Dessert)
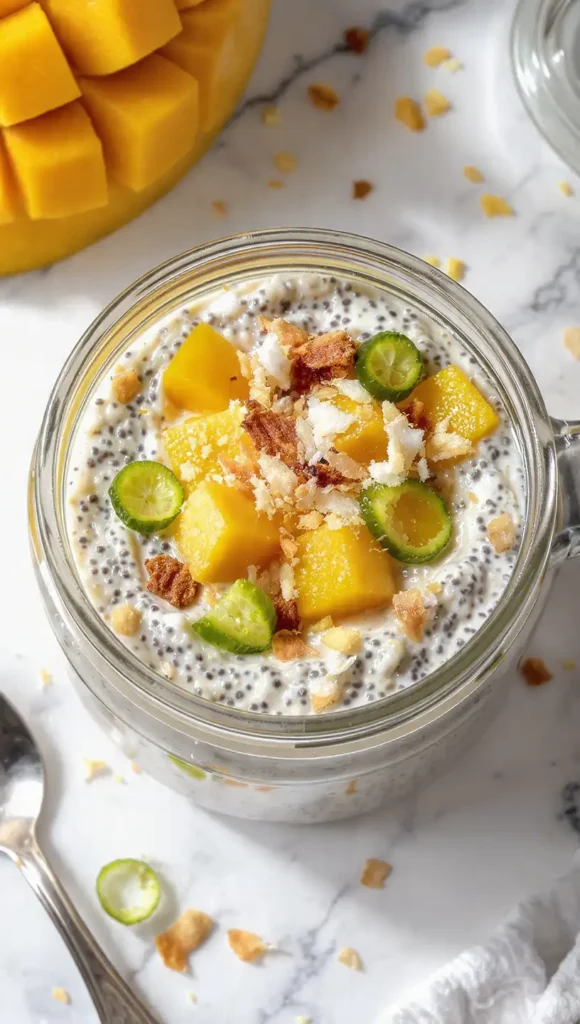
I meal-prep these every Sunday and my mornings are SO much easier. Plus they’re one of those healthy spring recipes desserts that kids think is a treat.
Chia pudding seemed weird to me at first—like, seeds that gel up? Suspicious. But it’s actually creamy and delicious and keeps you full for hours. The mango and coconut make it taste tropical and spring-y at the same time. And you literally just mix and refrigerate. No cooking.
Ingredients:
- 1/4 cup chia seeds
- 1 cup coconut milk (the carton kind, not canned—though canned works if you want it richer)
- 1 tbsp maple syrup or honey
- 1/2 tsp vanilla extract
- 1 ripe mango, diced
- 2 tbsp shredded coconut (toasted if you’re fancy)
- Optional: fresh lime zest
Instructions:
- In a bowl or jar, whisk together chia seeds, coconut milk, maple syrup, and vanilla extract. Whisk really well—you don’t want clumps.
- Let it sit for 5 minutes, then whisk again. This prevents all the chia seeds from settling at the bottom and forming one giant seed blob (it’s happened to me).
- Cover and refrigerate for at least 4 hours or overnight. The chia seeds will absorb the liquid and create a pudding-like texture.
- When you’re ready to eat, give it a stir. If it’s too thick, add a splash more coconut milk.
- Top with diced mango, shredded coconut, and lime zest if using.
Tips & Real Talk:
- I make 4 servings at once in individual jars. Breakfast is done for half the week.
- If you don’t like mango, try berries. Or banana. Or literally any fruit.
- Toasting the coconut makes a huge difference—just toss it in a dry pan for 2 minutes.
- This is naturally gluten-free and can be vegan if you use maple syrup.
- My kids eat this thinking it’s pudding. I don’t correct them.
11. Spring Veggie Frittata (For When You Need Breakfast to Feel Grown-Up)

I started making this when I had a bunch of random vegetables in the fridge and didn’t know what to do with them. Now it’s a weekly thing.
Frittatas are basically “what vegetables do I have + eggs” and they always work out. This version is packed with spring vegetables, herbs, and just enough cheese to make it interesting. Great for healthy spring recipes clean eating because it’s whole foods, high protein, and tastes way better than it should for how easy it is.
Ingredients:
- 8 large eggs
- 1/4 cup milk (any kind)
- 1 tbsp olive oil
- 1/2 cup asparagus, chopped
- 1/2 cup cherry tomatoes, halved
- 1/4 cup red onion, diced
- 2 cups baby spinach
- 1/2 cup feta cheese, crumbled
- 2 tbsp fresh dill or basil, chopped
- Salt and pepper
Instructions:
- Preheat your oven to 375°F.
- In a large bowl, whisk together eggs and milk. Season with salt and pepper. Set aside.
- Heat olive oil in a 10-inch oven-safe skillet (cast iron works great) over medium heat.
- Add the red onion and asparagus. Cook for 3-4 minutes until they start to soften.
- Toss in the cherry tomatoes and spinach. Cook for another 2 minutes until the spinach wilts down.
- Pour the egg mixture over the vegetables. Use a spatula to make sure it’s evenly distributed.
- Sprinkle feta cheese and fresh herbs over the top.
- Let it cook on the stovetop for 2-3 minutes without stirring, just until the edges start to set.
- Transfer the skillet to the oven and bake for 12-15 minutes until the center is set and doesn’t jiggle when you shake the pan.
- Let it cool for 5 minutes, then slice into wedges.
Tips & Real Talk:
- You can use literally any vegetables. I’ve done mushrooms, bell peppers, zucchini—all great.
- If you don’t have an oven-safe skillet, start it on the stove then transfer to a greased pie dish for baking.
- This is incredible cold, which makes it perfect for meal prep or picnics.
- I’ve used goat cheese instead of feta. Also delicious.
12. Lemon Blueberry Oat Bars (The “I Made These Myself?!” Dessert)
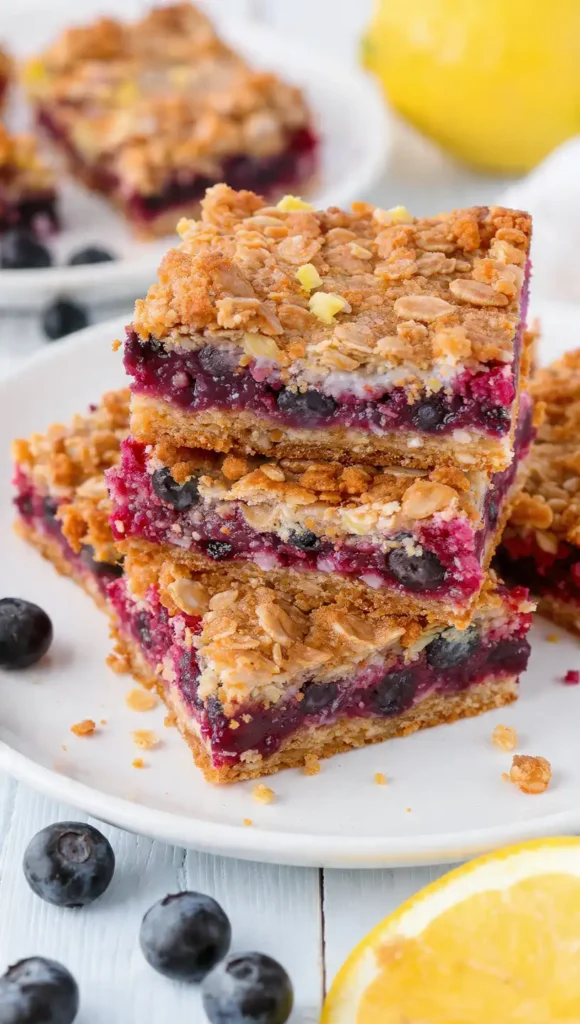
These look bakery-quality but are embarrassingly easy. I brought them to a potluck and three people asked where I bought them. I felt so accomplished.
This is one of my favorite healthy spring recipes gluten free options (if you use certified GF oats). They’re sweet but not too sweet, the lemon and blueberry combo screams spring, and they’re actually filling thanks to the oats. Plus they don’t require any weird ingredients. Just pantry staples and fresh blueberries.
Ingredients:
- 2 cups rolled oats (use gluten-free if needed)
- 1 cup almond flour
- 1/3 cup honey or maple syrup
- 1/4 cup coconut oil, melted
- 1 egg
- Zest of 2 lemons
- 1/4 tsp salt
- 2 cups fresh blueberries
- 2 tbsp lemon juice
- 2 tbsp cornstarch or tapioca starch
Instructions:
- Preheat oven to 350°F. Line an 8×8 baking pan with parchment paper, leaving some overhang (makes it easier to lift out later).
- In a large bowl, mix together oats, almond flour, lemon zest, and salt.
- In a separate small bowl, whisk together honey, melted coconut oil, and egg.
- Pour the wet ingredients into the dry ingredients and stir until everything is combined and the oats are coated. The mixture will be crumbly.
- Press about 2/3 of the oat mixture firmly into the bottom of your prepared pan. Really press it down with your hands or the back of a measuring cup.
- In another bowl, toss the blueberries with lemon juice and cornstarch until coated. This thickens the filling so it doesn’t get too runny.
- Spread the blueberry mixture over the oat base.
- Crumble the remaining oat mixture over the top of the blueberries. It won’t cover completely—that’s fine, it’s supposed to be rustic-looking.
- Bake for 35-40 minutes until the top is golden brown and the blueberry filling is bubbling around the edges.
- Let it cool COMPLETELY in the pan before cutting. I know it’s hard to wait, but if you cut it warm, it’ll fall apart.
Tips & Real Talk:
- Seriously, let them cool. I’ve ruined a whole batch by being impatient.
- You can use frozen blueberries. Don’t thaw them first, just add an extra 5 minutes to baking time.
- I’ve made these with raspberries and strawberries too. All good.
- They keep for about 5 days in the fridge, or freeze them for longer.
- The cornstarch is important. Without it, the blueberry layer is a soggy mess.
Wrapping It Up
So there you have it : 12 healthy spring recipes that I actually make on repeat. Some are weeknight staples. Some are weekend projects. A couple are desserts because life’s too short to skip dessert.
The thing about spring cooking is that the ingredients do most of the work. Fresh vegetables actually taste good, you don’t need to drown everything in heavy sauces, and meals feel lighter without being boring or unsatisfying.
Are these recipes perfect? No. Will you probably mess one up the first time like I did? Maybe. But they’re all tested (by me, in my very normal kitchen, with my very normal skill level), and they all taste way better than they have any right to for how healthy they are.
Let me know which one you’re making first. I’m genuinely curious if anyone else accidentally overcooks their zucchini noodles like I do.