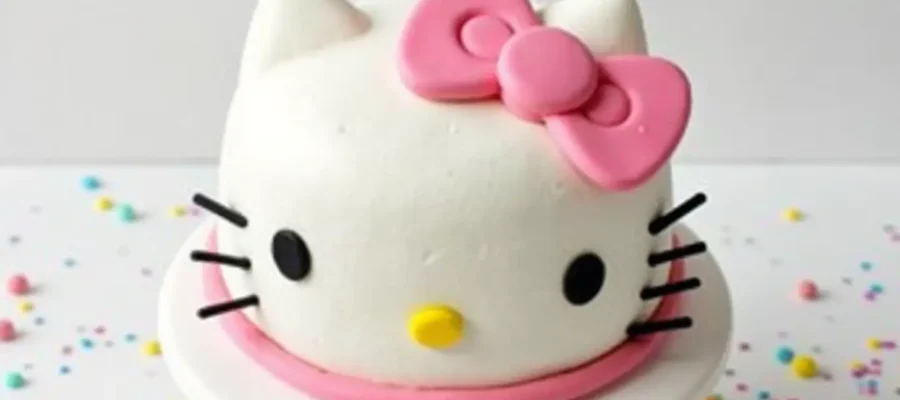
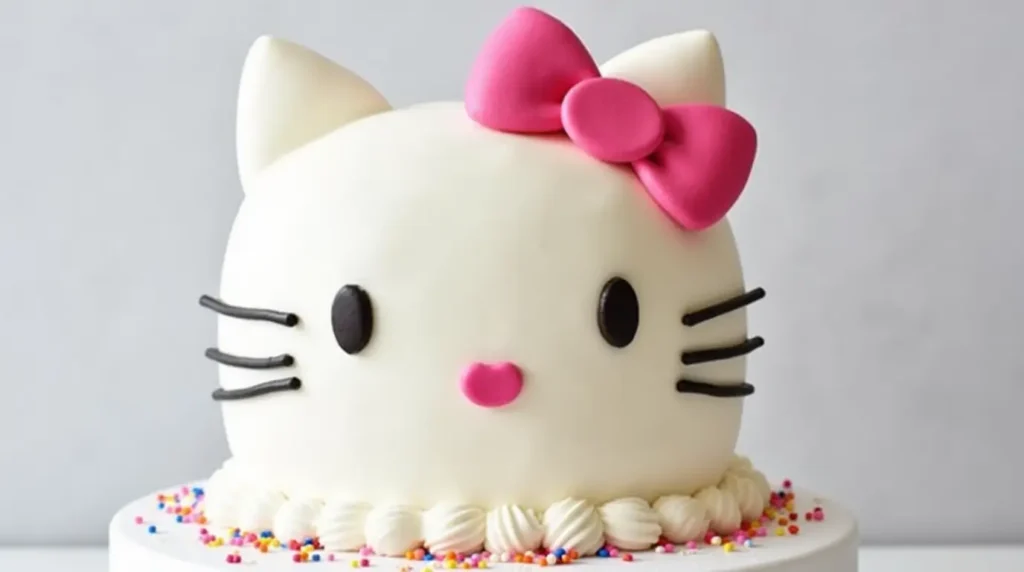
Who doesn’t love a fun, whimsical cake that’s as cute as it is delicious? Whether you’re celebrating a birthday, hosting a themed party, or just want to add a little extra sweetness to your day, this Hello Kitty Cake is the perfect treat! The adorable design, coupled with a delicious flavor, makes it a crowd-pleaser for kids and adults alike.
Table of Contents :
This cake isn’t just about looks—it’s also incredibly versatile. From choosing the cake flavor to decorating it with buttercream or fondant, there are endless possibilities to make it uniquely yours. And the best part? It’s surprisingly simple to make, even if you’re a beginner baker. So, if you’re ready to bring a bit of Hello Kitty magic to your kitchen, let’s get started! You’ll soon be creating a cake that’s bound to steal the show and leave everyone smiling.
Key Benefits of Making a Hello Kitty Cake
Making a Hello Kitty Cake isn’t just about creating an adorable dessert; it’s about bringing joy, creativity, and deliciousness to any occasion. Here’s why you’ll love this recipe:
- Perfect for Any Celebration: Whether it’s a child’s birthday, a baby shower, or a themed party, a Hello Kitty Cake will be the star of the show. Its cute design and sweet flavor make it the ideal centerpiece for any special occasion.
- Easy and Fun to Make: You don’t need to be a professional baker to make this cake! With simple ingredients, step-by-step instructions, and easy decorating tips, this recipe is perfect for beginners or experienced bakers alike.
- Customizable for All Ages: Hello Kitty is a beloved character, and her cake can be personalized for different tastes. From customizing the frosting colors to adding fun, unique decorations, this cake is as versatile as it is cute.
- Delicious and Decadent: Beyond the design, this cake is a treat for the taste buds. With soft, moist cake layers and rich, creamy frosting, every bite is a little bit of heaven.
- Great for Making Memories: Baking and decorating a Hello Kitty Cake is a fantastic family activity. Whether you’re in the kitchen with your kids or preparing for a big party, the process is just as rewarding as the finished product.
Making a Hello Kitty Cake is more than just following a recipe — it’s about creating something that brings smiles, excitement, and delicious flavor all in one.
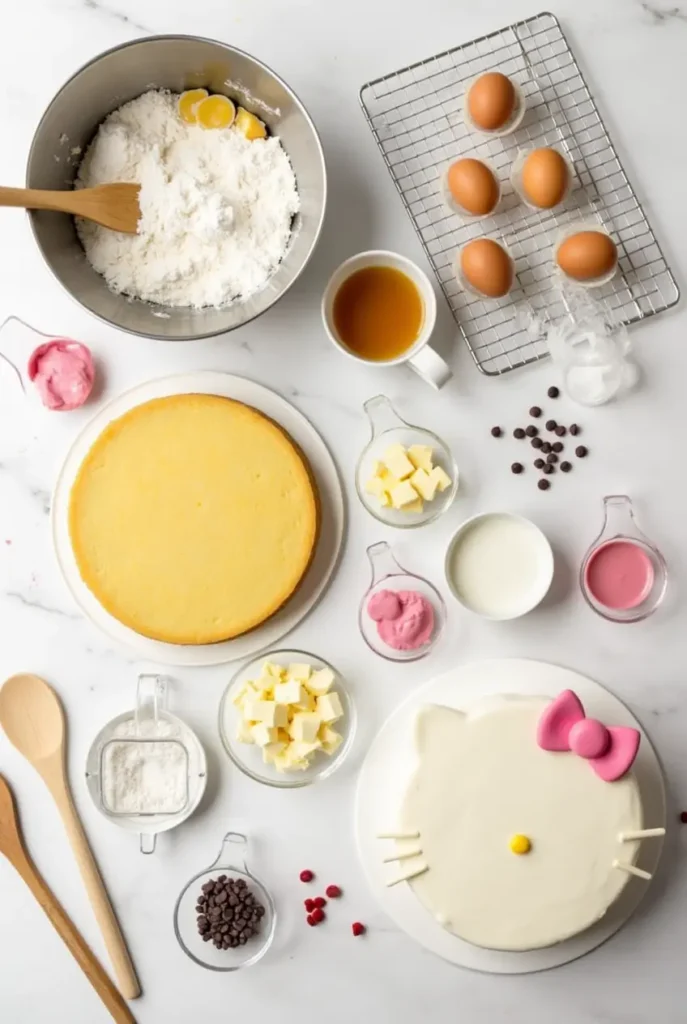
Ingredients for Hello Kitty Cake: What You’ll Need
Before you begin baking your Hello Kitty Cake, make sure you have all the ingredients ready to go. The key to a successful cake is having everything prepped and measured, so you can focus on the fun part — decorating! Here’s what you’ll need for both the cake and the frosting.
For the Cake:
- 2 ½ cups all-purpose flour – This is your base for the cake. Sift it to ensure it’s light and fluffy!
- 1 ½ cups granulated sugar – Sweetness is key, but you can adjust the sugar level to your preference.
- 2 teaspoons baking powder – This helps the cake rise and gives it that perfect, soft texture.
- 1 teaspoon salt – A small pinch of salt brings out the sweetness and balances the flavors.
- 1 cup unsalted butter (softened) – Make sure your butter is softened at room temperature for easy mixing.
- 4 large eggs – These will provide structure and moisture to your cake.
- 1 cup milk – Whole milk is best for a rich, moist cake, but any milk will work.
- 2 teaspoons vanilla extract – The vanilla adds a warm, comforting flavor to the cake.
For the Frosting:
- 1 cup unsalted butter (softened) – Just like in the cake, softened butter ensures smooth, creamy frosting.
- 4 cups powdered sugar – This creates the fluffy, spreadable texture of your frosting.
- 2 teaspoons vanilla extract – Adding a little more vanilla to the frosting intensifies the flavor.
- 1-2 tablespoons milk – For adjusting the consistency of the frosting. If it’s too thick, add a little milk to make it spreadable.
- Red food coloring – For creating the signature pink cheeks of Hello Kitty (optional but so cute!).
For the Decoration:
- White fondant – Used to cover the cake for a smooth, polished finish.
- Black fondant – To create Hello Kitty’s eyes, nose, and whiskers.
- Red fondant – For crafting a cute bow on Hello Kitty’s head.
- Pink buttercream – To add rosy cheeks to Hello Kitty’s face (this will match her adorable look).
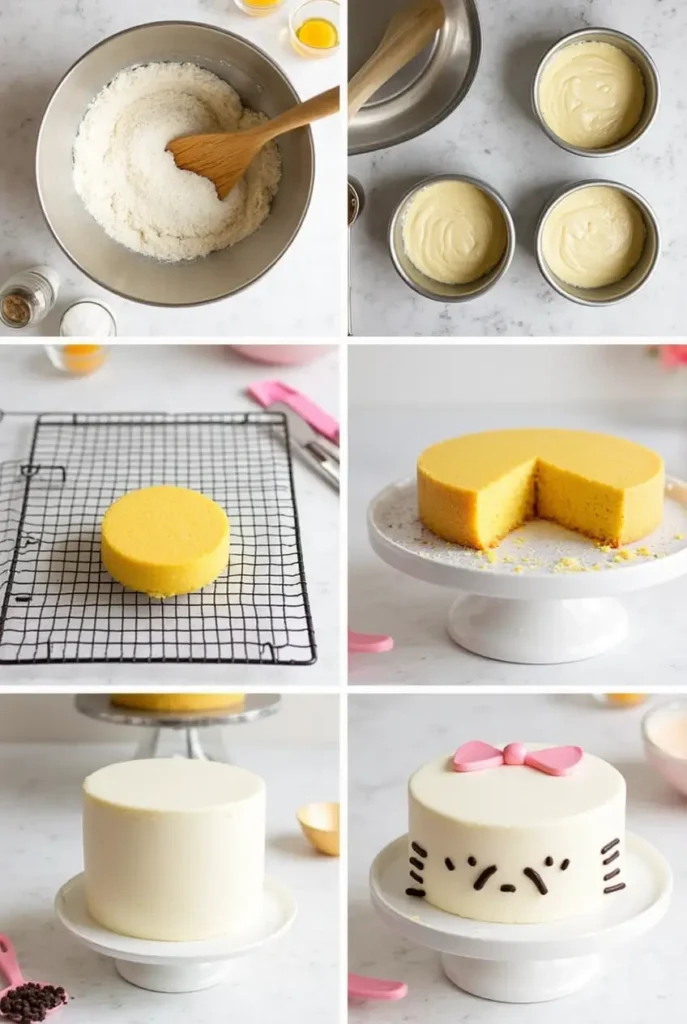
How to Make Hello Kitty Cake: Step-by-Step Instructions
Ready to start baking your Hello Kitty Cake? Follow these simple steps to create a delicious and adorable treat that’s sure to impress! Whether you’re a novice or a pro, I’ve got you covered with easy-to-follow instructions and a few handy tips to ensure your cake turns out perfectly.
Step 1: Preheat and Prep Your Pans
Before you do anything, preheat your oven to 350°F (175°C). This ensures the cake will bake evenly. While the oven heats up, grease and flour two 9-inch round cake pans. You can also line the bottoms with parchment paper for extra security — no one wants a stuck cake!
Step 2: Make the Cake Batter
Now for the fun part — making the batter! In a large mixing bowl, combine the dry ingredients:
- 2 ½ cups all-purpose flour
- 1 ½ cups granulated sugar
- 2 teaspoons baking powder
- 1 teaspoon salt
In a separate bowl, beat together the wet ingredients:
- 1 cup unsalted butter (softened)
- 4 large eggs
- 1 cup milk
- 2 teaspoons vanilla extract
Slowly add the dry ingredients to the wet ingredients, mixing as you go. Stir until smooth and well combined. Be careful not to over-mix — this will ensure your cake stays light and fluffy.
Step 3: Bake the Cake
Once your batter is ready, pour it evenly into the prepared pans, spreading it out with a spatula. Place the pans in the oven and bake for 25-30 minutes. Check doneness by inserting a toothpick into the center — if it comes out clean, your cakes are done.
Let the cakes cool in their pans for about 10 minutes before transferring them to a wire rack to cool completely. Patience is key here — try not to rush the cooling process, as frosting a warm cake can lead to messy results.
Step 4: Make the Frosting
While the cakes are cooling, it’s time to make the buttercream frosting. Beat 1 cup unsalted butter until it’s light and fluffy. Gradually add 4 cups powdered sugar, one cup at a time, mixing thoroughly. Add 2 teaspoons vanilla extract and a splash of milk if needed to reach your desired consistency.
Step 5: Frost the Cake
Once the cakes are completely cooled, place the first layer on your cake stand or plate. Spread a generous amount of frosting over the top, smoothing it out to the edges. Then, gently add the second layer of cake and press it down lightly so it sticks.
Step 6: Decorate the Cake
Now for the fun part: decorating! Cover the entire cake with white fondant for a smooth, polished look. Roll the fondant into a thin layer and gently drape it over the cake, smoothing out the wrinkles. If fondant feels intimidating, you can always skip it and use buttercream instead.
Next, roll out black fondant and cut out two eyes, a nose, and whiskers for Hello Kitty. Then, create a red fondant bow and place it on the side of the cake, just above her face.
For the cheeks, pipe small circles of pink buttercream on both sides of Hello Kitty’s face. This adds a sweet pop of color that’s quintessential to her adorable look.
[adinserter block=”4″]Step 7: Enjoy Your Creation!
Once your Hello Kitty Cake is fully decorated, take a moment to admire your work. Whether you’ve made it as a fun weekend project or a special treat for a celebration, this cake is sure to be a hit!
Serving Suggestion: Serve the cake with a side of fresh fruit or a scoop of ice cream to balance out the sweetness. Your guests will love the combination of flavors and the charming look of your Hello Kitty creation.
Pro Tips and Variations for Your Hello Kitty Cake
Making a Hello Kitty Cake is all about having fun while baking and decorating. To help you create a picture-perfect cake that’s both delicious and adorable, I’ve put together some expert tips and variations to elevate your baking game. Whether you’re a beginner or seasoned baker, these helpful pointers will make the process even easier and more enjoyable!
1. Achieve a Smooth Finish with the Right Tools
For a sleek, professional-looking cake, you’ll need the right tools. A fondant smoother is a game-changer when it comes to covering your cake with fondant. It helps remove air bubbles and smooth out any wrinkles, giving your cake a flawless finish.
2. Make the Cake Layers Ahead of Time
If you’re short on time, you can bake the cake layers a day in advance. Simply let them cool completely, wrap them tightly in plastic wrap, and store them in the fridge overnight. When you’re ready to assemble and frost, your cake layers will be perfectly fresh, and you won’t be rushing to bake last minute.
3. Flavor Variations for the Cake
While a classic vanilla cake is perfect for a Hello Kitty Cake, feel free to experiment with different flavors. You can switch things up by:
- Chocolate: Add ½ cup of cocoa powder to your dry ingredients for a rich, chocolaty version of the cake.
- Strawberry: Swap out some of the milk for fresh strawberry puree to create a fruity base. You can also use strawberry extract for a more intense flavor.
- Lemon: Add zest from one lemon for a refreshing citrus twist.
This is where you can get creative and make the cake even more personalized for the person you’re baking for!
4. Buttercream Variations
While classic buttercream works perfectly for this recipe, you can switch up the flavor to suit your taste. Here are some ideas to mix things up:
- Chocolate Buttercream: Add cocoa powder to your buttercream for a rich chocolate flavor.
- Berry Buttercream: Puree your favorite berries and fold them into the frosting for a fruity and vibrant twist.
- Coffee Buttercream: For coffee lovers, add a tablespoon of instant coffee or espresso powder to the buttercream for a subtle kick.
5. Go Beyond Fondant for the Face
If working with fondant feels intimidating, don’t worry! You can still create a cute Hello Kitty face using buttercream piping. Simply use a fine piping tip to create the eyes, nose, and whiskers. You can even use chocolate chips for the eyes and a mini marshmallow for the nose if you want to make the process even simpler.
6. Create a Two-Tier Hello Kitty Cake
If you’re looking to go all out, consider making a two-tiered Hello Kitty Cake. Simply bake an additional set of cake layers and stack them on top of your first cake. Decorate each tier with fondant and frosting to create a fun, layered design. This approach is great for larger parties or if you want to add an extra “wow” factor.
7. Keep the Cake Fresh
To keep your Hello Kitty Cake looking great for a few days, store it in an airtight container at room temperature. If the weather is particularly warm, you may want to refrigerate it to prevent the frosting from melting.
[adinserter block=”4″]Serving Suggestions for Your Hello Kitty Cake
Now that your Hello Kitty Cake is all decorated and looking picture-perfect, it’s time to think about how to serve it. Whether you’re preparing for a birthday party, baby shower, or just a fun family gathering, these serving ideas will make your Hello Kitty Cake even more enjoyable and memorable.
1. Pair with Fun, Themed Beverages
To make the occasion even more festive, serve your cake with fun beverages that complement the playful theme. Consider these options:
- Milkshakes: Vanilla, chocolate, or strawberry milkshakes are always a hit with cake! Add a fun twist by serving them in colorful glasses with cute straws.
- Fruit Punch: A sweet and fruity drink like pink lemonade or fruit punch can enhance the playful vibe of your Hello Kitty cake.
- Hot Chocolate: If you’re serving this cake for a cozy winter party, hot chocolate with marshmallows will pair perfectly with the sweetness of the cake.
2. Serve with Fresh Fruit for Balance
Balance out the sweetness of the cake with some fresh fruit on the side. Fruits like strawberries, blueberries, and raspberries work beautifully with the cake and add a pop of color to the plate. For an extra touch, you could even decorate the fruit in a way that fits the theme — maybe creating little “faces” with the fruit pieces.
3. Add Ice Cream for Extra Fun
What’s a cake without a little ice cream on the side? Serve your Hello Kitty Cake with a scoop of vanilla, chocolate, or strawberry ice cream for the perfect dessert combo. For an added flair, you can top the ice cream with sprinkles, chocolate syrup, or even a cherry on top.
4. Create a Themed Dessert Table
If you’re hosting a party, set up a Hello Kitty-themed dessert table to make the occasion even more special. You can place cupcakes, cookies, and small desserts alongside your Hello Kitty Cake. Use pink and white decorations, such as napkins, plates, and tablecloths, to tie everything together.
5. Cut into Fun Shapes
If you’re serving the cake to children or just want to add some fun, try cutting the cake into different shapes using cookie cutters. You can create smaller Hello Kitty face shapes or cut the cake into simple squares or hearts. This adds a playful, individualized touch that is sure to delight everyone.
[adinserter block=”4″]6. Decorate Plates for an Extra Special Touch
For a polished presentation, take a few extra minutes to decorate the plates. You can pipe some extra buttercream around the edges or drizzle a little raspberry coulis or chocolate sauce for an elegant look. It’s all about adding those little details to make your Hello Kitty Cake stand out even more!
7. Serve with a Hot Cup of Tea or Coffee
If your gathering is more on the elegant side, pairing your cake with a warm cup of tea or coffee can create a delightful balance between sweetness and warmth. Try serving it with a chai latte, a light herbal tea, or even a nice espresso to give your guests a sophisticated touch.
FAQs: Common Questions About Hello Kitty Cake
1. Can I make this Hello Kitty Cake in advance?
Yes, you can absolutely make this cake in advance! The cake layers themselves can be baked a day ahead, and once cooled, you can wrap them tightly in plastic wrap and store them at room temperature or in the fridge. You can also prepare the frosting and fondant decorations in advance. Just make sure to assemble the cake on the day you plan to serve it to ensure it’s fresh and looks its best!
2. Can I use a different flavor for the cake?
Of course! While a classic vanilla cake works wonderfully, you can customize the flavor to your liking. Some popular options include:
- Chocolate Cake: Add cocoa powder to the dry ingredients for a rich, chocolatey flavor.
- Strawberry Cake: Use fresh strawberry puree or strawberry extract for a fruity twist.
- Lemon Cake: Add lemon zest and a splash of lemon juice to give your cake a refreshing citrus flavor.
Feel free to get creative with your flavors to match the theme of your event!
3. How do I store the Hello Kitty Cake?
To keep your cake fresh, store it in an airtight container at room temperature for up to 2-3 days. If the weather is warm or the cake contains fondant, it’s best to refrigerate it to avoid melting. However, if you store it in the fridge, allow it to come to room temperature before serving, as fondant can get a bit hard when chilled.
[adinserter block=”4″]4. What if I don’t want to use fondant?
No worries! If you’re not comfortable using fondant, you can still achieve a gorgeous cake using buttercream. You can pipe Hello Kitty’s features directly onto the cake with a fine piping tip, or use candy pieces like chocolate chips and mini marshmallows to create the face. For the bow, you can use a swirl of pink buttercream or even red candy.
5. Can I make the Hello Kitty Cake without a cake stand?
Absolutely! If you don’t have a cake stand, simply use a large, flat plate or any other sturdy surface for assembling your cake. A cake stand is a great way to elevate the look, but it’s not essential. Just make sure whatever surface you use is big enough to hold the weight of the cake comfortably.
Hello Kitty Cake
Struggling to make a perfect Hello Kitty Cake? Discover 7 simple tips for flawless results and impress your guests with a sweet, adorable creation. Try now!
- 2 ½ cups all-purpose flour
- 2 ½ tsp baking powder
- ½ tsp salt
- 1 cup unsalted butter (softened)
- 1 ½ cups granulated sugar
- 3 large eggs
- 1 tbsp vanilla extract
- 1 cup whole milk
- 1 batch of buttercream frosting
- Pink food coloring
- Fondant (white and pink for decoration)
- Chocolate chips (for eyes)
- Black food coloring (for whiskers)
- Red food coloring (for bow)
- Preheat your oven to 350°F (175°C). Grease and flour two 8-inch round cake pans.
- Mix dry ingredients: In a medium bowl, whisk together the flour, baking powder, and salt. Set aside.
- Cream the butter and sugar: In a large mixing bowl, beat the butter and sugar together until light and fluffy (about 3-4 minutes).
- Add eggs and vanilla: Beat in the eggs, one at a time, followed by the vanilla extract.
- Combine the wet and dry ingredients: Gradually add the dry ingredients into the wet ingredients, alternating with the milk, until the batter is smooth.
- Bake the cake: Divide the batter evenly between the two prepared pans. Bake for 30-35 minutes or until a toothpick inserted into the center comes out clean. Allow the cakes to cool completely on a wire rack.
- Prepare the frosting: While the cakes are cooling, make the buttercream frosting. Set aside a portion of the frosting to color pink for the bow and use the rest for the base.
- Assemble the cake: Once the cakes have cooled, place one layer on a cake stand. Spread a layer of frosting on top. Place the second cake layer on top and frost the entire cake with the remaining frosting.
- Decorate with fondant: Roll out the white fondant and cover the entire cake. Use the pink fondant to make Hello Kitty’s bow. Roll out small pieces of black fondant to make the whiskers and place chocolate chips for the eyes.
- Serve and Enjoy: Slice, serve, and enjoy your adorable Hello Kitty Cake!
Conclusion: Celebrate with Your Perfect Hello Kitty Cake!
Congratulations, you’ve made it to the end of this Hello Kitty Cake journey! From baking the layers to decorating the cute, iconic face, you’ve created something truly special. Whether you’re celebrating a birthday, hosting a party, or simply indulging in a fun baking project, this cake is sure to bring joy to everyone who sees it — and, of course, enjoys a slice.
Remember, practice makes perfect, so don’t worry if your first Hello Kitty Cake isn’t flawless. The more you bake and experiment with decorating techniques, the more confident you’ll become. Most importantly, have fun! This Hello Kitty Cake is all about spreading joy and creating sweet memories, one slice at a time.
Ready to Bake?
Now that you have all the tips, tricks, and inspiration, it’s time to gather your ingredients and get started. Whether you’re baking solo or with loved ones, your Hello Kitty Cake is going to be a hit. So, let your creativity run wild, and enjoy the sweet success of this adorable, delicious cake. Happy baking!
[adinserter block=”4″]