Table of Contents
The holiday season is here, and there’s no better way to show someone you care than with a thoughtful, homemade gift. Imagine their delight when they receive a beautifully styled cookie tray, filled with delicious homemade cookies, wrapped up with love. A cookie tray is not only a treat for the taste buds but also a gift that spreads joy, warmth, and a little bit of holiday magic. Whether you’re celebrating a special occasion, surprising a friend, or just spreading a bit of festive cheer, a cookie tray is the perfect way to bring a smile to anyone’s face.
Now, if you’re thinking that putting together a cookie tray might be too time-consuming or complicated, don’t worry! It’s much simpler than you might think. In just five easy steps, you can create a stunning and mouthwatering cookie tray that looks as good as it tastes. Plus, there’s no shortage of cookie recipes to fill your tray, from classic chocolate chip cookies to fun holiday-themed shapes.
If you love giving gifts that are both personal and scrumptious, you might also enjoy our post on “How to Bake the Best Homemade Cookies“. The tips there will help you perfect your cookies, ensuring that your tray is full of baked goodness everyone will rave about. Let’s get started on styling that beautiful cookie tray that’ll make the perfect gift this season!
What is a Cookie Tray?
A cookie tray—well, it’s exactly what it sounds like! A large tray (or platter) filled with an assortment of delicious, bite-sized cookies, arranged beautifully for gifting or sharing. Why is it called a cookie tray? Maybe it’s because all the cookies are gathered together on a tray, so simple, right? But here’s the fun part: Cookie trays aren’t just about the cookies! They’re a delightful combination of color, textures, and flavors, with a little creativity thrown in. And let’s not forget that classic saying, “the way to a man’s heart is through his stomach”—and what’s a better way to win someone’s heart than with a tray full of cookies?
Trust me, when you hand someone a beautifully styled cookie tray, they’ll be impressed by your thoughtfulness—and your baking skills. Ready to give it a try? Let’s dive into how to style the perfect cookie tray.
Why You’ll Love Styling a Cookie Tray for Gifts
A cookie tray for gifts is not only a beautiful gesture, but it’s also an incredibly practical one. Here are three reasons you’ll fall in love with this idea:
- Versatility: You can mix and match different types of cookies to suit anyone’s taste. Chocolate chip, snickerdoodle, gingerbread, or even gluten-free options—there’s something for everyone on a cookie tray. Plus, you can add extra little touches like mini cupcakes, small candies, or even chocolate-covered pretzels to make it extra special.
- Cost-effective: Baking cookies at home is way more affordable than buying pre-made gift baskets or treats from a store. You can create a lavish-looking gift without spending a fortune. And the best part? You’ll have plenty of cookies left over to enjoy yourself!
- Creativity: Styling a cookie tray gives you the chance to show off your creativity! From selecting fun, seasonal cookies to choosing the perfect decorative elements (think ribbon, edible glitter, or pretty boxes), you can turn an ordinary cookie tray into a one-of-a-kind gift that’s as unique as the recipient.
If you love giving gifts that are both delicious and thoughtful, this is one gift idea you can’t miss. So, let’s get styling!
How to Style a Cookie Tray for Gifts in 5 Steps
Quick Overview
Styling a cookie tray for a gift is a fun, simple process that requires a bit of creativity and planning. It’s an easy way to show someone you care with a delicious and visually appealing gift. The best part? You can customize it based on the recipient’s tastes and the season—making it a personal gift that everyone will love.
Preparation Time: 30-45 minutes (for styling and assembly)
Difficulty Level: Easy to Moderate
Key Ingredients for Styling Your Cookie Tray
Before we get into the styling steps, let’s talk about the “ingredients” you’ll need for your cookie tray. While we’re talking about a cookie tray, here’s a list of the key items that will make your tray beautiful and functional:
- Cookies (Homemade or Store-bought)
- Aim for at least 3-4 types of cookies to make your tray visually interesting.
- Consider including classic cookies like chocolate chip, oatmeal raisin, sugar cookies, or festive gingerbread.
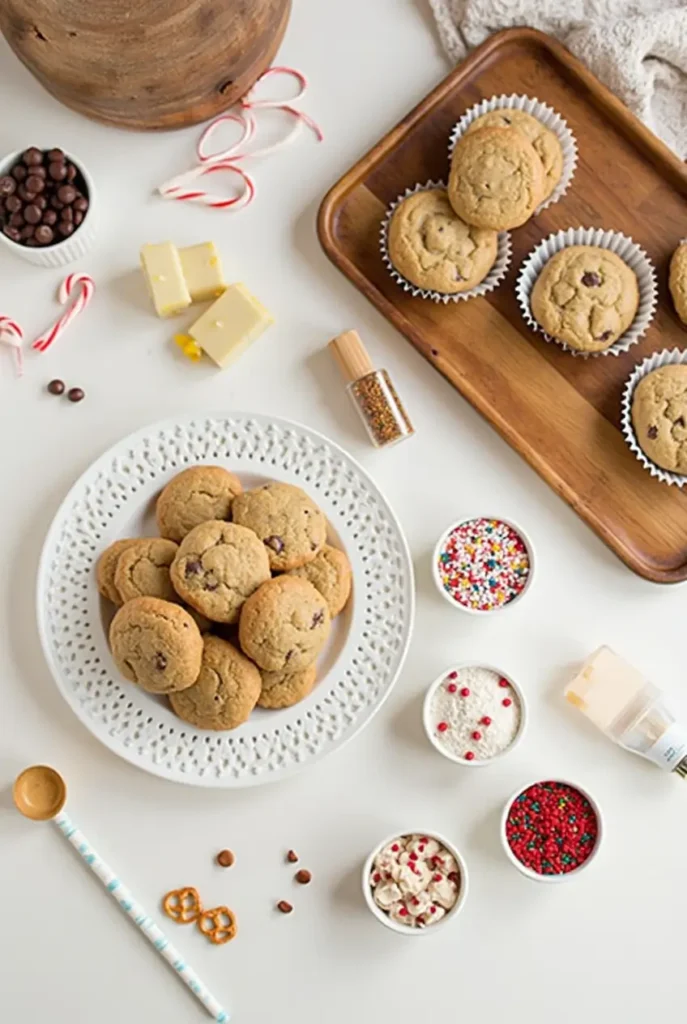
- Decorative Elements
- Ribbons, lace, or fabric napkins for lining the tray.
- Edible glitter, sprinkles, or chocolate drizzle for extra flair.
- Serving Tray or Platter
- A large tray, decorative platter, or even a rustic wooden board.
- Try to choose a tray that complements the theme of your cookies (holiday-themed, rustic, or modern).
- Baking Cups or Mini Paper Liners
- These help to separate the cookies and add a cute touch.
- Additional Snacks or Treats (optional)
- If desired, include extras like small candies, chocolate-covered pretzels, or fruit.
Step-by-Step Instructions: How to Style Your Cookie Tray
Step 1: Choose Your Cookies Wisely
The first step to styling your cookie tray is selecting a variety of cookies that will delight the recipient. The goal is to offer a range of textures and flavors, which will make the tray more visually appealing and exciting to the taste buds.
- Mix textures: Include chewy cookies like snickerdoodles, crispy ones like biscotti, and soft ones like sugar cookies.
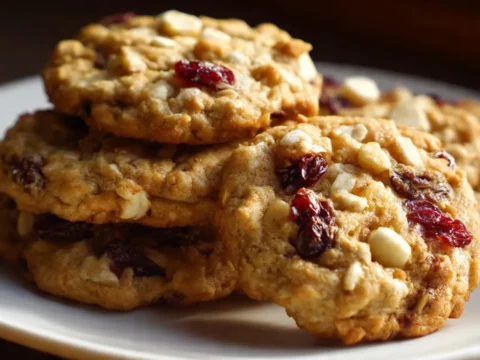
- Add variety in flavors: Combine classic chocolate chip with holiday favorites like gingerbread or peppermint bark cookies.
- Consider dietary preferences: It’s always a nice touch to include a gluten-free or vegan option for anyone with specific dietary needs.
Step 2: Choose a Tray and Line It
Once you have your cookies ready, it’s time to think about presentation. The tray or platter you choose sets the stage for how the cookies will look.
- Pick a large tray: Aim for a tray that’s big enough to fit multiple cookies and leaves some space for styling.
- Line the tray: Line the tray with parchment paper, decorative fabric, or even lace to add an elegant touch. If you’re going for a rustic look, a wooden tray with a simple cloth underneath works beautifully.
Step 3: Arrange the Cookies
Now, let’s get creative! The way you arrange the cookies on the tray will make a big difference in how the gift looks.
- Start with a base: Arrange the cookies in rows or small clusters in the center of the tray. Mix up sizes and shapes for added interest.
- Add depth and layers: If your cookies are all similar sizes, consider placing a few on top of others, using small paper baking cups to elevate them.
- Use color and contrast: Play with color! For example, red and green sugar cookies or white chocolate-dipped cookies will pop beautifully against a dark-colored tray.
Step 4: Add Decorative Touches
Now it’s time for the fun part—decorating! You can add little touches that make the tray feel extra special.
- Edible glitter or sprinkles: Sprinkle edible glitter over the cookies for some sparkle, or dust with powdered sugar for a wintery touch.
- Ribbons or bows: Tie a beautiful ribbon around the tray or place a small decorative bow at the top.
- Candies or other snacks: Add small treats like peppermint bark or candy canes alongside the cookies. These extra bits not only taste great but also enhance the overall presentation.
Step 5: Wrap and Present
Lastly, wrap up the tray to make it easy for gifting and extra festive.
- Wrap the tray: Use clear cellophane or gift wrap to wrap the tray. Secure it with a ribbon for a beautiful finish.
- Personalize: Attach a handwritten note or a cute tag to the tray with a festive message or a note about the cookies.
What to Serve with Your Cookie Tray
If you’re gifting a cookie tray as part of a larger holiday spread, consider serving it alongside a hot beverage like spiced cider, hot chocolate, or even coffee. These drinks complement the cookies beautifully, creating a cozy experience for the recipient.
Top Tips for Perfecting Your Cookie Tray
- Be mindful of presentation: Even simple cookies look amazing when presented thoughtfully. Take the time to arrange them in a way that looks appealing.
- Don’t forget about spacing: Give your cookies room to shine. If you overcrowd the tray, they won’t stand out as much.
- Use contrasting colors: Play with vibrant colors, especially during the holiday season, to make the cookies pop.
Storing and Reheating Tips
If you happen to have leftovers (though that’s unlikely!), here’s how to store them:
- Storage: Store cookies in an airtight container at room temperature for up to one week. For longer storage, freeze them in a single layer in an airtight container for up to 3 months.
- Reheating: To bring cookies back to life, heat them in the microwave for a few seconds or in the oven at 300°F for 5-7 minutes.
By following these simple steps, you’ll create a stunning and mouthwatering cookie tray that’s perfect for gifting this holiday season or any special occasion. Happy styling—and even happier gifting!