
Okay, so I’ve been making these pancakes for like six months now, and I’m pretty sure they’ve ruined regular pancakes for me forever. In the best way possible.
Look, I’m gonna be honest with you—I stumbled onto this recipe by complete accident. I was out of regular pancake mix (again, because I have zero grocery planning skills), and all I had was this box of Kodiak Cakes that my sister left at my place. Plus some Greek yogurt that was about to expire.
You know that moment when you’re just throwing stuff together hoping it doesn’t turn into a disaster? Well, this was the opposite of disaster. This was magic.
Table of Contents :
Why These Pancakes Changed My Weekend Mornings
Here’s the thing about regular pancakes—they taste amazing for about ten minutes, then you crash harder than my motivation on Monday mornings. These? These actually keep you full. Like, genuinely satisfied until lunch, not just “I guess I should eat something” hungry at 10 AM.
My neighbor Tom (the one who runs marathons and makes me feel guilty about my Netflix habits) tried these last weekend and literally asked if I put protein powder in them. Nope! Just Kodiak Cakes doing their thing with some Greek yogurt magic.
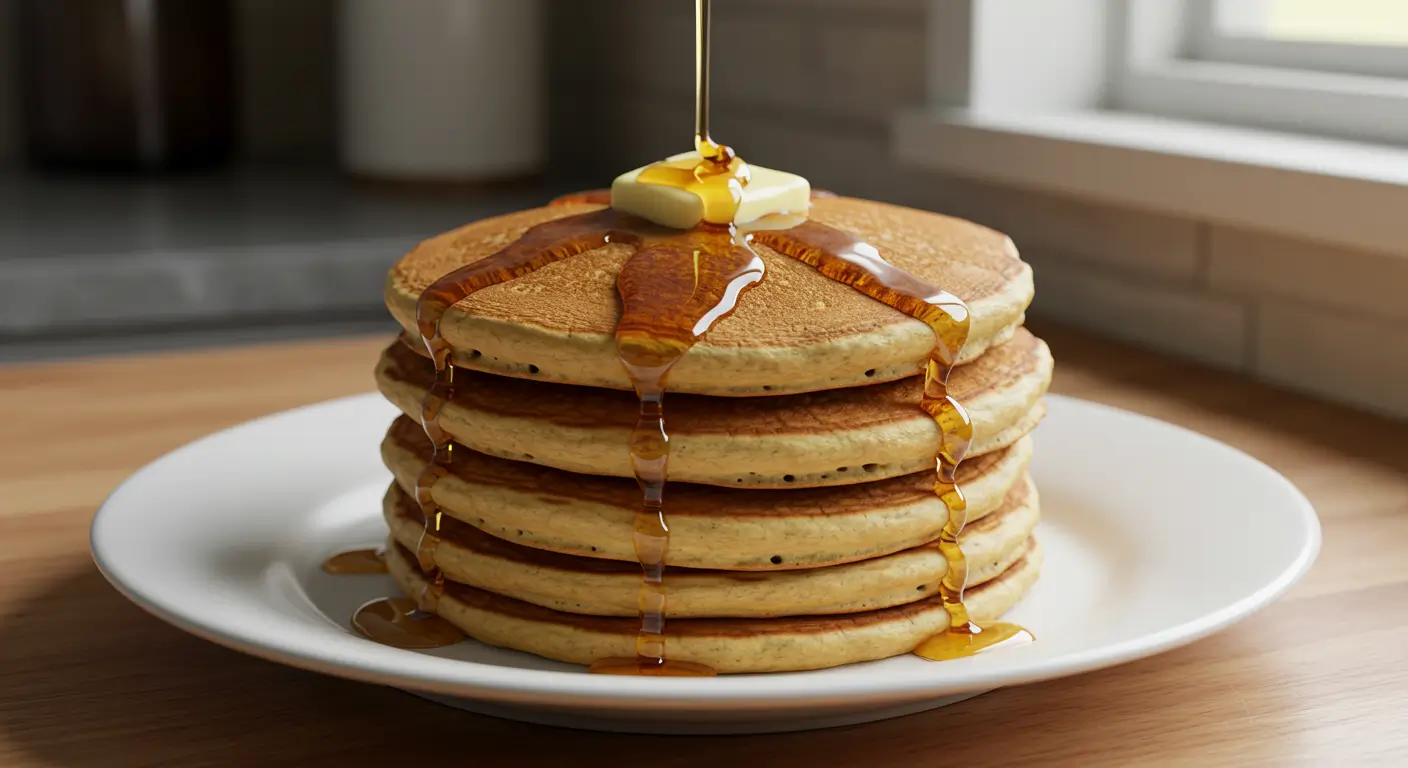
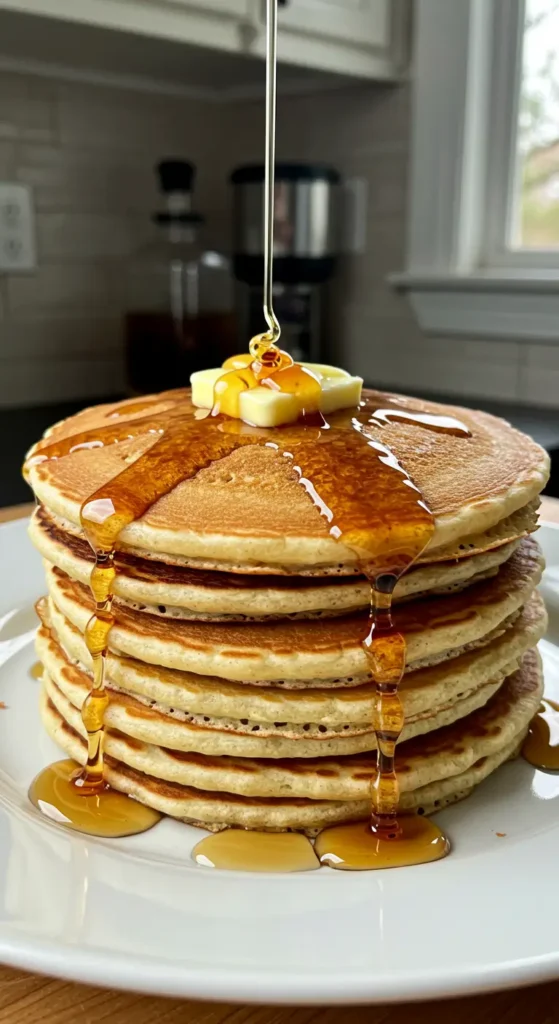
And can we talk about how fluffy these get? I don’t know what happens when Greek yogurt meets Kodiak mix, but it’s like they have some secret pancake chemistry going on. The first time I made them, I actually took a picture because I couldn’t believe how thick and fluffy they were. Yes, I’m that person who photographs food now.
The Epic Pancake Fails That Led Me Here
Before we get to the good stuff, let me tell you about my pancake disaster history. Because everyone needs to know they’re not alone in their kitchen failures.
Attempt #1: Regular Kodiak Cakes with just water. Turned out like hockey pucks. My dog wouldn’t even eat them, and she literally ate a sock last month.
Attempt #2: Added milk instead of water. Better, but still kinda dense and sad-looking. Like pancakes that had given up on life.
Attempt #3: Tried adding an egg. Now we’re getting somewhere, but something was still missing.
Then came the Greek yogurt experiment. I was cleaning out my fridge (shocking, I know) and found this container of vanilla Greek yogurt that was supposed to expire that day. Instead of throwing it out like a normal person, I thought, “What if…?”
Best kitchen mistake of my life.
What Makes These Pancakes So Ridiculously Good
The secret isn’t really a secret—it’s just that Greek yogurt does about five amazing things at once:
First, it makes them incredibly fluffy. I think… no, I know this works better than any other liquid I’ve tried. The proteins in the yogurt react with the Kodiak mix and create these air pockets that make the pancakes super light.
Second, extra protein without trying. You’re getting protein from the Kodiak mix AND the Greek yogurt. I calculated it once (during a very boring conference call), and each pancake has about 8-10 grams of protein. That’s like… a lot. Good lot.
Third, they taste slightly tangy in this amazing way that makes you want another bite. It’s like buttermilk pancakes but better.
Speaking of which—my 8-year-old nephew visits every other weekend, and this kid is THE pickiest eater on the planet. He won’t eat anything that’s “healthy” or “good for you.” But these? He calls them “the special pancakes” and asks for them every time. I don’t have the heart to tell him they’re basically a protein bomb disguised as weekend treats.
Ingredients (AKA The Dream Team)
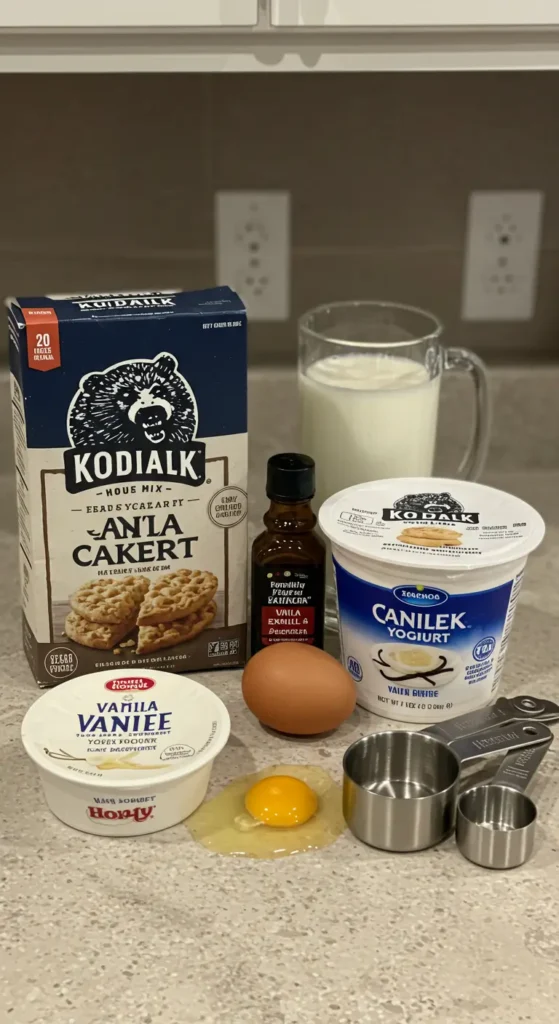
- 1 cup Kodiak Cakes mix (I use the classic, but any flavor works)
- 3/4 cup vanilla Greek yogurt (don’t use plain, trust me on this one)
- 1/2 cup milk (whatever kind you have—I’ve used everything from almond milk to whole milk)
- 1 large egg
- 1 tablespoon honey or maple syrup (optional, but I always add it)
- 1/2 teaspoon vanilla extract (because vanilla makes everything better)
- Pinch of salt (even if your mix already has salt—just do it)
Random ingredient notes from my trial-and-error phase:
The Greek yogurt brand matters more than I thought it would. Fage works amazing, Chobani is great too. Avoid the super cheap stuff—it’s too watery and your pancakes will be sad.
I tried using plain Greek yogurt once thinking I’d save calories. Wrong move. The vanilla is essential for flavor balance. Don’t be a hero like me.
Honey vs maple syrup in the batter: honey makes them slightly more tender, maple syrup gives a subtle flavor that’s really nice. Both work, pick whatever you have.
Oh, and about the milk—I’ve used literally everything. Oat milk makes them extra creamy, almond milk works fine, regular milk is perfect. The only thing that didn’t work was that weird protein milk my gym-obsessed friend brought over. Just… no.
The Actual Cooking Part (Where Magic Happens)
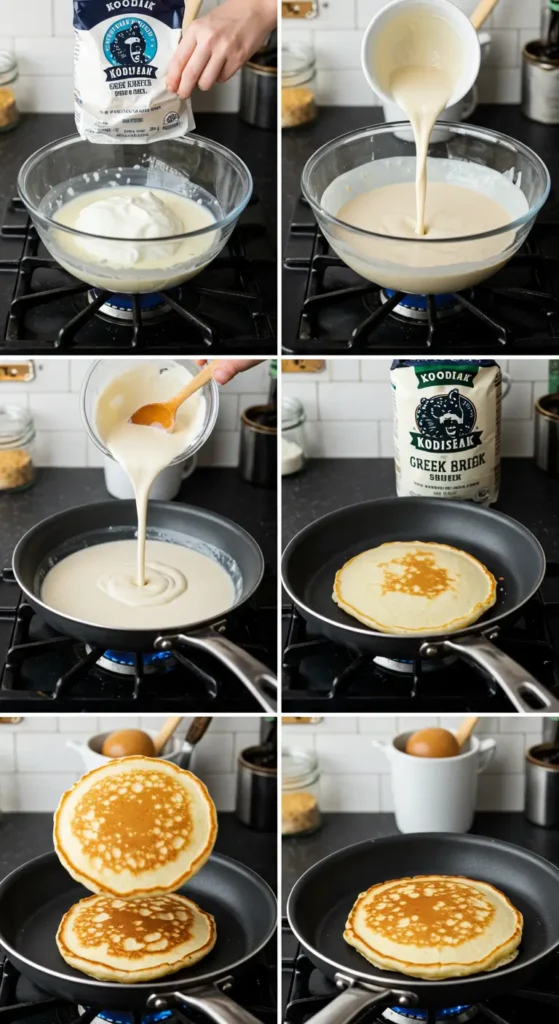
- Mix the wet stuff first. This is important! Greek yogurt, egg, milk, honey, vanilla all go in a bowl. Whisk it until it’s smooth and there aren’t any yogurt chunks. This takes like 30 seconds with a regular whisk, don’t overthink it.
- Add the Kodiak mix and salt. Here’s where I used to mess up—I would overmix because I thought lumps were bad. Wrong! You want to fold it together until it JUST comes together. Some lumps are totally fine and actually make better pancakes.
- Let it rest for 2-3 minutes. I know, I know, who has time to let pancake batter rest on a weekend morning? But seriously, this step makes them so much fluffier. The mix needs time to hydrate or something science-y like that.
- Heat your pan to medium. Not medium-high, not medium-low. Just medium. I learned this the hard way after burning the outside while leaving the inside raw more times than I care to admit.
- Use butter or cooking spray. I’m a butter person, but cooking spray works fine if you’re watching calories. Just don’t skip the fat entirely—they’ll stick and your morning will be ruined.
- Pour about 1/4 cup per pancake. They spread quite a bit, so give them room. I can usually fit 3 pancakes in my regular-sized pan.
- Wait for bubbles. This is the hardest part because they smell so good while they’re cooking. But wait until you see bubbles forming on the surface and the edges look set. Usually 2-3 minutes.
- Flip once. Only once! I used to be a serial pancake flipper, thinking more flips = better pancakes. Nope. One flip, then another 1-2 minutes and they’re done.
The first pancake is always a sacrifice to the pancake gods. Don’t judge your entire batch on pancake #1—it’s never perfect while your pan is still figuring out the right temperature.
Pro Tips From Someone Who Makes These Way Too Often
Temperature check: If you flick a drop of water on the pan and it sizzles and evaporates in about 2 seconds, you’re good to go.
Size matters: Smaller pancakes are easier to flip and cook more evenly. I learned this after attempting dinner-plate-sized pancakes and ending up with raw centers and burnt edges. Not cute.
The batter thickens: Don’t panic if your batter gets thicker as it sits. That’s normal! If it gets too thick, add a splash more milk.
Make extra: These reheat really well in the toaster. I usually make a double batch on Sunday and have easy breakfast for the week. Future me always thanks weekend me.
Freezer friendly: Seriously, make a huge batch and freeze them with parchment paper between each pancake. They toast up perfectly from frozen in about 2 minutes.
Topping Combinations That Actually Work
Look, you could just do syrup and butter like a normal person. But if you want to get fancy (or need more protein), here are combinations I actually eat, not just ones that sound good on paper:
The Classic Plus: Butter, real maple syrup, and a handful of fresh berries. Simple, perfect, makes you feel like you’re at a nice brunch place.
Peanut Butter Addict: Warm peanut butter (microwave it for like 15 seconds), sliced banana, tiny drizzle of honey. This is basically a protein-packed dessert for breakfast.
Greek Yogurt Double Down: More vanilla Greek yogurt on top with berries and a drizzle of honey. Sounds excessive but it’s actually really light and refreshing.
The Chocolate Fix: Sugar-free chocolate chips mixed into the batter, topped with whipped cream and strawberries. For when you want dessert but it’s 9 AM and you have standards.
What Went Wrong (So You Don’t Have To)
Dense pancakes: You overmixed the batter. I did this approximately 847 times before learning my lesson. Mix until JUST combined, ignore the lumps.
Burnt outside, raw inside: Your heat is too high. Turn it down and be patient. Good pancakes can’t be rushed.
Flat pancakes: Your baking powder might be expired (Kodiak mix has baking powder in it), or you let the batter sit too long before cooking. Use it within 10-15 minutes of mixing.
Sticking to the pan: Not enough fat, or your pan isn’t hot enough yet. Wait for the right temperature and don’t skimp on the butter/spray.
Actually, you know what? Even my worst attempts at these pancakes were still better than most restaurant pancakes. So don’t stress too much.
The Real Talk About These Pancakes
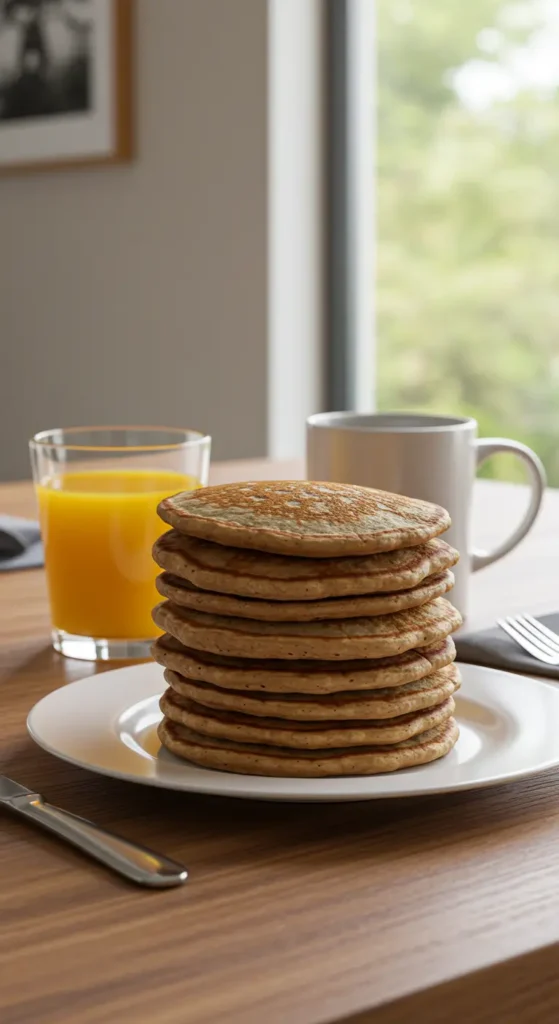
Are they going to change your life? Probably not. But they might change your weekends, and honestly, that’s enough for me.
They’re not fancy. They don’t require special ingredients or equipment. You don’t need to be a good cook to make them work. But they’re filling, they taste great, and they make Saturday mornings feel a little more special.
Plus, there’s something really satisfying about eating pancakes that actually fuel your day instead of making you want to take a nap by 11 AM.
My mom always said the best recipes are the ones you actually make regularly, not the ones that look impressive but require a grocery shopping expedition and three hours of prep time. These definitely fall into the “actually make regularly” category.
Final Thoughts (Because I Can’t Shut Up About These)
I’ve probably made these pancakes 50+ times in the last six months. That’s not normal, but here we are. They’re just that good and that easy.
The best part? They taste indulgent but they’re actually pretty nutritious. You’re getting protein, some probiotics from the yogurt, and fiber from the Kodiak mix. It’s like sneaking vegetables into mac and cheese, except you’re sneaking nutrition into pancakes.
If you try these and they don’t turn out amazing, message me or leave a comment because I probably forgot to mention something important. I’ve made them so many times that some steps feel automatic now.
Also, if you have any tricks for making them even better, please share! I’m always looking for ways to perfect my weekend pancake game.
Happy pancaking! (And may your Saturday mornings be forever fluffy and protein-packed)
Kodiak Cakes + Greek Yogurt Protein Pancakes (Extra Fluffy & Filling)
These protein-packed Kodiak Cakes pancakes with Greek yogurt are incredibly fluffy, filling, and perfect for weekend mornings. The Greek yogurt adds extra protein and creates the fluffiest texture you've ever had in a pancake. Easy to make with simple ingredients and keeps you satisfied for hours.
Ingredients
- 1 cup Kodiak Cakes mix
- 3/4 cup vanilla Greek yogurt
- 1/2 cup milk
- 1 large egg
- 1 tablespoon honey or maple syrup
- 1/2 teaspoon vanilla extract
- Pinch of salt
Instructions
- Step 1Mix Greek yogurt, egg, milk, honey, and vanilla extract in a large bowl until smooth.
- Step 2Add Kodiak Cakes mix and salt, fold together until just combined (lumps are okay).
- Step 3Let batter rest for 2-3 minutes to hydrate.
- Step 4Heat pan to medium temperature and add butter or cooking spray.
- Step 5Pour 1/4 cup batter per pancake, leaving space between each.
- Step 6Cook for 2-3 minutes until bubbles form on surface and edges look set.
- Step 7Flip once and cook another 1-2 minutes until golden brown.
- Step 8Serve immediately with desired toppings.