So I’ve been perfecting this moist banana bread recipe for about three years now, and I’m finally confident enough to share it because honestly? Most banana bread recipes online are just okay. They’re not terrible, but they’re not the kind that makes you want to eat the entire loaf in one sitting either. This one actually stays moist for days, which is saying something because banana bread has this annoying tendency to turn into cardboard after like 24 hours.
Table of Contents :
Why This Banana Bread Actually Stays Moist
Look, I’m gonna be honest—I used to be one of those people who thought banana bread was just an okay way to use up brown bananas. My mom made it sometimes when I was a kid, but it was always kind of dry and I’d have to dunk it in milk to make it edible. Then last year I was stuck at home with a bunch of overripe bananas that were basically turning to mush on my counter, and I thought, there has to be a way to make this stuff actually good.
The first few attempts were disasters. I followed recipes exactly and kept getting dense, dry loaves that nobody wanted to finish. I tried adding more butter, more eggs, different flours. Nothing worked until I figured out the secret is actually in the fat combination and not overmixing the batter. Also, Greek yogurt. I know it sounds weird, but trust me on this one.
Now I make this probably twice a month because people actually request it. My neighbor even asked me to make an extra loaf for her book club, which is basically the highest compliment you can get in suburban mom circles.

Ingredients moist banana bread recipe
The ingredient list isn’t complicated, but each thing here has a specific job in keeping this bread moist and flavorful. I’ve tested substitutions for most of these, so I’ll tell you what works and what definitely doesn’t. The key is really in the fat ratios and the acid balance—sounds fancy, but it’s actually pretty simple once you understand why each ingredient matters.
Shopping tip: get your bananas about a week ahead of when you want to bake. The more spotted and soft they are, the better your bread will be. I actually buy extra bananas just for baking and let them get gross-looking on purpose.
Overripe Bananas (3-4 large ones)
These need to be seriously overripe—like, you wouldn’t want to eat them as-is anymore. The peels should have lots of brown spots and the fruit should be really soft when you squeeze it. Under-ripe bananas don’t mash well and won’t give you enough natural sweetness. I usually mash mine with a fork until they’re mostly smooth with just a few small lumps.
All-Purpose Flour (about 1¾ cups)
Regular all-purpose works perfectly here. I’ve tried whole wheat flour and it makes the bread too dense and heavy. You can substitute up to ¼ cup with almond flour if you want a slightly nuttier flavor, but don’t go overboard. The key is not overmixing once you add this—stir just until you can’t see dry flour anymore.
Melted Butter (½ cup)
Real butter, not margarine. I melt mine in the microwave and let it cool slightly before adding it to the wet ingredients. The butter adds richness and helps create that tender crumb we’re going for. You can substitute with vegetable oil if you need to, but you’ll lose some of the flavor depth.
Plain Greek Yogurt (¼ cup)
This is my secret weapon for moisture. The acidity in Greek yogurt tenderizes the gluten and adds incredible moistness without making the bread heavy. Use plain, not vanilla—the flavor will be too sweet. If you don’t have Greek yogurt, sour cream works almost as well, or you can use regular plain yogurt but drain it for 10 minutes first.
Large Eggs (2 whole eggs)
Room temperature works best, but if you forget to take them out ahead of time like I always do, just put them in a bowl of warm water for 5 minutes. The eggs provide structure and richness. I’ve tried this with just one egg and it comes out too crumbly, and three eggs makes it too dense.
Brown Sugar (¾ cup, packed)
Brown sugar keeps things moister than white sugar because of the molasses content. I use light brown sugar, but dark brown would work too if you want a slightly deeper flavor. Don’t skip the “packed” part—really press it down when you measure. You can reduce this to ½ cup if your bananas are super sweet, but I like the caramel notes the brown sugar adds.
Baking Soda (1 teaspoon)
This is what gives the bread its rise and tender texture. Make sure yours is fresh—if it’s been sitting in your pantry for over a year, get a new box. Old baking soda won’t give you the lift you need and the bread will be dense.
Salt (½ teaspoon)
Don’t skip this. Salt enhances all the other flavors and balances the sweetness. I use regular table salt, but sea salt or kosher salt work fine too. Without salt, the bread tastes flat and one-dimensional.
Vanilla Extract (1 teaspoon)
Real vanilla extract, not imitation if you can help it. It just tastes better and the flavor is more complex. If you only have imitation vanilla, use it, but maybe add just a tiny pinch of cinnamon to give it more depth.
Instructions moist banana bread recipe
This is honestly one of the easier quick breads to make, but there are a few spots where things can go wrong if you’re not paying attention. The most important thing is not overmixing the batter—it should look a little lumpy and rough when you’re done stirring. Smooth batter means tough bread, and nobody wants that.
The whole process takes about 10 minutes of active work, then an hour in the oven. Your kitchen is going to smell amazing about halfway through baking, and that’s when you’ll know you did it right. Don’t open the oven door to peek until at least 50 minutes have passed, or you risk the bread collapsing.
Preheat your oven and prep your pan.
Set the oven to 350°F and grease a 9×5 inch loaf pan with butter or cooking spray. I also like to line the bottom with parchment paper because it makes getting the loaf out so much easier later. If you skip this step and the bread sticks, you’ll be scraping it out in chunks and cursing yourself. The oven needs to be fully preheated before the bread goes in, so give it at least 15 minutes.
Mash your bananas until mostly smooth.
Put the peeled bananas in a large mixing bowl and mash them with a fork or potato masher. You want them mostly smooth with just a few small lumps—those little pieces will create nice pockets of banana flavor in the finished bread. If your bananas aren’t ripe enough, this will be really hard work. Properly ripe bananas should mash easily and smell sweet and fragrant.
Mix in all the wet ingredients.
Add the melted butter, Greek yogurt, eggs, brown sugar, and vanilla to the mashed bananas. Stir everything together until it’s well combined and there are no streaks of yogurt or unmixed egg. The mixture will look a little chunky and wet, and that’s exactly what you want. This takes about a minute of stirring with a wooden spoon or whisk.
Combine your dry ingredients separately.
In another bowl, whisk together the flour, baking soda, and salt. This ensures everything is evenly distributed before you add it to the wet ingredients. I learned this step matters the hard way after getting a loaf with a bitter pocket of unmixed baking soda—not pleasant. Just a quick whisking for 30 seconds does the trick.
Fold the dry ingredients into the wet ingredients gently.
This is where most people mess up. Add the flour mixture to the banana mixture and stir just until you can’t see any more dry flour. The batter should look lumpy and rough, not smooth. Stop stirring as soon as the flour disappears—overmixing develops the gluten too much and you’ll get tough, chewy bread instead of tender, moist bread. It feels wrong to leave it lumpy, but resist the urge to keep stirring.
Pour into your prepared pan and bake.
Scrape the batter into your greased loaf pan and spread it out gently with a spatula. It doesn’t need to be perfectly smooth on top. Bake for 60-65 minutes, until a toothpick inserted in the center comes out with just a few moist crumbs clinging to it. The top should be golden brown and the bread should start pulling slightly away from the sides of the pan. If the top starts getting too dark before it’s done, tent it loosely with foil.
Cool completely before slicing.
This is the hardest part because it smells so good, but let the bread cool in the pan for about 10 minutes, then turn it out onto a wire rack to finish cooling. If you slice it while it’s still warm, it’ll be gummy and fall apart. I know it’s torture to wait, but properly cooled banana bread slices cleanly and has the right texture. It takes about an hour to cool completely.
Tips & Variations moist banana bread recipe
This bread stays moist for 3-4 days wrapped in plastic wrap at room temperature, and it actually tastes even better the second day once all the flavors have had time to meld together. You can freeze individual slices wrapped in plastic wrap for up to 3 months—great for when you want banana bread but don’t want to eat an entire loaf. If you want to add chocolate chips or nuts, fold in about ¾ cup with the flour, but honestly, this bread is perfect as-is.
Final Thoughts moist banana bread recipe
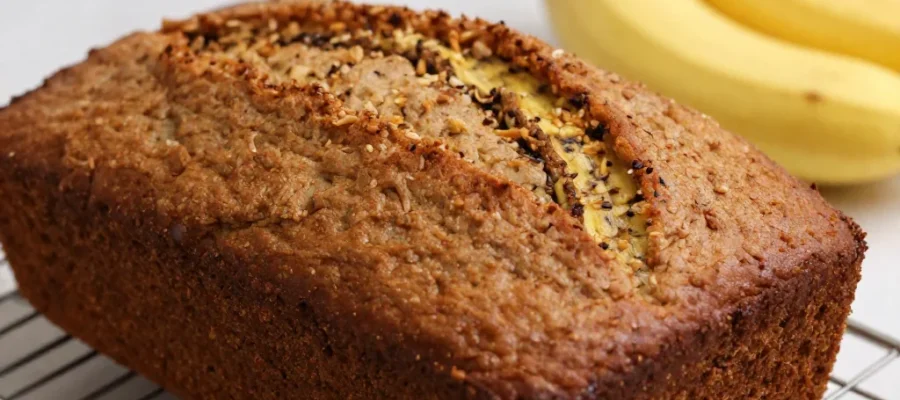
Look, this isn’t going to win any fancy baking competitions, but it’s the kind of banana bread that actually gets finished instead of sitting on the counter getting stale. It won’t look like those perfect Instagram photos with the tall dome and flawless crumb—homemade banana bread is supposed to look a little rustic and imperfect. But it’ll taste incredible and stay moist for days, which is really what matters.
Give this a try and let me know how it works in your kitchen. I’m always curious if other people get the same results or if my oven runs weird. Seriously, drop me a comment if you make this—I love hearing about people’s banana bread adventures and inevitable kitchen mishaps.
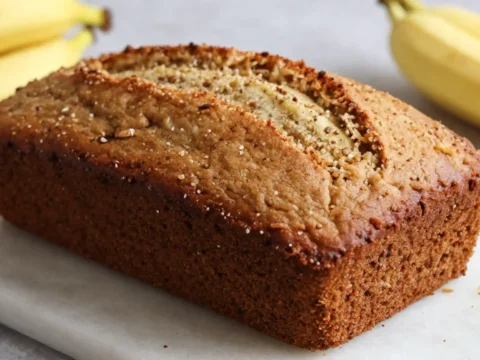
Moist Banana Bread Recipe (Never Dry!)
This moist banana bread recipe stays deliciously moist for days, making it a favorite for using up overripe bananas. Its rich flavor and tender crumb set it apart from typical banana breads.