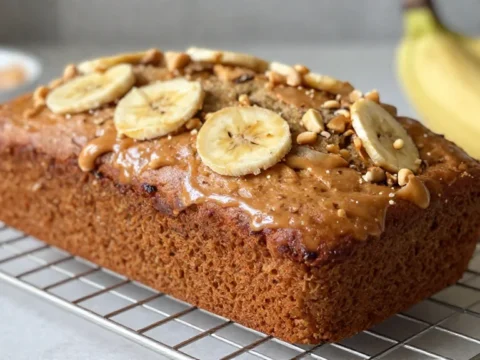
This banana nut bread recipe has been my go-to for years, and honestly, I think most people overcomplicate it. Look, I’ve tried the fancy versions with brown butter and exotic flours, but sometimes you just want a slice of soft, moist banana bread that actually tastes like bananas and doesn’t require a degree in chemistry to make. This version delivers every single time—no dry edges, no dense middle, just perfectly tender bread that stays fresh for days.
Table of Contents :
Why I Keep Coming Back to This Recipe
I started making banana bread back when everyone was stuck at home and apparently decided to become bakers overnight. My first few attempts were honestly disasters—dry, flavorless bricks that even my kids wouldn’t eat. I was following recipes that called for way too much flour and not enough fat, thinking I was being “healthy.” Wrong move.
The turning point came when my neighbor brought over a loaf that was so incredibly moist and flavorful that I practically begged for the recipe. Turns out, the secret isn’t some fancy technique—it’s using really ripe bananas, not overmixing the batter, and adding just enough nuts for texture without going overboard. I’ve been tweaking this recipe for about two years now, and I finally got it exactly where I want it.
What I love about this version is that it’s forgiving. Forgot to take your eggs out to room temperature? No problem. Only have salted butter? Works fine. This isn’t one of those finicky recipes that falls apart if you look at it wrong.
Ingredients banana nut bread recipe
The ingredient list here is pretty straightforward—nothing exotic or hard to find. I’ve learned that banana bread is really about the technique and ratios more than fancy ingredients. The key is using bananas that are legitimately overripe, like brown-spotted and soft to the touch. Don’t use those barely-yellow bananas thinking it’ll work the same way. It won’t.
I usually keep a few really ripe bananas in my freezer specifically for this recipe. They get even mushier when they thaw, which is actually perfect for banana bread. Plus, it means I can make this whenever the craving hits without waiting for bananas to ripen.
Very Ripe Bananas (3 large ones)
These need to be seriously overripe—brown spots all over, soft when you press them, maybe even a little mushy. I know they look gross, but that’s when the sugars are concentrated and the flavor is intense. If your bananas are still mostly yellow, wait a few more days or stick them in a paper bag to speed things up. I mash mine with a fork and leave some small chunks for texture.
All-Purpose Flour (1½ cups)
Nothing fancy here, just regular all-purpose flour. I’ve tried bread flour thinking it would be better, but it actually made the texture too dense. The key is not to overmeasure—I spoon it into my measuring cup and level it off rather than scooping directly from the bag, which packs it down and gives you too much flour.
Unsalted Butter (⅓ cup, melted)
This is what keeps everything moist and tender. I melt it in the microwave and let it cool slightly before adding to the batter. If you only have salted butter, that’s fine—just skip the added salt in the recipe. I’ve tried substituting oil here, but butter gives you better flavor and that slightly richer texture that makes this bread special.
Granulated Sugar (¾ cup)
This might seem like a lot, but remember that bananas vary in sweetness, and you want the bread to taste like a treat, not health food. I’ve reduced it before and regretted it—the bread just tastes flat. Brown sugar works too if that’s what you have, and it adds a slightly deeper flavor that some people prefer.
Large Egg (1)
Room temperature is ideal, but I usually forget to take it out ahead of time. If that happens, I just put the egg in a bowl of warm water for 5 minutes while I prep everything else. The egg helps bind everything together and creates that tender crumb we’re going for.
Vanilla Extract (1 teaspoon)
Don’t skip this even if it seems optional. It rounds out the banana flavor and makes everything smell amazing while it’s baking. I use the real stuff, not imitation, but honestly, in banana bread the difference isn’t huge if imitation is what you have on hand.
Baking Soda (1 teaspoon)
This is your leavening agent, and it’s crucial for getting that light, tender texture. Make sure yours is fresh—if it’s been sitting in your pantry for over a year, it might not work as well. The acidity in the bananas activates the baking soda, so don’t substitute baking powder here.
Salt (pinch)
Just a tiny bit to enhance all the other flavors. I use regular table salt, nothing fancy. If you’re using salted butter, you can skip this entirely.
Chopped Walnuts (½ cup)
I buy walnut pieces rather than whole walnuts because they’re usually cheaper and I’m just going to chop them anyway. Toast them lightly in a dry skillet for 2-3 minutes if you want extra flavor, but it’s not necessary. Pecans work great too, or you can skip nuts entirely if someone has allergies.
Instructions banana nut bread recipe
This whole process takes about 10 minutes of actual work, then an hour in the oven. It’s one of those recipes where the hardest part is waiting for it to finish baking because your kitchen smells incredible. The key is not to overthink it—mix until just combined, pour into the pan, and let the oven do its work.
I usually start this right after dinner so it’s ready by the time we’re thinking about dessert. The timing works out perfectly, and there’s something satisfying about having fresh banana bread cooling on the counter while you clean up the kitchen.
Preheat your oven and prep the pan.
Get your oven going to 350°F and grease a 9×5 inch loaf pan really well with butter or cooking spray. I also like to dust it lightly with flour, which helps prevent sticking. Don’t skip this step—nothing’s worse than amazing banana bread that breaks apart when you try to get it out of the pan. The oven needs about 15 minutes to properly preheat, so start this first.
Mash those bananas.
In a large mixing bowl, mash your bananas with a fork until they’re mostly smooth but still have some small chunks. Don’t stress about making it perfectly smooth—those little banana pieces actually add nice texture to the finished bread. The bananas should be soft enough that this is easy. If you’re struggling to mash them, they probably weren’t ripe enough.
Mix in the wet ingredients.
Add the melted butter to your mashed bananas and stir it in. The mixture might look a little separated and weird—that’s totally normal. Then add your sugar, egg, and vanilla, stirring after each addition. Don’t worry about making it perfectly smooth; just get everything roughly combined. The mixture should smell sweet and banana-y at this point.
Add the dry ingredients carefully.
Sprinkle the flour, baking soda, and salt over your wet ingredients. Here’s the crucial part—stir just until you can’t see dry flour anymore, then stop. Seriously, stop stirring. Overmixing develops the gluten and makes your bread tough and dense. It should look a little lumpy and rough, not smooth like cake batter. This is where a lot of people go wrong.
Fold in the nuts.
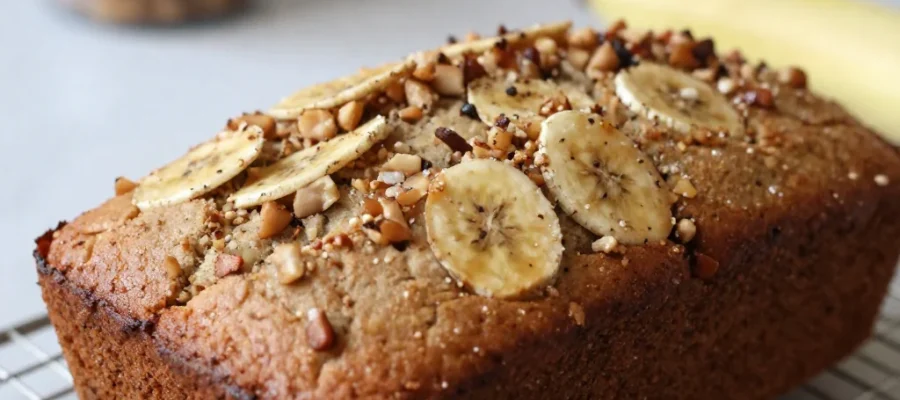
Gently fold in your chopped walnuts with just a few strokes. You want them distributed throughout the batter but not beaten to death. Some pieces will stick out of the top when you pour it into the pan, and that’s perfect—they’ll get golden and toasty during baking.
Pour and bake.
Scrape the batter into your prepared loaf pan and spread it roughly evenly—don’t stress about making it perfect. Bake for 55-65 minutes, until the top is golden brown and a toothpick inserted in the center comes out with just a few moist crumbs. The top might crack slightly, which is totally normal and actually looks rustic and homemade in a good way.
Cool before slicing.
This is the hardest part—let it cool in the pan for 10 minutes, then turn it out onto a wire rack. Wait at least 30 minutes before slicing, or it’ll fall apart and be gummy in the middle. I know it smells amazing and you want to eat it immediately, but trust me on this. The texture needs time to set up properly.
Tips & Variations banana nut bread recipe
This keeps well wrapped in plastic wrap for about 4 days on the counter, or you can freeze individual slices for up to 3 months. I actually think it tastes better the second day—the flavors have time to meld together. If you want to make it a little healthier, you can substitute up to half the flour with whole wheat flour, but it’ll be a bit denser. Some people add chocolate chips instead of nuts, which turns it into basically dessert, but hey, no judgment here.
Final Thoughts banana nut bread recipe
Look, this isn’t going to win any fancy baking competitions, but it’s exactly what banana bread should be—moist, flavorful, and reliable. I’ve made this probably 50 times now, and it works every single time as long as you don’t overmix the batter. It’s become my go-to whenever I need to bring something to a potluck or just want something sweet around the house.
Give it a try and let me know how it turns out. I’m always curious whether this works as well in other people’s kitchens as it does in mine. Seriously, drop a comment and tell me if you make any changes—I love hearing about people’s variations.
Moist Banana Nut Bread Recipe – Easy, Soft & Packed with Flavor
This moist banana nut bread is my go-to recipe for years—simple, flavorful, and perfect for using overripe bananas. No dry edges, just tender and delicious bread.