
No Bake Mini Egg Cheesecake: The Perfect Spring Dessert That Takes Minutes to Make
You know that feeling when you’re craving something sweet and creamy, but the thought of turning on the oven makes you want to crawl back into bed? That’s exactly how I felt last Easter when I was tasked with bringing dessert to our family gathering. I wanted something that screamed spring celebration but didn’t require me to spend hours in a hot kitchen. Enter this No Bake Mini Egg Cheesecake – and let me tell you, it was such a hit that my sister-in-law actually asked if I’d bought it from a fancy bakery!
The best part about this recipe is that it combines the rich, creamy texture of traditional cheesecake with the fun, colorful crunch of mini chocolate eggs. It’s like Easter decided to throw a party in dessert form, and everyone’s invited. Plus, since there’s no baking involved, you can whip this up in about 20 minutes and let the fridge do all the work while you focus on other things.
Table of Contents :
Why You’ll Love This No Bake Mini Egg Cheesecake
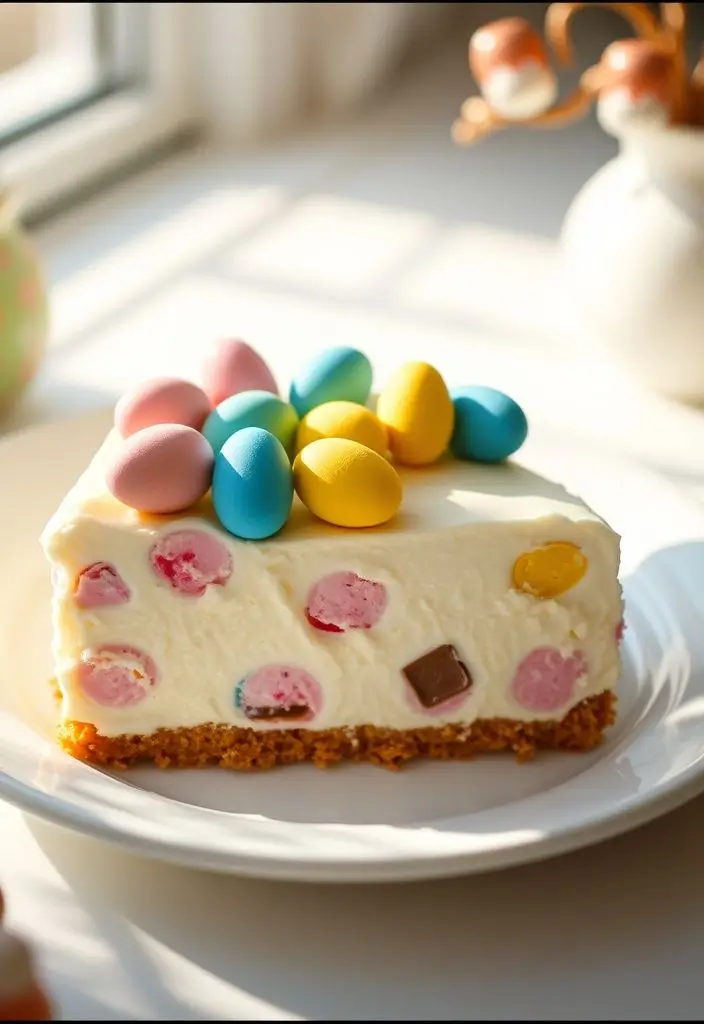
This dessert is everything you want in a spring treat. The cheesecake base is incredibly smooth and creamy, with just the right amount of sweetness that doesn’t overpower the delicate vanilla flavor. The mini eggs add this delightful textural contrast – you get that satisfying crunch followed by smooth chocolate that melts in your mouth.
What really makes this recipe shine is how foolproof it is. Even if you’re someone who thinks they can’t make desserts, this one will change your mind. There’s no temperamental oven temperatures to worry about, no risk of cracks forming on top, and no waiting around for hours wondering if it’s done. You literally mix, pour, chill, and enjoy.
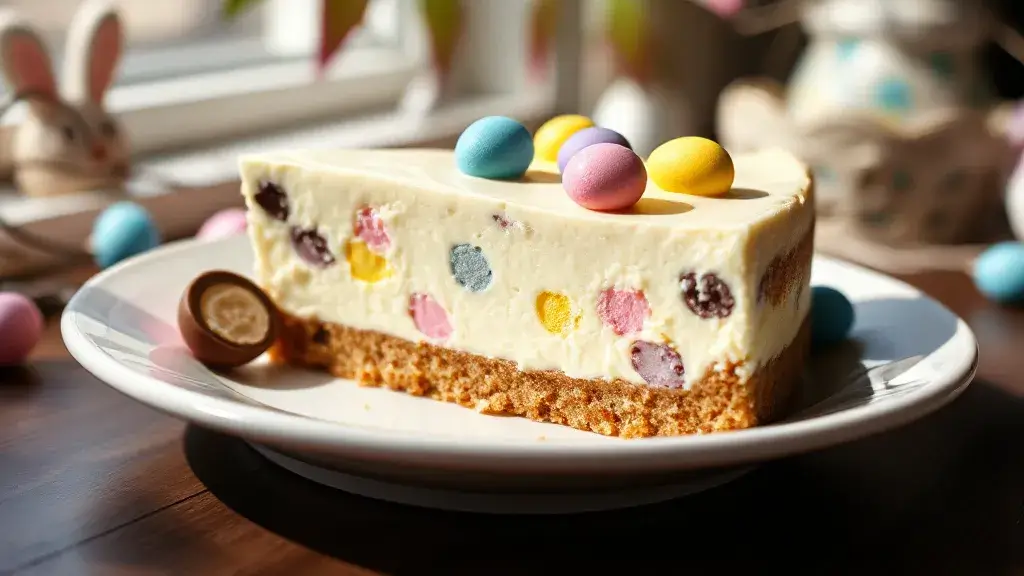
The presentation is absolutely stunning too. Those colorful mini eggs scattered on top look like little Easter jewels, making this dessert perfect for spring gatherings, Easter brunches, or even just a regular Tuesday when you want to brighten up your week.
Ingredients You’ll Need
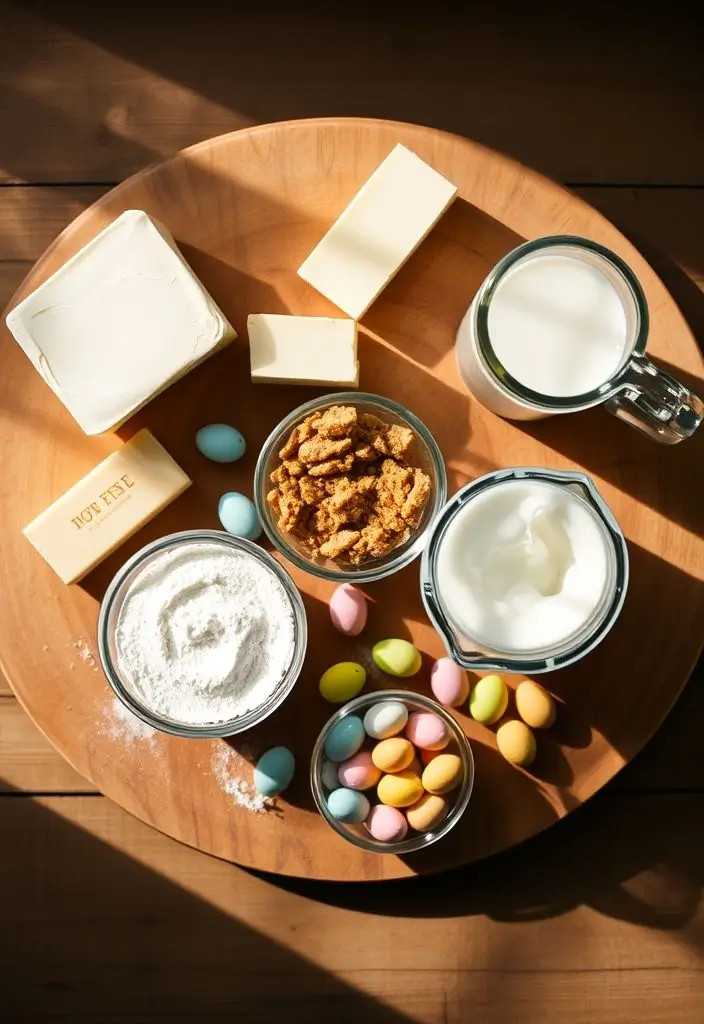
For the Crust:
- Graham Crackers (about 8-10 crackers): These create the perfect buttery, slightly sweet base. You can crush them yourself or buy pre-made graham cracker crumbs to save time.
- Unsalted Butter (4 tablespoons, melted): This binds the crumbs together and adds richness to the crust.
- Sugar (2 tablespoons): Just a touch to enhance the sweetness of the crust.
For the Cheesecake Filling:
- Cream Cheese (16 oz, room temperature): This is the star of the show. Make sure it’s completely softened so you don’t end up with lumps in your filling.
- Powdered Sugar (1 cup): Dissolves more easily than granulated sugar, giving you that silky smooth texture.
- Vanilla Extract (2 teaspoons): Pure vanilla extract makes all the difference here – it adds depth and warmth to the flavor.
- Heavy Whipping Cream (1 cup): This gets whipped to create that light, airy texture that makes the cheesecake feel luxurious.
- Mini Chocolate Eggs (about 1 cup): The fun factor! Look for the small, colorful ones – they’re perfect for both mixing in and decorating on top.
For Topping:
- Additional Mini Eggs: For that gorgeous presentation that makes everyone think you’re a dessert genius.
- Whipped Cream (optional): A dollop on each serving adds extra indulgence.
Step-by-Step Instructions
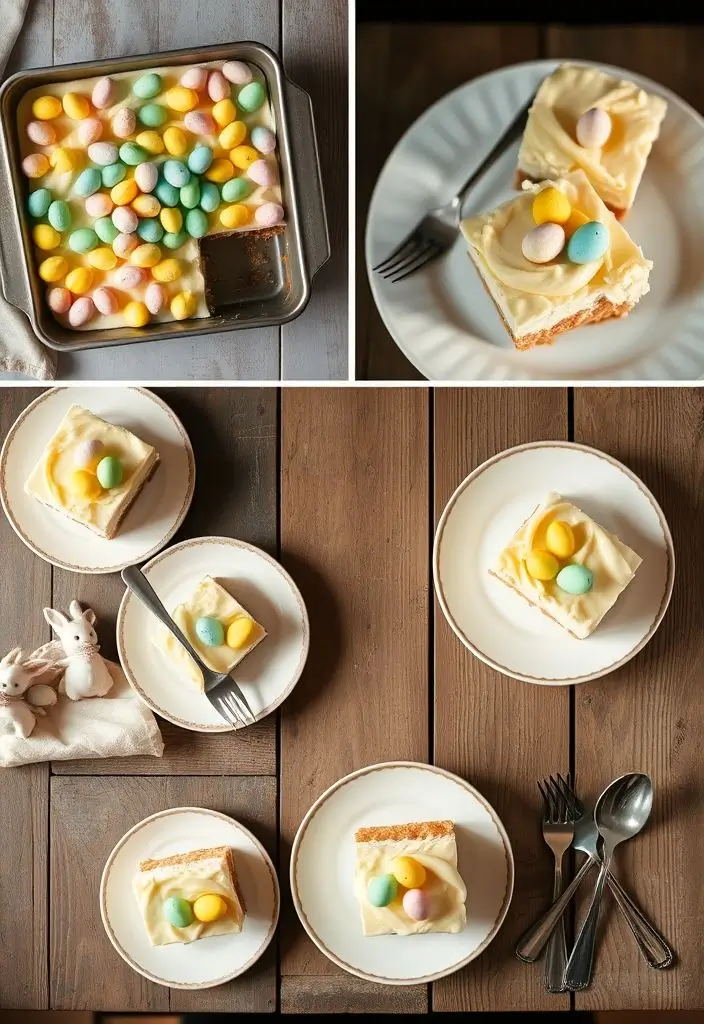
Prepare Your Pan Start by lining an 8×8 inch square pan with parchment paper, leaving some overhang so you can easily lift the cheesecake out later. Trust me on this – it makes serving so much easier and your dessert will look professionally made.
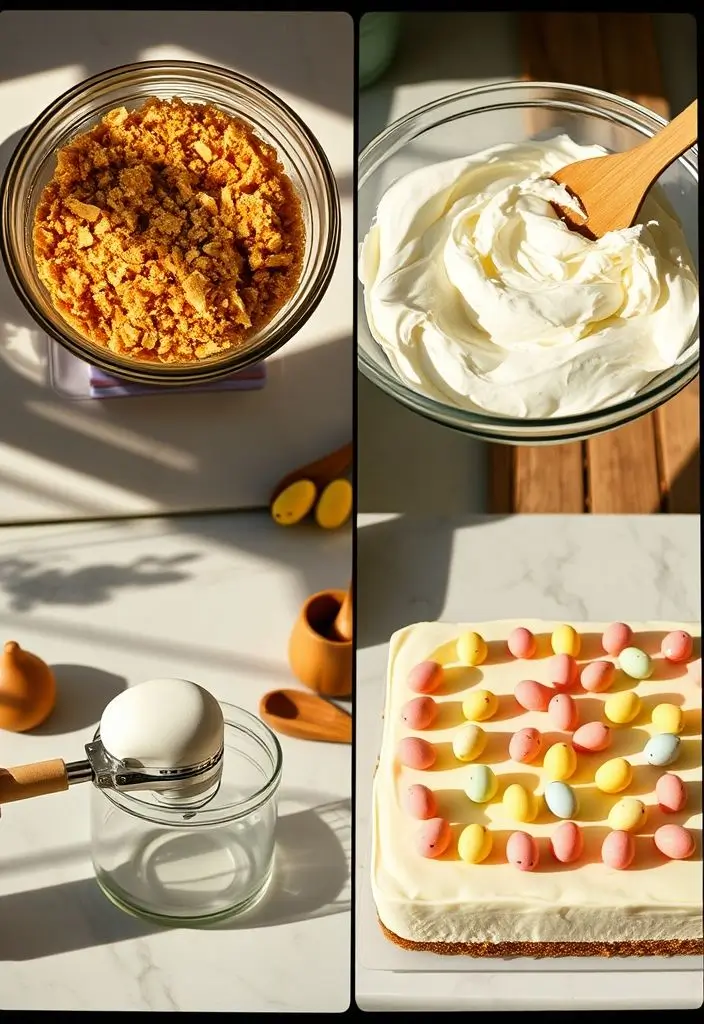
Make the Crust Crush your graham crackers into fine crumbs. You can do this by placing them in a sealed plastic bag and rolling over them with a rolling pin, or pulse them in a food processor. Mix the crumbs with melted butter and sugar until everything looks like wet sand. Press this mixture firmly into the bottom of your prepared pan. Pop it in the fridge while you make the filling.
Create the Filling Magic In a large bowl, beat the softened cream cheese until it’s completely smooth and fluffy – this usually takes about 3-4 minutes with an electric mixer. Gradually add the powdered sugar and vanilla, beating until well combined. Don’t rush this step; getting the cream cheese perfectly smooth is key to avoiding lumps.
In a separate bowl, whip the heavy cream until soft peaks form. You want it whipped but not stiff – think of the consistency of a fluffy cloud. Gently fold this whipped cream into the cream cheese mixture using a spatula. Be gentle here; you want to maintain that airy texture.
Add the Fun Factor Roughly chop about half of your mini eggs into smaller pieces and fold them into the cheesecake mixture. This gives you little bursts of chocolate throughout each bite. Pour this mixture over your chilled crust and smooth the top with a spatula.
The Final Touch Arrange the remaining whole mini eggs on top of the cheesecake in whatever pattern makes you happy. I like to do a mix of scattered and arranged – it looks natural but intentional. Cover with plastic wrap and refrigerate for at least 4 hours, but overnight is even better.
Tips & Notes for Perfect Results
Room Temperature is Key: Make sure your cream cheese is completely softened before you start. Cold cream cheese will give you lumps no matter how long you beat it. If you forgot to take it out early, you can soften it quickly by cutting it into small cubes.
Don’t Overwhip: When making the whipped cream, stop as soon as you see soft peaks. Overwhipped cream can make your filling grainy instead of smooth and creamy.
Chill Time Matters: I know it’s tempting to dig in early, but giving this cheesecake proper time to set makes all the difference. The flavors meld together beautifully, and the texture becomes perfectly firm yet creamy.
Mini Egg Alternatives: Can’t find mini eggs? No problem! You can use chopped regular chocolate eggs, mini chocolate chips, or even colorful candy-coated chocolates. The key is having something that adds both color and crunch.
Make it Extra Special: For special occasions, try drizzling melted chocolate over the top before adding the mini eggs, or dust with a little cocoa powder for an elegant finish.
Storage and Serving Suggestions
This cheesecake keeps beautifully in the refrigerator for up to 5 days – if it lasts that long! Cover it tightly with plastic wrap or store in an airtight container. The flavors actually improve after a day or two, so it’s perfect for making ahead.
Serving Ideas:
- Cut into squares and serve with fresh berries for a beautiful spring presentation
- Add a dollop of whipped cream and a drizzle of chocolate sauce for extra indulgence
- Serve alongside fresh strawberries and mint for a refreshing contrast
- Perfect for Easter brunch, spring picnics, or Mother’s Day celebrations
Common Mistakes to Avoid
Using Cold Cream Cheese: This is the biggest culprit behind lumpy cheesecake filling. Always plan ahead and let it come to room temperature.
Overmixing After Adding Whipped Cream: Once you fold in that whipped cream, be gentle. Overmixing will deflate all those lovely air bubbles you worked to create.
Skipping the Chill Time: I get it – waiting is hard when something looks this good. But proper chilling time is what transforms your mixture from a fluffy cream into proper cheesecake consistency.
Crushing Mini Eggs Too Small: You want some substantial pieces for texture. If they’re too small, they’ll just disappear into the filling.
This No Bake Mini Egg Cheesecake has become my go-to dessert when I want something that looks impressive but doesn’t require pastry school skills. It’s creamy, it’s fun, it’s absolutely delicious, and it never fails to make people smile. The combination of that rich cheesecake flavor with the playful crunch of mini eggs creates something that feels both sophisticated and whimsical – exactly what spring desserts should be.
Whether you’re planning an Easter celebration, looking for a make-ahead dessert for a spring gathering, or just want to add a little joy to your week, this cheesecake delivers on all fronts. Plus, there’s something deeply satisfying about creating something this beautiful without even turning on your oven. Now that’s what I call a win-win!