Sheet pan pancakes recipe discovery changed my entire breakfast game about three years ago, and I honestly can’t believe I spent decades flipping individual pancakes like some kind of kitchen martyr. The first time I made these for my sister’s family visit, her kids thought I was some kind of breakfast wizard. Little did they know I was lounging with coffee while the oven did all the work. If you’ve never tried baking pancake batter in a sheet pan, prepare for your weekend mornings to get a whole lot easier.
Table of Contents :
Why Sheet Pan Pancakes Will Save Your Sanity
I discovered sheet pan pancakes during a particularly chaotic family reunion when I needed to feed 12 people breakfast without losing my mind. Traditional pancakes left me stuck at the stove for ages, serving people in shifts while earlier batches went cold. There had to be a better way.
My first attempt was… well, a disaster. Complete disaster. I didn’t preheat the oven properly and used a pan that was too small, which resulted in a gooey center and overflowing batter that burned on the bottom of my oven. The smoke detector went off, my nephew started crying, and my reputation as the “good cook” in the family was temporarily tarnished.
But failures make the best teachers. After some experimenting (and oven cleaning), I cracked the code. The sheet pan method creates pancakes with a slightly different texture than stovetop versions – they’re fluffier and more cake-like, which my family actually prefers now. Plus, everyone gets to eat at the same time, and I get to sit down with them instead of playing short-order cook all morning.
Ingredients for Sheet Pan Pancakes
The beauty of sheet pan pancakes is that you can use basically the same ingredients as regular pancakes. I’ve tested both scratch recipes and boxed mixes, and honestly, both work perfectly. The main difference is making sure you have enough batter for an entire sheet pan without it being too thin or too thick.
One note on substitutions – this recipe is incredibly forgiving. I’ve made these with regular milk, buttermilk, almond milk, and even watered-down yogurt when I was desperate. They all work, though each gives a slightly different flavor and texture. Play around and find your favorite!
All-purpose flour (2 cups)
Regular old all-purpose flour works perfectly here. I’ve tried fancier flours, but honestly couldn’t tell much difference in the final product. If you need a gluten-free version, a 1:1 gluten-free baking flour works great – I use Bob’s Red Mill when my gluten-intolerant niece visits, and nobody can tell the difference.
Baking powder (1 tablespoon)
This is non-negotiable – it’s what makes your pancakes fluffy! Make sure yours is fresh; baking powder loses potency after about 6-9 months. I learned this the hard way when I made sad, flat pancakes with baking powder that had been sitting in my cupboard since the Obama administration.
Granulated sugar (3 tablespoons)
Just enough to add a touch of sweetness without making things cloying. You can substitute brown sugar for a deeper flavor, or even maple sugar if you’re feeling fancy. I’ve reduced this to 1 tablespoon when making savory versions with bacon and cheese (yes, that’s a thing, and yes, it’s amazing).
Salt (1/2 teaspoon)
Don’t skip this! Salt balances the sweetness and makes all the other flavors pop. I use kosher salt because that’s what’s always in my salt cellar, but table salt works fine too – just use a bit less (about 1/4 teaspoon) since its crystals are smaller.
Milk (1 1/2 cups)
Any kind works – dairy or non-dairy. Buttermilk adds a nice tang, while almond milk makes things a bit lighter. When using buttermilk, I sometimes need to add an extra splash since it’s thicker. The key is getting a pourable batter that’s not too runny.
Eggs (2 large)
Eggs bind everything together and add richness. Room temperature eggs incorporate better than cold ones, but who remembers to take eggs out early? Not me. If you’re out of eggs or need a vegan version, a flax egg (1 Tbsp ground flaxseed + 3 Tbsp water per egg) works surprisingly well.
Melted butter (1/4 cup)
Butter adds flavor and keeps things moist. You can substitute oil (vegetable or coconut) for a dairy-free version. I’ve even used olive oil in a pinch, which gives an interesting flavor that works well if you’re doing a more savory pancake.
Vanilla extract (1 teaspoon)
The secret ingredient that makes homemade pancakes taste so good. Real vanilla extract makes a noticeable difference here, but the imitation stuff works if that’s what you’ve got. Sometimes I use almond extract instead for a different flavor profile.
Mix-ins of choice (1-2 cups total)
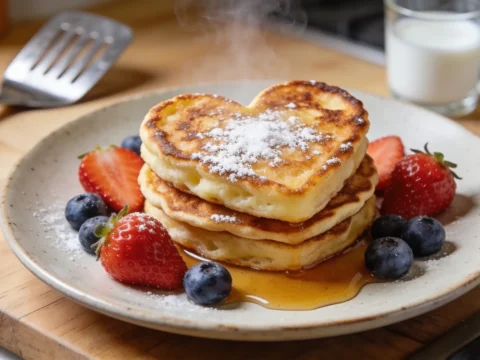
Here’s where the fun begins! Berries, chocolate chips, banana slices, chopped nuts – whatever you like in regular pancakes. I usually go with blueberries in one section, chocolate chips in another, and leave one area plain for the picky eaters. The sheet pan format lets you customize sections easily.
Instructions for Sheet Pan Pancakes
Here’s the part you’ve been waiting for – how to actually make these magical sheet pan pancakes! The process is pretty straightforward, but there are a few tricks I’ve learned after making these at least 50 times. The whole process takes about 30 minutes if you’re organized, or 40 if you’re easily distracted like me.
Don’t be tempted to crank up the oven temperature to make these faster. I tried that once and ended up with pancakes that were burned on top and undercooked in the middle. Patience, my friend. These aren’t traditional skillet pancakes, so they won’t look exactly the same – they’ll be a bit more cake-like in texture, which is actually perfect for soaking up maple syrup.
STEP 1: Preheat your oven and prep your pan.
Preheat your oven to 425°F (218°C) and generously grease a 13×18-inch rimmed sheet pan. And when I say generously, I mean GENEROUSLY – these pancakes love to stick. I use butter because I love the flavor it adds, but cooking spray works too. If you’re paranoid about sticking (I’ve been there), line the pan with parchment and then grease the parchment. Belt and suspenders, you know?
STEP 2: Mix the dry ingredients.
In a large bowl, whisk together the flour, baking powder, sugar, and salt. Make sure to really blend these well – I use a whisk and get a bit aggressive with it. Nobody wants to bite into a clump of baking powder (learned that the hard way when my son dramatically spat out a bite at our Mother’s Day breakfast). The whisking also adds a bit of air to the flour, which helps with fluffiness.
STEP 3: Mix the wet ingredients separately.
In another bowl, whisk the milk, eggs, melted butter, and vanilla until well combined. The butter might solidify a bit if your milk is cold – no biggie, just make sure it’s broken up reasonably well. If you dump super hot melted butter into cold eggs, you might end up with scrambled eggs, so let the butter cool slightly before adding. Ask me how I know this. Actually, don’t.
STEP 4: Combine wet and dry ingredients.
Pour the wet ingredients into the dry ingredients and whisk until just combined. DO NOT OVERMIX! I repeat, step away from the whisk once the big lumps are gone. Small lumps are your friend. Overmixing activates the gluten and makes tough pancakes. You want a batter that’s thick but pourable – similar to regular pancake batter. If it seems too thick, add a splash more milk.
STEP 5: Transfer to the sheet pan.
Pour the batter onto your prepared sheet pan and use a spatula to spread it evenly to the corners. The batter won’t be super deep – maybe about 1/4 inch or so. Don’t worry, it will puff up nicely in the oven. Give the pan a couple of gentle taps on the counter to pop any big air bubbles, but don’t go wild with the tapping or you’ll deflate your batter.
STEP 6: Add your mix-ins.
Sprinkle your chosen mix-ins evenly over the batter (or in designated sections if you’re doing the multi-flavor approach). For berries, I gently press them in just slightly. If using frozen berries, don’t thaw them first or they’ll bleed color throughout your batter – I learned that lesson when I served my kids disturbingly purple pancakes. They loved it; I was slightly horrified.
STEP 7: Bake until golden and cooked through.
Bake for 15-18 minutes, until the pancake is puffed up and golden around the edges, and a toothpick inserted in the center comes out clean. It should spring back slightly when touched. You’ll smell that incredible pancake aroma when they’re almost done – your kitchen will smell like a gourmet breakfast joint. The edges will get slightly crispy, which is actually my favorite part.
STEP 8: Slice and serve warm.
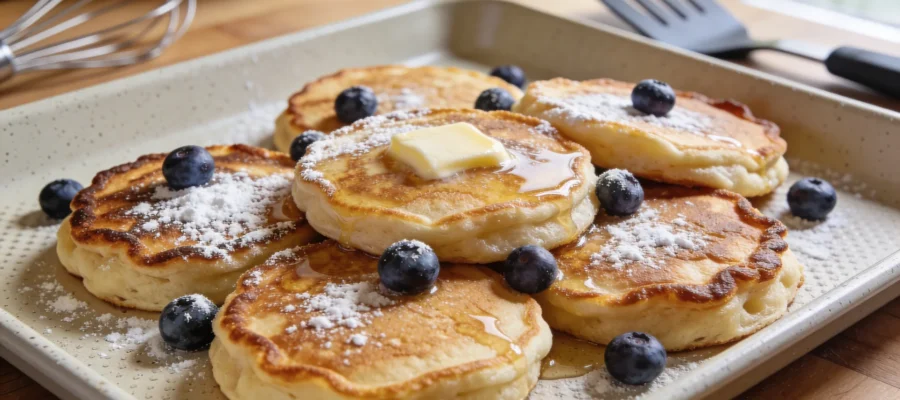
Let the giant pancake cool in the pan for about 5 minutes (it’s still cooking a bit during this time). Then cut into squares or rectangles – I use a pizza cutter because it’s way easier than a knife. Serve warm with butter, maple syrup, whipped cream, fruit, or whatever toppings you love. The beauty is everyone can grab their portion and customize it however they want.
Tips & Variations for Sheet Pan Pancakes
Sheet pan pancakes will keep in the fridge for about 3 days. Reheat individual squares in the microwave for 20-30 seconds or in a toaster oven. They actually freeze really well too – I often make a double batch and freeze the extras for quick weekday breakfasts. Just separate squares with parchment paper before freezing, then microwave from frozen for about 45 seconds.
For fun variations, try adding 1 teaspoon of cinnamon to the batter, or go wild with lemon zest and blueberries for a summery version. If your pancakes aren’t as picture-perfect as those Instagram photos, join the club! Mine sometimes have uneven browning or a crack or two – they still taste amazing. Real food doesn’t need to be perfect.
Oh, and you can totally make these sheet pan pancakes into a birthday breakfast by adding sprinkles to the batter and cutting them with cookie cutters after baking. My daughter requested this for her 8th birthday instead of a traditional cake, and it was a huge hit with her friends.
Final Thoughts on Sheet Pan Pancakes
Look, I’m not saying these sheet pan pancakes will change your life, but they might just save your Saturday mornings. They’ve given me back hours of my life that I would have spent flipping individual pancakes, and for that alone, they deserve a permanent spot in my breakfast rotation.
If you try this sheet pan pancakes recipe, please drop me a comment! I love hearing about your mix-in combinations and whether your family fights over the crispy edge pieces like mine does. And if your first attempt isn’t perfect, remember my smoky kitchen disaster and give it another shot – I promise it’s worth it.
Sheet Pan Pancakes
Discover the magic of sheet pan pancakes that allow you to serve a crowd breakfast in just 30 minutes, with no flipping required.