
Okay, so I’m gonna be completely honest here – I stumbled onto these Spider Eggs by total accident last Halloween. My daughter’s class party was the next day, and I’d completely forgotten to make something until like 9 PM the night before. Classic mom move, right?
I was standing in my kitchen, staring at a dozen eggs and thinking “great, deviled eggs again” when my 8-year-old walks in and goes, “Mom, those look boring.” Thanks, kid. Really helpful. But then she spotted the can of black olives on the counter and said they looked like little spiders. And boom – Spider Eggs were born.
Now, here’s the thing about these creepy little guys. They look absolutely terrifying (in the best possible way), but they taste like perfectly normal deviled eggs. It’s like a Halloween costume for food, and trust me, kids go absolutely nuts for them.
Table of Contents :
Why Spider Eggs Are My New Halloween Go-To
Look, I’ve tried making fancy Halloween treats before. Last year I attempted those elaborate pumpkin-shaped cookies with orange frosting and… disaster. Complete disaster. Took me three hours, half the cookies broke, and honestly? They tasted like cardboard with sugar on top.
These Spider Eggs, though? Game changer. Takes maybe 30 minutes start to finish, uses ingredients I actually have in my house, and the kids act like I’m some kind of culinary genius. My neighbor Sarah saw them at the party and literally asked if I hired a caterer. I mean, I’ll take it.
The best part is they’re basically foolproof. You mess up the spider legs? Just call them “abstract art spiders.” Trust me on this one – I’ve made wonky-looking spiders, and the kids thought they were even cooler.
What You’ll Need for These Creepy Spider Eggs
Here’s what you’re gonna need, and I promise it’s stuff you probably already have:
For the eggs:
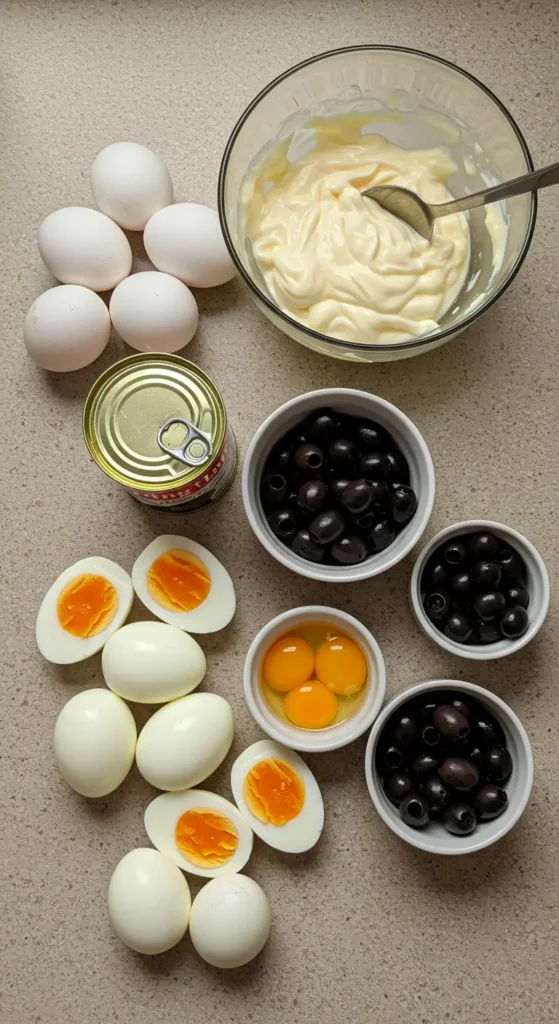
- 12 large eggs (I always buy extra because someone inevitably cracks one)
- 1/2 cup mayonnaise (I use Hellmann’s, fight me)
- 2 teaspoons yellow mustard
- Salt and pepper to taste
- A tiny bit of paprika if you want to get fancy
For the spiders:
- 1 can of large black olives, pitted (don’t get the cheap ones, they’re too mushy)
- Maybe some extra olives because I always eat half while I’m cooking
That’s it. Seriously. No weird ingredients, no special tools, just regular kitchen stuff.
Speaking of olives – my mother-in-law insists on buying those fancy Mediterranean ones, but honestly? The regular black olives from the grocery store work perfectly fine. Save your money for wine instead.
How to Make Spider Eggs (The Real Way)
Step 1: Cook the Eggs
First things first – get those eggs cooking. I put them in a big pot, cover with cold water, and bring to a boil. Once they’re boiling, I turn off the heat and let them sit for about 12 minutes.
Now here’s where I always mess up if I’m not paying attention. Set a timer. Seriously. Last month I got distracted by my neighbor’s dog getting loose (long story) and came back to find my eggs had been sitting in hot water for like 30 minutes. They were basically rubber balls at that point.
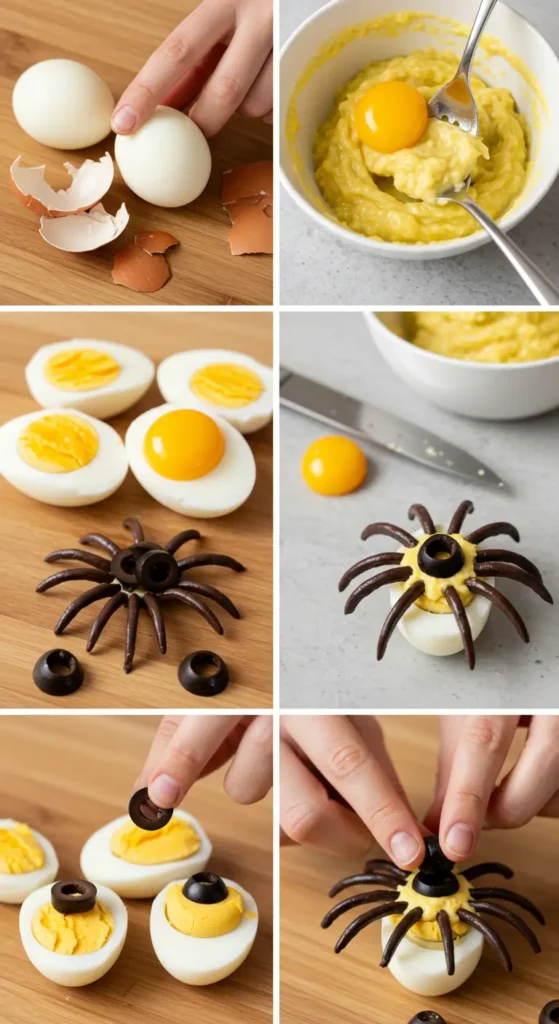
After 12 minutes, drain the hot water and run cold water over them. This stops them from cooking and makes them way easier to peel.
Step 2: The Peeling Drama
Okay, peeling eggs is either super easy or completely infuriating, and I can never predict which way it’s gonna go. Sometimes the shells slip right off, other times it looks like I attacked them with a cheese grater.
Here’s what I’ve learned: start peeling from the bigger end where the air pocket is. And honestly? If a few eggs get mangled during peeling, just chop them up for egg salad later. Problem solved.
Step 3: Make the Filling
Cut all your eggs in half lengthwise and scoop out the yolks into a bowl. Now comes the fun part – well, fun if you like mashing things.
I mash the yolks with a fork (tried using my food processor once and turned them into yellow dust – learn from my mistakes), then mix in the mayo, mustard, salt, and pepper. Taste it. Add more of whatever it needs.
My husband always wants me to add relish or something weird, but honestly? Keep it simple. The kids don’t care about gourmet deviled egg filling when there are spiders involved.
Step 4: Creating Your Spider Army
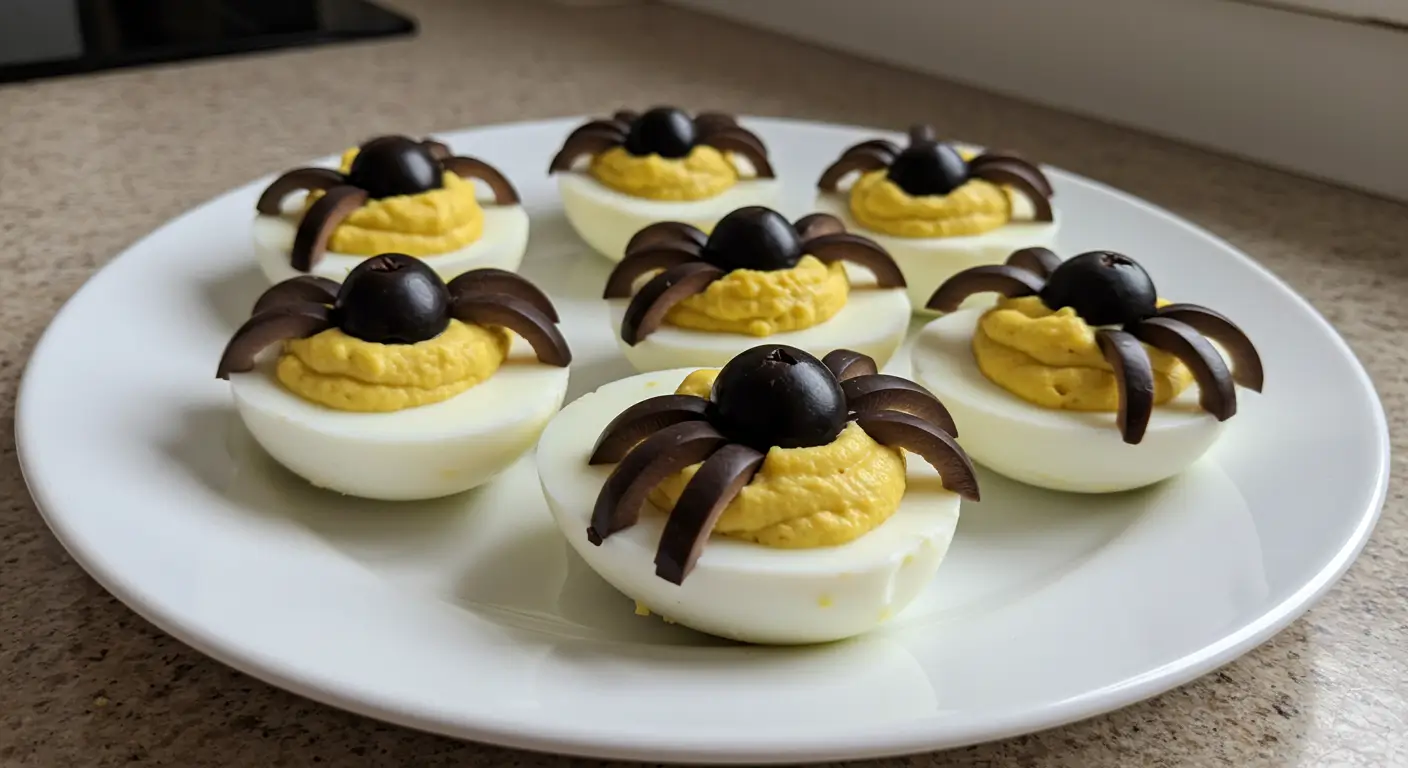
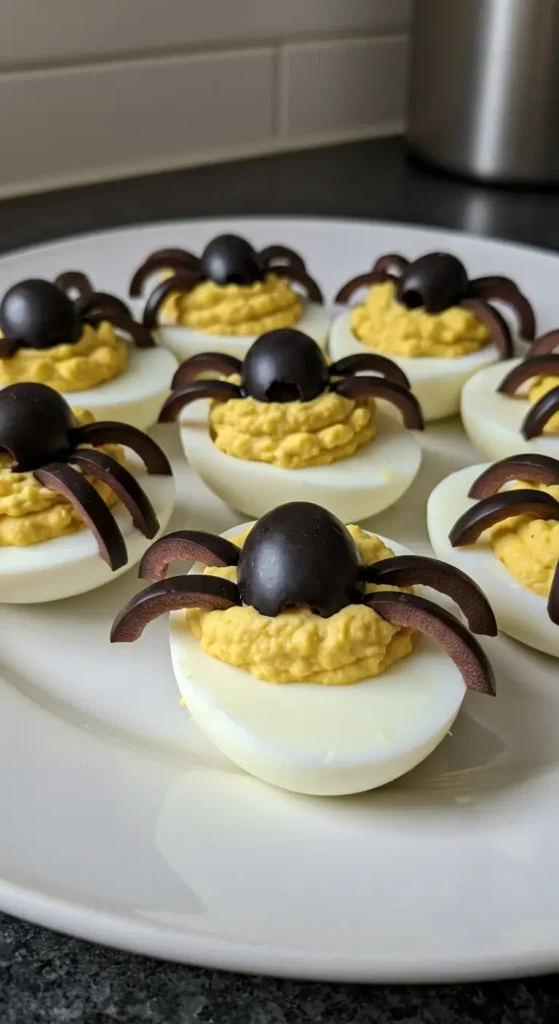
This is where the Spider Eggs magic happens, and also where things can get a little chaotic. Take your black olives and cut them in half. One half becomes the spider body, and the other half gets sliced into thin strips for the legs.
Now I’m gonna be real with you – my first attempt at cutting olive legs looked like someone had a knife fight with the olives. They were all different sizes and shapes. But you know what? The kids didn’t care. They thought the wonky legs made the spiders look more “realistic.”
For each egg, you’ll need one olive half for the body and about 8 thin strips for legs. Do the math – that’s a lot of olive cutting. Put on some music or a podcast because this part takes a while.
Assembly Time (AKA Controlled Chaos)
Fill your egg white halves with the yolk mixture. I use a spoon because I’m not fancy enough to own a pastry bag, and honestly, the slightly messy look makes them seem more homemade anyway.
Place one olive half (cut side down) in the center of each egg for the spider body. Then comes the tricky part – arranging the legs. Four on each side, trying to make them look somewhat spider-like.
Here’s the thing though – don’t stress about making them perfect. I spent way too much time on my first batch trying to make magazine-worthy Spider Eggs, and my kids were like “can we eat them now?” Perfection is overrated.
Pro Tips I Learned the Hard Way
Olive selection matters. I tried using those pre-sliced olives once thinking I’d save time. Nope. They’re too flimsy and break apart. Stick with whole olives and slice them yourself.
Make extra filling. I always end up with a couple egg whites that crack or look weird, so I usually hard-boil 14 eggs but plan for 12 servings.
Keep them cold. These are basically deviled eggs, so they need to stay refrigerated until serving time. Learned this lesson at a school potluck where they sat out too long. Nobody got sick, but still.
Let kids help with the spider assembly. My daughter loves putting the legs on, even if they end up looking more like abstract art than actual spiders. It keeps her busy and she feels like she’s helping.
When Things Go Wrong (Because They Will)
Last Halloween, I was making a double batch for two different parties. Everything was going great until I realized I was almost out of olives halfway through making the spiders. Had to send my husband to three different stores because apparently everyone in town decided to make Spider Eggs that weekend.
Another time, my cat knocked over the bowl of olive legs while I was assembling. Five-second rule definitely applied that day, and honestly, nobody was the wiser.
If your spiders look more like weird octopi or abstract sculptures, just own it. Tell the kids they’re “mutant Halloween spiders” or something. They’ll probably think that’s even cooler.
The Reaction (Worth Every Minute)
The first time I brought these to a Halloween party, I watched kids’ faces light up when they saw the platter. There’s something about food that looks scary but tastes familiar that just works for them.
Even the adults were impressed, asking for the recipe like I’d created some complex culinary masterpiece. I mean, I’m not gonna tell them it took me 30 minutes and zero cooking skills.
My friend Lisa tried to recreate them and texted me a picture of what looked like olive explosions on eggs. We both laughed so hard, and I reminded her that even my first batch looked pretty rough. Practice makes… well, maybe not perfect, but definitely edible.
Make-Ahead Magic
Here’s something I discovered by accident when I made them a day early – they actually taste better after sitting overnight. The flavors kind of meld together, and somehow they look even more realistic.
You can make the deviled eggs part up to two days ahead, then just add the olive spiders the day you’re serving them. The legs can get a bit soggy if they sit too long, so I learned to do the spider assembly right before the party.
Storage and Leftovers
These keep in the fridge for about 3-4 days, though in my experience, they never last that long. My kids will sneak into the kitchen and grab the leftover Spider Eggs for after-school snacks.
Pro tip: if you have leftovers, you can always pick off the olive pieces and just eat them as regular deviled eggs. Nobody judges you for deconstructing your Halloween snacks in November.
Final Thoughts on Spider Eggs
Look, I’m not gonna pretend these are some revolutionary recipe that’ll change your life. They’re deviled eggs with olives on top. But sometimes the simplest ideas are the ones that work best, especially when you’re dealing with kids and Halloween parties and the general chaos that comes with both.
What I love most about Spider Eggs is that they’re accessible. You don’t need special equipment or hard-to-find ingredients or advanced cooking skills. You just need eggs, olives, and the willingness to embrace the fact that your spiders might look a little wonky.
Every time I make these now, I think about that panicked night before my daughter’s class party when I thought I was gonna show up empty-handed. Sometimes the best recipes come from moments when you just have to figure it out with whatever’s in your kitchen.
So go ahead, give these Spider Eggs a try. And if they turn out looking more like alien life forms than spiders, just tell everyone they’re “creative interpretations.” Trust me, the kids won’t care, and the adults will be too impressed that you made something Halloween-themed to notice the imperfections.
Happy Halloween, and may your spider legs stay attached to your eggs! 🕷️
Spider Eggs: Creepy-Cute Halloween Snack Kids Will Love
Make spooky Spider Eggs for Halloween using deviled eggs and black olives! This easy recipe creates creepy-looking but delicious Halloween treats that kids absolutely love.
Ingredients
- 12 large eggs
- 1/2 cup mayonnaise
- 2 teaspoons yellow mustard
- Salt to taste
- Black pepper to taste
- Paprika (optional)
- 1 can large black olives, pitted
Instructions
- Step 1Place eggs in large pot, cover with cold water. Bring to boil, then turn off heat and let sit for 12 minutes.
- Step 2Drain hot water and run cold water over eggs. Peel eggs once cooled.
- Step 3Cut eggs in half lengthwise, remove yolks to bowl. Mash yolks with mayonnaise, mustard, salt, and pepper.
- Step 4Cut black olives in half. Use one half for spider body, slice other half into thin strips for legs.
- Step 5Spoon yolk mixture back into egg white halves.
- Step 6Place one olive half in center of each egg for spider body. Arrange 8 olive strips around body for spider legs.
- Step 7Refrigerate until ready to serve. Keep chilled for food safety.