
Okay, so I’ve been making the same three desserts on repeat for like two years, and my family finally staged an intervention. “We love you,” my sister said at Easter brunch, “but if you bring that same chocolate cake one more time…”
Ouch. Fair.
So I went on this whole spring dessert recipes quest, determined to find things that felt lighter, brighter, and honestly just more spring-like than my usual heavy winter baking. And here’s what I learned: spring desserts don’t have to be complicated or fancy. They just need to taste like sunshine and not sit in your stomach like a brick. These seven recipes have become my go-to rotation for everything from casual weeknight desserts to bringing something to potlucks without panicking at 9 PM the night before.
Most of these use seasonal flavors—lots of lemon, berries, and lighter textures. Nothing here requires a stand mixer or fancy techniques. Just real ingredients, simple steps, and results that make people ask for the recipe. Which is exactly why I’m writing this down, because I kept texting the same instructions to different people.
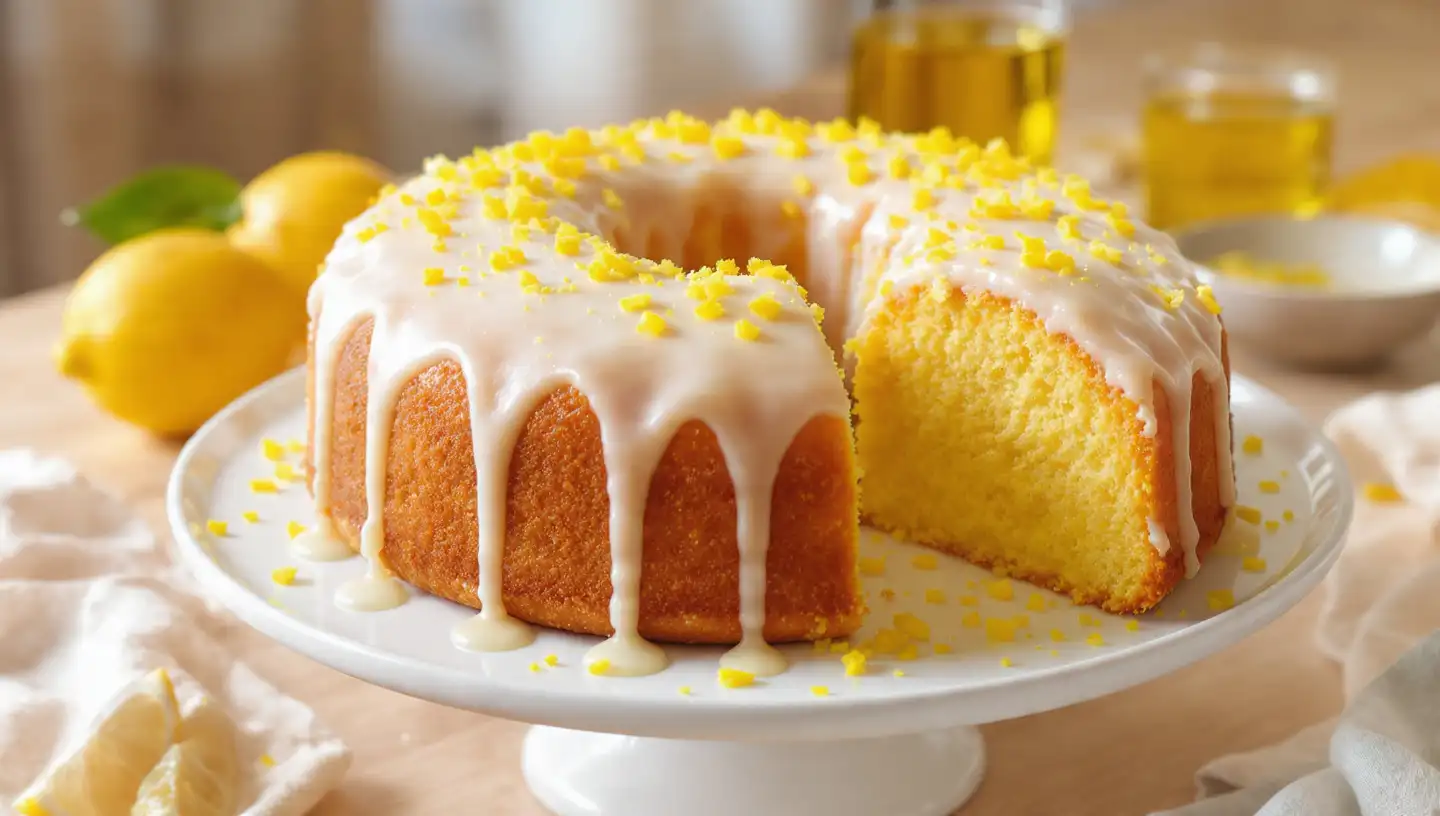
1. Lemon Olive Oil Cake That Tastes Like Spring in Cake Form
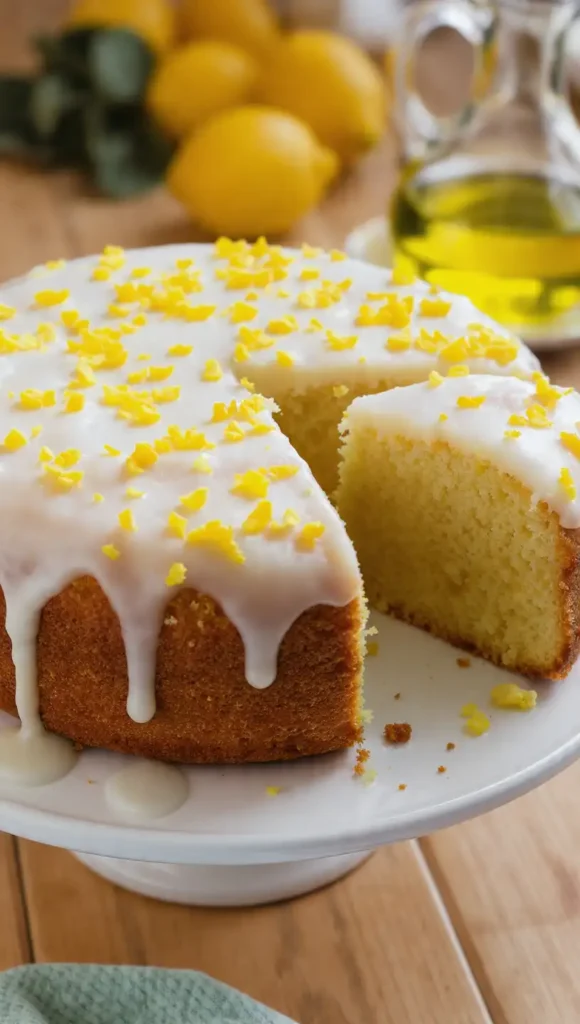
First time I made this, I was skeptical about the olive oil. Like, wouldn’t it taste… oily? Spoiler: it doesn’t. It makes the cake insanely moist and gives it this subtle richness that butter can’t quite match. My mom’s been making variations of this for years, and now I get why.
This is one of those spring dessert recipes easy enough for a Tuesday night but impressive enough for a dinner party. The lemon flavor is bright without being overwhelming, and the texture is tender and light. Plus it stays fresh for days, which never happens with most cakes in my house.
Ingredients:
- 1½ cups all-purpose flour (just scoop and level, no need to get fancy)
- 2 tsp baking powder
- ½ tsp salt
- 3 large eggs (room temperature if you remember, but honestly I’ve used cold ones)
- 1 cup granulated sugar
- ¾ cup good olive oil (not the fancy expensive kind, but not the bottom-shelf stuff either)
- ½ cup whole milk (I’ve used 2% in a pinch)
- Zest of 2 large lemons (use a microplane if you have one)
- ¼ cup fresh lemon juice (about 1-2 lemons)
- 1 tsp vanilla extract
For the glaze:
- 1 cup powdered sugar
- 2-3 tbsp fresh lemon juice (add gradually)
- 1 tbsp lemon zest for topping
Instructions:
- Preheat your oven to 350°F. Grease a 9-inch round cake pan and line the bottom with parchment paper. (I skip this step sometimes and just grease really well, but the parchment makes life easier.)
- In a medium bowl, whisk together the flour, baking powder, and salt. Set it aside.
- In a large bowl, beat the eggs and sugar together until the mixture is pale and slightly thick—about 2-3 minutes with a hand mixer or whisk. Your arm will get tired if you’re whisking by hand. That’s normal.
- Slowly pour in the olive oil while mixing. Then add the milk, lemon zest, lemon juice, and vanilla. Mix until everything’s combined and looks smooth.
- Add the dry ingredients to the wet ingredients in two batches, stirring gently with a spatula between each addition. Don’t overmix—stop as soon as you don’t see flour streaks anymore.
- Pour the batter into your prepared pan and bake for 35-40 minutes. It’s done when a toothpick inserted in the center comes out with just a few moist crumbs. Mine usually takes 38 minutes, but every oven’s different.
- Let the cake cool in the pan for 15 minutes, then turn it out onto a wire rack to cool completely. If you try to glaze it while it’s warm, the glaze will just melt into the cake. (Found that out the hard way.)
- For the glaze, whisk together the powdered sugar and lemon juice until smooth. Start with 2 tablespoons of juice and add more if it’s too thick—you want it pourable but not runny. Drizzle over the cooled cake and sprinkle with extra lemon zest.
Tips & Chaos Notes:
- Don’t use extra virgin olive oil with a super strong flavor. It’ll overpower the lemon.
- This cake actually gets better on day two. The flavors meld and the texture gets even more moist.
- I’ve added fresh blueberries to the batter before (fold in ¾ cup at the end). Delicious but they sink to the bottom. Still tastes great.
- If you don’t have a cake pan, use an 8×8 square pan. Just add 5 minutes to the bake time.
- Store this covered at room temperature for up to 3 days, or refrigerate for up to a week.
2. No-Bake Strawberry Cheesecake Cups for When You’re Too Lazy to Turn On the Oven
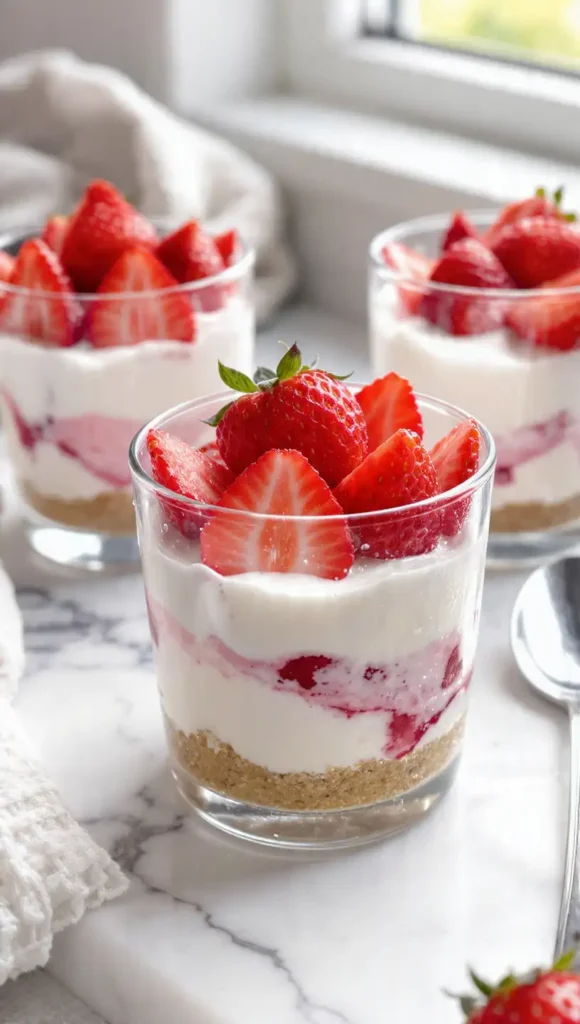
Last May, I promised to bring dessert to a cookout and completely forgot until 2 hours before. Panic mode. But then I remembered these no-bake cheesecake cups my friend made once, and honestly? They saved me. No one knew I’d thrown them together in 20 minutes.
These are perfect spring dessert recipes for a crowd because you can make a ton of them, they’re easy to transport, and everyone gets their own portion. Plus they look way fancier than the effort required.
Ingredients:
- 8 oz cream cheese, softened (leave it out for 30 minutes or microwave for 15 seconds)
- ½ cup powdered sugar
- 1 tsp vanilla extract
- 1 cup heavy whipping cream (the real stuff, not Cool Whip)
- 1½ cups fresh strawberries, diced small (about 8-10 strawberries)
- 1 cup graham cracker crumbs (about 7-8 crackers crushed up)
- 3 tbsp melted butter
- 2 tbsp granulated sugar
For topping:
- Extra strawberry slices
- Mint leaves if you’re feeling fancy (I never am)
Instructions:
- In a small bowl, mix the graham cracker crumbs, melted butter, and granulated sugar until the mixture looks like wet sand. Divide this between 6-8 small cups or jars, pressing it down firmly with the back of a spoon or your fingers. Stick these in the fridge while you make the filling.
- In a large bowl, beat the softened cream cheese with the powdered sugar and vanilla until it’s smooth and fluffy—about 2 minutes. If your cream cheese has lumps, keep beating. Nobody wants chunks of cream cheese in their dessert.
- In a separate bowl, whip the heavy cream until stiff peaks form. This takes about 3-4 minutes with a hand mixer. You’ll know it’s ready when you lift the beaters and the cream holds its shape.
- Gently fold the whipped cream into the cream cheese mixture. Use a spatula and fold carefully—you want to keep all that air you just whipped in. The mixture should be light and fluffy, not deflated.
- Fold in the diced strawberries. Some of them will break apart and make the filling slightly pink. That’s fine and actually looks pretty.
- Spoon or pipe the cheesecake filling into your cups over the graham cracker crust. I usually just spoon it because I’m lazy, but piping looks nicer if you’re bringing these somewhere.
- Top each cup with a few strawberry slices. Refrigerate for at least 2 hours before serving, but overnight is even better. The graham cracker crust softens slightly and the flavors meld together.
Tips & Chaos Notes:
- Use actual heavy cream, not whipped topping. The texture is completely different and worth it.
- You can make these in wine glasses, mason jars, or those little plastic cups with lids for transporting.
- Fresh strawberries are key here. Frozen ones make everything watery and sad.
- These last 2-3 days in the fridge, but the crust gets softer over time.
- My kid likes these with crushed Oreos instead of graham crackers. It’s not traditional but it works.
3. Coconut Lime Bars That Are Basically Vacation in Square Form
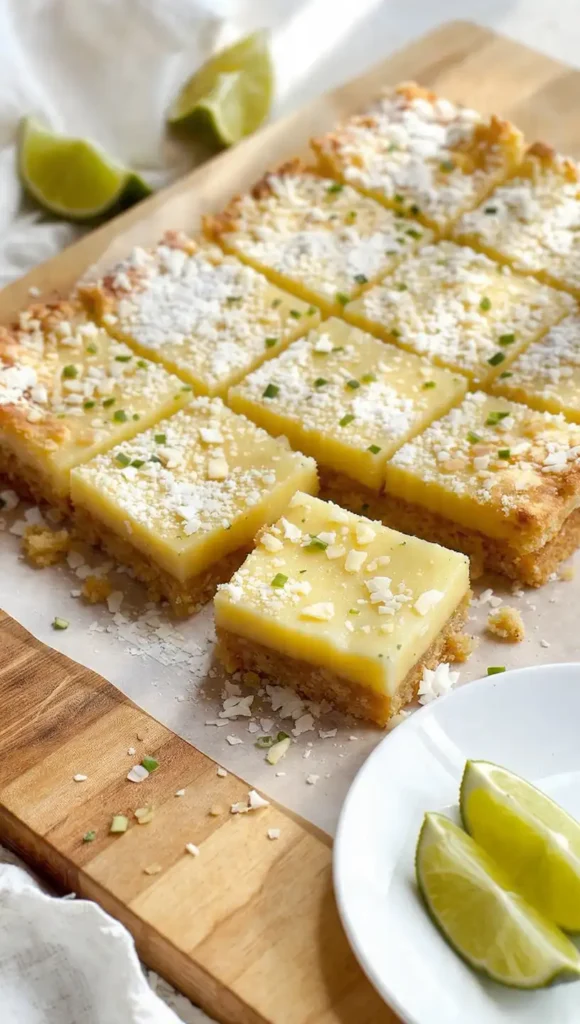
I made these for the first time after a beach trip got canceled (thanks, random work crisis), and they somehow made me feel a little less bitter about it. The combination of coconut and lime is just so bright and tropical. They’re like if a margarita and a dessert had a baby.
These are among the best spring dessert recipes I’ve found for potlucks because they’re easy to cut into squares, travel well, and have that wow factor. The buttery shortbread crust plus the tangy-sweet lime filling is perfection.
Ingredients:
For the crust:
- 1½ cups all-purpose flour
- ½ cup powdered sugar
- ¾ cup cold butter, cut into cubes (do NOT use melted butter here)
- ¼ tsp salt
- ½ cup shredded sweetened coconut
For the filling:
- 4 large eggs
- 1½ cups granulated sugar
- ¼ cup all-purpose flour
- ½ cup fresh lime juice (about 4-5 limes)
- Zest of 2 limes
- ½ cup shredded sweetened coconut
- ¼ tsp salt
For topping:
- Powdered sugar for dusting
- Extra toasted coconut if you want (I usually skip this)
Instructions:
- Preheat your oven to 350°F. Line a 9×13 inch baking pan with parchment paper, leaving some overhang on the sides so you can lift the bars out later.
- Make the crust by combining flour, powdered sugar, salt, and coconut in a food processor. Add the cold butter cubes and pulse until the mixture looks like coarse crumbs. If you don’t have a food processor, you can use a pastry cutter or just smoosh everything together with your hands. It takes longer but works.
- Press the crust mixture evenly into the bottom of your prepared pan. Really pack it down—use the bottom of a measuring cup to flatten it. Bake for 18-20 minutes until it’s lightly golden around the edges. It won’t look fully baked and that’s okay.
- While the crust is baking, make the filling. Whisk together the eggs and sugar in a large bowl until combined. Add the flour, lime juice, lime zest, coconut, and salt. Whisk until smooth. The mixture will be thin and liquidy—that’s right.
- Pour the filling over the hot crust as soon as it comes out of the oven. Spread it to the edges with a spatula.
- Bake for another 23-25 minutes until the filling is set but still has a slight jiggle in the center when you shake the pan gently. Mine usually takes exactly 24 minutes.
- Let the bars cool completely at room temperature, then refrigerate for at least 2 hours. Cold bars are way easier to cut cleanly.
- Use the parchment paper overhang to lift the whole thing out of the pan. Cut into squares with a sharp knife, wiping the knife clean between cuts. Dust with powdered sugar right before serving.
Tips & Chaos Notes:
- Fresh lime juice is non-negotiable here. Bottled lime juice tastes fake and weird.
- If your filling seems too liquidy, you probably didn’t whisk it enough. It should be uniform with no flour lumps.
- Store these in the fridge for up to 5 days. They actually don’t freeze well—the texture gets weird.
- The crust should be golden but not dark brown. Watch it.
- Use a bench scraper or thin metal spatula to cut these if you have one. Cleanest cuts ever.
4. Vegan Lemon Poppy Seed Muffins Because Not Everything Needs Butter and Eggs
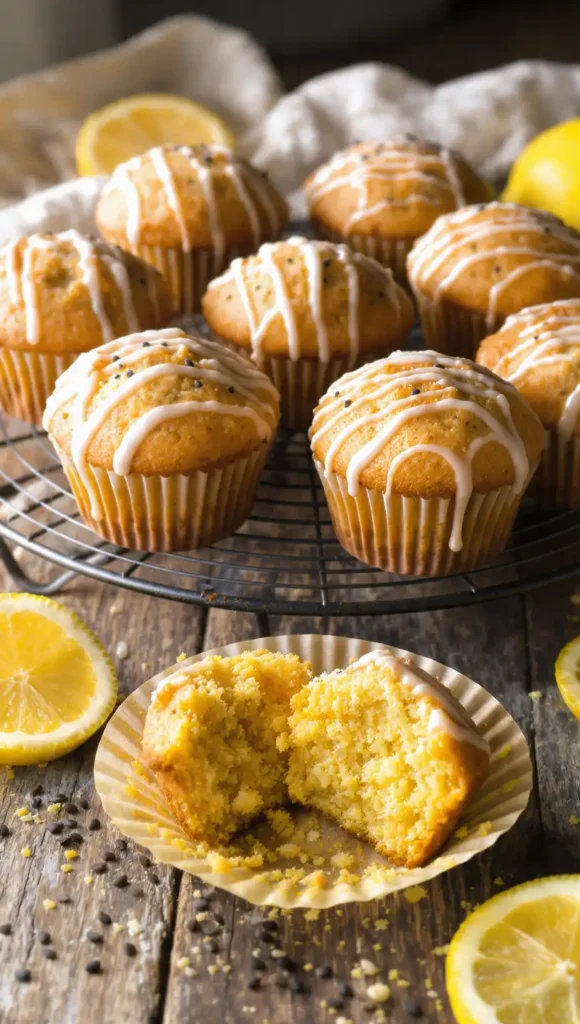
My neighbor is vegan, and every time there’s a neighborhood thing, she brings store-bought cookies because “no one makes vegan desserts.” Challenge accepted. These spring dessert recipes vegan muffins proved her wrong, and now she asks me to make them for every gathering.
They’re light, fluffy, and so lemony. And honestly, even my non-vegan family loves them. You wouldn’t know they’re vegan unless I told you, which is exactly the point.
Ingredients:
- 2 cups all-purpose flour
- ¾ cup granulated sugar
- 2 tsp baking powder
- ½ tsp baking soda
- ½ tsp salt
- 2 tbsp poppy seeds
- ¾ cup unsweetened almond milk (or any plant milk you like)
- ⅓ cup neutral oil (vegetable, canola, or light olive oil)
- ⅓ cup fresh lemon juice
- Zest of 2 lemons
- 1 tsp vanilla extract
- 1 tsp apple cider vinegar (this reacts with the baking soda for lift)
For the glaze:
- 1 cup powdered sugar
- 2-3 tbsp lemon juice
- ½ tsp lemon zest
Instructions:
- Preheat your oven to 375°F. Line a 12-cup muffin tin with paper liners or grease it really well.
- In a large bowl, whisk together the flour, sugar, baking powder, baking soda, salt, and poppy seeds. Make sure everything’s evenly distributed.
- In a separate bowl or measuring cup, combine the almond milk, oil, lemon juice, lemon zest, vanilla, and apple cider vinegar. Stir it together and let it sit for a minute—it’ll look slightly curdled from the acid. That’s good.
- Pour the wet ingredients into the dry ingredients and stir with a spoon or spatula until just combined. There will be lumps. Do NOT overmix or your muffins will be dense. I learned this the hard way after making hockey pucks the first time.
- Divide the batter evenly among the muffin cups, filling each about ¾ full. I use an ice cream scoop for this because it’s faster and they come out the same size.
- Bake for 18-22 minutes until the tops are golden and a toothpick inserted in the center comes out clean. Mine are usually perfect at 20 minutes.
- Let the muffins cool in the pan for 5 minutes, then transfer to a wire rack. Let them cool completely before glazing.
- For the glaze, whisk together the powdered sugar and lemon juice until smooth. Drizzle over the cooled muffins and sprinkle with a bit of lemon zest.
Tips & Chaos Notes:
- Don’t skip the apple cider vinegar. It’s the secret to fluffy vegan muffins.
- Fresh lemon juice is important here. The flavor is SO much better than bottled.
- These stay fresh for about 3 days at room temperature in an airtight container.
- You can skip the glaze and just sprinkle a little coarse sugar on top before baking if you want them less sweet.
- I’ve made these with orange instead of lemon. Also delicious.
5. Gluten-Free Berry Crumble That Doesn’t Taste Like Cardboard
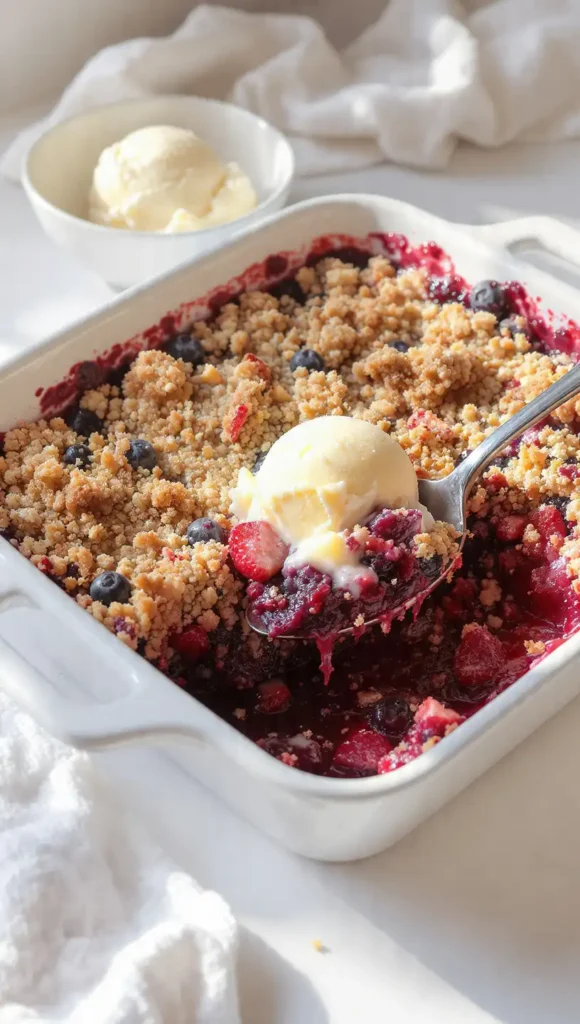
I’ll be honest—I’ve made some truly terrible gluten-free desserts. Dry, gritty, weird aftertaste… the whole nightmare. But this one? This one’s actually good. My gluten-free cousin tried it and didn’t immediately ask “what flour did you use?” which is the highest compliment.
This is one of those spring dessert recipes gluten free that works for anyone. The topping is buttery and crisp, the berries are juicy and sweet-tart, and the almond flour adds a subtle nutty flavor that’s actually better than regular flour.
Ingredients:
For the filling:
- 3 cups mixed fresh berries (I use 1 cup each: strawberries, blueberries, raspberries)
- ¼ cup granulated sugar
- 2 tbsp cornstarch (this thickens the juices)
- 1 tbsp lemon juice
- 1 tsp vanilla extract
- Pinch of salt
For the crumble topping:
- 1 cup gluten-free all-purpose flour blend (I use Bob’s Red Mill 1-to-1)
- ½ cup almond flour
- ½ cup old-fashioned oats (make sure they’re certified gluten-free)
- ½ cup packed brown sugar
- ½ tsp cinnamon
- ¼ tsp salt
- ½ cup cold butter, cut into small cubes (vegan butter works too)
Instructions:
- Preheat your oven to 375°F. Butter an 8×8 inch baking dish or a similar-sized oven-safe dish.
- In a large bowl, toss the berries with sugar, cornstarch, lemon juice, vanilla, and salt. Make sure the cornstarch is evenly distributed—no clumps. Let this sit while you make the topping. The berries will start releasing juice.
- Pour the berry mixture into your prepared baking dish and spread it evenly.
- In another bowl, mix together both flours, oats, brown sugar, cinnamon, and salt.
- Add the cold butter cubes and use your fingers or a pastry cutter to work the butter into the flour mixture until it looks like chunky crumbs. Some bigger pea-sized pieces are fine—they’ll create pockets of crispy buttery goodness.
- Sprinkle the crumble topping evenly over the berries. Don’t pack it down, just let it sit on top loosely.
- Place the baking dish on a rimmed baking sheet (trust me, the berry juices will bubble over) and bake for 40-45 minutes until the topping is golden brown and the berry filling is bubbling around the edges.
- Let it cool for at least 15 minutes before serving. The filling needs time to thicken up. If you dig in immediately, it’ll be soup. Delicious soup, but still.
Tips & Chaos Notes:
- Use any berry combination you want. I’ve done all blueberries, all strawberries, whatever’s on sale.
- Frozen berries work too—just add 5 minutes to the bake time and an extra tablespoon of cornstarch.
- Serve this warm with vanilla ice cream. It’s basically mandatory.
- The topping gets soggy if you store it covered, so I keep it loosely tented with foil and reheat in the oven to crisp it back up.
- My gluten-free flour blend has xanthan gum in it. If yours doesn’t, add ½ tsp xanthan gum to the topping mixture.
6. Honey Lavender Panna Cotta That Sounds Fancy But Is Secretly Easy
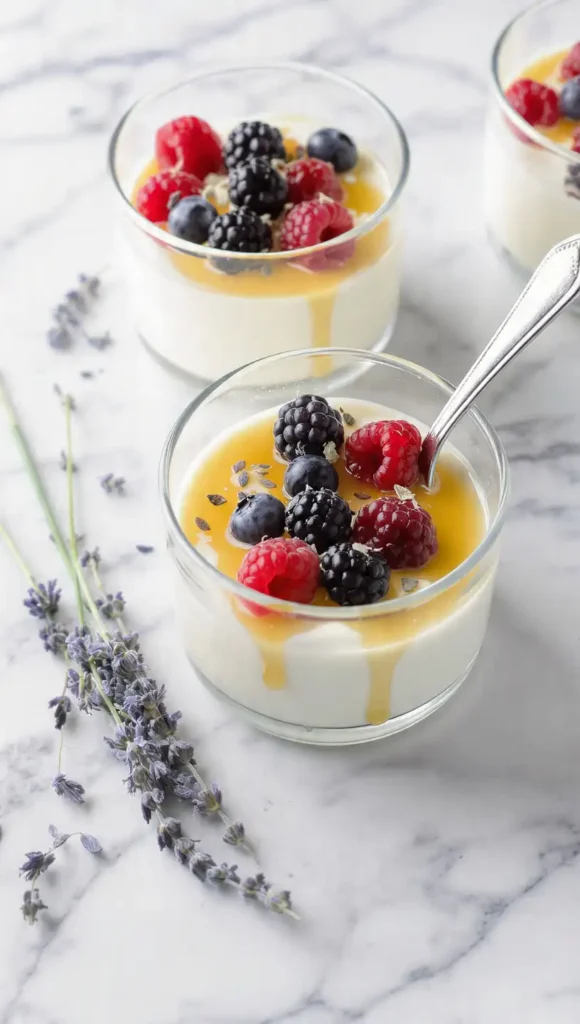
I made these for a dinner party once, and everyone assumed I’d been cooking all day. Nope. Twenty minutes of actual work, and the rest is just waiting for them to set in the fridge. The lavender makes them feel so light spring dessert recipes elegant, but they’re honestly foolproof.
Panna cotta is just sweetened cream that’s been set with gelatin. That’s it. If you can boil water and stir, you can make this.
Ingredients:
- 2 cups heavy cream
- ½ cup whole milk
- ⅓ cup honey (good quality makes a difference here)
- 1 tbsp dried culinary lavender (NOT the stuff from the craft store—make sure it’s food-grade)
- 2¼ tsp unflavored gelatin powder (one standard packet)
- 3 tbsp cold water
- 1 tsp vanilla extract
- Pinch of salt
For serving:
- Fresh berries
- Extra honey for drizzling
- Mint leaves if you’re trying to impress someone
Instructions:
- Pour the cold water into a small bowl and sprinkle the gelatin evenly over the surface. Don’t stir yet—just let it sit and bloom for about 5 minutes. It’ll look weird and spongy.
- In a medium saucepan, combine the cream, milk, honey, and lavender. Heat over medium heat, stirring occasionally, until it just starts to steam and tiny bubbles form around the edges. Do NOT let it boil. If it boils, you’ll have to start over.
- Remove from heat and let it steep for 10 minutes. This is when the lavender infuses everything. Your kitchen will smell amazing.
- Strain the mixture through a fine-mesh sieve into a clean bowl or large measuring cup to remove the lavender buds. Press on the buds to get all the liquid out.
- Add the bloomed gelatin to the still-warm cream mixture and whisk until it’s completely dissolved—about 1 minute. Add the vanilla and salt.
- Pour the mixture into 6 small ramekins, glasses, or cups. I use 4-ounce ramekins but honestly any small container works.
- Refrigerate for at least 4 hours, but overnight is better. They need time to fully set. The first time I made these, I got impatient and served them after 2 hours—they were jiggly soup.
- Serve them in the ramekins with fresh berries on top and a drizzle of honey. Or you can unmold them by running a knife around the edge and inverting onto a plate, but that’s extra work.
Tips & Chaos Notes:
- Buy culinary lavender online or from spice shops. Regular lavender from garden centers isn’t food-safe.
- If you don’t like lavender or think it tastes like soap (my husband says this), just skip it. The panna cotta is delicious plain.
- These last 3-4 days in the fridge covered with plastic wrap.
- Make sure your gelatin fully dissolves or you’ll have weird rubbery bits.
- If you want to unmold them, lightly oil the ramekins before pouring in the mixture.
7. Lemon Blueberry Sheet Cake for When You Need to Feed Actual Humans
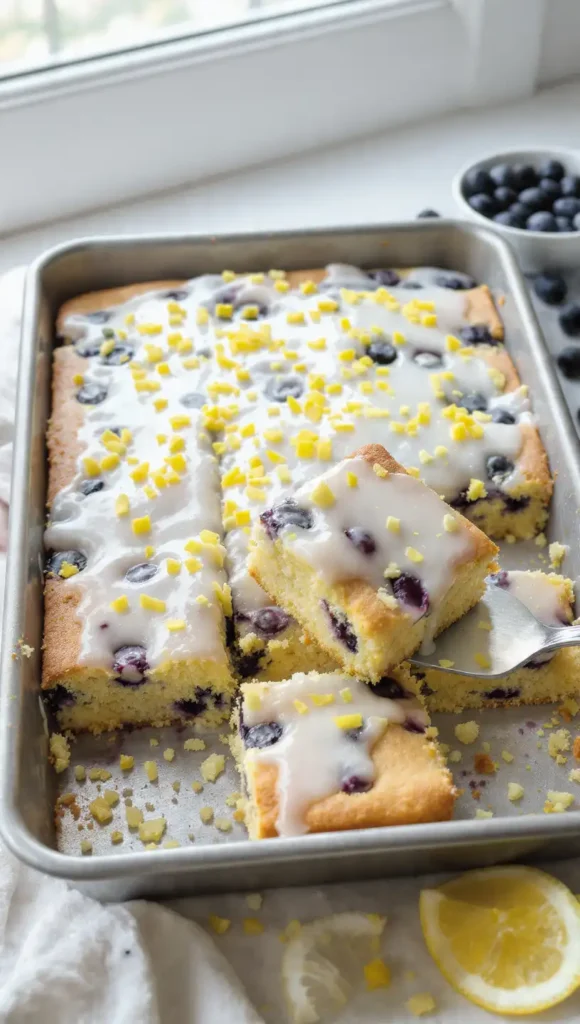
Last thing I’m including here is a sheet cake, because let’s be real—sometimes you need easy dessert recipes for spring that serve a crowd without making 47 individual portions. This cake is simple, uses one bowl, and people always go back for seconds.
The lemon and blueberry combination screams spring, and the cake itself is tender and buttery. Plus sheet cakes are just easier to transport than layer cakes. No special pans, no frosting disasters.
Ingredients:
For the cake:
- 2½ cups all-purpose flour
- 2 tsp baking powder
- ½ tsp salt
- ¾ cup unsalted butter, softened
- 1½ cups granulated sugar
- 3 large eggs
- 1 cup whole milk
- Zest of 2 lemons
- 3 tbsp fresh lemon juice
- 2 tsp vanilla extract
- 1½ cups fresh blueberries (toss them in 1 tbsp flour before adding to prevent sinking)
For the glaze:
- 2 cups powdered sugar
- ¼ cup fresh lemon juice
- 2 tbsp melted butter
- Lemon zest for topping
Instructions:
- Preheat your oven to 350°F. Grease and flour a 9×13 inch baking pan, or line it with parchment paper.
- In a medium bowl, whisk together the flour, baking powder, and salt. Set aside.
- In a large bowl, beat the softened butter and sugar together until light and fluffy—about 3 minutes with a hand mixer. It should look pale and creamy.
- Add the eggs one at a time, beating well after each addition. The mixture might look slightly curdled. That’s fine.
- Add the lemon zest, lemon juice, and vanilla. Mix until combined.
- Add half the flour mixture and mix on low speed just until combined. Add the milk and mix. Add the remaining flour mixture and mix until you just barely see streaks of flour.
- Toss the blueberries with 1 tablespoon of flour in a small bowl. This helps prevent them from all sinking to the bottom. Gently fold them into the batter with a spatula.
- Pour the batter into your prepared pan and spread it evenly. The batter will be thick.
- Bake for 35-40 minutes until the top is golden and a toothpick inserted in the center comes out clean or with just a few moist crumbs. Mine takes 38 minutes every time.
- Let the cake cool completely in the pan on a wire rack. If you glaze it while warm, everything will melt and slide off.
- For the glaze, whisk together the powdered sugar, lemon juice, and melted butter until smooth. Pour over the cooled cake and spread with a spatula. Sprinkle with lemon zest.
- Let the glaze set for about 30 minutes before cutting. Or don’t wait and eat it with a fork straight from the pan. I won’t judge.
Tips & Chaos Notes:
- Don’t skip tossing the blueberries in flour. They will 100% sink otherwise.
- Frozen blueberries work in a pinch but add 5 minutes to bake time and the color bleeds more.
- This cake stays moist for 3-4 days covered at room temperature.
- You can skip the glaze and just dust with powdered sugar if you want it less sweet.
- I’ve made this with raspberries instead of blueberries. Also excellent.
- Cut this into squares or rectangles depending on how many people you’re feeding. I usually get 15-20 servings.
Look, Here’s the Deal
These spring dessert recipes aren’t going to win any awards for culinary innovation, but they’re all solid, reliable, and actually taste like spring instead of the same heavy chocolate stuff I make all winter. They’ve survived kid birthday parties, potlucks, random Tuesday night cravings, and that one time I needed to impress my mother-in-law (the lemon olive oil cake sealed the deal).
The thing about spring desserts is they don’t need to be complicated. Fresh flavors, lighter textures, maybe some berries or citrus—that’s really all it takes. And if you mess one up, try again. I’ve burned more cakes than I’d like to admit, but that’s how you figure out what works.
Let me know which one you try first. I’m genuinely curious if anyone else’s family picks out the poppy seeds from the muffins like mine does. Also, if you make the panna cotta and hate lavender, I promise I won’t be offended. Just skip it.