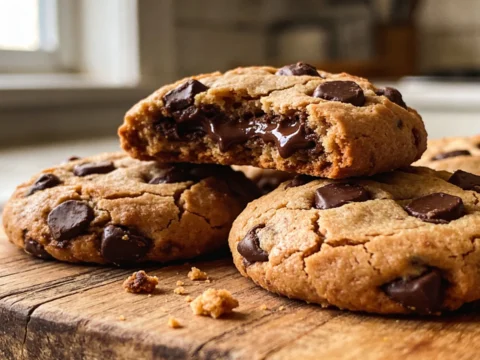
This sugar cookie recipe has been my secret weapon for years. The cookies hold their shape perfectly during baking, yet somehow manage to stay soft and tender for days. I’ve tweaked and adjusted this recipe more times than I can count, usually late at night before school bake sales or holiday gatherings. If you’ve struggled with cookies that spread into unrecognizable blobs or turn rock-hard after cooling, I promise this recipe will change your cookie game forever.
Table of Contents
Why I Obsessed Over Creating the Perfect Sugar Cookie
Look, I’m going to be honest with you. I used to hate making sugar cookies. The dough would stick to everything, the shapes would spread into amorphous blobs in the oven, and the cookies would either be too crisp or weirdly soft in the middle but hard around the edges. It was frustrating, especially when my kids would look so disappointed at their misshapen dinosaurs and stars.
The breaking point came during my daughter’s 7th birthday party. I’d planned this whole cookie decorating station — bought special sprinkles, made colored icing, the works. I baked the cookies the night before, following a recipe that claimed to be “foolproof.” Well, those cookies spread so badly they all merged together on the baking sheet. I was up until 2 AM frantically remaking them with another recipe, and those turned out like little hockey pucks. I ended up buying store-bought cookies and pretending that was the plan all along. My mom knew. She always knows.
After that disaster, I went into full research mode. I tested recipe after recipe, adjusting flour amounts, trying different sugars, playing with oven temperatures. I made so many cookies that my husband started taking them to work by the dozen. The breakthrough came when I finally understood the relationship between fat, sugar, and flour ratios. And the chilling time? Non-negotiable, as it turns out.
Ingredients for This Sugar Cookie Recipe
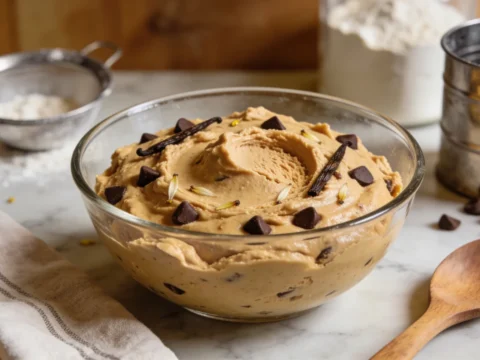
The beauty of this sugar cookie recipe is that it uses simple pantry staples, but how you handle them makes all the difference. I’ve tested every substitution imaginable (some successful, many not), so I’ll share what works and what absolutely doesn’t. The most important thing I’ve learned is that measuring precisely matters more with sugar cookies than almost any other baked good I make.
Temperature matters too. Several ingredients need to be at specific temperatures for the dough to come together properly. I learned this the hard way after making a batch with butter that was practically melting instead of just softened – those cookies spread like pancakes. Anyway, let’s break down what you’ll need:
Unsalted Butter (1 cup/2 sticks, softened but still cool)
This is the foundation of our cookie. It needs to be soft enough to cream with sugar but not so warm that it’s losing structure. Leave it out for about 30-45 minutes before using – when you press it, your finger should leave an indent but not sink in. If you only have salted butter, you can use it but reduce the added salt to ¼ teaspoon.
Granulated Sugar (1 cup)
I’ve tested with brown sugar, and while it makes cookies chewier, it also causes more spreading and changes the classic sugar cookie flavor. Stick with white granulated sugar for this recipe. The fine crystals cream perfectly with butter to create tiny air pockets that give these cookies their perfect texture.
Eggs (2 large, room temperature)
Room temperature eggs blend more evenly into the dough. If you forget to take them out ahead of time (I always do), place them in a bowl of warm water for 5-10 minutes. The protein in eggs provides structure, and the fat in the yolks adds richness and helps keep our cookies soft.
Pure Vanilla Extract (2 teaspoons)
Please don’t use imitation vanilla here. I did a side-by-side taste test, and the difference is noticeable. The real stuff costs more, but it’s worth it for this recipe. If you want to get fancy, try adding ¼ teaspoon of almond extract too – it adds that professional bakery flavor that makes people ask for your recipe.
All-Purpose Flour (3¼ cups, measured correctly)
This is where most sugar cookie recipes go wrong. Too little flour and your cookies spread; too much and they’re dry and crumbly. I spoon flour into my measuring cup then level it with a knife – never scoop directly with the measuring cup. For even more precision, 1 cup should weigh about 125 grams. I’ve tried cake flour (too soft) and bread flour (too tough), so stick with all-purpose.
Baking Powder (¾ teaspoon)
Not baking soda! I made that mistake once, and my cookies tasted weirdly metallic. Baking powder gives just enough lift without causing spreading. Make sure yours is fresh – test it by adding a pinch to hot water; it should bubble vigorously. If it doesn’t, your cookies won’t rise properly.
Salt (½ teaspoon)
I use kosher salt because that’s what’s in my salt cellar, but table salt works perfectly too. Don’t skip this! Salt balances the sweetness and enhances the vanilla flavor. Without it, your cookies will taste flat and one-dimensional – I learned that the hard way during my “is salt really necessary?” experimental phase.
Instructions sugar cookie recipe
The process for these cookies isn’t difficult, but there are a few non-negotiable steps that make the difference between cookies that hold their shape and cookies that become sad, shapeless blobs. The total active time is about 30 minutes if you’re organized, 45 if you’re me and keep stopping to check your phone. But there’s also chilling time – don’t even think about skipping it.
The dough can be made ahead and refrigerated for up to 3 days or frozen for up to a month. I actually prefer making it at least a day ahead because the flavor develops more fully. And if you’re planning to decorate these for a special occasion, do yourself a favor and make them at least a day before you need to decorate – trying to do it all in one day is a recipe for stress. Trust me on this one.
STEP 1: Cream the butter and sugar.
In a large bowl (or stand mixer if you have one), beat the softened butter and sugar together for a full 3-4 minutes until it’s light and fluffy. I’m serious about the timing – set a timer if you need to. When I rush this step, my cookies aren’t as tender. The mixture should turn noticeably paler and increase in volume. You’ll need to scrape down the sides of the bowl a couple of times during mixing.
STEP 2: Add eggs and vanilla.
Add your room temperature eggs one at a time, beating for about 30 seconds after each addition. If the mixture looks a little curdled, don’t panic – that’s normal and will smooth out when you add the dry ingredients. Mix in the vanilla extract (and almond extract if using). The batter should look smooth and glossy at this point. If it doesn’t, your butter might have been too cold or your eggs too cold.
STEP 3: Prepare and add the dry ingredients.
In a separate bowl, whisk together your flour, baking powder, and salt. This step seems fussy but it ensures everything is evenly distributed. Now add this mixture to your wet ingredients in 2-3 portions, mixing on low speed just until combined. STOP as soon as the flour disappears – overmixing develops gluten which makes cookies tough. The dough will be soft but not sticky. If it’s sticking to your fingers, add another tablespoon of flour.
STEP 4: Chill the dough properly.
Divide the dough in half and form each portion into a flat disc (not a ball). Wrap each disc tightly in plastic wrap and refrigerate for AT LEAST 2 hours, but preferably overnight. This is the step I used to try to shortcut, and my cookies always suffered. Chilling firms up the butter so cookies hold their shape, allows the flour to hydrate fully, and lets the flavors develop. If you’re in a rush, 30 minutes in the freezer can work in a pinch, but the results won’t be quite as good.
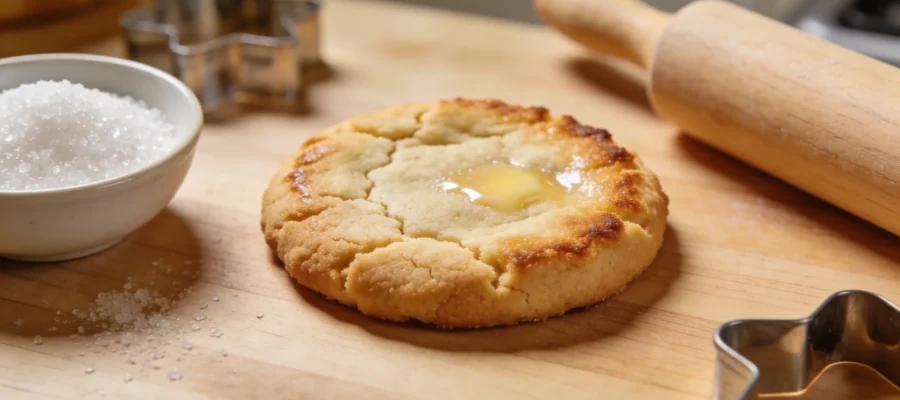
STEP 5: Roll out the dough correctly.
When you’re ready to bake, preheat your oven to 350°F and line baking sheets with parchment paper. Take one disc of dough out of the refrigerator (leaving the other chilled until needed). Let it sit for about 5-10 minutes to slightly soften – trying to roll completely cold dough will just crack and frustrate you. I usually whack it a few times with my rolling pin to get it started. Lightly flour your surface and rolling pin, then roll to ¼-inch thickness for softer cookies or ⅛-inch for crispier ones.
STEP 6: Cut out shapes and chill again.
Use cookie cutters to cut your shapes, placing them at least 1 inch apart on the prepared baking sheets. The amazing thing is, you can re-roll scraps 2-3 times without the cookies getting tough – just handle the dough gently. Here’s the secret step most recipes miss: put the cut-out cookies (on the baking sheet) back in the refrigerator for 10 minutes before baking. I know, I know – more chilling. But this final chill ensures they won’t spread even slightly during baking.
STEP 7: Bake with precision.
Bake one sheet at a time in the center of your oven for 8-10 minutes for ¼-inch cookies or 6-8 minutes for thinner ones. This is tricky because they won’t look done – they should be set but not browned at the edges. If they brown, they’ll be crisp, not soft. The first time I made these, I overbaked them waiting for that golden color that never came. You have to trust that pale cookies are done cookies. They’ll continue cooking slightly from residual heat after you take them out.
STEP 8: Cool completely before decorating.
Let the cookies cool on the baking sheet for 5 minutes (they’re too fragile to move immediately), then transfer to a wire rack to cool completely. They’ll firm up as they cool. Don’t even think about decorating until they’re completely cool – I’m talking room temperature throughout. Warm cookies plus icing equals a runny, frustrating mess. I’ve ruined many beautiful cookies by being impatient. If you’re planning to decorate with royal icing, give yourself plenty of time for the base layer to dry before adding details.
Tips & Variations sugar cookie recipe
These cookies keep beautifully in an airtight container for up to a week – they actually get softer and more flavorful after a day or two. For longer storage, freeze undecorated cookies between layers of parchment paper for up to 3 months. The raw dough also freezes well, just double-wrap it and thaw in the refrigerator overnight before using.
If you need these cookies to be extra sturdy for elaborate decorating, replace ¼ cup of the all-purpose flour with cornstarch. This gives them a slightly shorter texture that stands up to heavy icing. And speaking of decorating – if yours don’t look like the professional photos online, that’s completely normal. Mine certainly don’t, but they taste amazing and that’s what really matters.
For flavor variations, try adding the zest of one lemon or orange to the wet ingredients, or mix in 1 teaspoon of cinnamon for a snickerdoodle vibe. Just remember that any liquid add-ins may require a touch more flour to balance the moisture.
Final Thoughts sugar cookie recipe
Look, I’m not saying these are the world’s greatest sugar cookies – though my neighbor did ask for the recipe three times before I finally printed it out for her. What I am saying is that they’re reliable, they taste amazing, and they won’t let you down when you need cookies that actually look like what they’re supposed to be.
If you try this sugar cookie recipe, I’d love to hear how it turned out for you. Seriously – drop a comment about how your decorating went or what shapes you used. Did you make any tweaks? Did they actually hold their shape? Cookie conversations are my favorite kind of internet rabbit hole.
Soft Sugar Cookie Recipe That Holds Its Shape (Perfect for Decorating)
This sugar cookie recipe has been my secret weapon for years. The cookies hold their shape perfectly during baking, yet somehow manage to stay soft and tender for days.