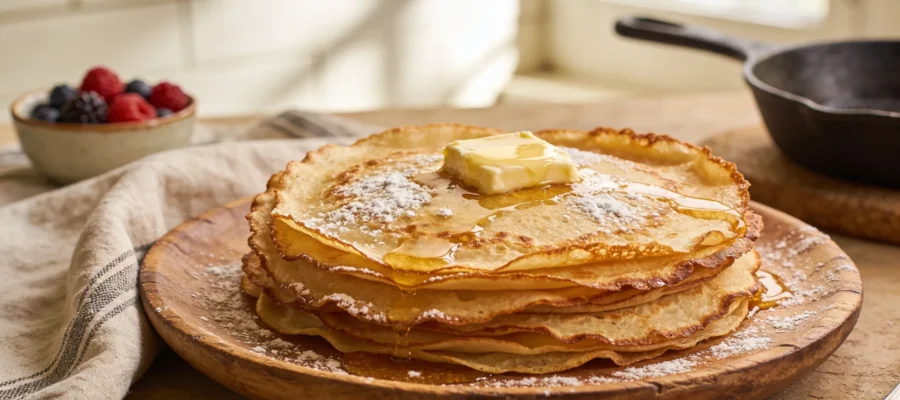
Swedish pancakes have been my weekend breakfast obsession for years, and I’ve finally perfected my Swedish pancakes recipe after countless Sunday morning experiments. These aren’t your typical American pancakes – they’re delicately thin, impossibly buttery, and practically melt in your mouth with each bite. The first time I made these for my kids, they actually stopped arguing for a full five minutes, which in my house counts as a culinary miracle. If you’ve never tried Swedish pancakes before, you’re in for a treat that makes regular pancakes seem downright boring.
Table of Contents :
My Journey to Swedish Pancake Perfection
Growing up with a Swedish grandmother meant these thin, delicate pancakes were a staple at our family gatherings. But recreating Mormor’s recipe? Total disaster the first few times. She never measured anything – just poured and mixed by feel. My first attempts were either thick and gummy or so thin they tore when I tried to flip them. And don’t get me started on my early flipping technique – I once managed to fold a pancake completely in half and then onto itself again, creating some kind of sad, doughy origami.
After ruining at least three batches (and nearly giving up), I finally called my aunt who revealed the secret: the batter needs to rest. Like, actually rest – not the “five minutes while I chop fruit” rest that I’d been doing. And the pan temperature is everything. Too hot and they burn before cooking through; too cool and they never get those beautiful golden edges that make Swedish pancakes so irresistible. These aren’t fluffy American pancakes or even French crepes – they’re their own unique thing: tender, buttery, and perfect for rolling around fresh berries or a smear of lingonberry jam.
Ingredients for Swedish Pancakes Recipe
The beauty of Swedish pancakes lies in their simplicity. You probably have everything you need already in your kitchen. But don’t let the basic ingredients fool you – each one plays a crucial role in creating that signature texture that’s somehow both tender and slightly chewy at the same time. The ingredient list might look similar to regular pancakes, but the proportions create something entirely different.
Quality matters here, especially with the butter. This is not the recipe to use that forgotten stick that’s been absorbing freezer smells for six months. And while I’m normally all for whole wheat substitutions, this is one place where good old-fashioned all-purpose flour really does work best. I’ve tried whole wheat versions, and while they’re fine, they miss that authentic delicate texture.
All-Purpose Flour (1 cup)
Regular all-purpose flour works perfectly here. I’ve tried fancy European-style flours, and honestly, they make very little difference. The key is measuring it correctly – I fluff, spoon, and level rather than scooping directly with the measuring cup, which can pack in too much flour and make your pancakes heavy instead of delicate.
Whole Milk (2 cups)
Full-fat milk is non-negotiable for Swedish pancakes. I tried making these with 2% once when that’s all I had, and while they were edible, they lacked that rich mouthfeel that makes Swedish pancakes special. If you’re feeling fancy, you can substitute up to half a cup of the milk with heavy cream for even more decadence.
Eggs (4 large)
Eggs provide structure and richness. Four eggs might seem like a lot for pancakes, but this is what gives Swedish pancakes their custard-like quality. Room temperature eggs blend better than cold ones, but I rarely remember to take them out ahead of time and they still turn out fine. Just beat them well.
Unsalted Butter (3 tablespoons, melted, plus more for cooking)
I use unsalted butter so I can control the salt content, but salted works too – just reduce the added salt. Melt it and let it cool slightly before adding to the batter so it doesn’t cook the eggs. And yes, you’ll need additional butter for the pan – these are called Swedish BUTTER pancakes for a reason in my house.
Sugar (2 tablespoons)
Just enough sugar to enhance flavor without making them truly sweet. Don’t skip it though – I tried once and the pancakes tasted flat. The sugar also helps with that beautiful caramelization on the edges. Brown sugar can be substituted for a slightly different flavor profile that works beautifully.
Salt (1/4 teaspoon)
A little salt balances the sweetness and enhances all the flavors. I use kosher salt, but table salt works fine – just use slightly less since it’s more concentrated. This is one of those ingredients that nobody notices until you forget it, and then something just seems “off” about the pancakes.
Vanilla Extract (1 teaspoon)
Not strictly traditional, but I add it anyway because it adds wonderful depth. My grandmother would probably roll her eyes, but even my Swedish relatives have admitted it’s a nice touch. Use the real stuff if possible – the artificial kind leaves a weird aftertaste.
Instructions for Swedish Pancakes Recipe
Making Swedish pancakes isn’t difficult, but there’s definitely a learning curve to getting them just right. The first one almost always turns out weird – it’s like the sacrifice pancake to the breakfast gods. Don’t get discouraged! By the third or fourth one, you’ll find your rhythm. The whole process takes about 30 minutes if you’re organized, or closer to 45 if you’re easily distracted like me.
The most important thing to remember is that these cook FAST once they hit the pan – we’re talking 1-2 minutes total cooking time per pancake. So have your flipping confidence ready and your plate standing by. And unlike thick American pancakes, you won’t see bubbles forming to tell you when to flip – you’ll need to watch for the edges to set and the surface to look less shiny.
STEP 1: Make the batter.
In a large bowl, whisk the eggs until frothy – about 30 seconds of vigorous whisking. Add the melted (but not hot) butter, milk, sugar, salt, and vanilla, then whisk until well combined. Sift in the flour gradually while whisking to prevent lumps. The first time I made these, I dumped all the flour in at once and spent 15 frustrated minutes trying to break up flour balls that refused to incorporate. Learn from my mistake!
STEP 2: Rest the batter.
Cover the bowl and let the batter rest for at least 30 minutes at room temperature, or up to overnight in the refrigerator. This step is non-negotiable! I was a skeptic until I did a side-by-side test. The rested batter produces noticeably more tender pancakes because the flour fully hydrates and the gluten relaxes. If you refrigerate overnight, let it sit out for about 15 minutes before cooking to take the chill off.
STEP 3: Prepare your pan.
Heat a 10-inch non-stick skillet or well-seasoned cast iron pan over medium heat. The pan is ready when a drop of water sizzles immediately on contact and dances across the surface. Too hot, and your pancakes will burn; too cool, and they’ll be pale and gummy. I ruined an entire batch once because I got impatient and turned the heat too high – ended up with pancakes that were simultaneously burnt and raw in the middle. Not appetizing.
STEP 4: Cook the first side.
Add about 1/2 teaspoon of butter to the hot pan and swirl to coat. Pour about 1/4 cup of batter into the center of the pan, then immediately lift and tilt the pan in a circular motion to spread the batter into a thin, even layer. Don’t pour too much batter – these should be thin! The first time I made these, I used too much batter and created something that was neither Swedish pancake nor regular pancake, just an identity-confused doughy disc.
STEP 5: Flip with confidence!
Cook until the edges look set and dry, and the bottom is golden brown – usually about 45-60 seconds. You’ll see the top start to look less shiny too. Carefully slide a thin spatula under the edge, then quickly and confidently flip the pancake. I cannot stress the “confidently” part enough – hesitation leads to folded, torn pancakes. My first few flips were disasters because I second-guessed myself mid-flip. Channel your inner Swedish chef and commit to the motion!
STEP 6: Cook the second side.
The second side needs even less time – about 30-45 seconds until golden brown. These cook much faster than regular pancakes, so don’t walk away! The first time I made these, I got distracted by my phone and came back to a pancake that more closely resembled a crispy cracker than anything you’d want to eat for breakfast. Stay vigilant!
STEP 7: Keep warm and repeat.
Slide the finished pancake onto a plate and cover with a clean kitchen towel to keep warm. Return the pan to the heat, add a bit more butter, and repeat the process with the remaining batter. You can also keep them warm in a 200°F oven, but don’t stack them too high or the weight will make the bottom ones gummy. I usually get about 12-14 pancakes from this recipe, depending on how many “test pancakes” I eat straight from the pan.
Tips & Variations for Swedish Pancakes Recipe
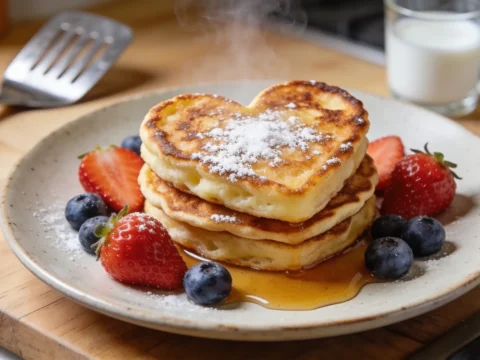
Swedish pancakes are best eaten fresh off the pan, but if you have leftovers (which rarely happens in my house), you can store them in the refrigerator for up to 2 days. Separate them with parchment paper to prevent sticking, then reheat briefly in a pan or microwave. They won’t be quite as good as fresh, but still delicious. For serving, traditional Swedish toppings include lingonberry jam or fresh berries and a dusting of powdered sugar. My kids love them with maple syrup, which isn’t authentic but is definitely delicious. You can also go savory with a sprinkle of cheese and ham folded inside. And while perfect circles are Instagram-worthy, weirdly shaped pancakes taste just as good – so don’t stress if yours look a little rustic. That’s part of their charm!
Final Thoughts on Swedish Pancakes Recipe
Swedish pancakes might take a little practice to master, but they’re absolutely worth the effort. They’ve become our Sunday tradition, and somehow taste even better when eaten in pajamas while the coffee brews. There’s something magical about their simplicity – just a few basic ingredients transformed into something that feels special enough for company but easy enough for regular weekends.
If you try this recipe, I’d love to hear how it went! Did you nail the flip on your first try, or did you end up with a few “practice pancakes” like I always do? And if you come up with any amazing topping combinations, please share – I’m always looking for new ways to enjoy these delicate little beauties.
Swedish Pancakes Recipe
Swedish pancakes are delicately thin, impossibly buttery, and practically melt in your mouth with each bite. Perfect for breakfast, these pancakes are an irresistible treat.