Okay, so I messed this Thai peanut chicken wrap up three times before getting it right. The first time? Dry chicken that could’ve doubled as cardboard. Second attempt, I made the peanut sauce so thick it basically glued my mouth shut. Not cute.
But here’s the thing, everyone at my kid’s soccer practice kept asking about these wraps I brought last Saturday, and I finally figured out what makes them actually good.
Table of Contents :
Why This Thai Peanut Chicken Wrap Recipe Works (When Others Don’t)
Look, I’ve tried probably fifteen different thai peanut chicken wrap recipes from Pinterest, and most of them are either too sweet, too bland, or require ingredients I can’t pronounce. This one uses stuff from a regular grocery store, and I promise you won’t spend $47 on ingredients you’ll use once.
I think I originally got this idea from my friend Mia—actually, no, wait. It was that cooking video everyone was sharing during lockdown. You know the one. Or maybe it was my aunt? Honestly can’t remember anymore, but I’ve changed it so much it’s basically mine now.
The secret is marinating the chicken. I know, I know—everyone says that. But the real secret is not overcooking it. (Trust me on this one.) Overcooked chicken in a wrap is just sad.
What Makes These Different From Restaurant Wraps
Restaurant versions are always so… heavy? Like, I feel guilty after eating one. These are lighter but still filling, and my 8-year-old actually eats them without complaining. Which is basically a miracle because that kid refuses anything remotely healthy-looking.
Plus, you can meal prep these. Make the thai chicken wrap ingredients on Sunday, and you’ve got lunch for three days. Or two days if your husband keeps “sampling” them like mine does.
Thai Peanut Chicken Wrap Ingredients (The Real List)
Here’s what you actually need. Don’t buy pre-shredded cabbage—it’s always brown and sad-looking by the time you use it.

For the Chicken:
- 1.5 lbs chicken breast (I use thighs sometimes because they’re cheaper and juicier)
- 3 tablespoons soy sauce (low sodium unless you want to retain water for three days)
- 2 tablespoons lime juice (fresh, not that stuff in the little plastic lime)
- 1 tablespoon honey
- 2 cloves garlic, minced (I use way more because I’m obsessed)
- 1 teaspoon fresh ginger, grated (or 1/2 teaspoon ground if you’re normal)
For the Peanut Sauce (The Star of the Show):
- 1/2 cup creamy peanut butter (I always use Jif, don’t @ me)
- 3 tablespoons soy sauce
- 2 tablespoons lime juice
- 1 tablespoon honey
- 1 tablespoon rice vinegar (regular vinegar works in a pinch)
- 1 teaspoon sesame oil (this makes SUCH a difference)
- 2-3 tablespoons warm water (to thin it out)
- 1 clove garlic, minced
- Red pepper flakes to taste (I skip these because my kid exists)
For Assembly:
- 6 large flour tortillas (the burrito-size ones)
- 2 cups purple cabbage, thinly sliced
- 1 large carrot, julienned (or just use a peeler, way easier)
- 1 red bell pepper, thinly sliced
- 1/2 cup fresh cilantro (controversial, I know—some people think it tastes like soap)
- 1/4 cup chopped peanuts for crunch
- Optional: cooked rice if you want to make thai peanut chicken wrap with rice
Good luck finding decent bell peppers this time of year. They’re either $4 each or look like they’ve been through a war. I usually grab whatever’s on sale and call it a day.
How to Make Thai Peanut Chicken Wraps (Step by Step, No BS)
Step 1: Marinate the Chicken (Don’t Skip This)
Mix soy sauce, lime juice, honey, garlic, and ginger in a bowl. Cut your chicken into thin strips—like, really thin. Thinner than you think. Add chicken to marinade and let it sit for at least 30 minutes. I’ve left it for 4 hours before and it was even better.
Set a timer. Then inevitably forget and panic at 45 minutes. It’s fine.
Step 2: Make the Peanut Sauce While You Wait
This is where the magic happens. Whisk together peanut butter, soy sauce, lime juice, honey, rice vinegar, sesame oil, and garlic. It’ll look weird at first—kinda thick and lumpy and gross—but that’s normal.
Add warm water one tablespoon at a time until it’s the consistency of… I don’t know, thick cream? You want it pourable but not watery. Last Tuesday I added too much water and basically made peanut soup. Learn from my mistakes.
Taste it. Add more lime if it’s too sweet, more honey if it’s too tangy. This is YOUR sauce. Make it work for you.
Step 3: Cook the Chicken (The Most Important Part)
Heat a large skillet over medium-high heat with a tiny bit of oil. When it’s hot—like, actually hot, not kinda warm—add your marinated chicken in a single layer. Don’t overcrowd the pan or it’ll steam instead of getting those nice brown bits.
Cook for about 3-4 minutes per side until it’s got some color and is cooked through. DO NOT OVERCOOK. Seriously. The second it’s done, take it off the heat. It’ll keep cooking a bit from residual heat anyway.
Oh wait, I forgot to mention—save a little marinade before adding raw chicken to it. You can drizzle that cooked marinade on top at the end. Just… make sure you cook it first. Food safety and all that.
Step 4: Prep Your Veggies
Slice everything thin. The cabbage, the carrots, the bell pepper. Thin = easier to wrap = less stuff falling out when you eat it.
I use a mandoline for the cabbage but I’ve also sliced my finger open twice with that thing, so maybe just use a sharp knife and be careful. Kitchen safety PSA over.
Step 5: Assembly Time (The Fun Part)
Lay out your tortilla. Spread about 2 tablespoons of that beautiful peanut sauce down the center. Not too much or it’ll be a drippy mess.
Layer on the chicken, cabbage, carrots, bell pepper, cilantro, and peanuts. Some people add cooked rice here for a heartier thai peanut chicken wrap with rice situation. I’ve done it both ways—with rice it’s more filling, without rice it’s lighter. Your call.
Now here’s the key: don’t overfill. I KNOW it’s tempting. But you need to actually be able to wrap this thing.
Fold in the sides, then roll from the bottom up, tucking as you go. It should look like a burrito. If it looks like a disaster, just call it “rustic” and move on.
Step 6: Optional Crisping Step
Want to get fancy? Heat a clean skillet and place your wrap seam-side down for about 2 minutes. This crisps up the outside and seals everything together. Game changer.
Or don’t. They’re great either way.
Tips I Learned the Hard Way
Sauce Consistency: Make it thinner than you think. It thickens up as it sits, and nobody wants peanut butter cement in their wrap.
Chicken Temperature: Let the cooked chicken rest for 5 minutes before adding to wraps. Otherwise, warm chicken + cold veggies = soggy tortilla situation. Been there.
Meal Prep Hack: Keep all components separate until ready to eat. Assemble wraps fresh, or they get soggy. Found this out when I made six on Sunday night and by Tuesday they were… questionable.
Tortilla Trick: Warm your tortillas for 10 seconds in the microwave before wrapping. They fold better and don’t crack. Why don’t more people know about this?
Veggie Variations: I’ve thrown in cucumber, snap peas, even shredded lettuce for thai peanut chicken lettuce wraps vibes. Basically any crunchy veggie works.
Nut-Free Option: If you’ve got allergies, sunflower seed butter works. It’s not the same, but it’s pretty close. My nephew has a peanut allergy and I made it for him—he couldn’t tell the difference. (Or he was being polite. Hard to say.)
Why My Kids Actually Eat These
My daughter—the one who picks pepperoni off pizza—loves these. I think it’s the peanut sauce. Kids and peanut butter, man. It’s universal.
My son eats them with ketchup on the side. Don’t ask me why. I’ve stopped questioning his choices.
Sometimes I make them with less sauce for the kids and extra spicy sauce for the adults. Everybody wins.
Storage and Leftovers (If You Have Any)
Cooked chicken keeps for 3-4 days in the fridge. Sauce lasts about a week. Veggies stay crisp for 3-5 days if you store them in a container with a paper towel to absorb moisture.
I usually make a double batch of chicken and sauce on Sunday. Then throughout the week I can throw together these wraps, add the chicken to salads, or even just eat it with rice when I’m too tired to think.
Freezing the assembled wraps? Don’t. Trust me. I tried. They turn into sad, soggy messes. But you CAN freeze the cooked chicken and sauce separately. Just thaw overnight in the fridge.
Serving Suggestions (From Real Life)
We eat these for:
- Lunch during the week
- Quick dinners when nobody feels like cooking
- Picnics (they travel well if assembled right before)
- That weird 4pm time when everyone’s starving but dinner isn’t for another two hours
Pair them with:
- Sweet potato fries (my kids’ favorite)
- A simple cucumber salad
- Mango chunks (so good with the peanut flavor)
- Or just eat them alone. They’re filling enough.
Actually, you know what? Sometimes I make extra sauce and use it as a salad dressing the next day. It’s REALLY good on a simple cabbage slaw.
Final Thoughts on This Thai Chicken Wrap Recipe
Is this authentic Thai food? Probably not. Am I Thai? Definitely not. But is it delicious and does my family request it constantly? Yes.
I’ve made these for soccer practice, work potlucks, and last month’s book club (where Karen said it was “interesting” which I think was a compliment?). People keep asking for the recipe, so I guess I did something right.
The thai peanut chicken wrap is basically the answer to “what’s for dinner” when you want something that feels fresh but is still satisfying. It’s not fancy, but it’s good and that’s what matters.
Plus, if I can make this without burning down my kitchen, anyone can. And I once set off the smoke alarm making toast, so that’s saying something.
Try it. Seriously, try this and tell me what you think. Let me know if you add anything weird that works—I’m always looking for new variations.
Now I’m craving this again. Thanks a lot, brain.
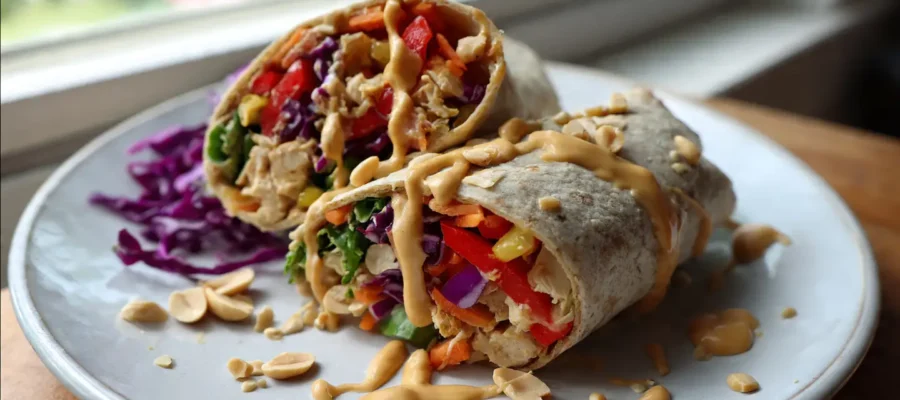
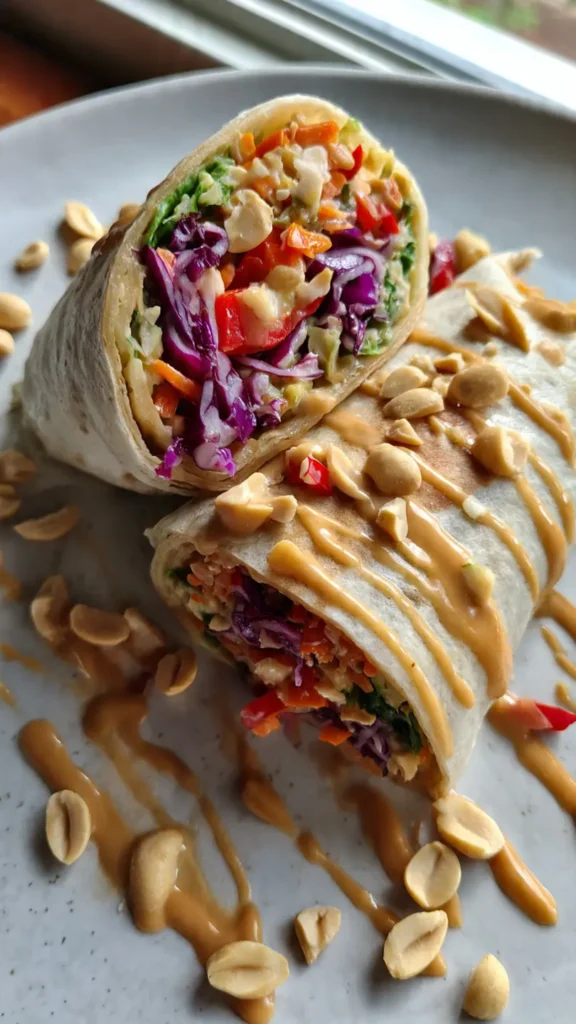
Thai Peanut Chicken Wrap with Creamy Peanut Sauce
Easy Thai peanut chicken wrap with tender marinated chicken, fresh crunchy vegetables, and a creamy homemade peanut sauce. Perfect for lunch, dinner, or meal prep. Fresh, satisfying, and easy to customize.