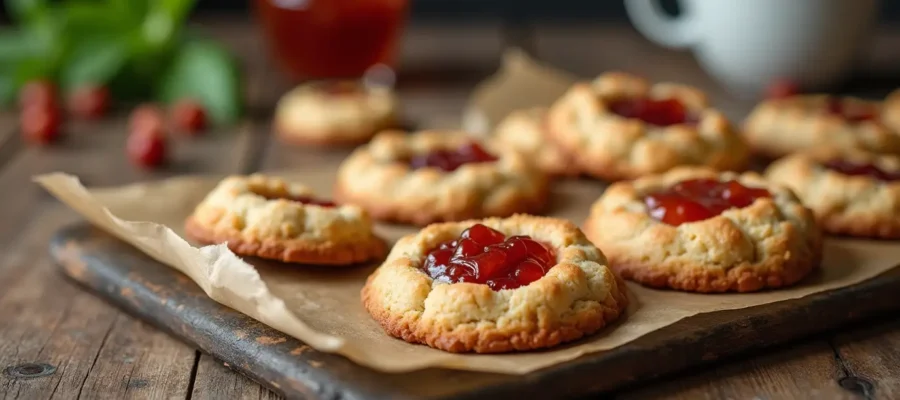
chestnut flour thumbprint cookies
If you’re looking for a unique twist on a classic cookie, chestnut flour thumbprint cookies are a must-try! With their nutty flavor, soft texture, and delicious jam filling, these gluten-free cookies are a delightful treat for any occasion. Whether you’re hosting a holiday gathering or just need a sweet pick-me-up, these cookies are easy to make, versatile, and sure to impress. Plus, the chestnut flour adds a depth of flavor that’s truly irresistible. Ready to make a batch? Let’s dive into the recipe!
Table of Contents :
Key Benefits of Chestnut Flour Thumbprint Cookies
When it comes to cookies, we all want something that’s not only delicious but also a bit better for you—without sacrificing flavor. That’s exactly what these chestnut flour thumbprint cookies deliver! Here’s why you’ll fall in love with them:
1. Naturally Gluten-Free & Healthier Than Traditional Cookies
Chestnut flour is naturally gluten-free, making these thumbprint cookies a fantastic choice for anyone with gluten sensitivities or following a gluten-free lifestyle. Unlike traditional cookies made with wheat flour, chestnut flour offers a rich, nutty flavor while being gentle on the digestive system. So, you get to enjoy a sweet treat without the gluten-related concerns.
2. Packed with Nutrients
Not only is chestnut flour a gluten-free option, but it’s also packed with essential nutrients like fiber, antioxidants, and healthy fats. Compared to regular white flour, chestnut flour has a higher concentration of vitamins, which means you’re getting more bang for your buck when it comes to health benefits. These cookies aren’t just a dessert—they’re a treat that contributes positively to your wellness.
3. Perfect for Special Diets
These thumbprint cookies aren’t just gluten-free—they can easily fit into various diets! Whether you’re on a paleo, low-carb, or sugar-free plan, this recipe is customizable to suit your needs. You can even use a natural sweetener like coconut sugar or a sugar substitute like stevia to make them perfect for those who are avoiding refined sugars.
4. Soft, Chewy Texture
Thanks to the combination of chestnut flour and butter (or dairy-free alternatives), these cookies bake up soft, chewy, and melt-in-your-mouth delicious. They’re not the typical crunchy cookie you might expect, but instead, each bite offers a smooth, satisfying texture that’s simply irresistible. Whether you’re enjoying them with a cup of tea or as a snack, their soft, comforting texture will make you feel cozy and content.
5. Customizable with Flavorful Jam
One of the best parts about chestnut flour thumbprint cookies is the fun of choosing the jam you fill the center with. Whether you prefer classic raspberry, sweet strawberry, or something a little more exotic like apricot or blueberry, the sky’s the limit! This gives you the freedom to tweak the flavor to your liking, so you never get bored of these cookies. The slightly tart jam balances beautifully with the nutty flavor of the chestnut flour, creating the perfect bite every time.
6. Perfect for Special Occasions or Everyday Snacking
These cookies aren’t just for special occasions; they’re great for everyday enjoyment! Serve them at your next party, holiday gathering, or simply as an afternoon snack. Because they’re made with chestnut flour, they hold up well and stay fresh longer than many other gluten-free cookies, making them a great option for meal prep or gifting to friends and family.
[adinserter block=”5″]Ingredients for Chestnut Flour Thumbprint Cookies
Now that you’re excited to make these chestnut flour thumbprint cookies, let’s take a look at the ingredients you’ll need to bring these delightful treats to life. Don’t worry; most of them are pantry staples, and I’m sure you’ll find this recipe super simple to put together.
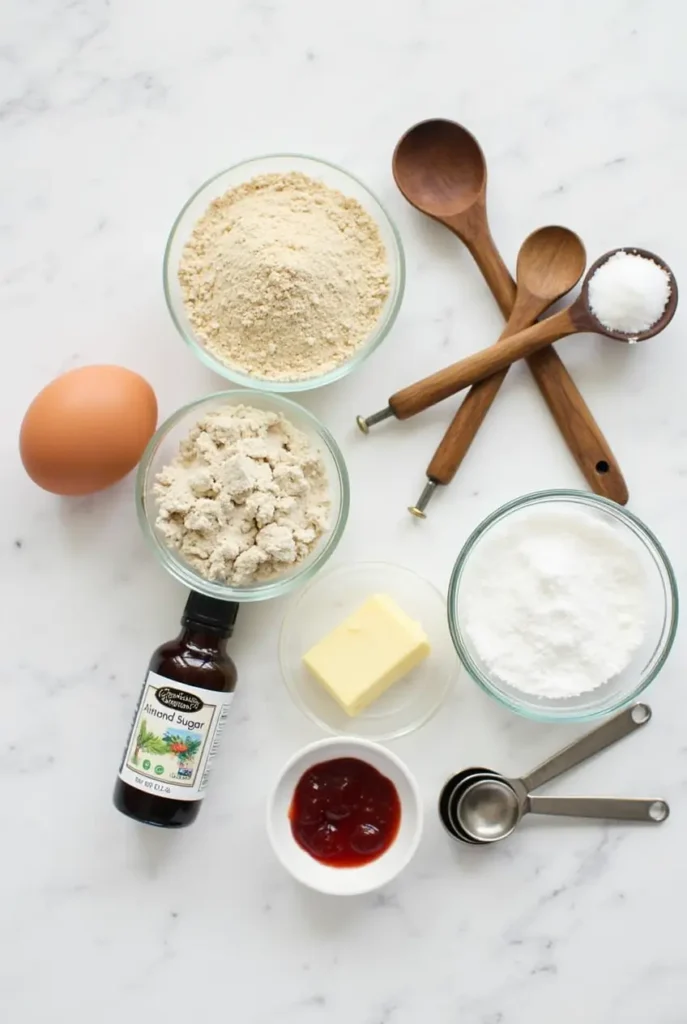
Here’s What You’ll Need:
- 1 1/2 cups chestnut flour
This is the star ingredient! Chestnut flour is naturally gluten-free and adds a lovely nutty flavor to your cookies. Make sure to measure carefully to get the perfect texture. - 1/4 cup almond flour (optional)
While chestnut flour is the base, almond flour can be added for extra richness and a slight nutty crunch. If you’re after a more delicate cookie, feel free to skip this. - 1/4 cup coconut sugar (or your preferred sweetener)
Coconut sugar provides a subtle caramel-like sweetness and is a great alternative to refined sugars. If you want to keep it sugar-free, try using a natural sweetener like stevia or monk fruit sweetener. - 1/4 cup unsalted butter (or a dairy-free alternative)
Butter gives these cookies their melt-in-your-mouth texture. If you’re following a dairy-free or vegan diet, simply swap in coconut oil or a plant-based butter. - 1 egg (or a flax egg for vegan version)
The egg helps bind the dough together and gives the cookies a soft, chewy texture. For a vegan substitute, use a flax egg (1 tbsp ground flaxseeds + 2.5 tbsp water, let it sit for 5 minutes to thicken). - 1 tsp vanilla extract
Vanilla extract adds a warm, aromatic depth of flavor that pairs perfectly with the nuttiness of the chestnut flour. - 1/4 tsp salt
A pinch of salt balances out the sweetness and enhances the flavors in the cookies. - 2-3 tbsp fruit jam (choose your favorite flavor)
The jam is what makes these cookies so iconic! Raspberry, strawberry, and apricot are traditional choices, but feel free to experiment with your favorite jam or even nut butters.
Ingredient Tips and Substitutions:
- Chestnut Flour: If you can’t find chestnut flour, you can substitute with almond flour, though the texture will be slightly different. Chestnut flour offers a unique, naturally sweet flavor, so it’s best to stick with it for this recipe if possible.
- Sweetener Swap: If you prefer not to use coconut sugar, you can substitute it with honey or maple syrup, but keep in mind that these liquid sweeteners may change the consistency of the dough, so you may need to add a little more chestnut flour to adjust.
- Jam Options: The jam filling is where you can get creative. Choose a thick fruit jam (or preserves) for the best texture. If you prefer a less sweet option, you could even use a sugar-free fruit spread or sugar-free fruit preserves.
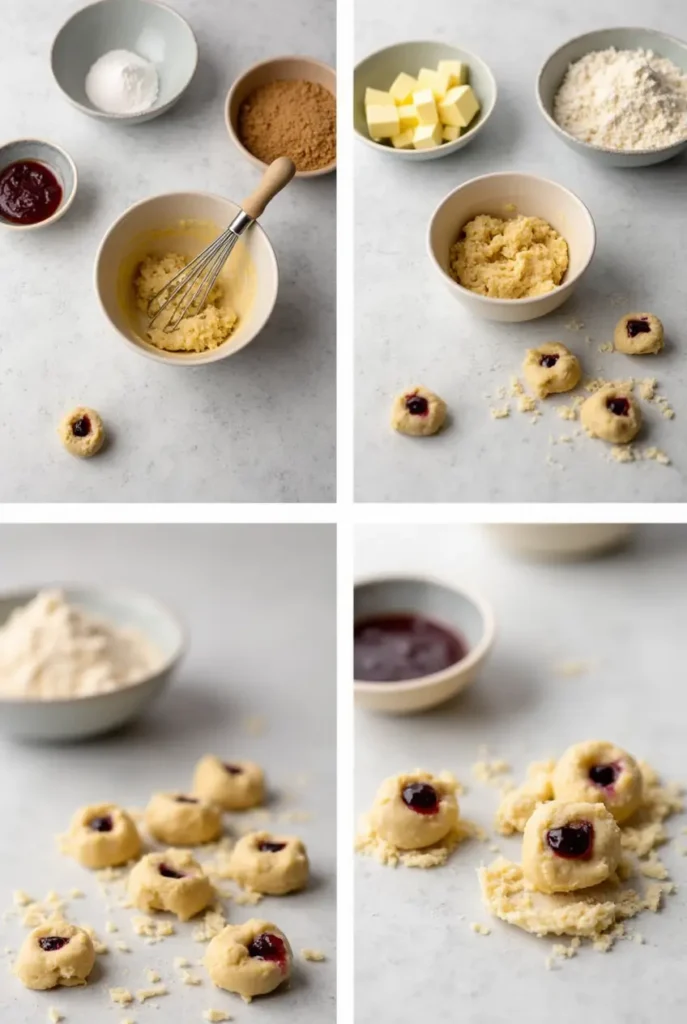
How to Make Chestnut Flour Thumbprint Cookies
Now that we’ve got all our ingredients ready, it’s time to roll up your sleeves and get baking! Making chestnut flour thumbprint cookies is a fun, straightforward process that’s bound to fill your kitchen with the most delicious aromas. Let’s walk through it step by step!
Step 1: Preheat the Oven & Prepare the Baking Sheet
Start by preheating your oven to 350°F (175°C). This ensures the cookies bake evenly. While the oven is heating up, line a baking sheet with parchment paper or a silicone baking mat. This makes cleanup a breeze and helps prevent the cookies from sticking.
Step 2: Mix the Dry Ingredients
In a large mixing bowl, combine your 1 1/2 cups chestnut flour, 1/4 cup almond flour, 1/4 cup coconut sugar, and 1/4 teaspoon salt. Stir them together until everything is well blended. The dry ingredients are the foundation of the dough, so make sure they’re evenly mixed before adding the wet ingredients.
Step 3: Add the Wet Ingredients
Next, add in the 1/4 cup unsalted butter (or your dairy-free alternative), 1 egg (or flax egg if vegan), and 1 teaspoon vanilla extract. Use a hand mixer or a spatula to bring everything together until you have a smooth, slightly sticky dough. If it feels too dry, you can add a tiny bit more butter or a splash of water to get the right consistency.
Step 4: Shape the Dough
Now comes the fun part—shaping the cookies! Scoop out about 1 tablespoon of dough at a time and roll it into a ball between your hands. Place each ball onto the prepared baking sheet, leaving about 2 inches between each one.
Step 5: Make the Thumbprint Indentation
This is where the thumbprint magic happens! Gently press your thumb into the center of each dough ball to create a small indentation. Be careful not to press too deep—just enough to hold a little dollop of jam. This gives the cookies their signature look and ensures the jam will stay in place while baking.
[adinserter block=”5″]Step 6: Add the Jam
Spoon about 1/2 to 1 teaspoon of jam into the center of each cookie. Raspberry and strawberry jam are classics, but feel free to use any fruit preserve you love. The jam not only adds flavor but also makes these cookies look gorgeous with that little splash of color!
Step 7: Bake the Cookies
Place your baking sheet in the oven and bake the cookies for 10-12 minutes, or until the edges are golden brown. Keep an eye on them towards the end, as baking times can vary depending on your oven. You’ll know they’re done when they’re slightly firm around the edges, but still soft in the center.
Step 8: Cool and Enjoy
Once baked, let the cookies cool on the sheet for a few minutes before transferring them to a wire rack to cool completely. This helps them set without breaking apart. These chestnut flour thumbprint cookies are soft when warm, so give them time to firm up before enjoying them.
Pro Tips and Variations for Chestnut Flour Thumbprint Cookies
Now that you’ve mastered the basics of making chestnut flour thumbprint cookies, let’s take them to the next level! Whether you’re looking to customize the flavor, adjust for dietary needs, or simply perfect the texture, these pro tips and variations will make sure you get the best possible cookies every time.
Pro Tips for Perfect Cookies
- Chill the Dough for Easier Handling
If you’re finding the dough a bit too sticky to work with, don’t worry! Simply pop it into the fridge for about 30 minutes. Chilled dough is much easier to roll into balls and shape, plus it helps the cookies hold their form while baking. - Use a Cookie Scoop for Consistency
For evenly sized cookies, use a cookie scoop to portion out the dough. This ensures that each cookie bakes uniformly and looks more professional. Plus, it speeds up the process! - Don’t Overfill the Jam
When adding jam to the center, use about 1/2 to 1 teaspoon per cookie. Adding too much can cause the jam to spill over during baking, creating a mess. A little goes a long way, and the jam will still shine through beautifully. - Watch the Baking Time
Keep an eye on the cookies during the final minutes of baking. Oven temperatures can vary, so check for a golden-brown edge around 10-12 minutes. If you’re unsure, gently touch the edge of a cookie—it should be slightly firm, while the center remains soft. - Let Them Cool on the Sheet
After baking, let the cookies sit on the baking sheet for 5 minutes before transferring them to a wire rack. This ensures they set properly and don’t break apart while still warm.
Delicious Variations to Try
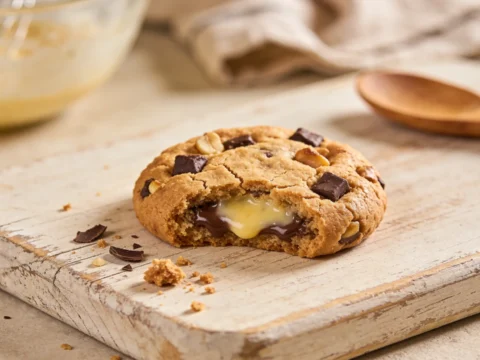
- Swap the Jam for Nut Butter
If you want to switch up the classic thumbprint, try filling the centers with nut butter like almond, peanut, or cashew butter. For a fun twist, drizzle melted dark chocolate on top for an indulgent treat. These nut butter cookies are rich, savory, and utterly delicious! - Experiment with Different Flavors
Raspberry jam is a classic, but why stop there? Try experimenting with different jam flavors like blueberry, apricot, or fig to create unique combinations. You could even go a step further and use citrus marmalade for a zesty touch. The possibilities are endless! - Make Them Sugar-Free
If you’re looking to cut out sugar altogether, you can use a sugar substitute like monk fruit sweetener, stevia, or erythritol. These will still provide the sweetness you crave without affecting your blood sugar levels. Just make sure to choose a sugar substitute that works for baking! - Add a Crunch with Nuts
For an added texture boost, try folding finely chopped nuts (like almonds, hazelnuts, or pecans) into the dough. This not only adds a satisfying crunch but also enhances the nutty flavor of the chestnut flour. - Make Them Dairy-Free or Vegan
To make the cookies completely dairy-free, simply swap the butter with coconut oil or any plant-based butter. For a vegan version, use a flax egg or chia egg (1 tbsp chia seeds + 2.5 tbsp water) in place of the egg. These small tweaks will keep the cookies soft and delicious while adhering to your dietary preferences.
Serving Suggestions for Chestnut Flour Thumbprint Cookies
Now that your chestnut flour thumbprint cookies are baked and ready to go, it’s time to think about how to serve them! These cookies are not only perfect for everyday snacking but also make an elegant addition to any gathering. Whether you’re hosting a holiday party or just enjoying a quiet afternoon, here are some serving suggestions to make your cookies even more special.
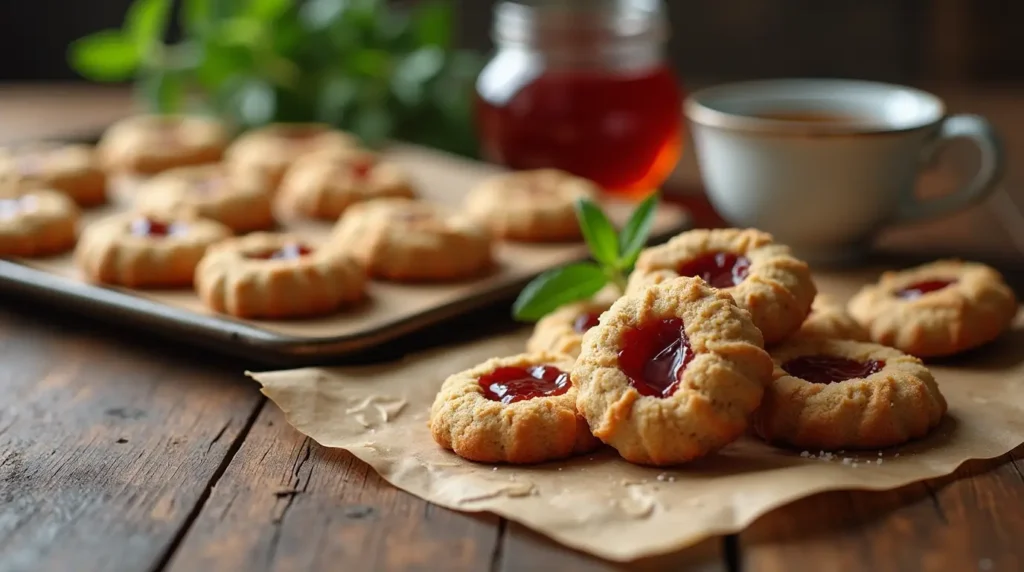
1. Perfect with Tea or Coffee
For the ultimate cozy treat, serve these cookies alongside a warm cup of tea or coffee. The nutty, slightly sweet flavor of the chestnut flour pairs beautifully with a hot beverage. Opt for a rich, smooth coffee or a delicate green tea for a comforting afternoon break.
2. Pair with Fresh Fruit
Looking to elevate your serving? Add a side of fresh fruit to balance the sweetness of the cookies. Berries like strawberries, raspberries, or blueberries make a colorful and tangy complement. You could also serve them with sliced apples or pears for a fresh, light contrast to the rich cookies.
3. Serve on a Dessert Platter
These chestnut flour thumbprint cookies are perfect for sharing! Arrange them on a beautiful dessert platter alongside other treats like mini cakes, truffles, or gluten-free brownies. This is a great option for a birthday party, holiday gathering, or any special occasion. The colorful jam centers add a pop of color that will impress your guests.
[adinserter block=”5″]4. Make Them Part of a Gift Box
These cookies also make an adorable and thoughtful homemade gift. Package them up in a decorative gift box or mason jar, and they’re ready to be gifted to friends, family, or coworkers. A personal touch like this makes any occasion extra special, whether it’s for the holidays, birthdays, or just as a sweet surprise.
5. Serve with a Scoop of Ice Cream
For a decadent dessert, pair your thumbprint cookies with a scoop of your favorite ice cream. Vanilla, chocolate, or even a dairy-free option will go wonderfully with the nutty cookies. The combination of warm, soft cookies and cold, creamy ice cream is always a winning choice!
6. Create a DIY Cookie Bar
Hosting a gathering or special event? Set up a DIY cookie bar where guests can decorate their own thumbprint cookies with different fillings. Provide a variety of jams, nut butters, and even some fun toppings like crushed nuts, coconut flakes, or melted chocolate for dipping. It’s a fun, interactive way to let guests enjoy these cookies in their own unique way.
Conclusion
These chestnut flour thumbprint cookies are more than just a delicious treat—they’re a perfect combination of rich flavor, soft texture, and a touch of sweetness. Whether you’re gluten-free, looking for a unique twist on a classic, or simply in the mood for something new, these cookies check all the boxes.
The nutty flavor of the chestnut flour adds a warm, earthy depth that pairs beautifully with the jam filling. Plus, they’re incredibly easy to make, with simple ingredients that you likely already have in your pantry. Whether you bake them for yourself or share them with loved ones, these cookies are bound to become a new favorite in your baking repertoire.
Why You’ll Keep Coming Back for More
- Gluten-Free & Naturally Nutty: Thanks to chestnut flour, these cookies are naturally gluten-free and full of flavor. They’re a great option for those on gluten-free diets or anyone who loves a nutty twist on traditional cookies.
- Versatile and Customizable: From the variety of jam options to the flexibility with butter and sweeteners, you can tailor these cookies to suit any dietary need. Want them vegan? You got it. Looking for sugar-free? No problem! The variations are endless.
- Perfect for Any Occasion: Whether you’re making a batch for yourself, gifting them to friends, or serving them at a party, these cookies are always a crowd-pleaser. They’re simple yet elegant, making them perfect for any occasion.
FAQs
1. Can I use a different flour instead of chestnut flour?
While chestnut flour is what gives these cookies their unique, nutty flavor, you can experiment with other gluten-free flours, such as almond flour or coconut flour. Keep in mind that different flours absorb moisture differently, so you may need to adjust the quantity or add a bit more liquid to get the right dough consistency.
2. How do I store these cookies?
Once your chestnut flour thumbprint cookies have cooled, store them in an airtight container at room temperature for up to 1 week. They’ll stay fresh and soft! For longer storage, you can freeze them for up to 3 months. Just be sure to separate layers with parchment paper to avoid them sticking together.
3. Can I make these cookies vegan?
Absolutely! To make these cookies vegan, simply replace the egg with a flax egg (1 tablespoon of ground flaxseed + 2.5 tablespoons of water) and swap the butter for coconut oil or a plant-based butter substitute. The texture and flavor will remain just as delicious!
4. What jam should I use for the thumbprint?
You can use any fruit jam you like! Raspberry, strawberry, blueberry, and apricot are popular choices, but feel free to get creative. You can even make your own homemade jam for an extra personal touch. Just be sure to choose one with a smooth consistency that won’t overflow when baked.
5. Can I add nuts to the dough for extra crunch?
Yes, absolutely! If you love a bit of extra texture, finely chopped nuts like hazelnuts, almonds, or pecans can be mixed into the dough for added crunch. The nutty flavor will complement the chestnut flour and give the cookies even more depth.
6. How do I prevent the cookies from spreading too much?
To prevent spreading, make sure your dough is well-chilled before baking. If the dough feels soft or sticky, refrigerate it for 30 minutes to an hour. This helps the cookies maintain their shape during baking.
7. Can I use a sugar substitute in these cookies?
Yes, you can use a sugar substitute like monk fruit sweetener or erythritol to make these cookies lower in sugar. Keep in mind that the texture and sweetness may vary slightly, so you may need to experiment to get the perfect balance.
8. What can I serve these cookies with?
These cookies pair wonderfully with a warm cup of coffee, tea, or even a scoop of ice cream for a delicious dessert. You can also serve them alongside fresh fruit or on a dessert platter for parties or gatherings.
9. Why are my cookies too crumbly?
If your cookies are too crumbly, it may be due to not enough binding agents (like butter or egg) or overmixing the dough. Make sure you measure the ingredients accurately and try adding a little more butter or liquid to the dough if it feels too dry.
10. How do I make these cookies more chewy?
If you prefer a chewy texture, try slightly reducing the baking time so that the cookies are soft when they come out of the oven. Let them cool on the baking sheet for a few minutes before transferring to a wire rack to finish setting. This helps keep them soft and chewy inside while still holding their shape.
[adinserter block=”5″]Chestnut Flour Thumbprint Cookies

Craving a gluten-free treat? Discover how chestnut flour thumbprint cookies offer a delicious, healthier twist on classic favorites. Try them today!
- 1 ½ cups chestnut flour
- ¼ cup almond flour
- ¼ teaspoon baking soda
- ¼ teaspoon sea salt
- 1/3 cup unsalted butter (softened)
- 1/4 cup coconut sugar or brown sugar
- 1 large egg
- 1 teaspoon vanilla extract
- ¼ cup fruit jam (raspberry, strawberry, or your favorite)
- Preheat the oven to 350°F (175°C) and line a baking sheet with parchment paper.
- In a large mixing bowl, whisk together the chestnut flour, almond flour, baking soda, and salt.
- In a separate bowl, cream together the softened butter and coconut sugar until light and fluffy.
- Add the egg and vanilla extract to the butter mixture, mixing until smooth.
- Gradually fold the dry ingredients into the wet ingredients, mixing until combined into a dough.
- Roll the dough into small balls (about 1 inch in diameter) and place them on the prepared baking sheet.
- Gently press your thumb into the center of each cookie to create an indent.
- Fill the indents with about ½ teaspoon of fruit jam.
- Bake for 10-12 minutes, or until the edges of the cookies are lightly golden.
- Let the cookies cool on the baking sheet for 5 minutes, then transfer to a wire rack to cool completely.
- Serve and enjoy your delicious chestnut flour thumbprint cookies!