This grilled chicken legs recipe finally gave me the crispy skin I’d been chasing for years. Look, I’m not gonna sugarcoat it, I burned through probably a dozen attempts before figuring out the secret isn’t fancy techniques or expensive equipment. It’s all about proper prep, the right temperature zones on your grill, and honestly, just being patient enough to let the skin do its thing. I’ll walk you through everything below, including the embarrassing mistake I kept making that left me with rubbery, pale chicken every single time.
Table of Contents :
Why I Became Obsessed With Perfect Grilled Chicken Legs
So here’s the thing about chicken legs. They’re cheap, they’re flavorful, and they should be foolproof. But for the longest time, mine were disasters. Either the skin stayed flabby and gross, or I’d crank the heat trying to crisp it up and end up with charcoal on the outside and raw meat near the bone. Super appetizing, right?
The turning point came during a neighborhood barbecue where I watched my friend Mike casually turn out perfect legs while I was still frantically flipping mine every two minutes like some kind of anxious chicken helicopter parent. His were golden, crackling, and juicy. Mine looked like sad, pale imitations of actual food. That’s when I realized I was doing literally everything wrong.
What I learned changed everything. The secret is setting up two heat zones on your grill and actually letting the chicken cook low and slow before finishing over high heat. Most recipes skip this part or rush through it, but trust me, this method works. My family actually requests these now, and my neighbor asked for the recipe after trying them at our last cookout.
Ingredients for grilled chicken legs recipe
The beauty of this recipe is how simple the ingredient list is. No fancy marinades or complicated spice blends. Just good quality chicken legs and a few pantry staples that work together to create that perfect combination of crispy skin and juicy meat. I’ve tried adding more ingredients over the years, but honestly, this streamlined version consistently delivers the best results.
Chicken drumsticks, 8 pieces (about 2 pounds)
Look for drumsticks that are roughly the same size so they cook evenly. I usually buy them from the butcher counter where I can see them clearly, but the packaged ones work fine too. Pat them completely dry before seasoning, this is crucial for crispy skin. If they’re wet, the skin will steam instead of crisp up.
Kosher salt (2 teaspoons)
Don’t use table salt here, the texture is wrong and it’s too harsh. Kosher salt draws out moisture from the skin, which is exactly what we want. I season the chicken at least 30 minutes ahead, but if you can do it a few hours early or even overnight, the skin gets even crispier.
Black pepper, freshly ground (1 teaspoon)
Pre-ground pepper works, but freshly cracked has more bite and better flavor. The coarse texture also helps create little pockets of seasoning that taste amazing when the skin gets crispy. Don’t be shy with it, chicken legs can handle plenty of pepper.
Paprika (1 teaspoon)
This adds color and a subtle smoky sweetness. I use regular paprika, not smoked, because I want the grill to provide the smoke flavor. The paprika helps the skin develop that gorgeous golden-brown color that makes everyone think you know what you’re doing.
Garlic powder (1/2 teaspoon)
Fresh garlic burns too easily on the grill, so powder is the way to go here. It distributes evenly and adds that savory depth without the risk of bitter burnt bits. Make sure your garlic powder isn’t ancient, it should still smell pungent when you open the container.
Vegetable oil (1 tablespoon)
Just enough to help the seasonings stick and prevent the skin from sticking to the grill grates. I use vegetable or canola oil because they have high smoke points. Olive oil burns too easily at the temperatures we need for crispy skin, so save it for something else.
How to Make grilled chicken legs recipe
The key to this whole process is patience and proper heat management. We’re going to start low and finish high, which gives the meat time to cook through gently while the skin gradually renders its fat and gets crispy. It takes about 35 to 40 minutes total, but most of that is hands-off time where you’re just letting the grill do its work.
STEP 1: Season the chicken legs thoroughly.
Pat the drumsticks completely dry with paper towels, then rub them all over with the oil. Mix the salt, pepper, paprika, and garlic powder in a small bowl, then sprinkle it evenly over all the chicken pieces. Rub the seasoning into the skin and let them sit at room temperature for at least 30 minutes. This gives the salt time to work and brings the meat closer to room temperature for more even cooking.
STEP 2: Set up your grill for two-zone cooking.
If you’re using a gas grill, heat one side to medium-high and leave the other side on low. For charcoal, pile the coals on one side and leave the other side empty. You want the hot side around 400°F and the cooler side around 300°F. This setup lets you move the chicken around as needed to control the cooking.
STEP 3: Start cooking on the cooler side.
Place the drumsticks on the cooler side of the grill, cover, and cook for 20 minutes without flipping. I know it’s tempting to peek, but resist. The chicken will release easily when it’s ready to flip. After 20 minutes, flip them once and cook another 10 minutes covered. The skin should be starting to look golden but won’t be crispy yet.
STEP 4: Move to high heat for crisping.
Now move the drumsticks to the hot side of the grill. This is where the magic happens, you’ll hear them start to sizzle immediately. Cook for 3 to 5 minutes per side, turning them frequently to get all sides crispy. Watch carefully because they can go from golden to burnt quickly. The internal temperature should hit 165°F when you’re done.
STEP 5: Rest before serving.
Let the chicken rest for 5 minutes after coming off the grill. This lets the juices redistribute and the skin stays crispy. I learned this the hard way after cutting into them immediately and watching all the juices run out onto the cutting board instead of staying in the meat where they belong.
What to Serve With grilled chicken legs recipe
These drumsticks are pretty versatile and go well with most summer sides. We always make corn on the cob when I’m grilling these because it uses the same heat zones and timing works out perfectly. Coleslaw is another favorite because the cool, crisp texture balances the rich, crispy chicken skin nicely. Potato salad, grilled vegetables, or even just a simple green salad all work great. For drinks, cold beer or lemonade are our go-to choices, nothing too fancy needed.
Tips for the Best grilled chicken legs recipe
Leftover drumsticks keep in the fridge for three days, but the skin loses its crispiness. To reheat them, I pop them under the broiler for a few minutes rather than microwaving, which just makes them soggy. You can prep these up to a day ahead by seasoning them and keeping them covered in the fridge. If you don’t have a grill, these work in a 425°F oven too, just start them on a wire rack and finish under the broiler. The timing stays about the same, and honestly, if yours don’t look like professional food photos, that’s completely normal. Mine never do either, but they taste incredible.
Questions People Ask About grilled chicken legs recipe
Here are the questions I get asked most often about this grilled chicken legs recipe.
Can I use chicken thighs instead of drumsticks?
Absolutely, bone-in thighs work great with this method. The cooking time stays roughly the same, maybe a few minutes less since thighs are usually smaller. Just make sure they hit 165°F internal temperature. The skin crisps up beautifully either way.
How do I know when the chicken legs are done?
The most reliable way is using an instant-read thermometer inserted into the thickest part of the meat, avoiding the bone. It should read 165°F. Visually, the juices should run clear when you pierce the meat, and the skin should be golden brown and crispy to the touch.
Can I make this grilled chicken legs recipe ahead of time?
You can season the drumsticks up to 24 hours ahead and keep them covered in the fridge. Actually, this makes the seasoning penetrate deeper and the skin gets even crispier. Just bring them to room temperature before grilling, which takes about 30 minutes.
What if I don’t have a two-zone setup on my grill?
You can still make great drumsticks, just keep the heat at medium and cook them longer, about 35 to 40 minutes total, flipping every 10 minutes. They won’t get quite as crispy, but they’ll still be delicious. Watch the temperature carefully to avoid burning.
Final Thoughts on grilled chicken legs recipe
Look, this isn’t going to win any fancy cooking awards, but people actually ask for seconds and that’s a win in my book. The two-zone method really does make all the difference, even though it feels like you’re overthinking simple grilled chicken. Once you nail the timing and temperature control, you’ll wonder why you ever struggled with chicken legs in the first place.
If you try this recipe, let me know how it turns out. Seriously, I love hearing whether this method works in other people’s kitchens or if mine is just weird. Drop a comment and tell me about your grilling disasters too, we’ve all been there.
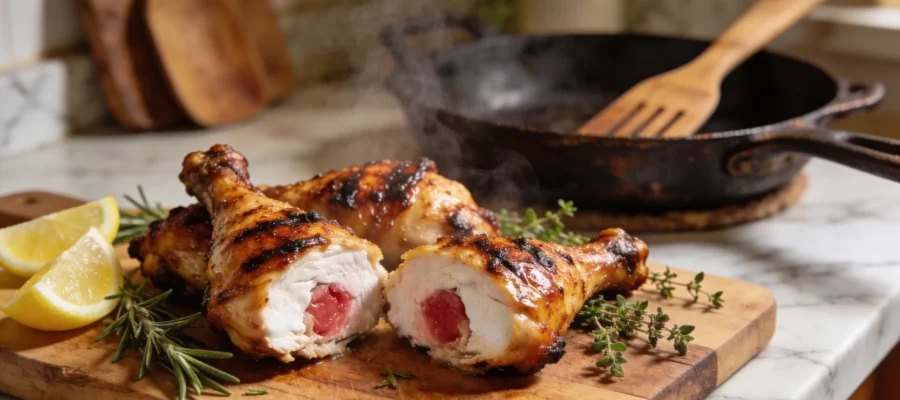
Grilled Chicken Legs — Crispy Skin and Juicy Inside
This grilled chicken legs recipe finally gave me the crispy skin I'd been chasing for years. With proper prep and patience, you can achieve perfectly crispy skin and juicy meat.