I’ve made approximately 47 birthday cakes in the last three years (thanks to having kids with too many friends), and let me tell you—not all of them were Pinterest-worthy. Actually, let’s be honest, most looked like they’d been through a small earthquake. But somewhere between cake disaster #12 and the Great Frosting Meltdown of 2023, I figured out some pretty birthday cake ideas that actually work.
Everyone keeps asking me how I went from “Pinterest fail” to “wait, did you actually make that?” So here we are. These aren’t those impossible cakes that require a degree in engineering and seventeen specialty tools. These are real-world pretty birthday cake ideas that regular humans can pull off without having a breakdown in the kitchen.
Whether you’re making a cake for your mom’s 50th, your daughter’s sweet sixteen, or your own “I survived another year” celebration, I’ve got you covered. Some are simple (because sometimes simple is exactly what you need), others are a bit more ambitious (for when you’re feeling fancy), but all of them are tried and tested in my chaotic kitchen.
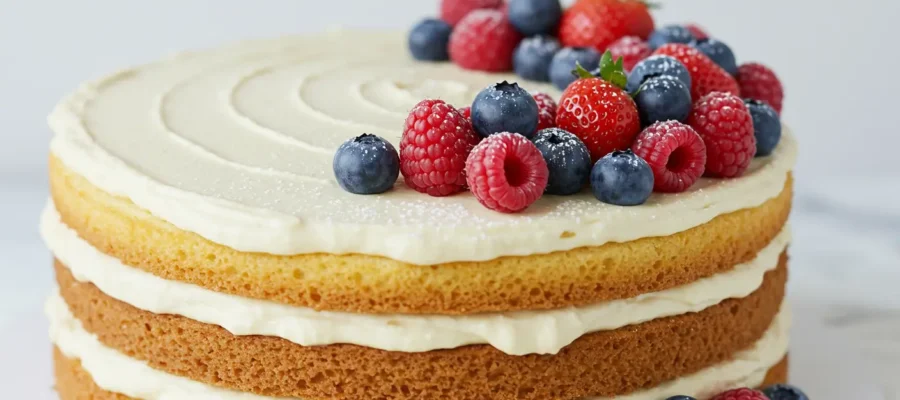
1. The Classic Vanilla Dream with Fresh Berries

Let me start with the cake that saved my reputation at my daughter’s 16th. I was stressed about making something “sophisticated” and almost went crazy with fondant roses before my sister talked me down.
Why it’s amazing: Sometimes the most beautiful things are the simplest. Fresh berries are nature’s confetti, and vanilla buttercream is literally foolproof (well, mostly foolproof—I did manage to curdle it once by adding cold butter to hot cream, but we don’t talk about that).
What you need:
- Your favorite vanilla cake (box mix is fine, I won’t judge)
- Buttercream frosting (homemade or store-bought, life’s too short)
- Mixed fresh berries (strawberries, blueberries, raspberries—whatever looks good at the store)
- A little powdered sugar for dusting
How to make magic happen:
- Bake your cake layers and let them cool COMPLETELY. I cannot stress this enough. Warm cake + frosting = disaster soup.
- Frost your cake smooth-ish (perfectionist frosting is overrated anyway)
- Arrange berries on top in whatever pattern makes you happy
- Dust with powdered sugar right before serving
Real talk: The berries will start releasing juice after a few hours, so don’t do this too far ahead. Learned that the hard way when I made one the night before and woke up to what looked like a crime scene.
2. Chocolate Drip Cake That Looks Way Harder Than It Is
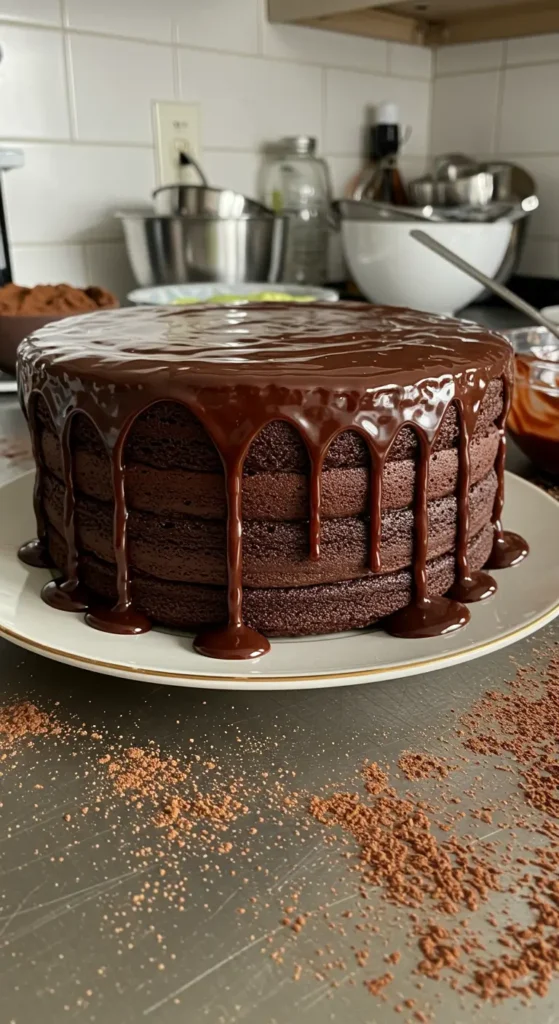
I was terrified of drip cakes for the longest time. They seemed so professional and intimidating. Turns out, they’re basically controlled chaos, which is right in my wheelhouse.
The magic: That glossy chocolate drip makes any cake look like it came from a fancy bakery. Plus, if your frosting job isn’t perfect, the drips hide a multitude of sins.
Shopping list:
- Chocolate cake (again, no shame in the box game)
- Vanilla or chocolate buttercream
- Heavy cream (1/2 cup)
- Dark chocolate chips (1 cup)
- Optional: cake toppers, sprinkles, whatever makes you smile
The process:
- Frost your cake and chill it for 30 minutes (this is crucial for good drips)
- Heat cream in microwave for 1 minute, pour over chocolate chips, let sit for 2 minutes, then stir until smooth
- Let the ganache cool for about 10 minutes—too hot and it runs everywhere, too cool and it doesn’t drip
- Pour ganache in the center and let it naturally drip down the sides
- Add decorations while the ganache is still soft
Chaos notes: My first drip cake looked like it was melting in fast-forward because I used hot ganache. The second one barely dripped because I let it cool too much. The third one was perfect. Practice makes progress, not perfection.
3. Naked Cake with Buttercream Flowers
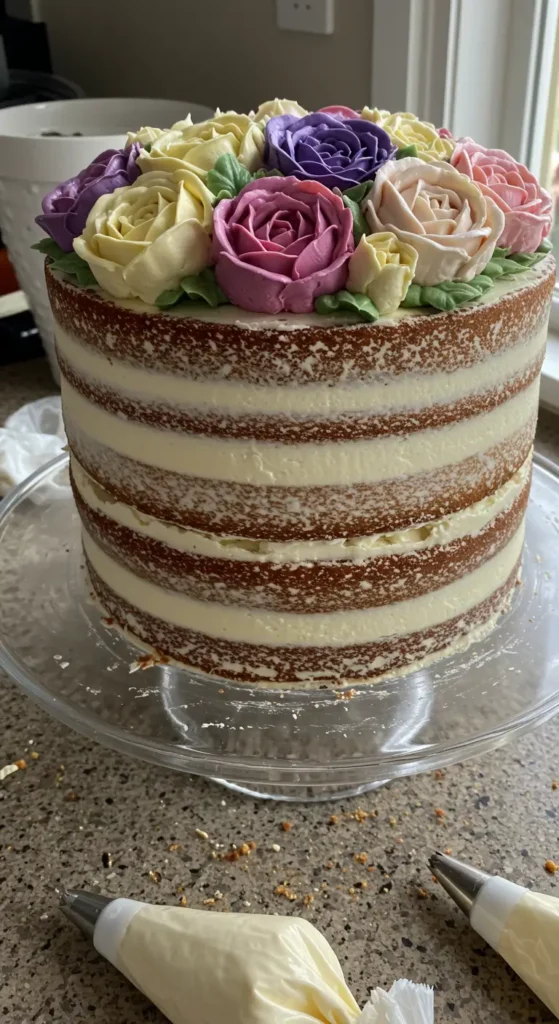
The first time I tried to make buttercream flowers, they looked like colorful blobs. But naked cakes are forgiving—they’re supposed to look rustic and homemade.
Why you’ll love this: It’s Instagram-pretty but actually achievable. Plus, if your piping skills are questionable (like mine were), the “rustic charm” covers for you.
What you’re working with:
- Any flavor cake layers (I love lemon for this)
- Buttercream in 2-3 colors
- Piping bags and flower tips (or just use a fork for texture, honestly)
Making it happen:
- Stack your cake layers with minimal frosting between them
- Leave the sides mostly naked with just a light scrape of frosting
- Pipe flowers around the top edge—roses, stars, whatever you can manage
- Fill in gaps with leaves or small flowers
Truth bomb: My first naked cake was more “accidentally forgot to frost the sides” than “intentionally rustic,” but everyone loved it anyway.
4. Rainbow Layer Surprise
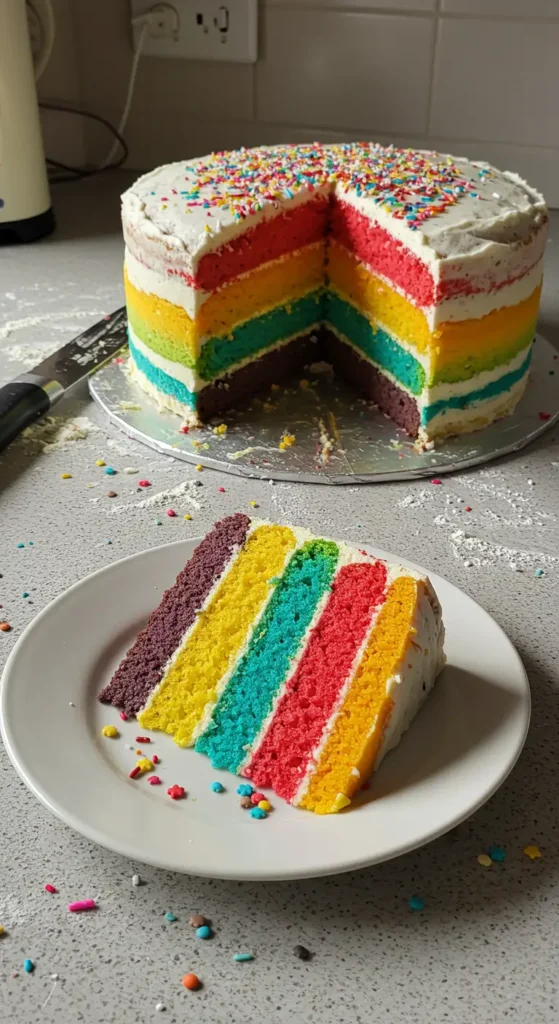
This one is pure joy in cake form. The rainbow surprise inside makes up for any frosting imperfections on the outside.
The wow factor: When you cut into it and those colorful layers are revealed, people lose their minds. It’s like a party inside a cake.
You’ll need:
- White cake batter (enough for 6 thin layers)
- Food coloring (gel works best)
- White buttercream
- Patience (this one takes time)
Step by step:
- Divide batter into 6 bowls, color each one (red, orange, yellow, green, blue, purple)
- Bake each layer separately—yes, it’s tedious, but so worth it
- Stack with white frosting between each layer
- Frost the outside however you want—the magic is on the inside
Lesson learned: Don’t skip colors because you’re impatient. I tried to make a “simplified” version with just three colors once. It wasn’t the same.
5. Elegant Rosette Cake
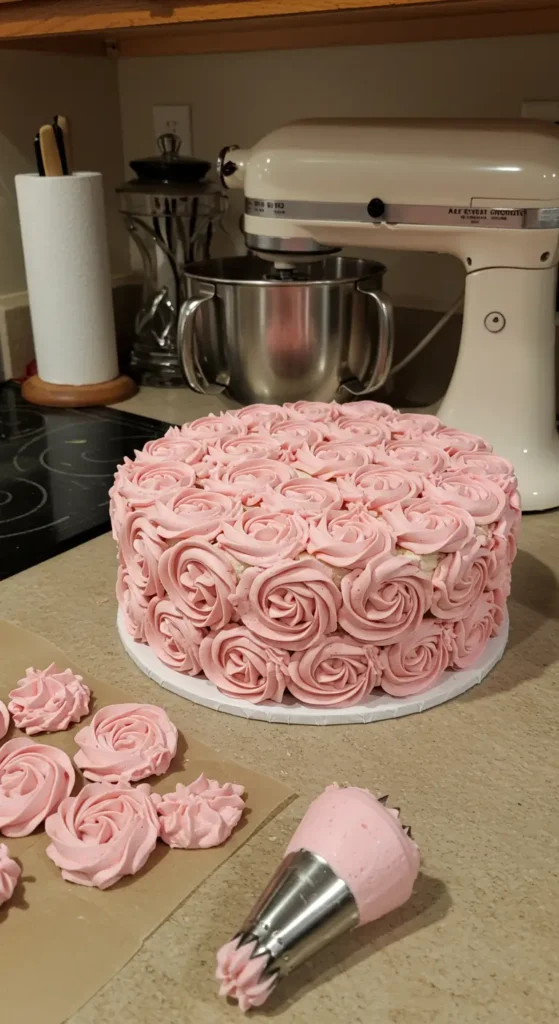
This looks fancy but is basically the same piping technique repeated about 100 times. Meditative, actually.
Why it works: Even if your rosettes aren’t perfect, the overall effect is stunning. Imperfect rosettes just look more natural.
Supply list:
- Round cake layers
- Buttercream (I like to do this in soft pastels)
- Large star tip for piping
- Strong piping bag (learned this lesson when mine burst mid-rosette)
The method:
- Frost cake smooth as your base
- Starting from the bottom, pipe rosettes in rows around the cake
- Work your way up, overlapping slightly
- Don’t overthink the spacing—organic looks better
6. Fresh Flower Crown Cake
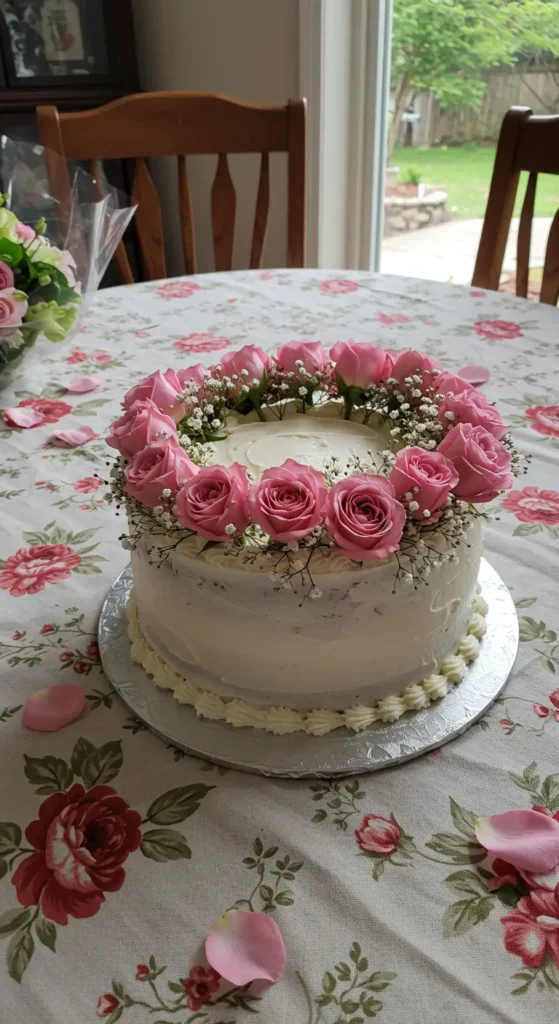
Real flowers on cakes always make people nervous, but it’s easier than you think if you stick to edible or food-safe varieties.
The appeal: Nature does the decorating work for you. You just provide the canvas.
What you need:
- Simple frosted cake (white or cream works best)
- Fresh flowers (roses, pansies, violas—check they’re food-safe)
- Floral wire or toothpicks if needed
Assembly:
- Frost cake in a simple, smooth finish
- Create a flower crown around the top edge
- Add a few scattered blooms on the sides if you want
- Remove all flowers before serving (unless they’re definitely edible)
Reality check: I once used flowers from my yard without checking if they were safe. Don’t do that. Stick to grocery store flowers or specifically edible ones.
7. Watercolor Buttercream Art
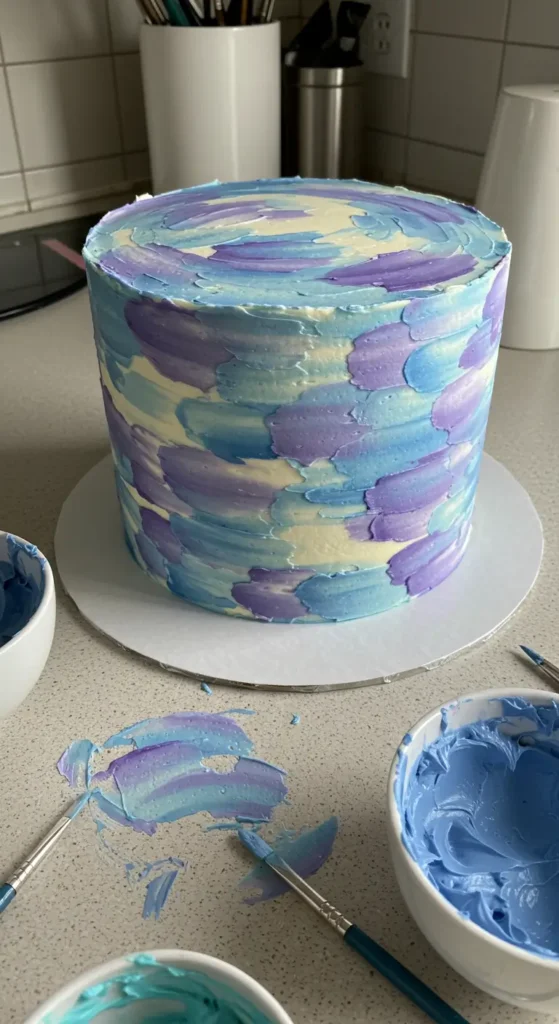
This technique makes every cake look like a piece of art, even when your artistic skills are questionable like mine.
The magic: Abstract watercolor effects are forgiving—there’s no “wrong” way to do it.
You’ll need:
- White cake, white buttercream base
- Food coloring in various shades
- Clean paintbrushes
- Paper towels for blending
Creating the art:
- Start with smooth white buttercream
- Dab different colors randomly on the surface
- Use damp paintbrushes to blend and create watercolor effects
- Less is more—resist the urge to keep adding color
8. Textured Buttercream Perfection
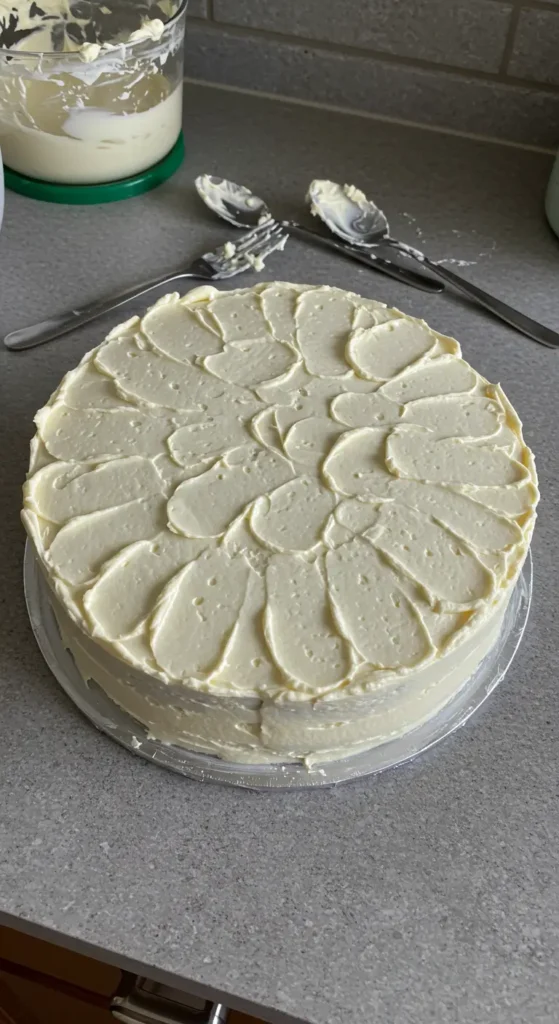
Sometimes the most beautiful cakes are all about texture rather than color or decorations.
The beauty: You can create amazing texture with tools you already have—forks, spoons, palette knives.
Basic supplies:
- Frosted cake
- Various tools for texture (fork, spoon, knife, comb)
- Patience to experiment
Technique time:
- Apply a thick layer of buttercream
- Use your tools to create patterns—swirls, lines, waves
- Try different angles and pressures
- Step back frequently to assess your work
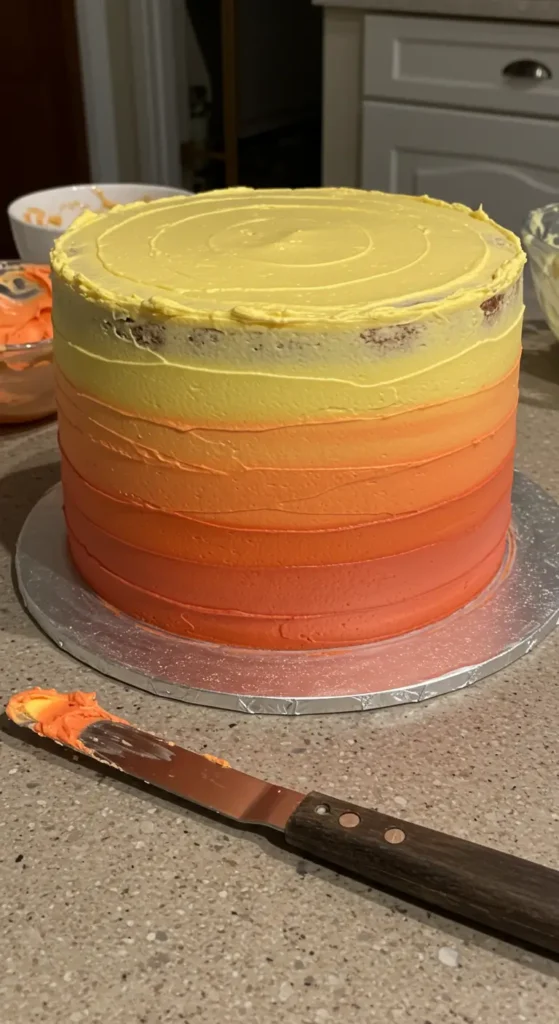
9. Ombre Perfection
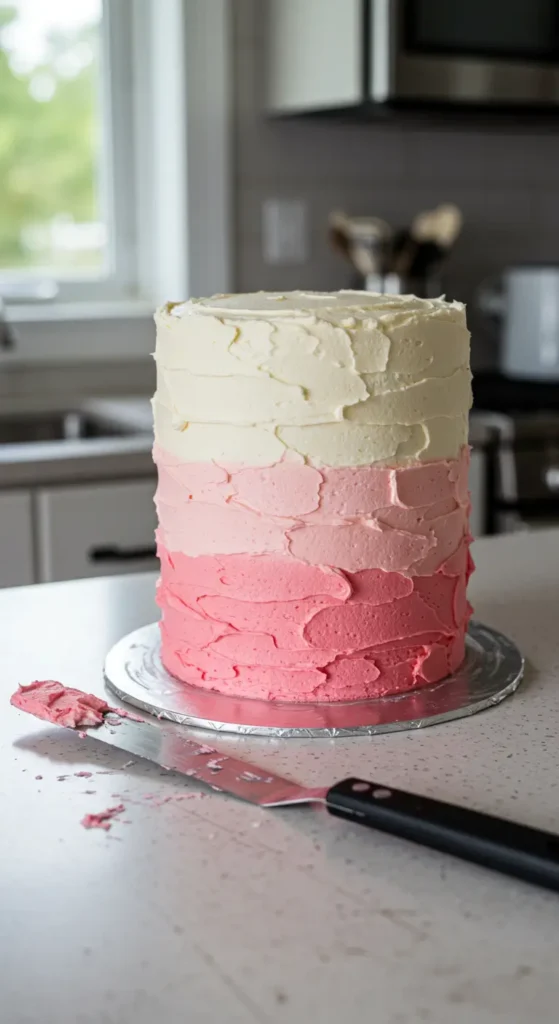
Ombre never goes out of style, and it’s more forgiving than you’d think.
Why it’s gorgeous: The gradient effect is naturally eye-catching and photographs beautifully.
Shopping list:
- Cake layers
- Buttercream
- Food coloring in one color family
The process:
- Divide buttercream into 4-5 portions
- Color from lightest to darkest
- Apply lightest shade to top, gradually working to darkest at bottom
- Blend where colors meet with a clean spatula
10. Geometric Gold Accent Cake
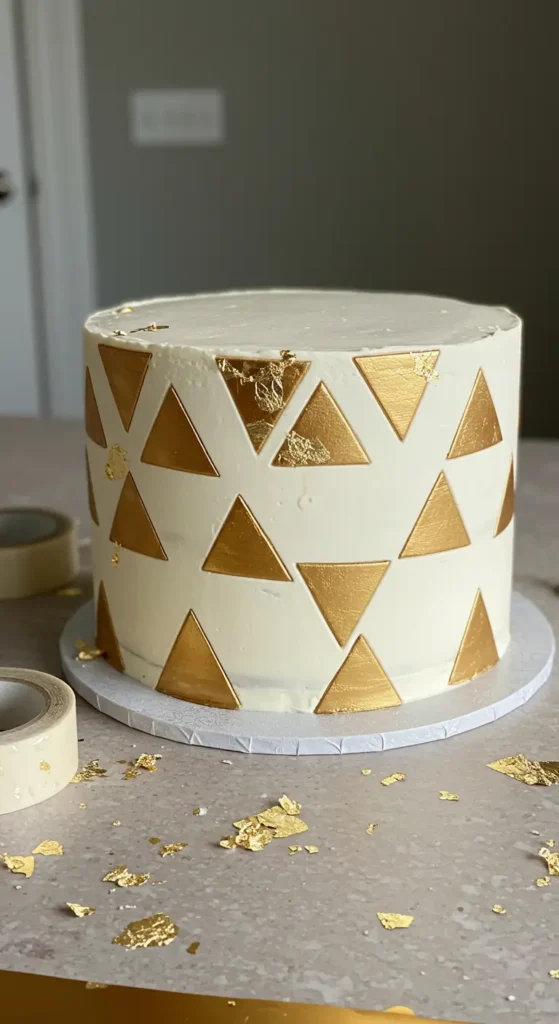
A touch of gold elevates any simple cake into something special.
The wow factor: Gold makes everything look expensive and professional.
You’ll need:
- Simple frosted cake (white or colored)
- Gold leaf, gold dust, or gold spray
- Stencils or tape for geometric patterns
Making it shine:
- Create your geometric pattern with tape or stencils
- Apply gold according to product instructions
- Remove tape carefully while gold is still slightly wet
- Touch up any imperfections
11. Vintage Ruffles Romance
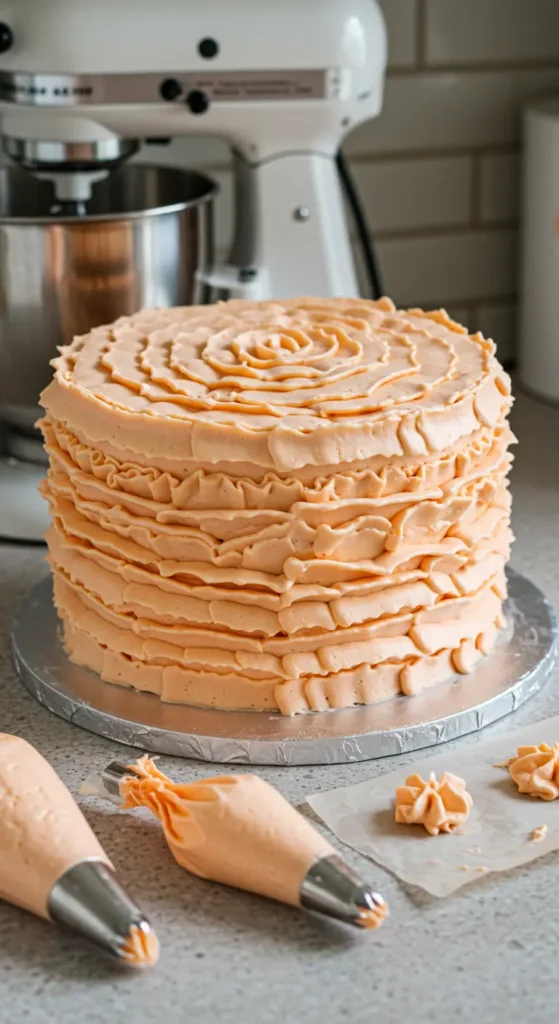
This technique looks complicated but is basically just piping the same ruffle over and over.
The charm: Vintage ruffles give any cake a romantic, timeless feel.
What you need:
- Round cake layers
- Buttercream in soft colors
- Petal tip for piping
- Steady hands (or at least caffeinated hands)
Creating ruffles:
- Start at the bottom of the cake
- Pipe ruffles in horizontal rows, working upward
- Overlap each row slightly
- Don’t worry about perfection—organic ruffles are prettier
12. Minimalist Single Tier Beauty
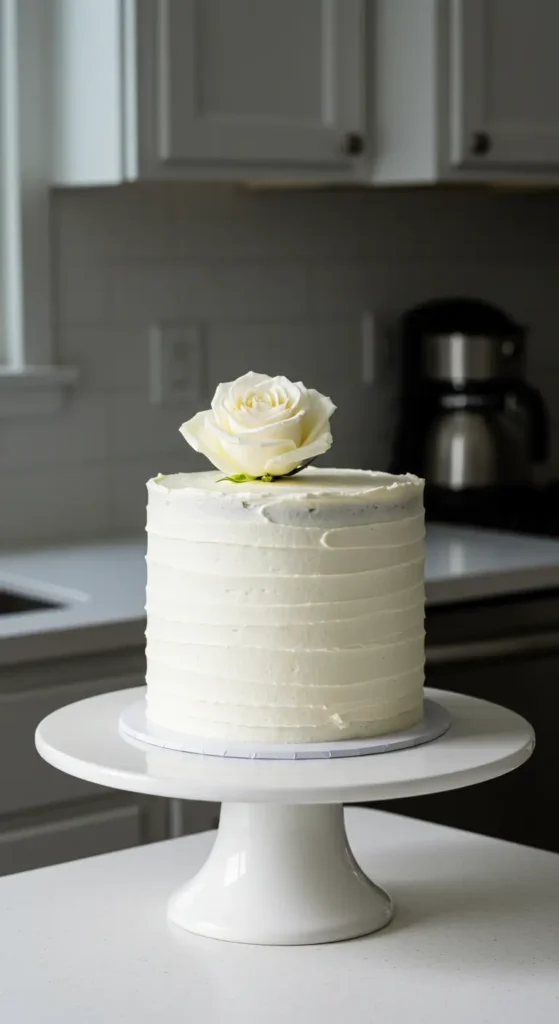
Sometimes simple is the most sophisticated choice of all.
The elegance: Clean lines and minimal decoration make a strong statement.
Supply list:
- Single layer cake or short stack
- Smooth buttercream
- One simple decoration (single flower, gold accent, etc.)
Less is more approach:
- Focus on perfect (or nearly perfect) smooth frosting
- Choose one beautiful accent
- Keep proportions balanced
- Let the simplicity speak for itself
13. Funfetti Birthday Explosion
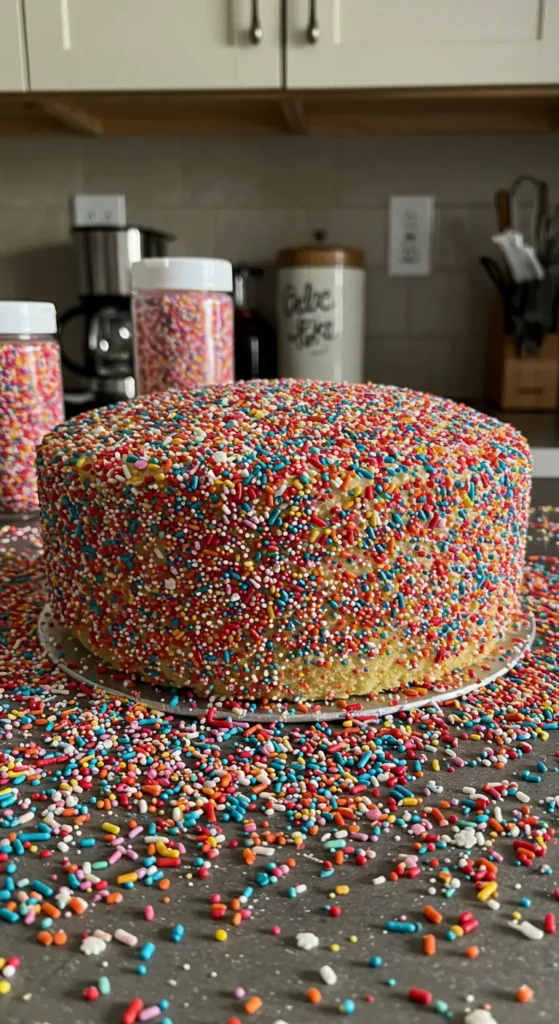
Because sometimes you need maximum fun factor over sophistication.
Pure joy factor: Sprinkles make everything better. This is science.
Fun supplies:
- Vanilla cake with rainbow sprinkles baked in
- White buttercream
- More sprinkles than you think you need
- Extra sprinkles for good measure
Making it party-ready:
- Mix sprinkles into cake batter before baking
- Frost with white buttercream
- Roll sides in sprinkles (messy but worth it)
- Top with even more sprinkles
- Ignore anyone who says it’s too much
14. Chocolate Ganache Mirror Glaze
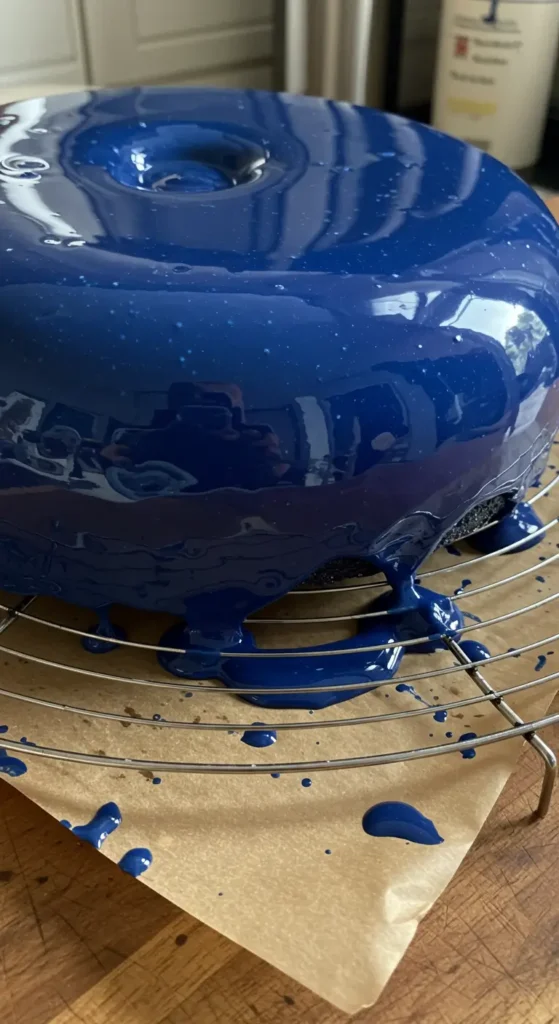
This one requires some patience, but the results are show-stopping.
The drama: Mirror glaze looks like liquid perfection poured over cake.
Technical supplies:
- Perfectly smooth frosted cake (chilled)
- Gelatin
- Sugar, water, condensed milk, white chocolate
- Food coloring
- Thermometer (important!)
The careful process:
- Prepare ganache mirror glaze (follow recipe exactly)
- Cool to exact temperature (around 90°F)
- Pour over chilled cake in one smooth motion
- Let excess drip off
- Don’t touch until completely set
Honesty moment: I’ve failed at this more than I’ve succeeded, but when it works, it’s magical.
15. Pressed Flower Garden Cake
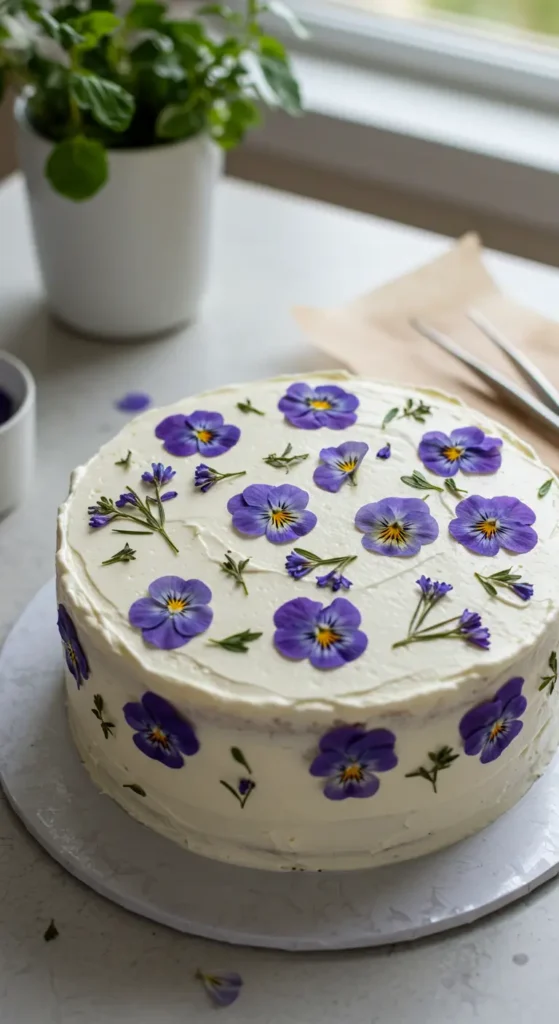
Delicate pressed flowers create an ethereal, garden-party vibe.
Natural beauty: Real flowers preserved in buttercream look like edible art.
You’ll need:
- Smooth white buttercream cake
- Pressed edible flowers (pansies, violas, herbs)
- Tweezers for placement
- Gentle touch
Delicate work:
- Press flowers between parchment for 24 hours
- Gently place on frosted cake surface
- Press very lightly into buttercream
- Create natural, scattered patterns
16. Marble Fondant Masterpiece
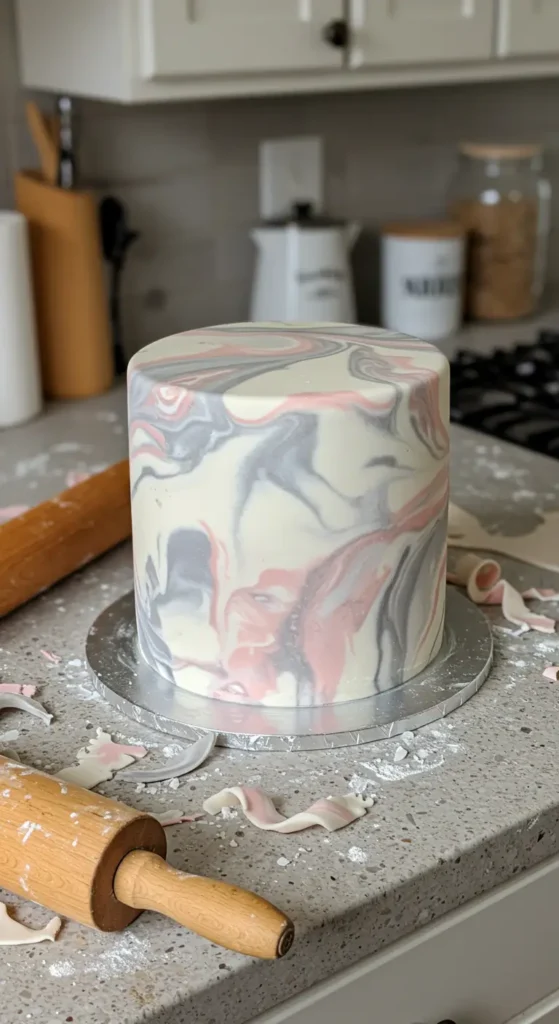
Fondant gets a bad rap, but marble fondant is genuinely beautiful.
Artistic appeal: Marble patterns are unique every time—no two cakes will look identical.
Materials needed:
- Cake covered in buttercream
- White fondant
- Food coloring (2-3 colors max)
- Rolling pin
- Patience for kneading
Creating marble magic:
- Color portions of fondant lightly
- Twist colors together without overmixing
- Roll out carefully to preserve marble pattern
- Cover cake and smooth gently
17. Fresh Fruit Cascade
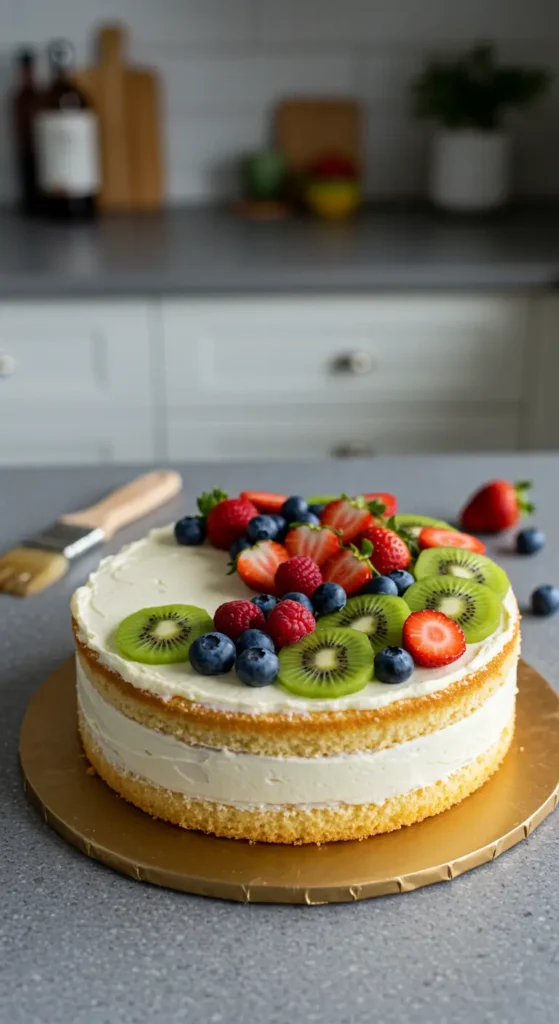
Let seasonal fruit be the star of your cake decoration.
Natural elegance: Fresh fruit is always beautiful and adds amazing flavor contrast.
Seasonal supplies:
- Simple frosted cake
- Best quality fresh fruit you can find
- Light simple syrup for glazing (optional)
Fruit artistry:
- Choose fruits that complement your cake flavor
- Arrange in cascading pattern down one side
- Fill in gaps with smaller fruits or berries
- Glaze lightly if desired for extra shine
18. Buttercream Painting Technique

Turn your cake into a canvas with buttercream paint effects.
Artistic freedom: Abstract buttercream art means there are no mistakes, only happy accidents.
Artist supplies:
- Smooth buttercream base
- Various colored buttercreams
- Palette knives of different sizes
- Paper towels for blending
Painting process:
- Apply different colored buttercreams randomly
- Use palette knives to blend and create effects
- Build layers gradually
- Step back frequently to assess your masterpiece
19. Elegant Pearl Border
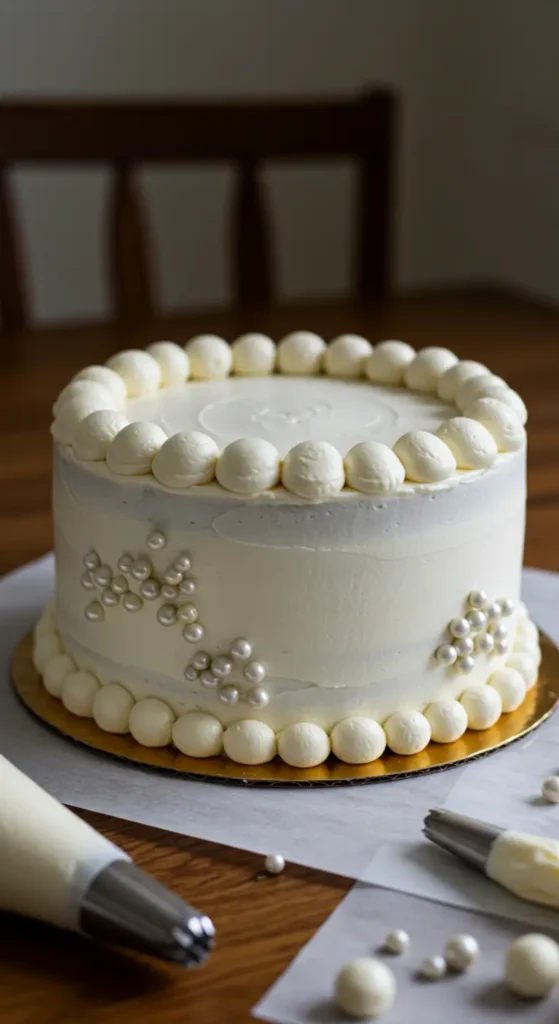
Buttercream pearls add sophistication without requiring advanced piping skills.
Timeless elegance: Pearls never go out of style and suit any age celebration.
Simple supplies:
- Frosted cake
- Buttercream in piping bag
- Round tip (size 12 or similar)
- Steady piping pressure
Pearl perfection:
- Hold piping bag at 90-degree angle to cake
- Squeeze to form pearl, stop pressure, pull away
- Repeat around borders or in patterns
- Keep pressure consistent for uniform pearls
20. Sunset Gradient Magic
Capture the beauty of a sunset in cake form.
Natural inspiration: Sunset colors are inherently beautiful and romantic.
Color palette:
- Yellow to orange to pink to purple buttercream
- Smooth frosted cake base
- Large offset spatula for blending
Sunset technique:
- Apply colors in horizontal bands
- Blend where colors meet
- Work quickly before buttercream sets
- Clean spatula between blending sessions
21. Vintage Lace Impression
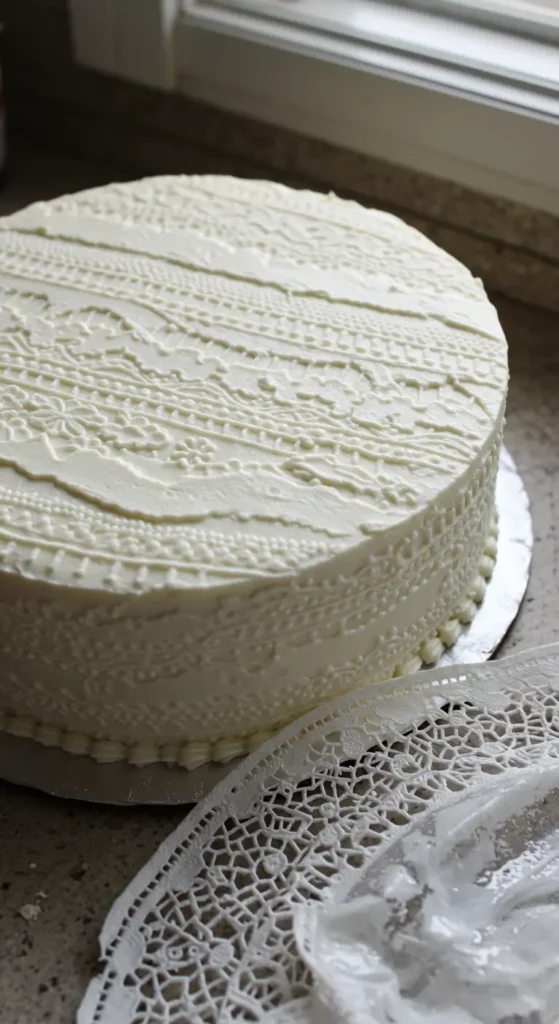
Create delicate lace patterns using textured mats or actual lace.
Romantic detail: Lace patterns add vintage charm and sophisticated texture.
Vintage supplies:
- Food-safe lace mat or clean doily
- Buttercream cake
- Rolling pin or smooth tool
Lace magic:
- Press lace pattern gently into fresh buttercream
- Remove carefully to preserve pattern
- Touch up any imperfections
- Avoid overhandling the delicate impression
22. Bold Geometric Patterns
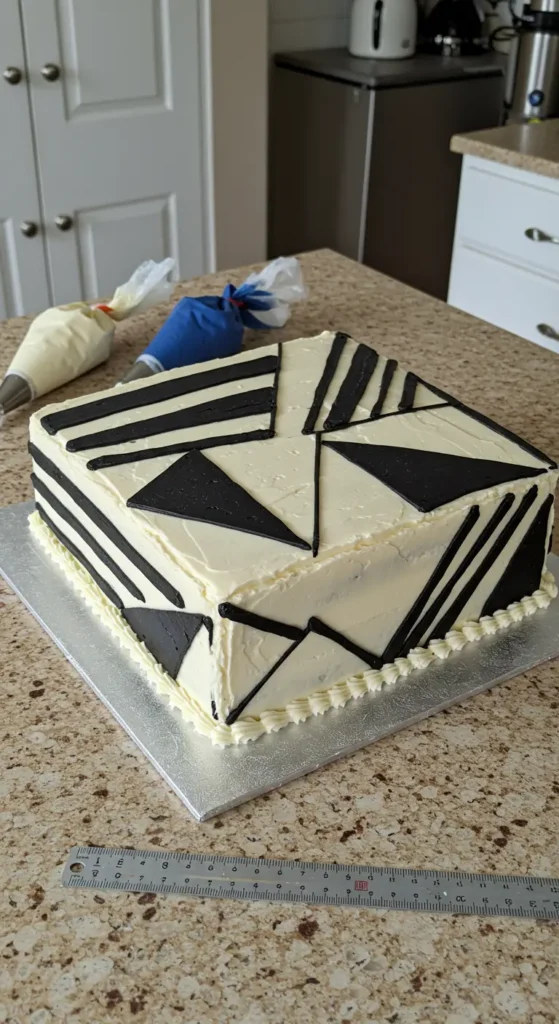
Sometimes modern and bold is exactly the right choice.
Contemporary style: Clean geometric lines create striking visual impact.
Modern materials:
- Colored buttercream
- Ruler or straight edge
- Steady hands
- Contrasting colors for definition
Geometric precision:
- Plan your pattern before starting
- Use tools to keep lines straight
- Work with contrasting colors for maximum impact
- Allow each section to set before adding adjacent colors
23. Chocolate Shaved Elegance
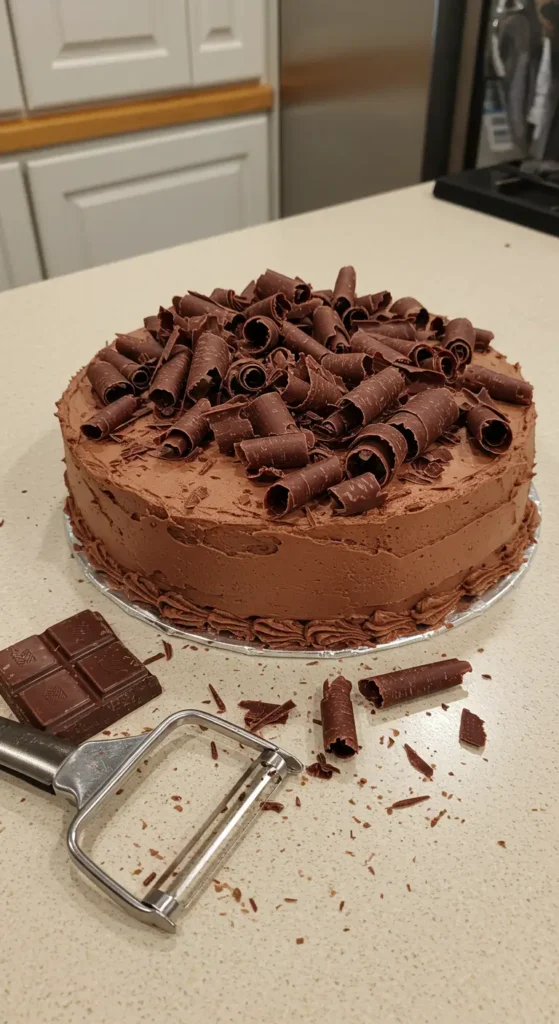
Sometimes the simplest decorations are the most elegant.
Sophisticated simplicity: Chocolate shavings add texture and rich flavor.
Chocolate supplies:
- Room temperature chocolate bar
- Vegetable peeler or knife
- Frosted cake
- Light touch for application
Shaving technique:
- Use vegetable peeler on room temperature chocolate
- Let shavings fall naturally onto cake
- Don’t overthink placement—organic looks best
- Chill cake to set shavings in place
24. Fresh Herb Garden Theme
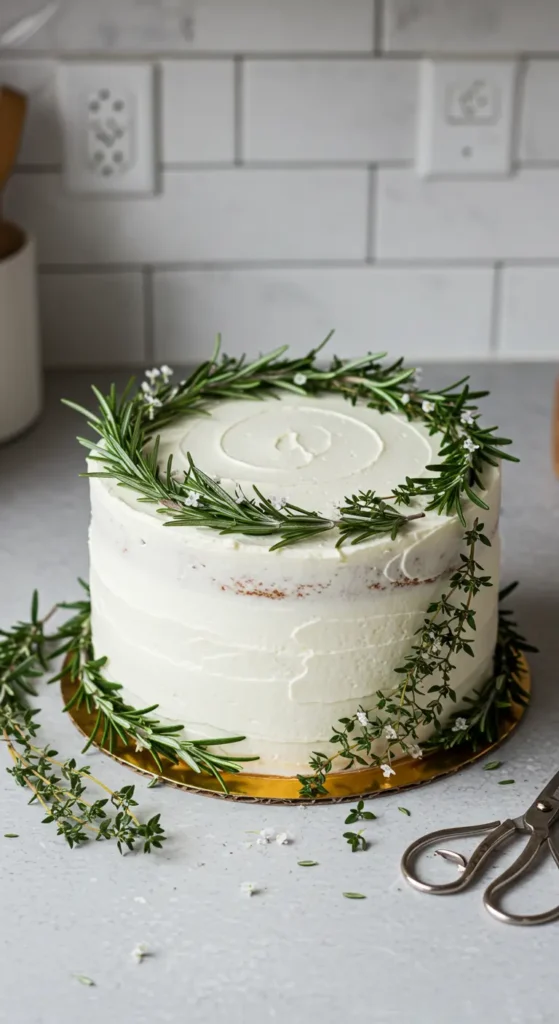
Herbs aren’t just for cooking—they make beautiful, fragrant cake decorations.
Unexpected beauty: Fresh herbs add color, fragrance, and unique visual interest.
Garden supplies:
- Fresh herbs (rosemary, thyme, mint, basil)
- Simple frosted cake
- Small flowers for accent (optional)
Herbal artistry:
- Choose herbs that complement your cake flavor
- Create natural, organic arrangements
- Combine different herb types for texture variety
- Remove before eating (unless specifically edible)
25. Painted Gold Accent Details

A touch of edible gold paint can transform any simple cake.
Luxury touch: Gold details make every cake look expensive and special.
Golden supplies:
- Edible gold paint or dust
- Small paintbrushes
- Simple buttercream details to paint
- Steady hand
Gilding process:
- Create simple buttercream details first
- Let details set slightly
- Paint with thin coats of gold
- Allow each coat to dry before adding more
26. Waterfall Buttercream Effect

Create the illusion of flowing buttercream for dramatic effect.
Dynamic movement: Flowing buttercream adds energy and visual interest to any cake.
Flow supplies:
- Multiple colors of buttercream
- Large piping bags
- Offset spatulas
- Patience for layering
Creating flow:
- Apply base colors in flowing patterns
- Use spatulas to create movement
- Blend where colors meet naturally
- Work quickly before buttercream sets
27. Classic Birthday Candle Crown
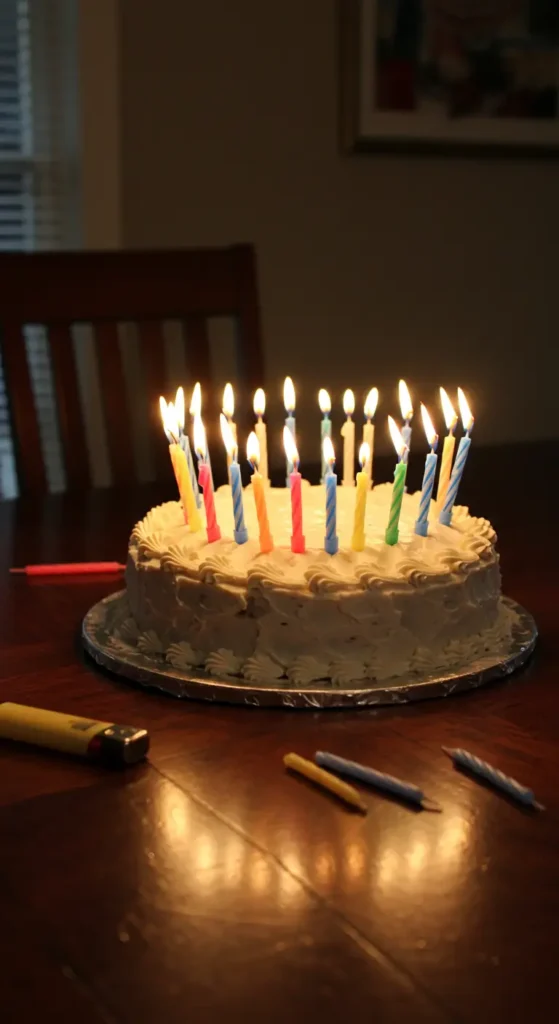
Sometimes traditional is exactly right—elevated with thoughtful presentation.
Timeless tradition: Beautiful candle arrangements make the birthday moment special.
Candle supplies:
- Simple, elegant frosted cake
- High-quality birthday candles
- Candle holders (optional)
- Matches that work (check first!)
Candle perfection:
- Choose candles that complement your cake colors
- Arrange in pleasing patterns, not just straight lines
- Consider height variations for visual interest
- Have a plan for lighting them all quickly
Okay, so there you have it, 27 pretty birthday cake ideas that won’t require a degree in cake architecture or a nervous breakdown in your kitchen. Not every cake needs to be a Pinterest masterpiece to be beautiful and meaningful.
The truth is, people remember how a cake made them feel more than whether the frosting was perfectly smooth or the decorations were symmetrical. I’ve learned that the “mistakes” often become the most charming parts of homemade cakes.
Whether you’re making a simple berry-topped vanilla cake for a quiet family celebration or going all-out with mirror glaze for a milestone birthday, what matters most is the love and effort you put into it. Trust me, I’ve seen people tear up over wonky homemade cakes and barely notice professionally perfect store-bought ones.
My advice? Pick one that speaks to you, gather your supplies, put on some good music, and just start. If it doesn’t turn out exactly like you pictured, so what? It’ll taste good, and that’s what really counts.
Let me know which one you’re trying first—I’m genuinely curious to hear how your cake adventures go! And hey, if you have any disasters along the way, join the club. We’ve all been there.
Happy baking! (And may your cakes rise evenly and your frosting cooperate better than mine did last weekend.)