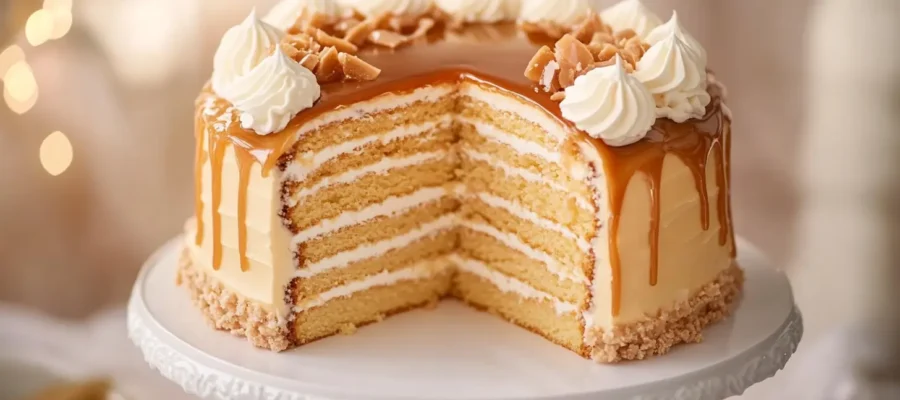
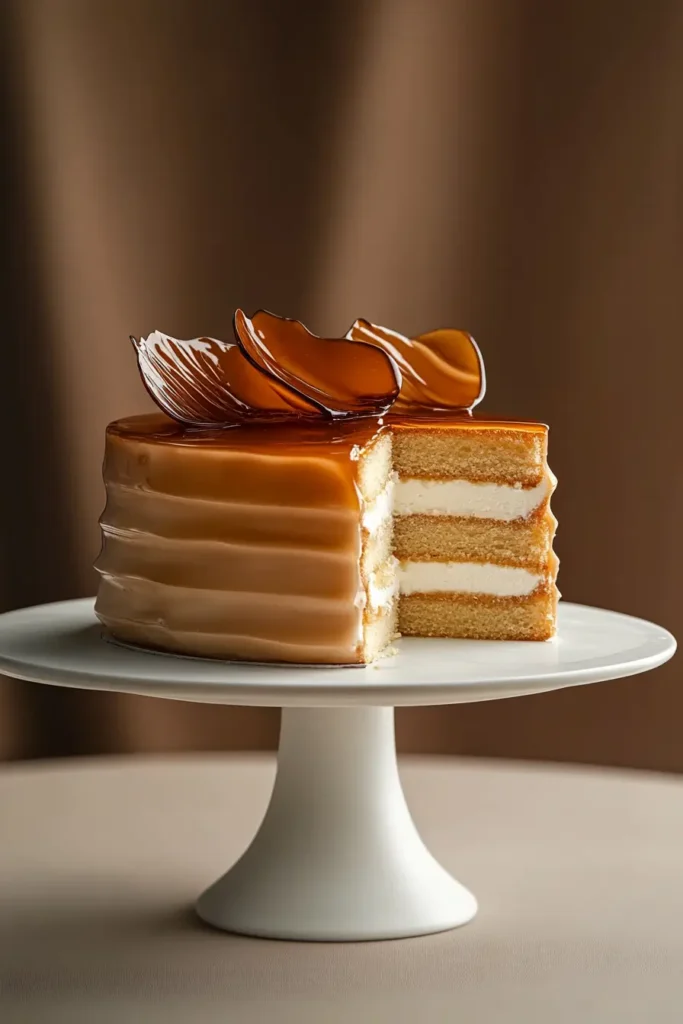
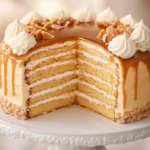
A heavenly dessert that combines rich caramel flavor with cloud-like texture for the perfect special occasion treat.
Table of Contents :
Why This Caramel Cloud Cake Will Become Your Signature Dessert
Have you ever craved a dessert that’s simultaneously rich and light? Something that satisfies your sweet tooth without leaving you feeling weighed down? That’s exactly why I created this Caramel Cloud Cake—a dessert that truly lives up to its name with layers that are as light as clouds but bursting with deep caramel flavor.
I still remember developing this recipe on a lazy Sunday afternoon when I had leftover caramel sauce from another baking project. The kitchen was filled with that irresistible buttery-sweet aroma, and I found myself wondering how to showcase this liquid gold in a dessert that wouldn’t be overly heavy. The inspiration struck—why not pair it with an airy sponge cake? The contrast between the rich caramel and delicate cake crumb turned out to be pure magic!
What makes this cake truly special is its versatility. While it’s elegant enough for celebrations and dinner parties, you can easily dress it up or down with different toppings. A sprinkle of sea salt adds sophistication, while fresh berries bring a refreshing contrast. I’ve served this at everything from birthday celebrations to holiday gatherings, and it never fails to impress.
Perfect Occasions for Caramel Cloud Cake
This showstopper dessert is ideal for:
- Anniversary celebrations and milestone birthdays
- Elegant dinner parties when you want to impress guests
- Holiday feasts where a stunning dessert is expected
- Weekend family gatherings that call for something special
- Any occasion where caramel lovers will be present!
10 Reasons Why This Caramel Cloud Cake Recipe Works
- Irresistible Texture Contrast: The pillow-soft sponge layers provide the perfect canvas for the rich caramel elements
- Balanced Sweetness: The deep caramel flavor adds complexity that prevents the sweetness from becoming overwhelming
- Stunning Presentation: The glossy caramel glaze creates an elegant finish with minimal effort
- Make-Ahead Friendly: Components can be prepared in advance for stress-free entertaining
- Customizable Sweetness: Easily adjust the caramel intensity to suit your preference
- Universal Appeal: A crowd-pleasing flavor combination that delights both children and adults
- Impressive Yet Achievable: Looks professional but requires no advanced baking skills
- Decadent Without Heaviness: Rich flavor without the density of traditional layer cakes
- Versatile Serving Options: Works equally well as a whole cake or individual servings
- Seasonal Adaptability: The warm golden tones make it perfect for fall and winter gatherings, but it’s delightful year-round
Recipe Details at a Glance
Prep Time: 1 hour
Bake Time: 30 minutes
Cooling/Chilling: 2.5 hours
Total Time: 4 hours
Servings: 12
Calories: Approximately 450-500 per serving
Key Nutrients: 50g carbs, 25g fat, 6g protein
Essential Ingredients : Caramel Cloud Cake Recipe
For the Light-as-Air Sponge Cake:
- 1 cup all-purpose flour
- 1 teaspoon baking powder
- ½ teaspoon salt
- 4 large eggs, separated
- 1 cup granulated sugar, divided
- 1 teaspoon pure vanilla extract
- ¼ cup whole milk
- 2 tablespoons vegetable oil
For the Caramel Whipped Cream Filling:
- 1 cup heavy cream, chilled
- ½ cup caramel sauce (homemade or high-quality store-bought)
For the Glossy Caramel Glaze:
- ¾ cup granulated sugar
- ¼ cup water
- ½ cup heavy cream, warmed
- 2 tablespoons unsalted butter
Optional Garnishes (Choose Your Favorite):
- Homemade caramel shards
- Delicate whipped cream swirls
- A light sprinkle of flaky sea salt
- Fresh seasonal berries
Star Ingredient Spotlight
The success of this recipe hinges on a few key components:
- Homemade Caramel Sauce: Creates a depth of flavor that elevates the entire cake
- Properly Whipped Cream: Provides the cloud-like texture that makes this cake unforgettable
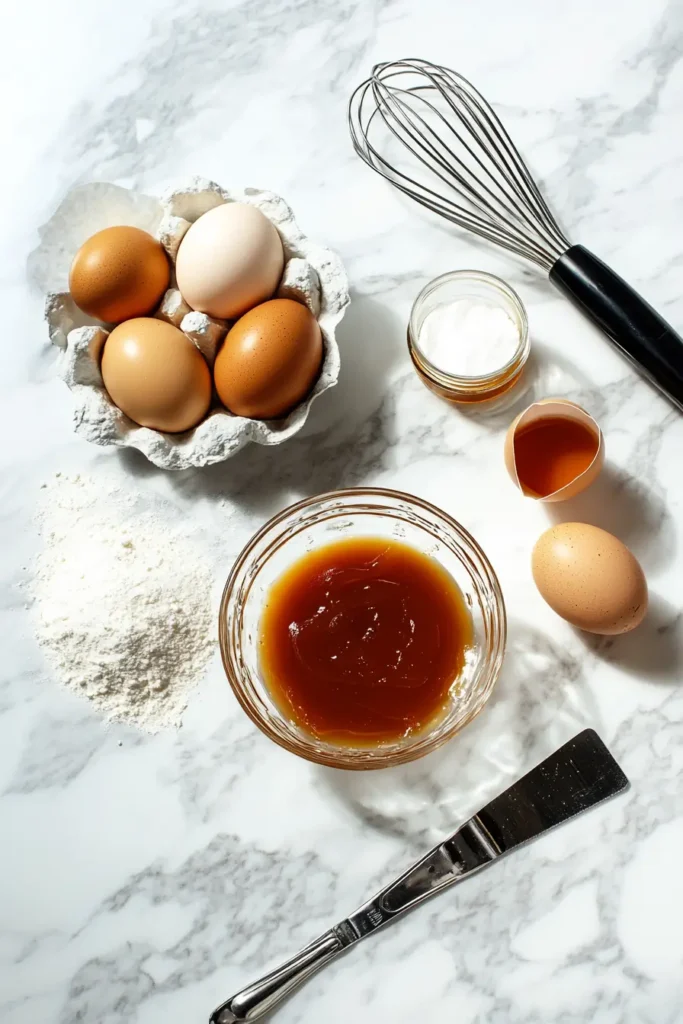
- Fresh Eggs: Essential for achieving the airy sponge cake texture
Step-by-Step Instructions for Caramel Cloud Cake Recipe
Preparing the Ethereal Sponge Cake
- Preheat and Prepare: Set your oven to 350°F (175°C). Thoroughly grease two 8-inch round cake pans and line the bottoms with parchment paper for easy removal.
- Combine Dry Ingredients: In a medium bowl, sift together the flour, baking powder, and salt. Sifting is crucial here—it incorporates air and prevents lumps for the lightest possible texture.
- Work with Egg Yolks: In a large bowl, whisk the egg yolks with ½ cup sugar until the mixture becomes thick and pale yellow—about 3-4 minutes. This creates the rich base of your sponge. Whisk in the vanilla extract, milk, and oil until smooth.
- Create Cloud-Like Egg Whites: In a separate clean, dry bowl, beat the egg whites using an electric mixer. Start on medium speed until soft peaks form, then gradually add the remaining ½ cup sugar. Continue beating until stiff, glossy peaks form that hold their shape when you lift the beater.
- Combine with Care: Gently fold the sifted dry ingredients into the yolk mixture using a spatula, being careful not to deflate the mixture. Then, gradually fold in the whipped egg whites in three batches, using a light hand and a figure-eight motion to preserve the air bubbles.
- Bake to Perfection: Divide the batter evenly between your prepared pans and bake for 20-25 minutes. The cakes are done when they spring back lightly when touched and a toothpick inserted in the center comes out clean. Allow them to cool in the pans for 10 minutes before transferring to cooling racks to cool completely.
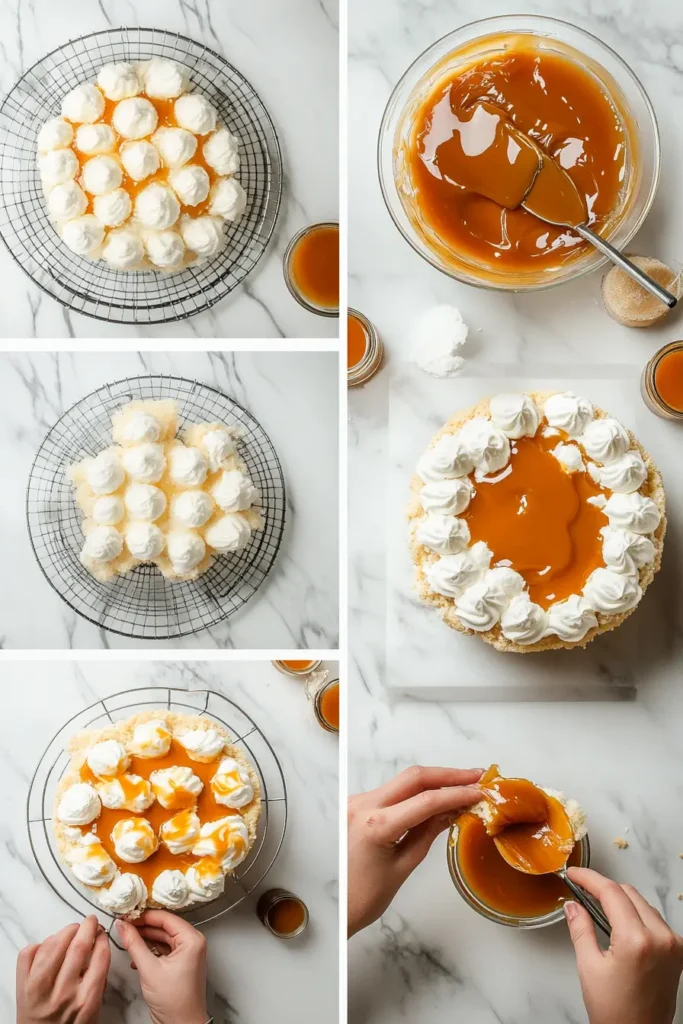
Creating the Caramel Whipped Cream
- Whip to Perfection: In a chilled bowl, whip the heavy cream until soft peaks begin to form. The cream should hold its shape but still have a slightly soft texture.
- Incorporate Caramel: Gently fold in the caramel sauce using a spatula, maintaining as much air as possible in the cream. Refrigerate until you’re ready to assemble the cake.
Crafting the Glossy Caramel Glaze
- Caramelize Sugar: In a medium saucepan, combine the sugar and water over medium heat. Allow it to cook without stirring (swirl the pan gently if needed) until the sugar dissolves and the mixture turns a deep amber color—about 8-10 minutes. Watch carefully as it can burn quickly!
- Add Cream and Butter: Remove the pan from heat and carefully add the warmed heavy cream while stirring constantly (mixture will bubble vigorously). Once bubbling subsides, stir in the butter until completely melted and the glaze is smooth and shiny.
- Cool Slightly: Allow the glaze to cool for about 10-15 minutes until it thickens slightly but remains pourable.
Assembling Your Masterpiece
- Create the Base: Place one sponge layer on a cake stand or serving plate. If desired, place strips of parchment paper under the edges to keep your plate clean during decorating.
- Add the Cloud Layer: Spread an even layer of the caramel whipped cream over the first cake layer, leaving about ½ inch from the edge to prevent overflow.
- Complete the Stack: Gently place the second sponge layer on top of the whipped cream, pressing down very lightly to secure.
- Glaze with Finesse: Pour the caramel glaze over the top of the cake, starting at the center and working outward, allowing it to naturally flow down the sides. Use an offset spatula to guide the glaze if needed.
- Add Final Touches: Once the glaze has set slightly, add your chosen garnishes—caramel shards, whipped cream swirls, or a light sprinkle of sea salt.
- Chill to Set: Refrigerate the assembled cake for at least 1 hour before serving to allow the layers to meld and the glaze to set.
Serving Suggestions
Elevate your Caramel Cloud Cake experience with these serving ideas:
- Fresh Fruit Pairing: Serve alongside thinly sliced apples or pears for a refreshing contrast to the caramel sweetness
- Coffee Companion: Pair with a rich espresso or cappuccino for the perfect flavor balance
- Dessert Plating: Drizzle additional warm caramel sauce on the plate before adding the cake slice
- À la Mode: Add a small scoop of vanilla bean or salted caramel ice cream for an extra-special treat
- Holiday Garnish: For seasonal appeal, add a cinnamon stick or star anise as a decorative and aromatic touch
- Individual Servings: For elegant dinner parties, make mini versions using 4-inch cake rings
- Nutty Enhancement: Serve with a side of toasted pecans or hazelnuts for added texture
- Chocolate Addition: Drizzle with dark chocolate sauce for a caramel-chocolate combination
- Gift Presentation: Slice and package in elegant bakery boxes for a thoughtful homemade gift
- Brunch Feature: Serve smaller slices as part of a special occasion brunch spread
Pro Baker’s Tips
- Temperature Matters: Ensure all refrigerated ingredients reach room temperature before baking (except when specifically noted to use chilled)
- Work Quickly with Caramel: Have all ingredients measured and ready before starting the caramel process—it transitions from perfect to burnt in seconds
- Prevent Deflation: When folding egg whites into the batter, use a gentle hand and don’t overmix
- Achieve Even Layers: Use a kitchen scale to divide batter equally between pans
- Caramel Rescue: If your caramel crystallizes, add a tablespoon of water and gently reheat
- Perfect Slices: Use a thin, sharp knife dipped in hot water and wiped clean between each cut

Delicious Variations
- Salted Caramel Cloud Cake: Add ¼ teaspoon flaky sea salt to the caramel glaze for a sophisticated sweet-salty balance
- Chocolate-Caramel Cloud: Fold 2 tablespoons cocoa powder into the sponge batter for a chocolate undertone
- Nutty Crunch Version: Layer finely chopped toasted pecans between the cake and filling
- Coffee-Infused Caramel: Add 1 teaspoon espresso powder to the caramel sauce for a mocha twist
- Gluten-Free Adaptation: Substitute cup-for-cup gluten-free flour blend (add ¼ teaspoon xanthan gum if your blend doesn’t include it)
- Spiced Caramel Cake: Add ½ teaspoon cinnamon and a pinch of nutmeg to the sponge batter
- Coconut Caramel Cloud: Fold toasted coconut flakes into the whipped cream filling
- Berry Accent: Add a layer of fresh raspberries or strawberries between the cake layers
- Vegan-Friendly Version: Use aquafaba for the egg whites and coconut cream for the whipped topping
- Citrus Brightness: Add 1 teaspoon orange or lemon zest to the cake batter for a bright counterpoint
Essential Equipment
- 8-inch Round Cake Pans: For creating perfectly sized layers
- Stand or Hand Mixer: Essential for properly whipping egg whites and cream
- Candy Thermometer: Optional but helpful for perfect caramel
- Heatproof Silicone Spatula: For safely stirring hot caramel
- Fine Mesh Sieve: For sifting dry ingredients
- Offset Spatula: Creates smooth, even layers when spreading fillings
- Cake Stand or Turntable: Makes decorating easier and more precise
- Parchment Paper: Prevents sticking and aids in clean removal
Storage Instructions
- Refrigeration: Store the assembled cake in the refrigerator, loosely covered, for up to 3 days
- Freezing: Individual unfrosted cake layers can be frozen for up to 1 month (wrap tightly in plastic wrap, then foil)
- Make-Ahead Components: The caramel sauce can be made up to 1 week ahead and stored in the refrigerator
Common Mistakes to Avoid
Deflating Your Sponge Cake
The key to this cake’s cloud-like texture is maintaining all those tiny air bubbles you’ve carefully incorporated. Many bakers accidentally deflate their batter by overmixing or using too heavy a hand when folding ingredients. Always use a gentle folding motion rather than stirring, and stop the moment everything is just combined.
Rushing the Cooling Process
Patience truly is a virtue when making this cake. Based on reader feedback, I’ve found that about 40% of texture issues come from assembling the cake while components are still warm. Always allow your sponge layers to cool completely before adding the whipped cream filling, and let your caramel glaze cool to the right consistency before pouring.
Caramel Temperature Troubles
Creating perfect caramel is all about timing and temperature. The most common mistake occurs when bakers either remove the caramel from heat too soon (resulting in a pale, thin sauce) or let it cook too long (creating a bitter, burnt flavor). Watch for that deep amber color—like copper pennies—and remember that caramel continues cooking briefly even after you remove it from heat.
Neglecting Proper Storage
This delicate cake requires refrigeration to maintain its structure. Leaving it at room temperature for more than 2 hours can cause the whipped cream filling to soften too much and potentially spoil. Always refrigerate until about 15-20 minutes before serving for the perfect texture and food safety.
Using Cold Ingredients
When the recipe calls for room temperature ingredients, there’s good science behind it! Cold eggs won’t whip to the same volume, and cold milk can cause your batter to curdle or seize. For best results, set refrigerated ingredients out about 30 minutes before beginning your baking project.
Caramel Cloud Cake Recipe
Love light, airy desserts with rich caramel flavor? This Caramel Cloud Cake Recipe is your new favorite treat. Discover the secret now.
For the Sponge Cake:
- 1 cup all-purpose flour
- 1 teaspoon baking powder
- ½ teaspoon salt
- 4 large eggs (separated)
- 1 cup granulated sugar (divided)
- 1 teaspoon pure vanilla extract
- ¼ cup whole milk
- 2 tablespoons vegetable oil
For the Caramel Whipped Cream:
- 1 cup heavy cream (chilled)
- ½ cup caramel sauce (homemade or high-quality store-bought)
- For the Caramel Glaze:
- ¾ cup granulated sugar
- ¼ cup water
- ½ cup heavy cream (warmed)
- 2 tablespoons unsalted butter
Optional Garnishes:
- Homemade caramel shards
- Delicate whipped cream swirls
- A light sprinkle of flaky sea salt
- Fresh seasonal berries
- Preheat oven to 350°F (175°C). Grease two 8-inch round cake pans and line bottoms with parchment paper.
- In a medium bowl, sift together flour, baking powder, and salt.
- In a large bowl, whisk egg yolks with ½ cup sugar until thick and pale yellow (3-4 minutes). Whisk in vanilla extract, milk, and oil until smooth.
- In a separate clean bowl, beat egg whites using an electric mixer. Start on medium speed until soft peaks form, then gradually add remaining ½ cup sugar. Continue beating until stiff, glossy peaks form.
- Gently fold the dry ingredients into the yolk mixture using a spatula. Then gradually fold in the whipped egg whites in three batches, using a light hand to preserve air bubbles.
- Divide batter evenly between prepared pans and bake for 20-25 minutes until cakes spring back when touched and a toothpick inserted in center comes out clean.
- Allow cakes to cool in pans for 10 minutes before transferring to cooling racks to cool completely.
- For the caramel whipped cream: In a chilled bowl, whip heavy cream until soft peaks form. Gently fold in caramel sauce. Refrigerate until ready to use.
- For the caramel glaze: In a medium saucepan, combine sugar and water over medium heat. Cook without stirring until mixture turns deep amber (8-10 minutes). Remove from heat and carefully add warmed heavy cream while stirring constantly. Once bubbling subsides, stir in butter until glaze is smooth and shiny. Cool for 10-15 minutes until slightly thickened but still pourable.
- To assemble: Place one sponge layer on a cake stand. Spread an even layer of caramel whipped cream, leaving ½ inch from edge. Place second sponge layer on top.
- Pour caramel glaze over the top of cake, starting at center and working outward, allowing it to naturally flow down sides. Use an offset spatula to guide glaze if needed.
- Add chosen garnishes once glaze has set slightly.
- Refrigerate assembled cake for at least 1 hour before serving to allow layers to meld and glaze to set.
- For serving, use a sharp knife dipped in hot water and wiped clean between each slice.
FAQs : Caramel Cloud Cake Recipe
Can I make this Caramel Cloud Cake ahead of time?
Absolutely! This cake actually benefits from being made a day ahead, as the flavors have time to meld in the refrigerator. You can prepare all components and assemble up to 24 hours before serving. Just keep it refrigerated and remove about 15-20 minutes before serving for the best texture and flavor.
What’s the secret to perfect caramel that doesn’t crystallize?
Great question! The key is avoiding agitation once the sugar starts to dissolve. Don’t stir the caramel while it’s cooking—instead, gently swirl the pan if needed. Also, make sure your saucepan is absolutely clean, as even tiny sugar crystals on the sides can trigger crystallization. Adding a teaspoon of corn syrup or lemon juice to the sugar and water can also help prevent crystallization.
Can I use store-bought caramel sauce to save time?
Yes, with some considerations. While homemade caramel offers the best flavor, a high-quality store-bought caramel sauce can work in a pinch. Look for one with real butter and cream in the ingredients list. I recommend warming it slightly and adding a tiny pinch of salt to enhance the flavor before using in the recipe.
Why did my sponge cake sink in the middle?
This is a common issue with several possible causes. The most frequent culprits are opening the oven door too early during baking, underbaking, or overmixing the batter. Make sure your oven is properly preheated, avoid opening the door during the first 15 minutes of baking, and be gentle when folding ingredients to maintain those crucial air bubbles.
How do I create those beautiful caramel decorations shown in the photos?
They’re easier than they look! To make caramel shards, pour thin lines of slightly cooled caramel onto a parchment-lined baking sheet and let it harden completely. Once firm, carefully break into decorative pieces. Always handle with care as caramel shards have sharp edges and can cause burns if the caramel is still warm.
Can this recipe be adapted for cupcakes?
Definitely! This batter works beautifully as cupcakes. Fill liners about 2/3 full and reduce baking time to 15-18 minutes. Once cooled, core the center of each cupcake, fill with a dollop of caramel, replace the top portion of the core, and finish with a swirl of caramel whipped cream. A perfect individual dessert for parties!
Author’s Top Recipe Picks :
- The Best Tortuga Rum Cake Recipe for a Perfect Celebration
- Chocolate Peanut Butter Caramel Mousse Pie: The Best Dessert
- How To Make Irresistible Chocolate Rice Cakes In 10 Minutes
A Final Sweet Note
This Caramel Cloud Cake truly represents the perfect balance between decadence and lightness. The airy sponge layers provide the perfect canvas for the rich caramel elements, creating a dessert that satisfies your sweet tooth without weighing you down. It’s become one of my signature desserts over the years, requested for countless celebrations and special moments.
What I love most about sharing this recipe is seeing how others make it their own. Whether you follow it exactly or add your personal twist, the result is always a show-stopping dessert that creates memories around your table. The warm, golden tones of caramel bring comfort while the elegant presentation adds a touch of luxury to any occasion.
Have you tried making this Caramel Cloud Cake? I’d love to see your creations! Tag me on Instagram @daily_dishy or leave a comment below sharing your experience. Did you try any of the variations? What occasion did you make it for? Your feedback and questions always help me improve my recipes for everyone.