Protein muffins saved my weekday mornings. I’m not exaggerating when I say these little powerhouses completely transformed my breakfast routine from “coffee and whatever I can grab” to actually feeling nourished before noon. After years of soggy overnight oats and expensive protein bars, I finally cracked the code on muffins that pack serious protein without tasting like cardboard or requiring a chemistry degree to make. The best part? One basic batter gives you three totally different flavors, so breakfast burnout becomes a thing of the past.
Table of Contents :
When Breakfast Feels Impossible
Look, I’m going to be honest here. Mornings and I have never been friends. For years, my breakfast “strategy” was grabbing whatever wouldn’t make me late for work – usually nothing, sometimes coffee, occasionally something pre-packaged with questionable ingredients.
The first time I tried making protein muffins, I ended up with dense little hockey pucks that even my dog approached with suspicion. The second batch wasn’t much better – somehow simultaneously dry AND gummy. What was I missing? Turns out, most recipes online are just wrong about protein powder-to-flour ratios. They’re either trying to use ALL protein powder (disaster) or so little that you might as well eat a regular muffin.
After about eight failed batches and way too much wasted protein powder, I finally figured out the magic balance. My husband, who usually responds to my baking experiments with polite nodding, actually asked if he could take some to work. That’s when I knew I had something worth sharing.
Ingredients for Protein Muffins
The beauty of this recipe is how straightforward the ingredients are – nothing weird, nothing you need to order online, just pantry staples plus protein powder. I’ve made these with both whey and plant-based proteins, and while there are small texture differences, both work beautifully with some minor adjustments I’ll explain below.
What’s absolutely non-negotiable here is measuring properly. Protein powder is finicky, and even a tablespoon too much can turn your muffins into rubber. I learned that one the hard way, trust me. Everything else? Pretty flexible.
Oat Flour (1½ cups OR 1¼ cups all-purpose flour)
I prefer oat flour for the nutty flavor and extra fiber, plus it makes these gluten-free if that matters to you. You can buy it pre-made or just blitz rolled oats in your blender until fine. If using all-purpose flour, reduce to 1¼ cups as it’s more dense than oat flour. The first time I made these with AP flour, I didn’t adjust and ended up with muffins that could have been used as doorstops.
Protein Powder (½ cup, about 2 scoops)
This is where things get personal. I use a vanilla whey-casein blend because it bakes more reliably than pure whey. If you’re using 100% whey, reduce to ⅓ cup or your muffins will dry out faster than laundry in the desert. Plant-based? Go with a pea-rice blend rather than pure pea protein, which can make your muffins taste like…well, peas. The brand actually matters here – I’ve had good luck with Optimum Nutrition and PEScience.
Greek Yogurt (1 cup, full-fat)
This is your secret weapon for moisture and extra protein. Low-fat works too, but full-fat gives you muffins that stay tender longer. I once tried substituting regular yogurt and ended up with a batter so wet I could have poured it like pancakes. Don’t do that. If you’re dairy-free, thick coconut yogurt is your best bet – not the runny stuff.
Eggs (2 large)
These provide structure, binding, and yes – more protein! They’re essential for getting that actual muffin texture instead of a protein bar pretending to be a muffin. I’ve tried flax eggs when baking for my vegan friend, and while the muffins were denser, they were still completely enjoyable. Just add an extra tablespoon of oil to compensate.
Maple Syrup (⅓ cup)
I’ve experimented with every sweetener under the sun, and maple syrup consistently gives the best flavor and moisture. Honey works too, though it makes the muffins slightly denser. If using a super-sweet protein powder, you can reduce to ¼ cup. And yes, I’ve tried those sugar-free syrups – let’s just say some experiments don’t need repeating.
Coconut Oil (¼ cup, melted)
The fat content here is non-negotiable for tender muffins, but the source is flexible. Melted butter works beautifully for a more traditional flavor. Olive oil is okay in a pinch, especially with the chocolate or pumpkin variations, but you’ll detect a slight olivey undertone. I once forgot the oil entirely and produced something closer to protein bread than muffins.
Milk (¼ cup, any kind)
This is just to adjust the batter consistency. Cow’s milk, almond, oat – whatever you have on hand works fine. Sometimes I need the full amount, sometimes less, depending on how thick my protein powder is and how humid the kitchen is that day. Start with 2 tablespoons and work up from there.
Baking Powder (2 teaspoons)
Don’t confuse this with baking soda! I’ve done that at 6 AM before coffee and wondered why my muffins tasted like soap. Baking powder gives these lift without needing to separate eggs or do any fancy techniques. Make sure yours is fresh – older than 6 months and you’ll get flat muffins.
Vanilla Extract (1 teaspoon)
Real vanilla extract makes a difference here, especially in the base and blueberry versions. I’ve skipped it before when I ran out, and while the muffins were still good, they lacked that warm, aromatic quality that makes you want to linger over breakfast.
Salt (¼ teaspoon)
Just a pinch, but don’t skip it. Salt balances the sweetness and enhances the protein powder flavor. Without it, these taste oddly flat – a lesson I learned on batch #3 when I was out of salt and thought “how important could it be?” Answer: very.
Instructions for Protein Muffins
This isn’t a complicated recipe, but there are a couple of crucial moments where things can go sideways. The most important thing? Don’t overmix once the wet and dry ingredients come together. I cannot stress this enough. Enthusiastic mixing leads to tough, chewy muffins that bounce when dropped. I’m speaking from experience here.
These take about 10 minutes to prep if you’re organized, 15 if you’re me and keep forgetting where you put things. The batter can be made the night before and refrigerated if mornings are especially chaotic for you – just add an extra minute or two to the baking time.
STEP 1: Preheat and prep.
Set your oven to 350°F (175°C) and line a 12-cup muffin tin with paper liners or give it a good spray with non-stick cooking spray. If using paper liners, give those a light spray too – protein muffins can stick more than regular ones. I learned this when half my muffin stayed with the wrapper and I was left with a sad crescent of breakfast.
STEP 2: Mix the dry ingredients.
In a large bowl, whisk together the oat flour (or all-purpose), protein powder, baking powder, and salt until well combined. Break up any lumps in the protein powder – those little suckers will stay dry pockets in your finished muffins if you don’t deal with them now. I usually run everything through a mesh strainer because my protein powder clumps like it’s trying to form its own social club.
STEP 3: Combine the wet ingredients.
In a separate bowl, whisk together the Greek yogurt, eggs, maple syrup, melted coconut oil (make sure it’s not hot or it’ll cook the eggs), vanilla extract, and 2 tablespoons of milk until smooth. This mixture should look glossy and well-blended. If your coconut oil starts to solidify because your other ingredients are cold, don’t panic – just warm the mixture gently by setting the bowl in warm water for a minute.
STEP 4: Create your batter.
Pour the wet ingredients into the dry ingredients and stir with a spatula just until combined. STOP when you no longer see dry flour streaks. The batter will be thick but should fall off your spoon in clumps. If it’s standing up like cookie dough, add the remaining milk 1 tablespoon at a time until it loosens slightly. My first few batches failed because I kept thinking “this can’t possibly be right” and added too much liquid.
STEP 5: Choose your flavor.
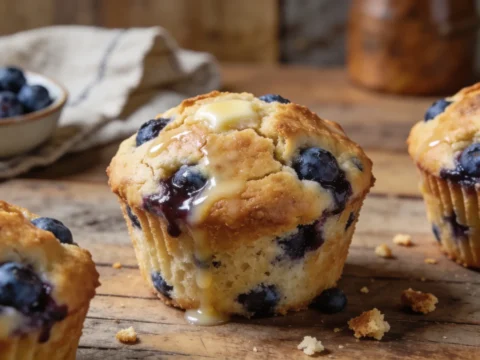
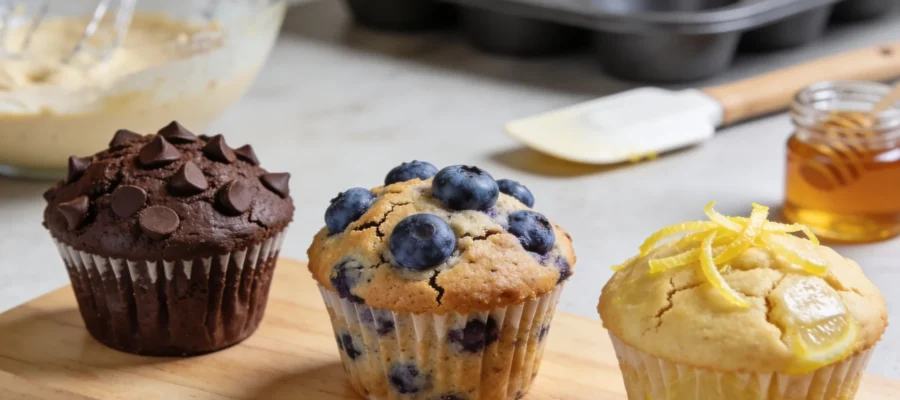
This is where the magic happens! For a basic batch, leave as is. For blueberry muffins, fold in 1 cup of fresh or frozen blueberries (don’t thaw if frozen). For chocolate muffins, fold in ¼ cup cocoa powder and ¼ cup mini chocolate chips. For pumpkin spice, fold in ¼ cup pumpkin puree (not pie filling), 1 teaspoon pumpkin pie spice, and reduce milk slightly. I’ve tried making all three flavors from one batch by dividing the batter, but measuring becomes tricky – best to commit to one flavor per batch.
STEP 6: Fill your muffin tin.
Divide the batter evenly among the muffin cups, filling each about ¾ full. These don’t rise quite as much as traditional muffins, so you can fill them a bit more generously. I use an ice cream scoop for this – not just because it’s perfect portioning, but because the release mechanism keeps things clean. If you’re doing the chocolate version, sprinkle a few extra mini chips on top for that bakery look.
STEP 7: Bake to perfection.
Bake for 18-22 minutes, until the tops are domed and a toothpick inserted in the center comes out mostly clean. Don’t wait for the toothpick to be bone dry or you’ll overbake them – a few moist crumbs are perfect. They’ll look slightly underdone in the center compared to regular muffins – this is normal! Protein muffins firm up considerably as they cool. My first batch, I kept baking until they looked “done” like regular muffins and ended up with protein hockey pucks.
STEP 8: Cool and store.
Let them cool in the tin for 5 minutes – not longer or they’ll steam and get soggy bottoms. Then transfer to a wire rack to cool completely. Once cool, store in an airtight container. They’ll keep at room temperature for 2 days, in the fridge for 5 days, or freeze them for up to 3 months. I make a double batch every other weekend and freeze most of them, then microwave for 30 seconds when needed.
Tips & Variations for Protein Muffins
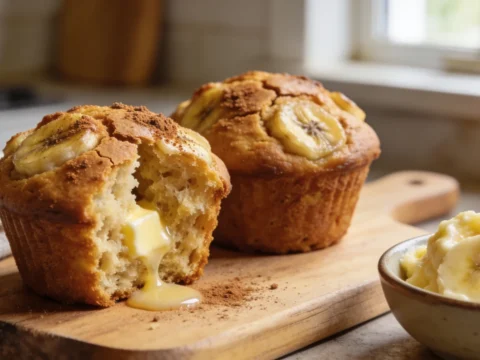
For the blueberry version, toss your berries in a tablespoon of the dry mix before folding in – this prevents them from sinking to the bottom. For extra protein punch, add 2 tablespoons of hemp hearts or chia seeds to any variation. If your muffins seem dry the next day (protein baking can do that), split one in half, pop it in the microwave for 10 seconds, then add a tiny smear of butter or nut butter.
The pumpkin version stays moist the longest, while the plain version tends to dry out quickest. All three freeze beautifully, though – just wrap individually in plastic wrap then store in a freezer bag. And if yours don’t look as perfect as those Instagram protein muffins with the impossibly tall domes? That’s completely normal. Those are probably made with extra leavening specifically for the photo.
Final Thoughts on Protein Muffins
These muffins aren’t going to win any fancy baking competitions, but they’ve won something more important – a permanent spot in my breakfast rotation. They’ve survived countless variations, kitchen mishaps, and even my husband’s scrutiny (he calls them “the good muffins” now, which in husband-speak is basically a five-star review).
If you try these, let me know which flavor became your favorite. I’m firmly in the blueberry camp, but my kids are chocolate all the way. And seriously, if you find another variation that works, drop a comment – I’m always looking for ways to avoid breakfast boredom without having to think before coffee.
Protein Muffins for Grab‑and‑Go Breakfast (One Batter, 3 Flavors)
Protein muffins saved my weekday mornings, transforming my breakfast routine. With one basic batter, enjoy three different flavors, eliminating breakfast burnout.