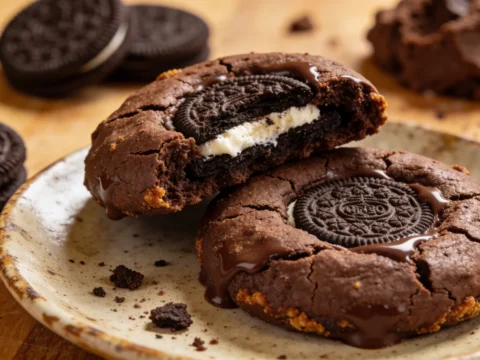
Looking for a dark chocolate cookies recipe that actually delivers on that rich, intense chocolate promise? I’ve been tweaking this one for years, and it’s finally at that perfect sweet spot where the cookies stay soft in the center with just enough chew at the edges. No sad, bland chocolate cookies here—these are practically brownie-adjacent in their chocolatey intensity, but still definitely cookies in texture.
Table of Contents :
Why These Dark Chocolate Cookies Are Worth Your Time
So here’s the thing about most chocolate cookies—they just don’t have enough actual chocolate flavor. I tried so many recipes that claimed to be “deeply chocolatey” but ended up tasting like, well, brown sugar cookies with a hint of cocoa. Disappointing doesn’t even begin to cover it.
My first attempts at fixing this problem were actual disasters. I once tried doubling the cocoa powder in a standard recipe and ended up with cookies so dry they practically turned to dust when you bit into them. Then I went through a phase of adding melted chocolate directly to the dough, which created these weird, overly dense cookies that never seemed to bake evenly—still raw in the center while the edges burned. Not great.
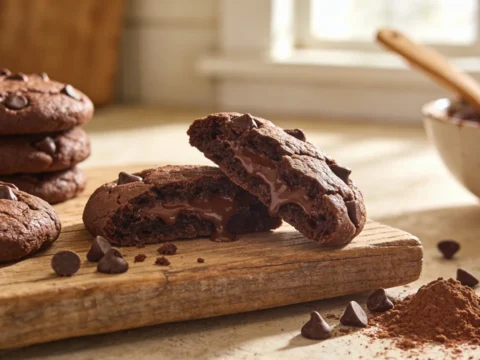
The breakthrough came when I realized we need to approach chocolate cookies more like brownies—using a combination of cocoa powder AND melted chocolate, but getting the ratios and mixing technique just right. The result? These cookies have that crackly exterior that gives way to a seriously fudgy middle. My chocolate-obsessed sister-in-law (who is brutally honest about my baking) declared them “the only chocolate cookies worth eating.” I’ll take it.
Ingredients dark chocolate cookies recipe
The magic of these cookies is all about quality ingredients and how they interact with each other. Don’t skimp on the chocolate components—that’s where all the rich flavor comes from. Everything else is just supporting the chocolate star of the show.
If you’re in a pinch, I’ve included substitutions where possible, but honestly, some ingredients are non-negotiable if you want that perfect texture. Trust me, I’ve tried cutting corners and always regretted it.
Unsalted Butter (1 cup, softened)
Room temperature is crucial here—not melted, not cold. If you can press your finger into it and leave an indent that holds its shape, you’re good to go. If you only have salted butter, that’s fine, just reduce the additional salt to a pinch. The butter creates that perfect cookie structure and carries the chocolate flavor.
Dark Brown Sugar (1 cup, packed)
The molasses in dark brown sugar adds depth that complements the chocolate. Light brown works in a pinch but won’t give you quite the same richness. And please actually pack it in the measuring cup—loose brown sugar will throw off your ratios and leave you with flatter, crisper cookies.
Granulated Sugar (1/2 cup)
This works with the brown sugar to create that perfect balance of chew and slight crispness at the edges. I’ve tried reducing it to make “healthier” cookies and they were terrible—flat and oddly chewy in a bad way. The granulated sugar is non-negotiable.
Eggs (2 large, at room temperature)
Cold eggs will solidify your butter and give you a weird, chunky dough. Take them out when you take out the butter. If you forget, place them in warm (not hot) water for 5-10 minutes. The eggs provide structure and that lovely slight rise that keeps the cookies from being too dense.
Vanilla Extract (2 teaspoons)
Real vanilla extract, please. I know it’s expensive these days (I nearly fainted at the price last time), but imitation vanilla has an artificial aftertaste that ruins the deep chocolate flavor. If you’re really in a bind, use bourbon or skip it entirely rather than using the fake stuff.
Dutch-Processed Cocoa Powder (3/4 cup)
This is darker and less acidic than natural cocoa powder, giving you that true dark chocolate flavor. If you only have natural cocoa powder, you’ll need to add 1/4 teaspoon of baking soda to balance the acidity. The Dutch-processed creates that deep color and smooth flavor without bitterness.
Dark Chocolate (8 oz, chopped)
Use bars of good baking chocolate (60-70% cacao), not chips! Chips have stabilizers that prevent them from melting properly. I like Ghirardelli or Guittard, but even Baker’s works fine. We’ll use half melted into the dough and half in chunks, so proper melting matters.
All-Purpose Flour (1 1/2 cups)
Just regular flour works perfectly here. I’ve tried fancy cake flour and bread flour experiments and honestly couldn’t tell enough difference to justify keeping multiple flours around. If you need gluten-free, a 1:1 baking blend works surprisingly well in these.
Baking Powder (1 teaspoon)
This gives the cookies just enough lift without making them cakey. Check that yours is still active by putting a pinch in some hot water—it should bubble. If it doesn’t, toss it and get a new container because your cookies won’t rise properly.
Salt (1/2 teaspoon)
I use kosher salt, but table salt works fine—just use a bit less (about 1/4 teaspoon). Salt doesn’t just make things “salty”—it amplifies the chocolate flavor and balances the sweetness. Don’t skip it!
Instructions dark chocolate cookies recipe
Alright, so these cookies aren’t complicated, but there are a few critical moments where things can go sideways if you’re not paying attention. The good news? Even my “mistakes” usually taste pretty good—they just might not have that perfect texture I’m aiming for.
The whole process takes about 20 minutes of active time, plus chilling (which is non-negotiable, I’ve tried skipping it and regretted it every time). I like to make the dough at night and bake them the next day, but a 2-hour chill will work if you’re in a reasonable hurry.
STEP 1: Prep your chocolate.
Chop all 8 ounces of your dark chocolate with a sharp knife. The pieces should be uneven—some small, some chunky (about 1/4 inch). Set aside half of it (4 oz) to fold into the dough later. Take the other half and melt it gently in the microwave in 30-second bursts, stirring between each. Mine usually takes about 90 seconds total. Be careful not to burn it—once chocolate burns, there’s no saving it. Let it cool slightly while you start the dough.
STEP 2: Cream the butter and sugars.
In a large bowl, beat the softened butter, brown sugar, and granulated sugar with an electric mixer for about 3 minutes. Don’t rush this! I used to only cream for like 30 seconds and wondered why my cookies had a different texture than bakery ones. You’re looking for the mixture to become noticeably lighter in color and fluffy in texture. Scrape down the sides of the bowl at least once during this process.
STEP 3: Add eggs and vanilla.
Add the eggs one at a time, beating well after each addition—about 30 seconds per egg. Then mix in the vanilla. At this point, the mixture should look smooth and glossy, almost like a loose cake batter. If it looks curdled or separated, your butter was probably too warm. It’ll still work out, though (voice of experience here).
STEP 4: Mix in the melted chocolate.
Pour in your slightly cooled melted chocolate and beat until completely incorporated. The mixture will darken dramatically and look almost like a chocolate frosting. Make sure to scrape the bottom and sides of the bowl to get any streaks of butter mixture that might be hiding. This is where the deep flavor base comes from, so make sure it’s well mixed.
STEP 5: Add the dry ingredients.
In a separate bowl, whisk together the cocoa powder, flour, baking powder, and salt. Add this to your chocolate mixture and mix on low speed just until combined—about 30 seconds. Over-mixing will develop the gluten and give you tough cookies. The dough will be fairly thick but still soft—somewhere between a traditional cookie dough and brownie batter in consistency.
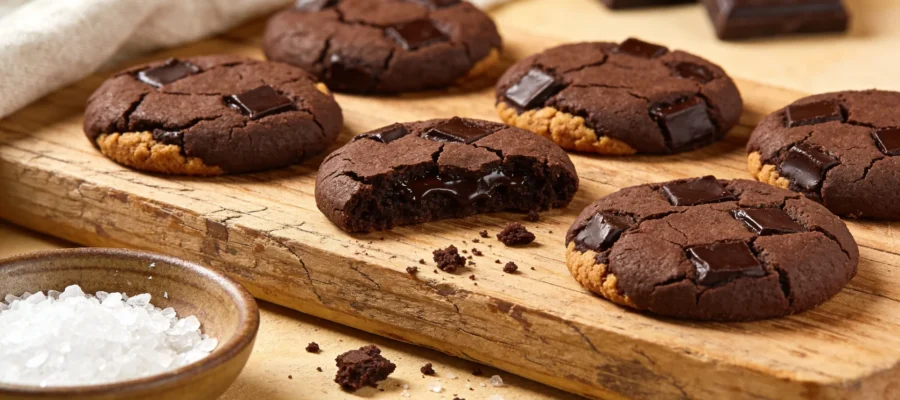
STEP 6: Fold in chocolate chunks.
Add those reserved chocolate chunks and fold them in with a spatula. Don’t use the mixer for this step or you’ll break up all your beautiful chunks. The dough will be seriously chocolatey and might even look like it has too much chocolate. It doesn’t—this is exactly what we want. It should smell intensely of chocolate at this point, rich and almost truffle-like.
STEP 7: Chill the dough.
Cover the bowl with plastic wrap and refrigerate for at least 2 hours, preferably overnight. I know it’s tempting to skip this, but don’t! Chilling does two important things: it allows the flour to fully hydrate, and it firms up the butter so your cookies don’t spread into sad puddles. I learned this the hard way after making flat chocolate pancake cookies that all ran together on the baking sheet. Not cute.
STEP 8: Prepare for baking.
When you’re ready to bake, preheat the oven to 350°F (175°C) and line baking sheets with parchment paper. Take the dough out of the fridge about 10 minutes before scooping—it’ll be too hard to scoop straight from the refrigerator. Use a 2-tablespoon cookie scoop or a regular spoon to portion the dough, rolling it into balls. Place them about 2 inches apart on your prepared sheets.
STEP 9: Bake to perfection.
Bake for 10-12 minutes. This is critical: they’ll look slightly underdone in the center when you take them out. The edges should be set, but the middle will look soft and almost raw. THIS IS CORRECT. They’ll continue cooking from residual heat and will firm up as they cool. If you wait until they look fully done in the oven, they’ll end up dry and crumbly once cooled. Trust the process.
STEP 10: Cool properly.
Let them rest on the baking sheet for exactly 5 minutes—during this time they’re finishing their internal cooking. Any less and they’ll fall apart when you move them; any more and the residual heat from the pan might overcook them. Then transfer to a wire rack to cool completely. As they cool, the exterior will set into that slightly crackly shell while keeping the center soft and fudgy.
Tips & Variations dark chocolate cookies recipe
These cookies will stay soft for 3-4 days in an airtight container at room temperature. The flavor actually improves on day two as the chocolate notes deepen. If they start to harden, pop one in the microwave for 10 seconds for that just-baked texture. For mix-ins, try mint chips for a chocolate-mint version, or add 1/2 cup of chopped walnuts for some crunch. If you’re a coffee lover, add 1 teaspoon of espresso powder to the dry ingredients—it won’t make them taste like coffee but will enhance the chocolate flavor even more.
For high-altitude bakers (I learned this when I visited my cousin in Colorado): add an extra 2 tablespoons of flour to the recipe and reduce both sugars by 1 tablespoon each. And if your cookies come out of the oven looking weird or uneven, don’t panic! Professional food photographers make dozens of cookies and pick the prettiest ones. Real homemade cookies have character.
Final Thoughts dark chocolate cookies recipe
These dark chocolate cookies are my go-to when I need something reliably impressive but don’t want to spend hours in the kitchen. They’re not fussy, just good honest chocolate cookies that deliver on their promise. The first time you bite into one still warm from the oven, with melty chocolate chunks and that perfect soft center, you’ll understand why I’ve made these approximately 500 times.
If you try this dark chocolate cookies recipe, let me know how it turns out! Did you stick with classic dark chocolate or experiment with add-ins? I’m always tweaking recipes and love hearing how they work in other kitchens with different ovens and ingredients. Seriously, your feedback helps make these recipes better for everyone.
Dark Chocolate Cookies
These dark chocolate cookies deliver an intensely rich chocolate flavor, with a soft center and slightly chewy edges, reminiscent of brownies.