I’ve burned more “easy” Halloween treats than I’d like to admit, including one batch of popcorn balls that basically became a single popcorn brick. So when people ask me for Halloween treats for kids that actually work for school parties, class snack duty, or just a random Tuesday when your kid demands something orange and spooky, I get it. October is a lot. Between costume drama and the fifteen emails from the PTA about “no nuts, no red dye, no glitter,” it’s easy to panic and just buy a bag of fun-size candy and call it a day.
But I’ve made almost all 21 of these, more than once, and some of them multiple times a season because my kids ask on repeat. I’m sharing everything from no-bake mummy dogs to healthy-ish fruit ghosts, plus my honest notes on what went sideways the first time I tried each one. These aren’t Pinterest-perfect. Some are a little lopsided. All of them are things a genuinely tired parent can pull off between Wednesday and the school Halloween party on Friday.
1. Banana Ghosts (Easy Healthy Halloween Treats for Kids)
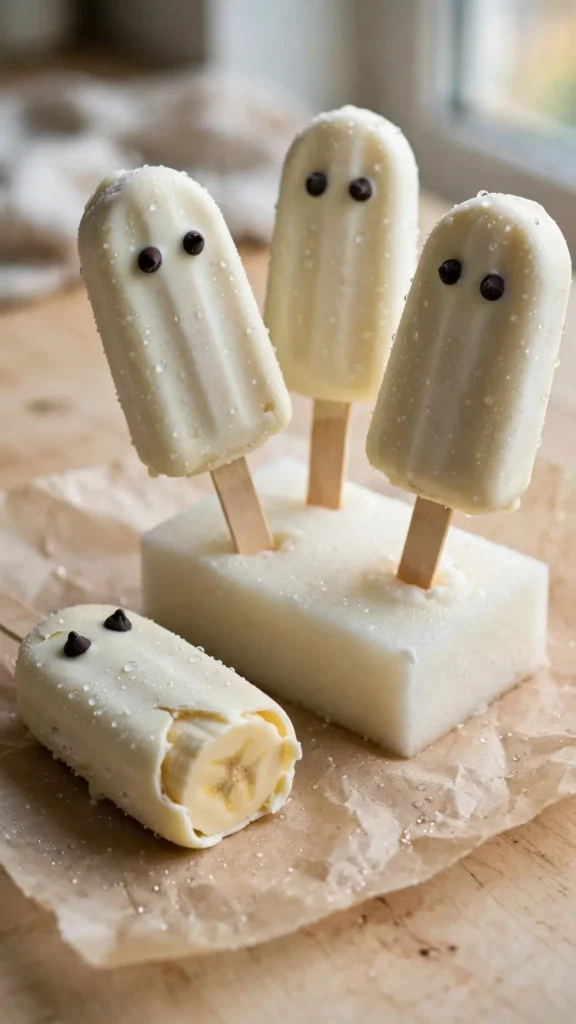
The first time I made these, I sliced the bananas too thin and they turned brown before the school party even started. Lesson learned: cut them thick, dip them, and go.
These are one of the easiest halloween treats for kids healthy enough that I don’t feel weird sending them to school. No sugar rush, no complaints from the “healthy snack only” parents in the group chat, and my daughter genuinely prefers these to candy, which still shocks me.
Ingredients:
- 4 bananas, cut into thirds (thick pieces, not thin coins)
- 1 cup white chocolate chips or white candy melts
- 1 tbsp coconut oil (helps the chocolate stay smooth, don’t skip it)
- Mini chocolate chips for eyes (I use the tiny ones, regular size looks like a chocolate chip cookie had a baby with a ghost)
Instructions:
- Insert a popsicle stick into the flat end of each banana piece.
- Melt the white chocolate and coconut oil together in the microwave in 20-second bursts, stirring each time so it doesn’t seize up.
- Dip each banana piece into the chocolate, turning to coat it fully. Let the extra drip off for a few seconds.
- Immediately press two mini chocolate chips on for eyes before the coating sets. You’ve got maybe 10 seconds.
- Lay them on parchment paper and freeze for 15-20 minutes until fully set.
- Serve straight from the freezer or fridge, they get soft fast at room temp.
Tips & Chaos Notes:
- Freeze the bananas for 30 minutes before dipping if your kitchen runs warm. Mushy bananas dipped in warm chocolate is a mess.
- White chocolate can seize if it gets any water in it, so dry your bowl and spoon completely first.
- These do not survive a warm classroom for six hours. Keep them cold until right before serving.
- If you liked this, you’ll love my Chocolate Dipped Fruit Party Platter for other easy dipping ideas.
2. Clementine Pumpkins
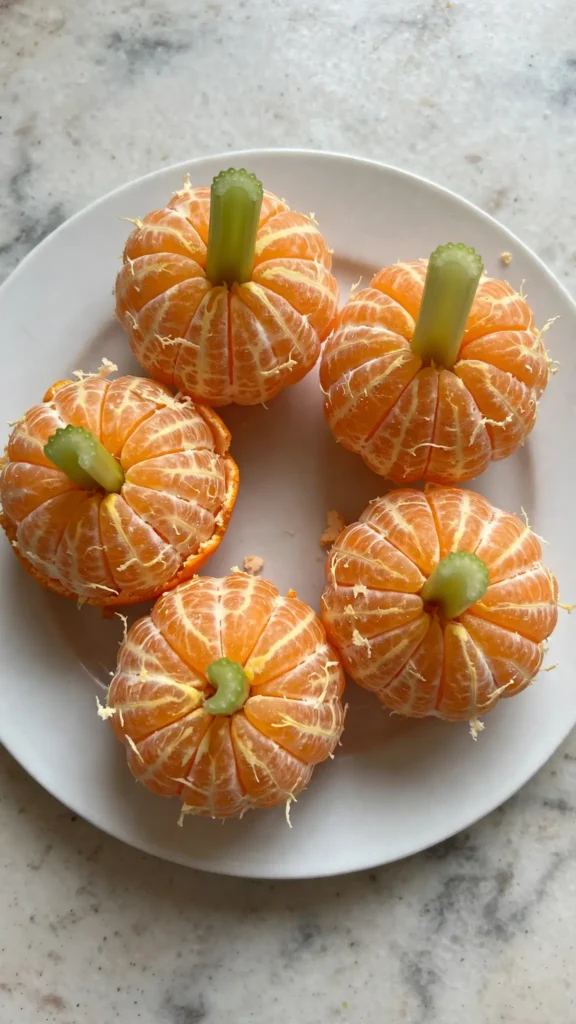
Genuinely the easiest thing on this list and I still somehow assembled the stems upside down the first time. Green celery, pointy end down, not up. Trust me.
This one always shows up on halloween treats for kids school lists because it takes about five minutes and needs zero cooking. Teachers love it because there’s nothing to unwrap besides the fruit itself, and parents love it because it’s basically just fruit with a costume on.
Ingredients:
- 6 clementines, peeled
- 1 celery stalk, cut into 2-inch pieces for stems
Instructions:
- Peel the clementines, keeping them whole if you can.
- Cut a small slit in the top center of each clementine.
- Insert a small piece of celery into the slit, pointy end down, so it looks like a pumpkin stem.
- Arrange on a plate or in individual snack bags.
Tips & Chaos Notes:
- Buy extra clementines because someone will squish one testing the peeling process. That someone is usually me.
- If celery isn’t allowed at school (some schools have weird produce rules), a small piece of green apple skin curled up works too.
- These brown a little if peeled too far in advance, so do it the morning of.
3. Mummy Hot Dogs

My kid refused to eat hot dogs for a solid year until I wrapped one in dough and called it a mummy. Now she requests these year-round, which was not the plan.
This is one of the classic halloween treats for kids party options because it’s dinner and a costume in one bite. Kids eat it because it’s fun, parents like it because it’s actual food and not just sugar.
Ingredients:
- 8 hot dogs (I use the all-beef kind, but whatever you’ve got is fine)
- 1 tube refrigerated crescent roll dough or breadstick dough
- Mustard, for the eyes
- Ketchup, for dipping
Instructions:
- Preheat your oven to 375°F.
- Unroll the dough and cut it into thin strips, about half an inch wide.
- Wrap each hot dog with the dough strips, leaving a small gap near one end for the “face,” and going in a slightly messy, overlapping pattern so it looks bandaged.
- Place on a parchment-lined baking sheet and bake for 12-15 minutes, until the dough is golden brown.
- Let cool for a couple minutes, then use a toothpick dipped in mustard to dot on two eyes.
- Serve with ketchup for dipping.
Tips & Chaos Notes:
- Don’t wrap them too tight, the dough needs room to puff up while baking or it comes out doughy in spots.
- If the dough browns too fast but isn’t cooked through, tent it with foil for the last few minutes.
- These reheat fine in the microwave for 20 seconds if you’re making them ahead for a party.
- If you liked this, you’ll love my Easy Pigs in a Blanket for Game Day, same idea, way less spooky.
4. Spider Web Pretzel Bark
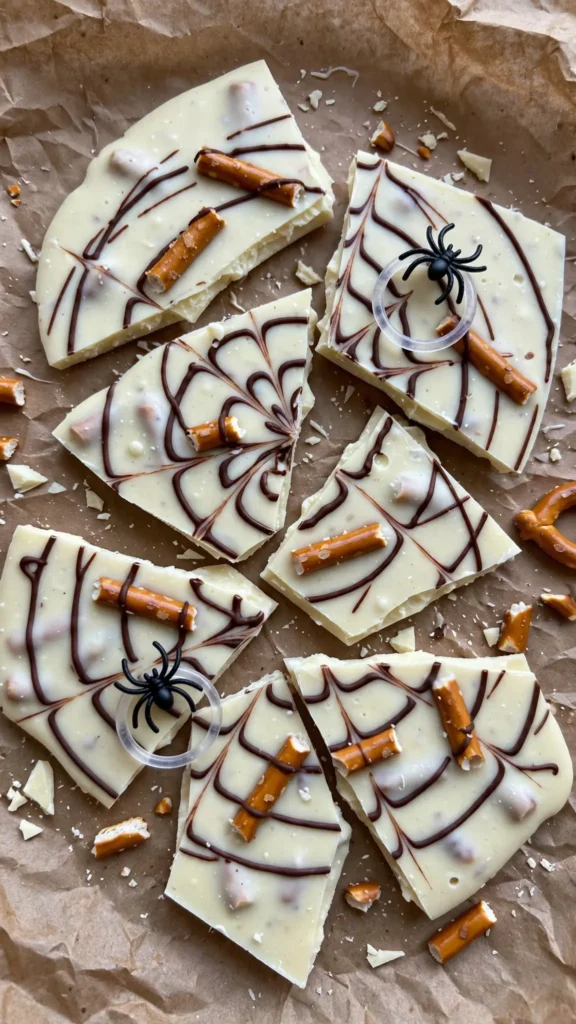
I once left this in the fridge overnight and forgot about it until my husband asked what the black and white slab in the back was. It was fine. It was actually great.
Ingredients:
- 2 cups white chocolate chips or candy melts
- 1 cup pretzel sticks, roughly broken
- 1/4 cup melted dark chocolate or black candy melts, for the web design
- Plastic spider rings (washed, for decoration, not eating obviously)
Instructions:
- Line a baking sheet with parchment paper.
- Melt the white chocolate in the microwave in 30-second bursts, stirring between each, until smooth.
- Stir in the broken pretzel pieces and spread the mixture evenly onto the parchment paper.
- Drizzle the melted dark chocolate over the top in thin lines, then drag a toothpick through the lines in a starburst pattern to create the web effect.
- Press a few plastic spider rings into the top while it’s still soft.
- Refrigerate for 30-45 minutes until fully hardened, then break into pieces.
Tips & Chaos Notes:
- Work fast on the web drizzle, once the white chocolate starts to set, the toothpick won’t drag through cleanly.
- Remove the spider rings before eating, obviously, but I’m saying it because someone always asks.
- This one’s great for halloween treats for kids goody bags since it breaks into random shard sizes that fit in small bags.
- Store in an airtight container, it gets soft if left out in a warm room.
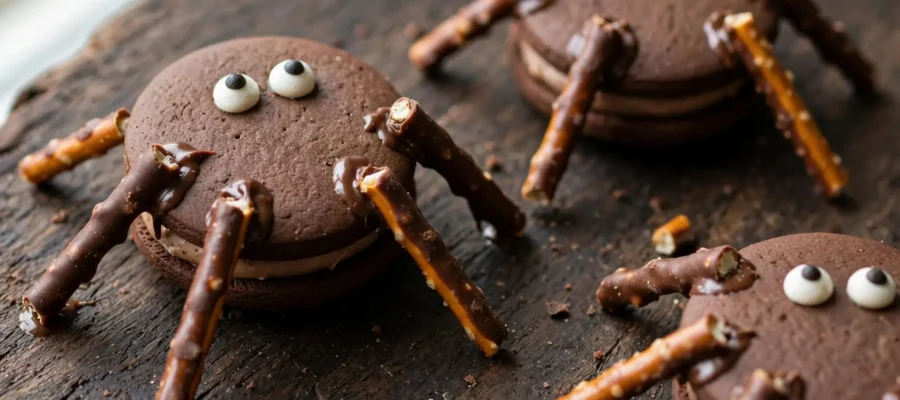
5. Oreo Spiders
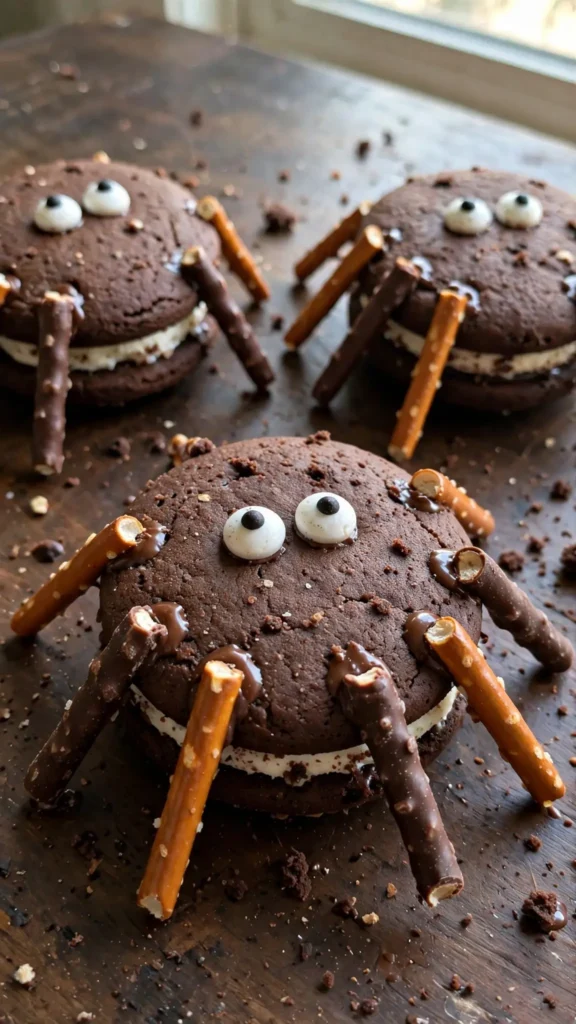
Straightforward, a little sticky, and my son insisted on naming each spider before eating it. Send help.
Ingredients:
- 12 Oreo cookies
- 24 chocolate-covered pretzel sticks, broken in half (for legs)
- 24 candy eyes
- 1/4 cup melted chocolate, for attaching pieces
Instructions:
- Use a dab of melted chocolate to attach four pretzel halves to each side of an Oreo, angled slightly downward like spider legs.
- Let sit for a minute so the legs hold in place.
- Dab a tiny bit of melted chocolate on top and press on two candy eyes.
- Let set on parchment paper for 15 minutes before moving.
Tips & Chaos Notes:
- The pretzels crack easily, buy a full box because you’ll waste a few.
- If the legs keep sliding off, your chocolate is probably too warm. Let it cool for a minute before dabbing.
- These are sturdy enough to travel in a lunch box, which makes them a solid pick for halloween treats for kids school bags.
6. Candy Corn Fruit Skewers
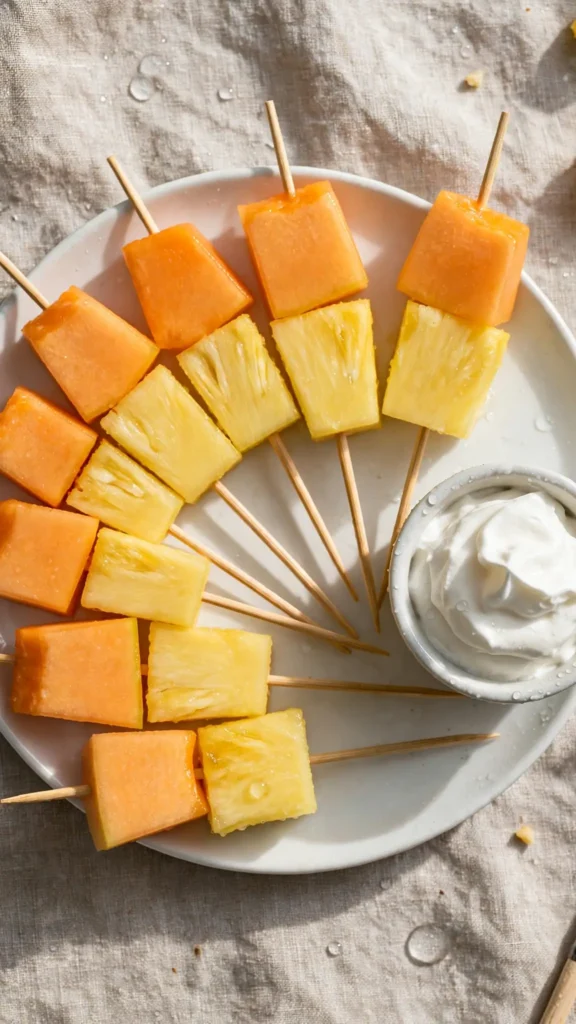
The healthiest looking thing on this list that still gets called “candy” by every kid who sees it. I’ll take the win.
Ingredients:
- 1 cup pineapple chunks (yellow)
- 1 cup cantaloupe or mandarin oranges (orange)
- 1 cup whipped topping or vanilla yogurt, for dipping (white)
- Small skewers or toothpicks
Instructions:
- Thread pineapple onto the bottom of each skewer, then cantaloupe or mandarin above it, mimicking the candy corn color pattern.
- Serve with a small cup of whipped topping or yogurt for dipping to represent the white tip.
- Keep chilled until serving.
Tips & Chaos Notes:
- Canned mandarin oranges work in a pinch if fresh cantaloupe isn’t in season.
- This is one of my go-to halloween treats for kids healthy ideas when I’m sending something to a party with a lot of dietary restrictions, since it’s naturally allergen friendly.
- Cut the fruit the night before and store separately from the skewers so it doesn’t get watery.
Quick check-in: Which one are you bookmarking so far? I’m genuinely curious which recipe gets tried first. Drop a comment below or save this post for later, you’ll want it on grocery day.
7. Popcorn Ghost Bags (No-Bake, No-Cook Option)
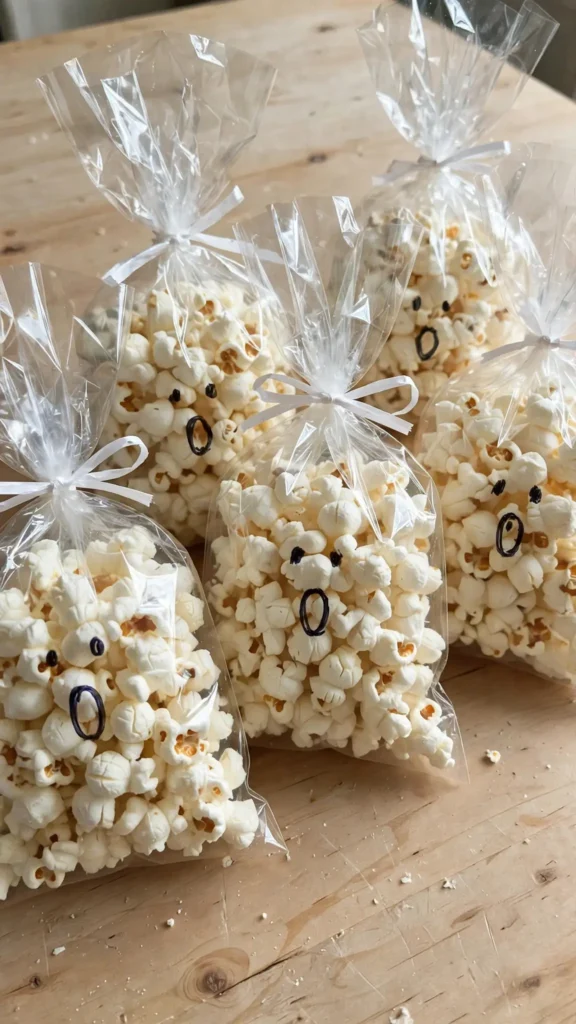
This is basically assembly, not cooking, which is exactly what I need by the third week of October.
Ingredients:
- Plain popped popcorn, enough to fill small bags
- Clear cellophane treat bags
- White ribbon or twist ties
- Black marker (permanent, for faces)
Instructions:
- Fill each cellophane bag about two-thirds full with popcorn.
- Tie the top closed with white ribbon, leaving a small poof of bag above the tie to look like a ghost head.
- Draw a simple ghost face (two eyes, an “o” mouth) on the front of the bag with permanent marker.
Tips & Chaos Notes:
- This is one of the few halloween treats for kids school no food adjacent options if you swap the popcorn for something like puffed rice cereal for classrooms with strict allergy rules, since it avoids most common allergens.
- Let the marker dry for a minute before handling so it doesn’t smudge onto little hands.
- Great for a big batch since it costs almost nothing per bag.
8. Witch Finger Cookies
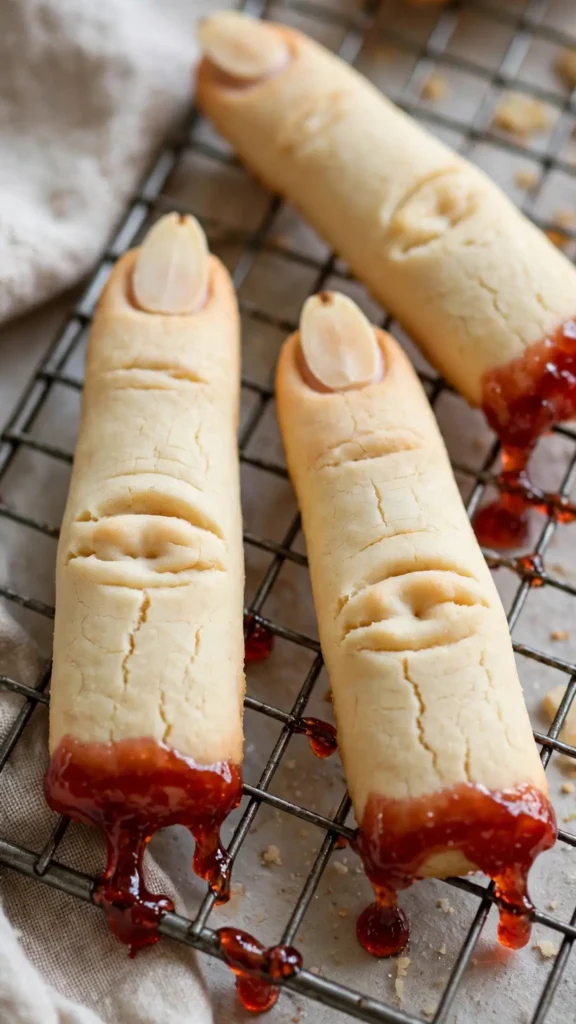
The first time I made these, I made the almond “fingernails” too big and they looked less like witch fingers and more like fingers that had a run-in with a door. Still delicious.
Ingredients:
- 1 tube sugar cookie dough (or homemade, if you’re motivated)
- Sliced almonds, for nails
- Red food coloring or red jam, for the “blood”
Instructions:
- Preheat oven to 350°F.
- Roll dough into finger shapes, about 3 inches long, pinching in the middle to look like a knuckle.
- Press a sliced almond into the tip of each finger for a nail.
- Bake for 10-12 minutes until just barely golden on the edges. Don’t overbake or they lose the pale, “finger” look.
- Once cooled, dip the base of each cookie in red food coloring mixed with a little water, or dab on red jam, so it looks like blood pooling around the nail.
Tips & Chaos Notes:
- Chill the dough for 10 minutes before shaping if it’s too soft to hold a finger shape.
- Press the knuckle indents with the back of a knife for extra realism, my kids love this part.
- These are a hit for halloween treats for kids school party tables because they look impressive but take barely any real skill.
You May Also Like :
25+ Halloween Party Food Ideas Everyone Will Scream For
Mini Ghost Pizzas: Kid-Friendly Halloween Recipe
Mummy Hot Dogs: The Halloween Recipe My Kids Beg For Year-Round
9. Monster Mouth Apple Bites
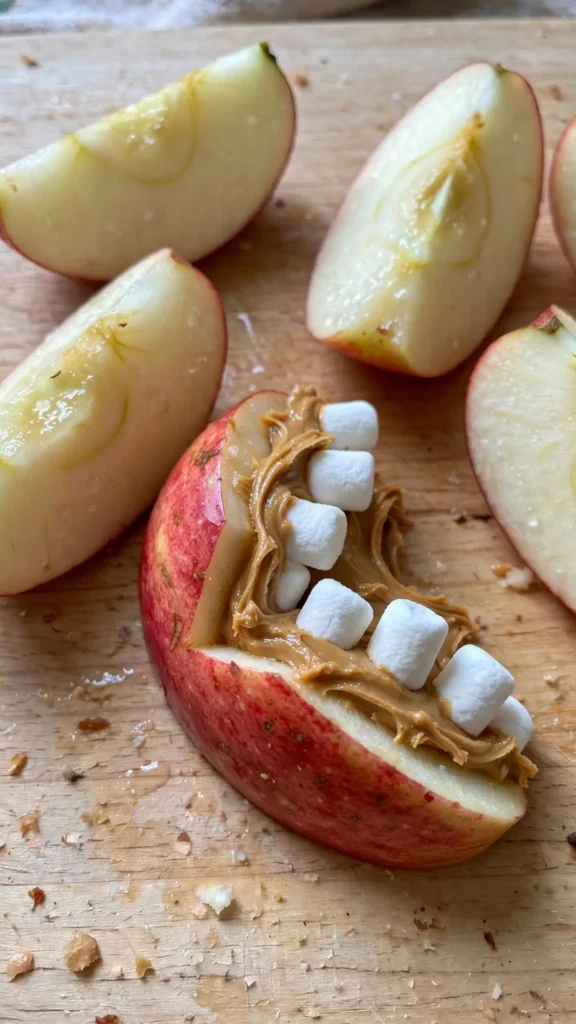
I under-cut the apple wedges the first time and the “mouths” barely opened. Cut a generous wedge out, it makes a difference.
Ingredients:
- 4 apples, sliced into wedges
- Peanut butter or sunbutter (for allergy-friendly classrooms)
- Mini marshmallows, for teeth
- Optional: red food coloring mixed into a bit of extra nut butter for “gums”
Instructions:
- Slice each apple into wedges, then carve a small wedge-shaped notch out of the skin side to make the “mouth” opening.
- Spread nut butter or sunbutter on the inside of the notch.
- Press mini marshmallows into the spread as teeth, sticking out slightly.
Tips & Chaos Notes:
- Toss the apple wedges in a little lemon juice first so they don’t brown before the party.
- Sunbutter is a solid swap if your kid’s school is nut-free, and honestly tastes just as good.
- This is one of the easier halloween treats for kids easy wins if you’re short on time, it’s just cutting and assembling.
10. No-Bake Pumpkin Rice Krispie Treats
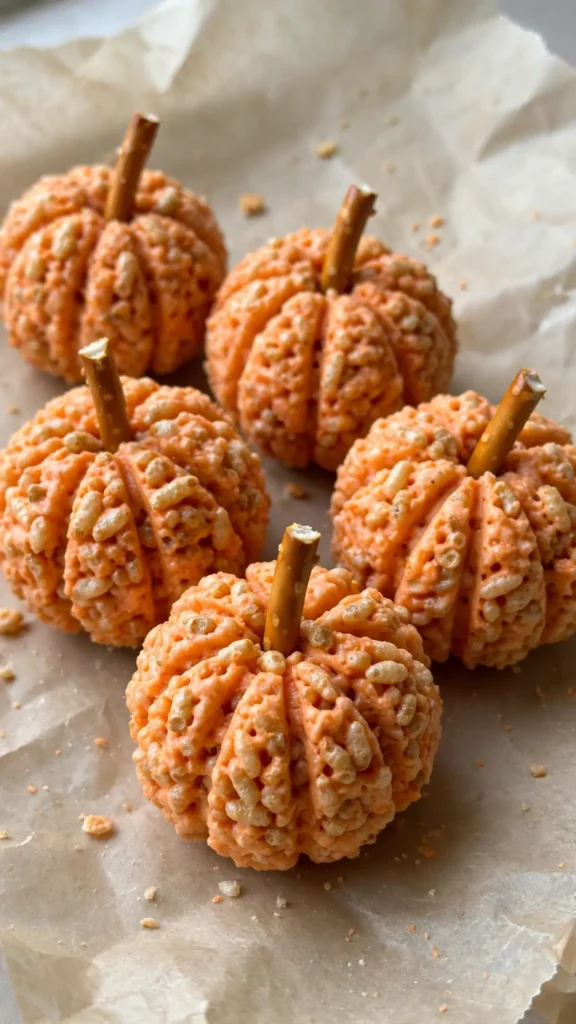
I once let the marshmallow mixture cool too long before shaping and ended up with crumbly, sad little balls instead of pumpkins. Work fast.
Ingredients:
- 6 cups rice cereal
- 1 bag mini marshmallows (about 10 oz)
- 3 tbsp butter
- Orange food coloring
- Pretzel sticks, broken in half, for stems
Instructions:
- Melt the butter in a large pot over low heat, then add the marshmallows, stirring constantly until fully melted.
- Stir in a few drops of orange food coloring until evenly colored.
- Remove from heat and fold in the rice cereal until fully coated.
- While still warm, butter your hands and roll the mixture into small pumpkin-shaped balls.
- Use a toothpick or knife to press vertical lines into each ball for the pumpkin ridges.
- Insert a pretzel stick half into the top of each as a stem.
Tips & Chaos Notes:
- Work quickly while the mixture is still warm, it hardens fast and gets impossible to shape once cool.
- Butter your hands generously, this stuff sticks to everything otherwise.
- These freeze surprisingly well for up to a month if you want to make them ahead.
11. Ghost Marshmallow Pops
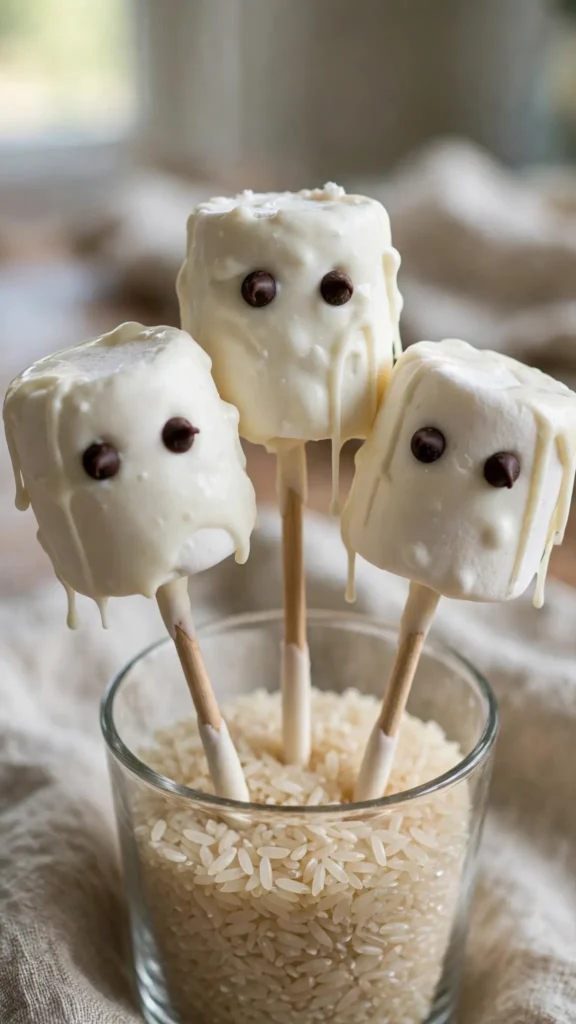
Simple, but the white chocolate cracked on me the first time because I dipped cold marshmallows straight from the fridge. Room temp marshmallows work better.
Ingredients:
- Large marshmallows
- Lollipop sticks
- White chocolate or candy melts
- Mini chocolate chips, for faces
Instructions:
- Insert a lollipop stick into each marshmallow.
- Melt the white chocolate in the microwave in short bursts, stirring often.
- Dip each marshmallow into the chocolate, coating fully, then let excess drip off.
- Press on two mini chocolate chips for eyes before it sets.
- Stand the pops upright in a piece of styrofoam or a cup of rice to set for 15 minutes.
Tips & Chaos Notes:
- If your chocolate is too thick to coat smoothly, add half a teaspoon of coconut oil to thin it out.
- These are sturdy for halloween treats for kids goody bags, just wrap individually in small cellophane bags once set.
- Don’t refrigerate these after they’re set, marshmallows can get weirdly chewy and the chocolate sweats.
12. Graveyard Pudding Cups
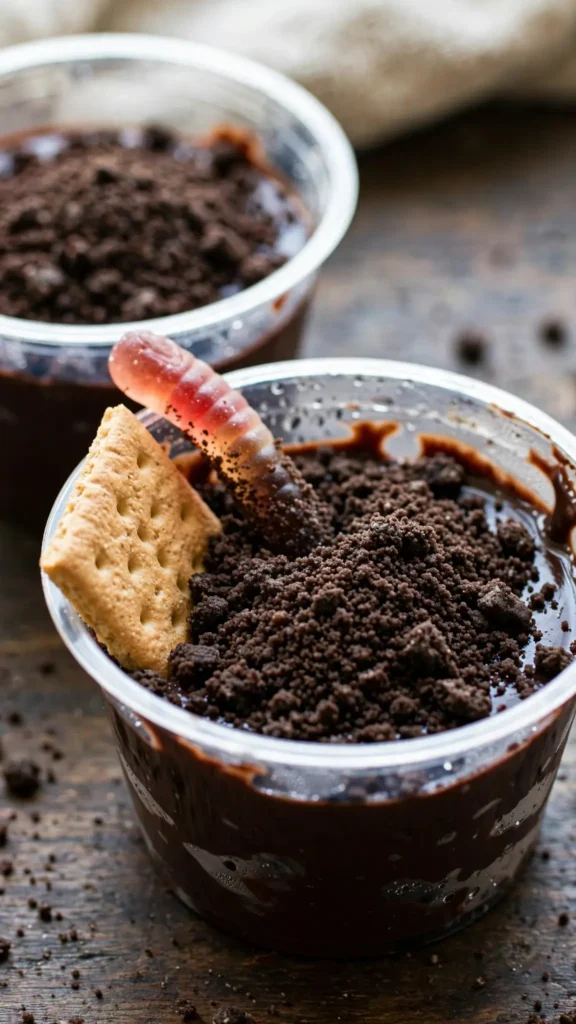
My kids fight over who gets to crush the cookies for this one. It’s the most requested treat in our house come October, hands down.
Ingredients:
- 1 box chocolate instant pudding mix (plus milk, per box instructions)
- 1 package chocolate sandwich cookies, crushed into “dirt”
- Mini gummy worms
- Square graham crackers or candy melts, for tombstones (write “RIP” with icing)
Instructions:
- Prepare the pudding according to the box instructions and refrigerate until set, about 2 hours.
- Spoon pudding into small cups, then top generously with crushed cookie “dirt.”
- Push a gummy worm partially into each cup so it looks like it’s crawling out.
- Stick a graham cracker tombstone into the dirt at an angle. If you want, pipe “RIP” on it with white icing.
Tips & Chaos Notes:
- Make the pudding the night before, it needs real time to set or it’s soupy.
- The USDA recommends refrigerating dairy-based desserts promptly and not leaving them at room temp for more than two hours, which matters if these are sitting out at a party table.
- This one’s messy, it’s basically edible dirt, so don’t wear your nice shirt while assembling.
- If you liked this, you’ll love my Chocolate Pudding Pie from Scratch for the non-Halloween version.
13. Boo-nana Split Bags (No-Food Halloween Option)
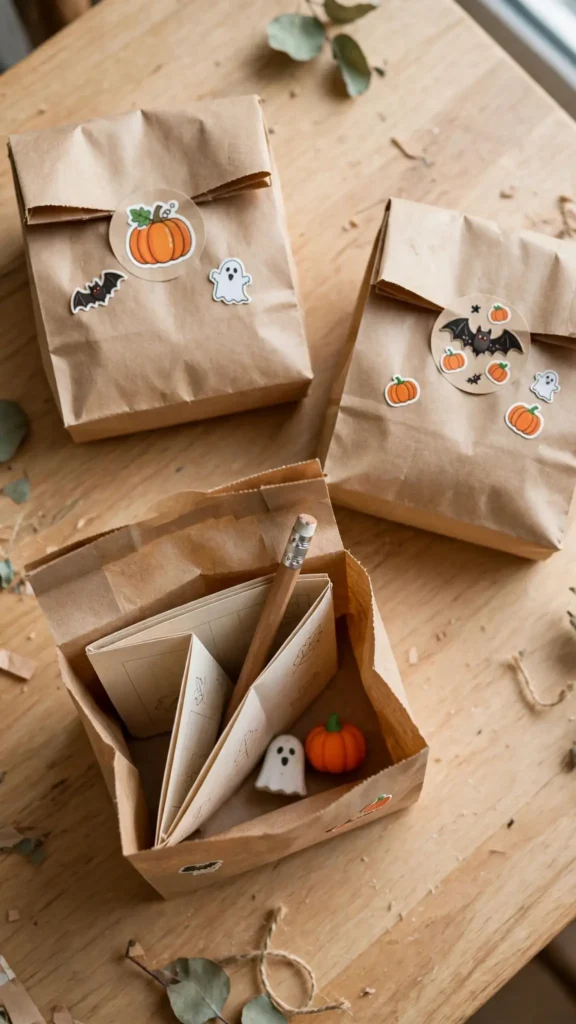
For the classrooms that have gone full “no food allowed,” this is your answer, and honestly it was a relief when my kid’s school made the switch a couple years back.
Materials:
- Small brown paper lunch bags
- Halloween stickers (pumpkins, bats, ghosts)
- Small activity slips (word searches, mazes) or mini erasers, pencils, stickers to fill the bag
Instructions:
- Decorate the outside of each bag with Halloween stickers.
- Fill with a small activity sheet, a pencil, and a couple of Halloween-themed erasers or stickers.
- Fold the top over and seal with a sticker.
Tips & Chaos Notes:
- This covers the halloween treats for kids school no food need pretty completely, since nothing edible is involved at all.
- Dollar stores are your best friend here, I’ve filled 25 bags for under $15 more than once.
- Kids genuinely seem just as excited about a spooky eraser as they are about candy. I don’t get it either, but I’ll take it.
14. Spider Cupcakes
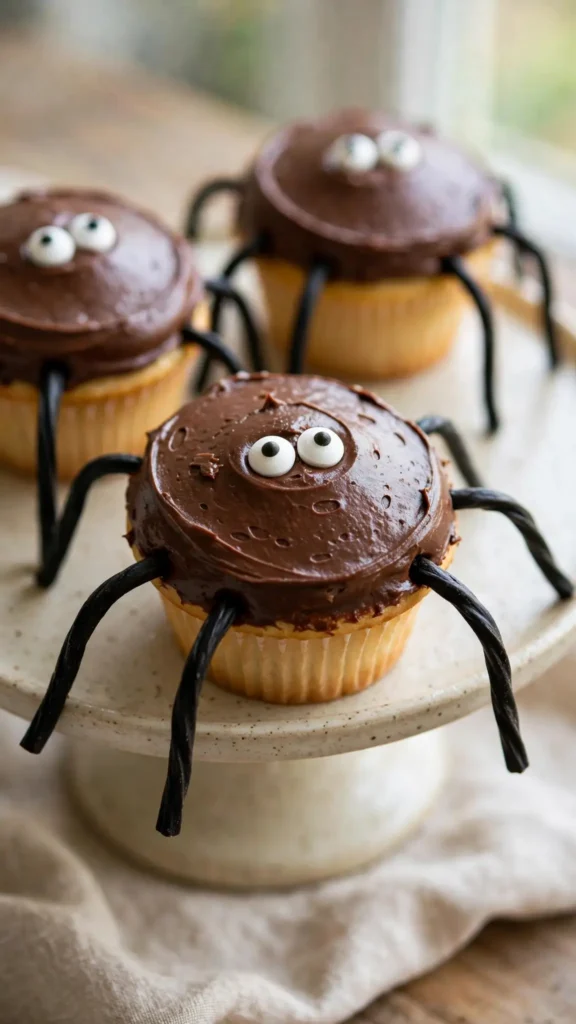
I once used too much frosting and my “legs” just slid right off the cupcake into a puddle. Less is more here.
Ingredients:
- 12 baked cupcakes (box mix is totally fine)
- Chocolate frosting
- Chocolate-covered pretzel sticks or black licorice, broken for legs
- Candy eyes
Instructions:
- Frost each cupcake with a smooth layer of chocolate frosting.
- Insert four pretzel or licorice pieces into each side of the cupcake, angled to look like spider legs.
- Press two candy eyes into the top center of the frosting.
Tips & Chaos Notes:
- Chill the frosted cupcakes for 10 minutes before adding legs so they don’t sink into soft frosting.
- Box mix is genuinely fine here, nobody is judging your cupcake base at a kindergarten party.
- These travel best in a cupcake carrier, not stacked in a regular container.
15. Frankenstein Cheese Sticks
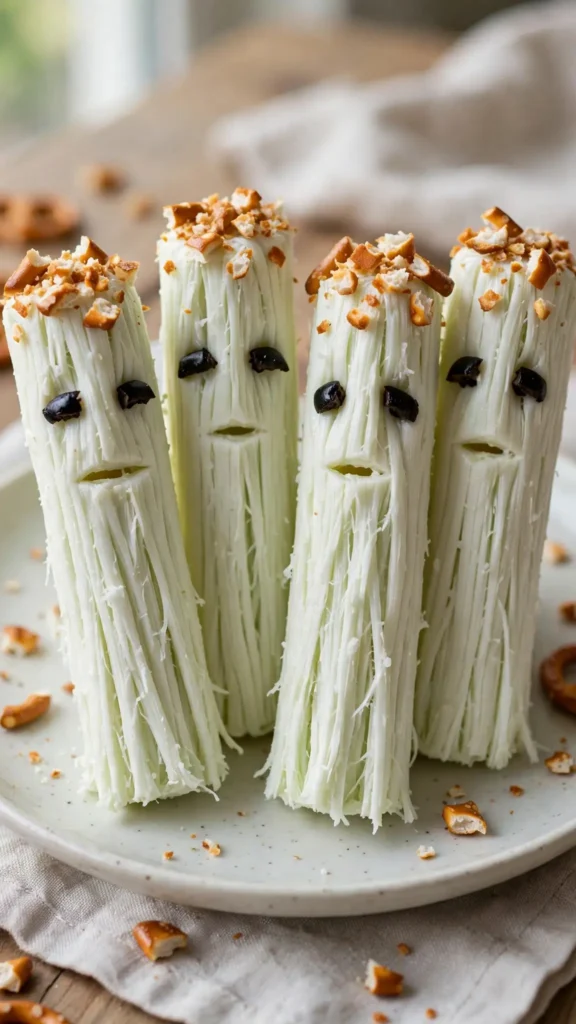
Quick, protein-based, and my pickiest eater actually eats string cheese now because it “looks like a monster.”
Ingredients:
- String cheese sticks
- Green food coloring (optional, for a green tint)
- Small pieces of black olive, for eyes
- Pretzel stick crumbs or chocolate chips, for “hair” and mouth
Instructions:
- If using food coloring, briefly soak peeled string cheese in a bowl of water with a few drops of green coloring for 5-10 minutes, then pat dry.
- Use a small knife to cut two small slits near the top of the cheese stick for eyes and press in tiny olive pieces.
- Cut a small horizontal slit lower down for a mouth.
- Press pretzel crumbs on top for hair.
Tips & Chaos Notes:
- Skip the food coloring step if you’re short on time, plain white “Frankenstein” cheese still works with a face on it.
- This is a solid halloween treats for kids school easy pick when you need something with zero sugar and zero baking.
- Keep these cold until serving, string cheese gets sweaty and gross at room temp for too long.
16. Candy Corn Popcorn Mix
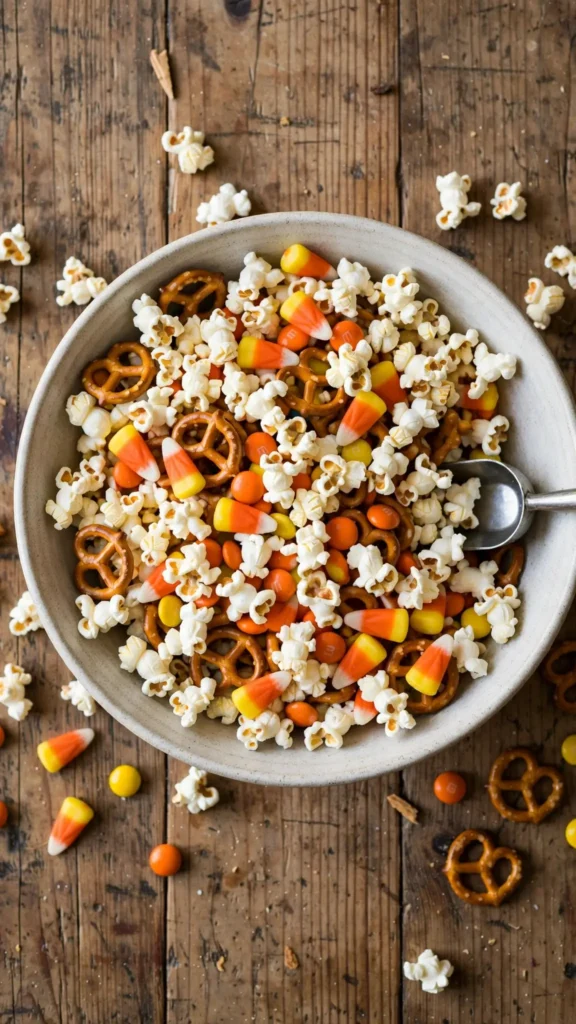
I doubled this recipe once for a party and ran out of bowls to mix it in. Learn from me, use your biggest bowl.
Ingredients:
- 8 cups popped popcorn
- 1 cup candy corn
- 1/2 cup mini pretzels
- 1/2 cup orange and yellow M&M’s
Instructions:
- Combine all ingredients in a large bowl.
- Toss gently to mix evenly.
- Portion into small bags or bowls for serving.
Tips & Chaos Notes:
- This one requires zero cooking, so it’s a good last-minute save if you forgot it was your snack week.
- Great for halloween treats for kids party bowls where kids just grab a handful as they go.
- Watch for choking hazards if you’ve got a mixed-age group, the pretzels and candy corn are fine for most kids but double-check for littles.
17. Mini Pumpkin Bagel Pizzas
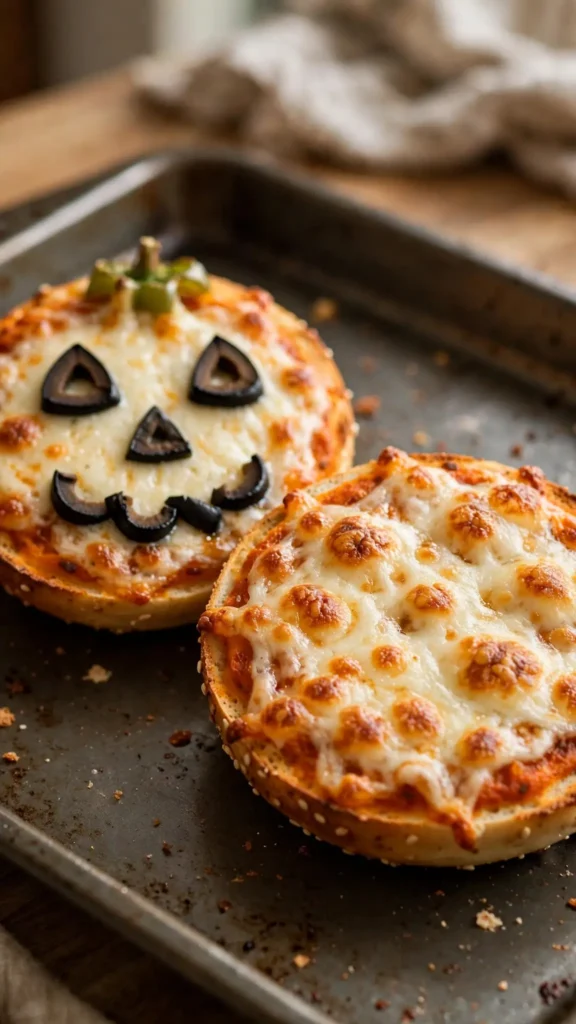
I sent these to school once and got a very confused text from another parent asking why her kid came home saying he ate “orange pizza.” Worth it.
Ingredients:
- Mini bagels, split in half
- Pizza sauce
- Shredded mozzarella
- Sliced black olives, for the pumpkin face
- A small piece of green bell pepper, for the stem
Instructions:
- Mix a small amount of orange food coloring into the pizza sauce, or use a naturally orange sauce if you can find one.
- Spread sauce on each bagel half and top with shredded mozzarella.
- Bake at 400°F for 8-10 minutes, until the cheese is melted and bubbly.
- Once cooled slightly, use sliced olives to create a jack-o-lantern face and a small piece of green pepper as the stem.
Tips & Chaos Notes:
- Don’t skip letting these cool for a couple minutes, molten cheese and excited kids don’t mix well.
- These reheat okay in a toaster oven if you’re making a big batch ahead of time.
- If you liked this, you’ll love my Weeknight Mini Pizza Bar for a non-Halloween version the kids can build themselves.
18. Eyeball Deviled Eggs
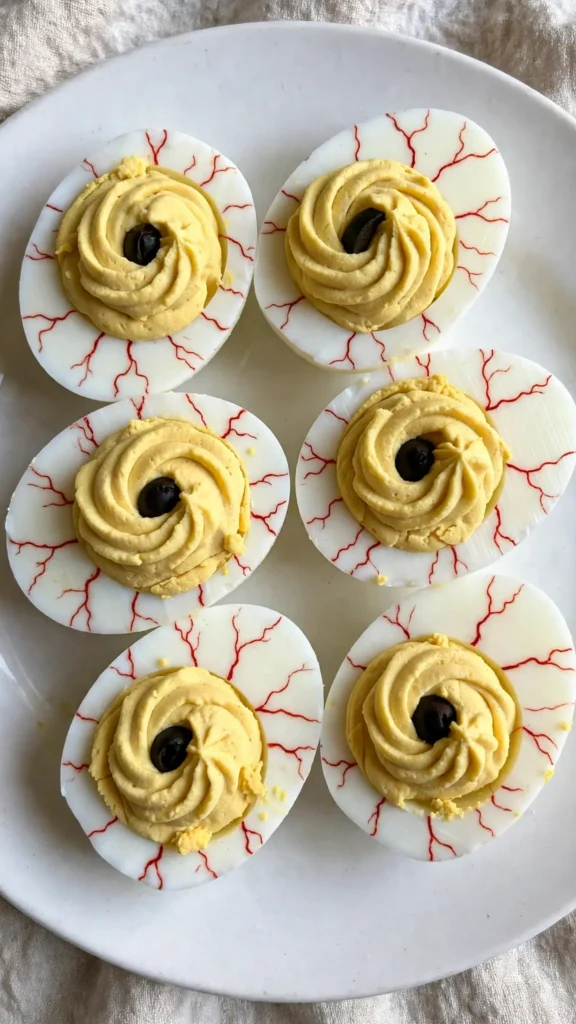
The classic gross-but-cute option. My father-in-law refuses to eat these because they freak him out, which honestly makes me want to make them more.
Ingredients:
- 6 hard-boiled eggs
- 2 tbsp mayonnaise
- 1 tsp mustard
- Sliced black olives, for pupils
- Paprika or a tiny dab of red food coloring, for “bloodshot” veins
Instructions:
- Halve the eggs and scoop the yolks into a bowl.
- Mash yolks with mayonnaise and mustard until smooth.
- Pipe or spoon the mixture back into the egg white halves.
- Press a small olive slice into the center of each for a pupil.
- Use a toothpick dipped in red food coloring to draw thin “veins” across the white for the bloodshot look.
Tips & Chaos Notes:
- These need to stay refrigerated. Eggs are not a “leave out on the counter for three hours” kind of food.
- Piping the yolk mixture with a ziplock bag (just snip the corner) is way less messy than spooning it.
- This one’s more of a party appetizer for the adults’ table than a school treat, most schools won’t allow eggs in shared snacks.
19. Ghost S’mores Bark
I left this out near a sunny window once and came back to a chocolate puddle with marshmallows floating in it. Keep it away from direct sun or heat vents.
Ingredients:
- 2 cups white chocolate chips
- 1 cup mini marshmallows
- 1 cup crushed graham crackers
- 1/2 cup mini chocolate chips, for eyes and ghost shapes
Instructions:
- Melt the white chocolate in the microwave in 30-second bursts, stirring between each.
- Spread evenly onto a parchment-lined baking sheet.
- Sprinkle marshmallows and crushed graham crackers over the top, pressing gently so they stick.
- Use mini chocolate chips to draw simple ghost faces scattered across the bark.
- Refrigerate for 30 minutes, then break into pieces.
Tips & Chaos Notes:
- If the marshmallows toast a little under a broiler for 30 seconds before you refrigerate it, it tastes even more like a campfire s’more. Watch it closely though, they burn fast.
- This one’s a good fit for halloween treats for kids to make together since the assembly is basically stress-free.
- Store in a cool spot, not near a window or the oven, it melts fast.
You May Also Like :
25+ Halloween Party Food Ideas Everyone Will Scream For
Mini Ghost Pizzas: Kid-Friendly Halloween Recipe
Mummy Hot Dogs: The Halloween Recipe My Kids Beg For Year-Round
20. DIY Trail Mix Boo Bags
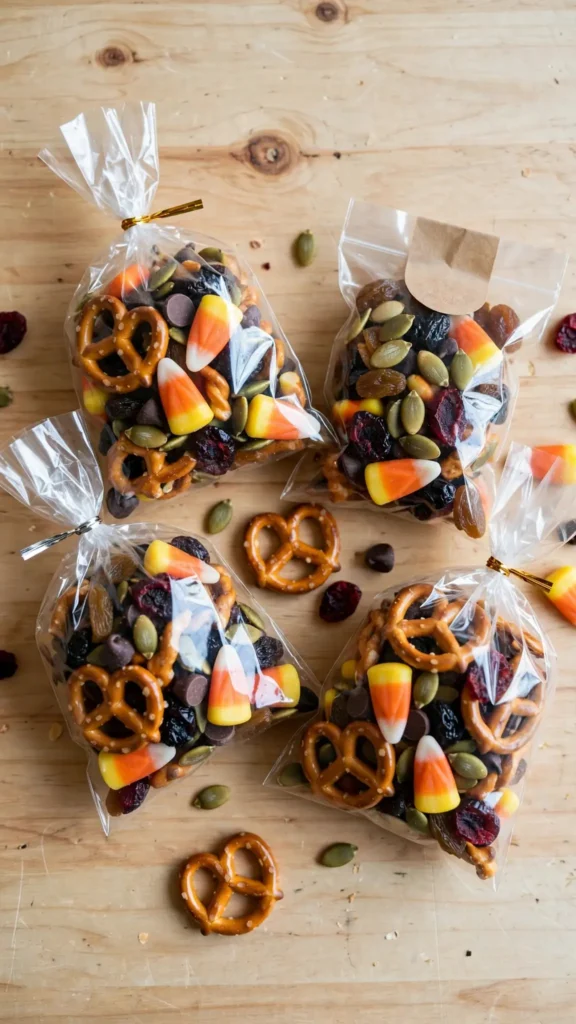
The most “throw it together in the car line” recipe on this whole list, and I say that with love.
Ingredients:
- 2 cups pretzel twists
- 1 cup candy corn
- 1 cup roasted pumpkin seeds
- 1 cup raisins or dried cranberries
- 1 cup chocolate chips
Instructions:
- Combine all ingredients in a large bowl and toss to mix.
- Portion into small snack bags, about 1/3 cup each.
- Seal and decorate the bags with a Halloween sticker if you’re feeling fancy.
Tips & Chaos Notes:
- This one leans halloween treats for kids healthy if you go light on the chocolate chips and heavier on the pumpkin seeds and dried fruit.
- Great for halloween treats for kids school bags since it doesn’t melt or get squished in a backpack.
- Watch for nut cross-contamination on packaged pumpkin seeds if your classroom has allergy concerns, always check the label.
21. Pumpkin Yogurt Bark
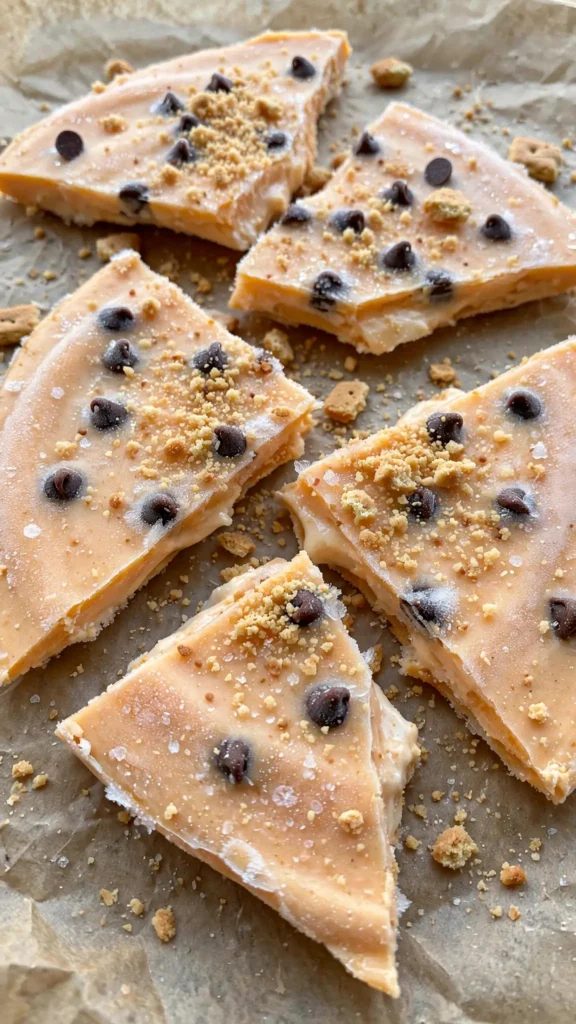
I froze this for way too long once and it took forever to break apart. Two hours is the sweet spot, not overnight.
Ingredients:
- 2 cups vanilla or plain Greek yogurt
- 1/4 cup pumpkin puree (plain, not pumpkin pie filling)
- 1 tsp cinnamon
- 2 tbsp honey or maple syrup
- Mini chocolate chips and crushed graham crackers, for topping
Instructions:
- Mix the yogurt, pumpkin puree, cinnamon, and honey together until smooth.
- Spread the mixture in a thin, even layer on a parchment-lined baking sheet.
- Sprinkle mini chocolate chips and crushed graham crackers over the top.
- Freeze for about 2 hours, until firm.
- Break into pieces and serve immediately, or store in the freezer in an airtight container.
Tips & Chaos Notes:
- This one melts fast once it’s out of the freezer, so only pull out what you’ll eat in the next 10-15 minutes.
- It’s one of the better halloween treats for kids school party options for a healthier table alongside the candy stuff.
- Skip the honey if serving to kids under one, but for a school party this age range usually isn’t a concern.
Still with me? Good, because that pumpkin yogurt bark is genuinely one of my favorites on this whole list. Worth scrolling back up for if you skimmed past it.
Not every recipe here is glamorous, but every single one is worth making, and I’ve made most of them more than once because my kids ask for them by name now (the mummy hot dogs get requested in July, which is a whole other conversation). Pin your favorite recipe so you can find it on grocery day, that’s honestly how I use half these lists myself. And let me know in the comments, what’s YOUR go-to Halloween treat that always disappears first at your kid’s school party? I’m always adding to this list.
Happy trick-or-treating (and may your white chocolate never seize on you like mine did last October).
Got Questions? I Had Them Too.
What are easy halloween treats for kids that don’t require baking?
Popcorn ghost bags, candy corn fruit skewers, and the trail mix boo bags are all zero-bake. I lean on these when I’ve got twenty minutes before I need to walk out the door with a full tray of something.
What are good halloween treats for kids school parties that follow no-food rules?
The boo-nana split bags in this post are a full no-food option, just stickers, erasers, and small activity sheets. A lot of schools have shifted this way, and honestly the kids don’t seem to mind at all.
How far ahead can I make halloween treats for kids for a party?
Most of the no-bake bark and trail mix recipes hold up 2-3 days ahead if stored airtight. Anything with fresh fruit, like the banana ghosts or clementine pumpkins, is best done the morning of so it doesn’t brown or get soggy.
Are these halloween treats for kids to make together as a family activity?
Yes, the spider Oreos, ghost marshmallow pops, and rice krispie pumpkins are all easy enough for kids to help assemble, even if the melting and baking steps stay with an adult.
What’s a good halloween treat for kids’ goody bags that won’t melt?
The DIY trail mix bags and spider web pretzel bark hold up well without refrigeration for a few hours, which makes them solid picks if the bags are sitting out at a party or in a backpack.
Is it safe to leave dairy-based Halloween treats like the pudding cups or pumpkin yogurt bark out at a party?
Not for long. The USDA recommends not leaving perishable dairy foods at room temperature for more than two hours, so keep those chilled until right before serving and don’t let them sit out the whole party.