Chocolate crinkle cookies have been my holiday secret weapon for years. You know those fancy bakery cookies with the powdered sugar “crackle” effect that look like they took serious skill? Yeah, turns out they’re ridiculously easy to make at home. The first time I brought these to my in-laws’ Christmas gathering, my mother-in-law literally asked if I’d bought them from that expensive bakery downtown. I’m still riding that high, five years later.
Table of Contents :
My Long Road to Crinkle Cookie Perfection
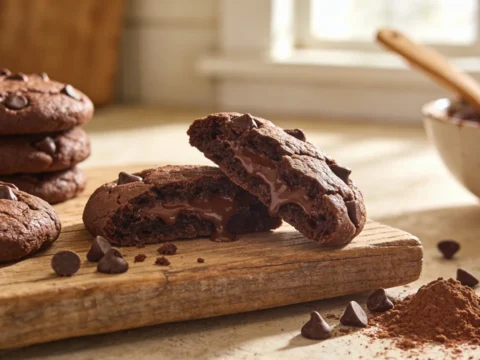
Okay so here’s the thing about chocolate crinkle cookies – most recipes out there are just…wrong. I mean, they’ll give you a cookie. But they won’t give you that perfect balance of fudgy interior and delicate crisp exterior that makes these cookies special.
The first batch I ever made turned out like sad little chocolate hockey pucks. Zero crinkles. Zero charm. My dough was too warm when I baked it, and I didn’t use nearly enough powdered sugar. The second attempt was better but still not what I wanted – the cookies spread too much and ended up thin and crispy instead of soft and chewy.
After some serious trial and error (and eating way too many mediocre cookies in the name of “research”), I finally cracked the code. The secret? Chilling the dough is non-negotiable, and you need to be GENEROUS with that powdered sugar coating. Like, way more than you think is necessary. Trust me on this one.
Ingredients for Chocolate Crinkle Cookies
The beauty of chocolate crinkle cookies is that they use pretty standard pantry ingredients, but somehow transform into something that looks totally fancy. I’ve made these in a pinch when unexpected guests were coming over, and everyone thinks I spent all day on them.
A note about chocolate quality – while I’m usually a chocolate snob for things like truffles or ganache, I’ve found that regular unsweetened cocoa powder works beautifully here. Save your fancy Dutch-processed stuff for another day (though if that’s all you have, it’ll work too – just expect slightly darker cookies).
Vegetable oil (1/2 cup)
I use vegetable oil instead of butter in these cookies. I know, I know – butter usually makes cookies better. But after testing both ways, oil creates that perfect soft, fudgy brownie-like center we’re after. Canola oil works perfectly fine too if that’s what you have on hand.
Granulated sugar (1 cup)
Just regular white sugar here. I’ve tried reducing the amount to make them “healthier” and regretted it immediately. These cookies need the full cup to create that perfect crackly exterior and to balance the intense chocolate. Don’t skimp here.
Unsweetened cocoa powder (1/2 cup)
Regular Hershey’s cocoa powder is my go-to. I’ve tried fancy brands and honestly couldn’t tell much difference in the final cookie. The key is making sure it’s fresh – old cocoa powder that’s been sitting open in your pantry for two years won’t give you that rich chocolate punch we’re after.
Eggs (2 large)
Eggs provide structure and richness. Make sure they’re room temperature – I forgot once and used cold eggs straight from the fridge, and the dough was much harder to work with. If you forget too, just place them in warm (not hot) water for about 5 minutes.
Vanilla extract (1 teaspoon)
I’m usually heavy-handed with vanilla, but chocolate is the star here. One teaspoon is perfect to enhance the flavor without competing. And yes, the artificial stuff will work in a pinch, though I prefer real extract when I have it.
All-purpose flour (1 cup)
Nothing fancy needed. I’ve tried this with gluten-free 1:1 baking flour for my cousin with celiac, and it worked surprisingly well – just slightly more delicate when handling the dough. Don’t overpack your measuring cup or you’ll end up with dry cookies.
Baking powder (1 teaspoon)
This gives the cookies their lift and contributes to that crackly exterior. Check the expiration date – baking powder loses its power over time. If yours has been sitting in your pantry since last Christmas, maybe grab a new can. I learned this lesson the hard way with a batch of sad, flat cookies.
Salt (1/4 teaspoon)
Don’t skip the salt! It balances the sweetness and makes the chocolate flavor pop. I use regular table salt, but kosher works too – just increase to a slightly heaping 1/4 teaspoon since kosher salt crystals are larger.
Powdered sugar (1 cup for coating)
This is what creates the magic “crinkle” effect. You need MORE than you think. I go through about a cup for one batch of cookies. The first time I made these, I lightly dusted the balls and ended up with barely-visible crinkles. Now I practically bury them in the stuff before baking.
Instructions for Chocolate Crinkle Cookies
The process is pretty straightforward, but there are a couple of crucial moments where things can go sideways. Chilling the dough isn’t optional – it’s absolutely necessary for getting that signature crackled look. And if you’re in a rush, know that these cookies take longer than you might expect from start to finish because of the chilling time.
The good news? The actual hands-on work is minimal. I usually make the dough the night before I need the cookies, then just roll and bake them the next day. The dough keeps well in the refrigerator for up to 3 days, which is perfect for holiday prep.
STEP 1: Mix the wet ingredients.
In a large bowl, whisk together the oil and granulated sugar until it resembles wet sand – about 1 minute of good whisking. Add the eggs one at a time, mixing well after each. The mixture will be thick but should be smooth. Stir in the vanilla extract. Don’t worry that it doesn’t look fluffy like butter-based cookie dough – oil-based doughs have a different texture.
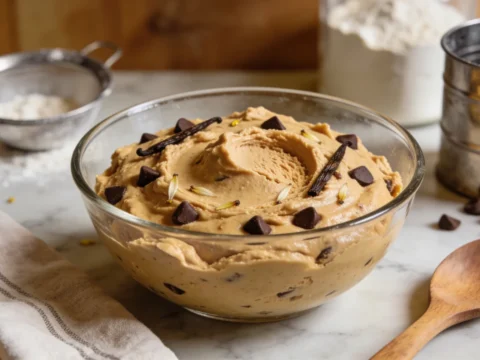
STEP 2: Add the dry ingredients.
In a separate bowl, whisk together the cocoa powder, flour, baking powder, and salt. Slowly add this dry mixture to the wet ingredients, stirring until just combined. The dough will be softer than typical cookie dough – more like a thick brownie batter. If it seems impossibly sticky, add an extra tablespoon of flour, but resist adding more – the cookies will be dry if you do.
STEP 3: Chill the dough.
Cover the bowl with plastic wrap and refrigerate for AT LEAST 4 hours, but preferably overnight. This is non-negotiable, I promise. The first time I made these, I was impatient and only chilled for an hour – the dough was still too soft and the cookies spread into flat discs with barely any crinkles. The fully chilled dough should be firm enough to roll into balls without sticking to your hands.
STEP 4: Prepare for baking.
When you’re ready to bake, preheat your oven to 350°F (175°C). Line two baking sheets with parchment paper or silicone mats. Pour the powdered sugar into a shallow bowl. This is where most people don’t use enough sugar – you want a generous layer, at least half an inch deep in your bowl.
STEP 5: Form the cookie balls.
Scoop about 1 tablespoon of dough and roll it between your palms to form a ball. The dough will soften as you work with it from the heat of your hands, so work somewhat quickly. If the dough becomes too sticky, pop it back in the fridge for 15 minutes. I usually scoop all the balls first, then roll them all at once to streamline the process.
STEP 6: Coat generously in powdered sugar.
Drop each ball into the powdered sugar and roll it around until it’s COMPLETELY coated – like, you can’t see the chocolate dough at all. Then pick it up and roll it between your hands to shake off the excess, and dunk it AGAIN for a second coating. This double-coating technique makes all the difference between weak crinkles and those dramatic cracks we’re after.
STEP 7: Arrange and bake.
Place the coated dough balls on the prepared baking sheets, spacing them about 2 inches apart. They will spread while baking. Bake for 10-12 minutes – and here’s where things get tricky. They’ll still look slightly underdone in the middle when they’re ready. The edges should be set, but the centers will look soft. If you wait until they look completely done, they’ll be dry and crunchy when cooled.
STEP 8: Cool properly.
Let the cookies cool on the baking sheet for 5 minutes before moving them to a wire rack to cool completely. They’re extremely delicate right out of the oven – I tried to move a batch too early once and ended up with crumbled messes. That 5-minute rest on the hot baking sheet lets them firm up enough to transfer safely. As they cool, they’ll develop that perfect balance of slightly crisp exterior and fudgy interior.
Tips & Variations for Chocolate Crinkle Cookies
These cookies keep well in an airtight container at room temperature for up to a week, though they rarely last that long in my house. For an extra flavor twist, try adding 1/2 teaspoon of espresso powder to the dry ingredients – it won’t make them taste like coffee, but it enhances the chocolate flavor beautifully.
If you’re feeling fancy, substitute 1/4 cup of the granulated sugar with brown sugar for a deeper flavor, or add 1/2 cup of mini chocolate chips to the dough for double chocolate goodness. And don’t worry if your cookies don’t look exactly like the picture-perfect ones on Pinterest – those are often styled with extra powdered sugar dusted on after baking for photos.
If you’re making these ahead of time, the baked cookies freeze really well! Just place them in a single layer in a container with parchment between layers. Let them thaw at room temperature when you’re ready to serve.
Final Thoughts on Chocolate Crinkle Cookies
Look, I’m not saying these are the world’s most sophisticated cookies. But there’s something magical about how simple ingredients transform into these impressive-looking treats. They’re the perfect balance of effort-to-reward ratio – they look like you spent hours on them, when really, your refrigerator did most of the work.
If you try these, drop a comment below. I especially want to hear if you added your own twist to the recipe. I’ve had readers tell me they’ve added orange zest, mint extract, or even a pinch of chili powder – and now I’m curious to try all those versions myself!
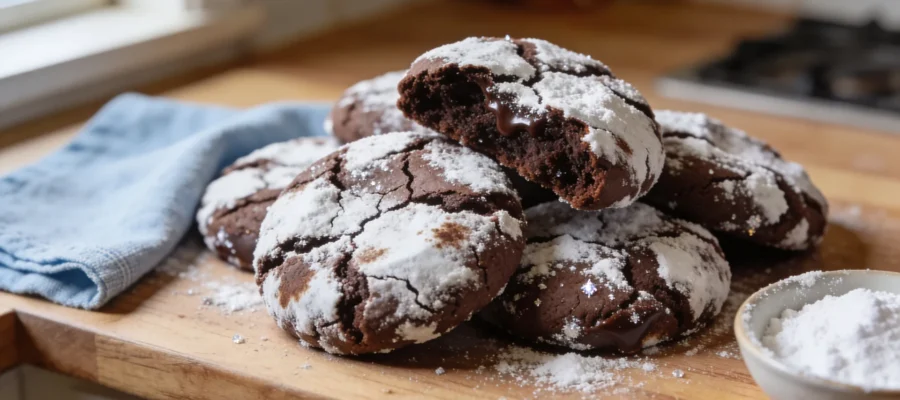
Chocolate Crinkle Cookies
Chocolate crinkle cookies have a perfect balance of fudgy interior and delicate crisp exterior, enhanced by a generous dusting of powdered sugar.