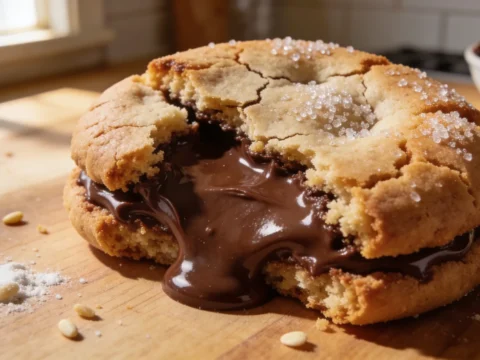
I spent years trying to perfect a brownie cookies recipe that actually delivers on the promise of tasting like a brownie but looking like a cookie. You know what I mean – those bakery-style treats with crackly tops and centers so fudgy they’re practically underbaked. After countless batches (and a few epic fails), I finally cracked the code. These brownie cookies have all the rich chocolate intensity of your favorite corner brownie piece but in a convenient, handheld cookie form.
Table of Contents :
Why These Brownie Cookies Will Ruin You For Regular Cookies
Look, I’m gonna be honest here. Regular chocolate chip cookies are great and all, but sometimes you need something more intense. Something that makes you close your eyes when you take a bite. That’s what these brownie cookies do.
The first time I tried making them, I basically created chocolate pancakes. The batter was way too thin and spread all over the baking sheet. Total disaster. Then I overcorrected and made something so dense it was like biting into fudge that had been left in the sun – not exactly the cookie experience I was going for. The secret, I eventually discovered, is in how you melt the chocolate and when you add the dry ingredients. Oh, and cooling the dough. I tried skipping that step once when I was in a hurry making these for my nephew’s birthday. Big mistake. HUGE.
What makes these different from other recipes floating around is the ratio of chocolate to flour. Most recipes are too cakey or too dry. These actually stay gooey in the center even days later (though good luck having any last that long).
Ingredients brownie cookies recipe
The beauty of this brownie cookies recipe is that you probably have most of these ingredients in your pantry already. Nothing fancy required, which is exactly how I like my baking projects. The quality of your chocolate matters most here – everything else is just supporting the chocolate’s starring role.
If you’re wondering about substitutions, I’ve tested quite a few over the years. While the original recipe is my favorite, I’ll share what works and what definitely doesn’t. Trust me on the espresso powder – it doesn’t make the cookies taste like coffee, it just intensifies the chocolate flavor in a way that’ll make people ask for your secret.
Semi-sweet chocolate (8 ounces)
This is the foundation of our brownie flavor, so use the best you can afford. I actually prefer the baking bars over chocolate chips here because they melt more smoothly. Ghirardelli is my go-to, but Trader Joe’s pound plus bars work beautifully too and cost less. In a pinch, you can substitute bittersweet chocolate, but you might want to add a touch more sugar.
Unsalted butter (1/2 cup)
Always unsalted so you can control the salt content. The butter needs to be just softened, not melting or greasy. If you’re in a hurry, cut it into small cubes – it’ll soften faster. I’ve tried using coconut oil as a substitute, and while it works technically, the flavor profile changes dramatically.
Granulated sugar (3/4 cup)
This isn’t just for sweetness – it’s crucial for creating those crackly tops we’re after. The sugar dissolves partially during baking and recrystallizes on top. I’ve tried reducing this and the texture suffers dramatically. Don’t mess with the sugar amount unless you don’t care about the crackly tops.
Light brown sugar (1/4 cup, packed)
Adds moisture and a subtle molasses flavor that deepens the chocolate notes. Dark brown sugar works too if that’s what you have – it’ll just give a slightly stronger molasses background. One time I used all white sugar because I ran out of brown, and the cookies were noticeably less fudgy in the center.
Eggs (2 large)
These provide structure and contribute to that shiny, crackly top. Room temperature eggs incorporate much better than cold ones. If you forgot to take them out ahead of time (I do this constantly), place them in warm water for 5-10 minutes. I’ve never found a successful egg substitute for this particular recipe that maintains the right texture.
Vanilla extract (1 teaspoon)
Enhances all the other flavors. Real vanilla extract makes a difference here – I learned that the hard way when I used the artificial stuff once during a pandemic baking frenzy. The flavor wasn’t as round or complex. But honestly, if artificial is what you have, these cookies will still be delicious.
All-purpose flour (1 cup)
The protein structure in all-purpose flour gives these cookies their shape without making them tough. I’ve tried bread flour (too chewy) and cake flour (too delicate). For gluten-free options, I’ve had success with cup-for-cup blends like Bob’s Red Mill, but the texture is slightly different – still good, just not identical.
Unsweetened cocoa powder (1/4 cup)
Adds depth to the chocolate flavor and contributes to the brownie-like texture. Dutch-processed works best here for that dark chocolate color and smoother flavor. Natural cocoa powder will work in a pinch but creates a slightly different flavor profile that’s more acidic. I prefer Hershey’s Special Dark or Droste.
Espresso powder (1 teaspoon, optional but recommended)
This is my secret weapon. It doesn’t make the cookies taste like coffee – it just makes the chocolate taste more intensely chocolate-y. It’s wild how much difference this tiny amount makes. If you don’t have it, instant coffee works too, just crush it into a fine powder first. You can skip it, but you’ll miss out on some flavor depth.
Baking powder (1/2 teaspoon)
Provides just enough lift without making these cakey. The small amount is intentional – we want these dense and fudgy. Check that your baking powder is fresh; if it’s been hanging around in your cabinet for years (no judgment, we’ve all been there), your cookies won’t rise properly.
Salt (1/4 teaspoon)
Balances the sweetness and enhances the chocolate flavor. I use kosher salt in pretty much everything. If you’re using table salt, reduce to 1/8 teaspoon. And yes, you need salt even though it seems like a small amount – I forgot it once and the cookies tasted flat and one-dimensional.
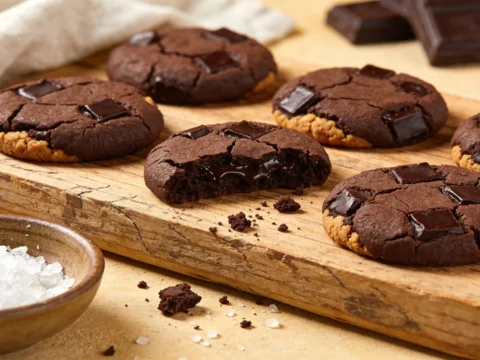
Semi-sweet chocolate chips (3/4 cup, optional)
These create those melty chocolate pockets that make people moan involuntarily when they bite in. You can substitute any chocolate chip variety here based on your preference – milk chocolate for sweeter cookies, dark for more intensity, or even chunks instead of chips for bigger melty spots. Sometimes I use half regular chips and half mini chips for texture variation.
Instructions brownie cookies recipe
The process for this brownie cookies recipe isn’t complicated, but timing matters. You’ll need about 20 minutes of active time, plus chilling time (which is non-negotiable, I’ve tested skipping it and regretted it every time). The good news is that the dough can be made ahead and refrigerated for up to 3 days before baking.
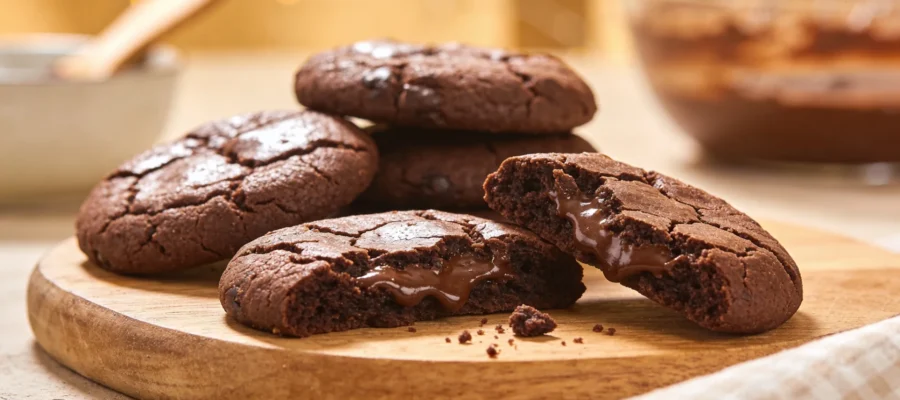
The most common mistake people make is overbaking these cookies. They might look underdone when you take them out – that’s exactly what we want! They’ll continue to set up as they cool, giving you that perfect fudgy center. If you bake until they look fully done, they’ll end up dry and cakey instead of rich and gooey.
STEP 1: Melt the chocolate and butter.
In a medium microwave-safe bowl, combine the chocolate and butter. Microwave in 30-second increments, stirring between each, until just melted and smooth. This usually takes about 1-1.5 minutes total. Don’t overheat or the chocolate can seize up and get grainy. The mixture should be warm but not hot – you should be able to comfortably touch it. Let it cool slightly while you prep the other ingredients.
STEP 2: Mix the wet ingredients.
In a large mixing bowl, whisk together the granulated sugar, brown sugar, eggs, and vanilla until fully combined, about 2 minutes by hand or 1 minute with an electric mixer. The mixture should lighten in color slightly. Don’t skimp on this mixing time – it’s crucial for developing that crackly top later. I learned this the hard way after rushing through this step once and wondering why my cookies looked so different.
STEP 3: Combine wet and chocolate mixtures.
Pour your slightly cooled chocolate mixture into the sugar and egg mixture, stirring constantly. The batter will thicken and become shiny, almost like a loose brownie batter. Make sure to scrape down the sides of the bowl to get everything incorporated. If the chocolate was too hot when you added it, you might scramble the eggs slightly – which is why the cooling period matters.
STEP 4: Add the dry ingredients.
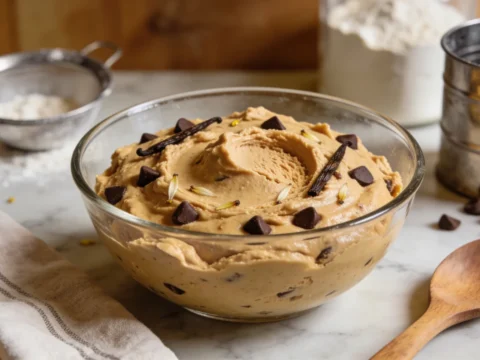
In a separate bowl, whisk together the flour, cocoa powder, espresso powder, baking powder, and salt. Add this to your chocolate mixture and fold gently until just combined. Don’t overmix or your cookies will be tough. You should still see a few streaks of flour when you stop mixing. The dough will be soft and somewhat sticky at this point – more like a thick brownie batter than a traditional cookie dough.
STEP 5: Fold in chocolate chips.
If using, gently fold in the chocolate chips. The dough will still be pretty soft, and that’s exactly what we want. The chips should distribute evenly through the batter. Sometimes I set aside a few chips to press into the tops of the cookies just before baking – it makes them look extra chocolatey and professional.
STEP 6: Chill the dough.
Cover the bowl with plastic wrap and refrigerate for at least 30 minutes, or up to 3 days. This step is non-negotiable! The dough needs to firm up to prevent excessive spreading. I know it’s tempting to skip this (and believe me, I’ve tried), but you’ll end up with flat pancake cookies if you do. Use this time to preheat your oven to 350°F and line your baking sheets with parchment paper.
STEP 7: Scoop and bake the cookies.
Using a cookie scoop or spoon, form 2-tablespoon balls of dough and place them 2 inches apart on your lined baking sheets. The dough will be firm but still somewhat sticky. If it’s too firm to scoop, let it sit at room temperature for 5-10 minutes. Bake for 10-12 minutes until the edges are set but the centers still look slightly underdone. They’ll puff up and then settle as they bake, creating those beautiful cracks on top.
STEP 8: Cool properly.
Let the cookies cool on the baking sheet for 5 minutes – during this time they’ll continue to cook slightly from the residual heat and will firm up enough to move. Then transfer them to a wire rack to cool completely. Well, theoretically. In practice, I always sneak one while it’s still warm because that melty center is completely irresistible. Just be careful not to burn your mouth on the molten chocolate chips!
Tips & Variations brownie cookies recipe
To store these brownie cookies, keep them in an airtight container at room temperature for up to 4 days. They actually get fudgier on day two! For longer storage, freeze them in a single layer until solid, then transfer to a freezer bag for up to 3 months. Thaw at room temperature or microwave for 10-15 seconds for that fresh-baked gooey center.
For variations, try adding 1/2 cup of chopped walnuts or pecans for a nutty crunch. Peppermint extract (1/4 teaspoon) plus crushed candy canes on top creates an amazing holiday version. For a Mexican chocolate twist, add 1/4 teaspoon of cinnamon and a pinch of cayenne. And if your cookies don’t look exactly like the picture? Don’t sweat it. As long as they taste amazing (which they will), that’s all that matters.
Final Thoughts brownie cookies recipe
These brownie cookies have become my go-to when I need to impress someone or just want to treat myself after a rough day. They’re the perfect balance between cookie convenience and brownie indulgence. While they take a bit more effort than your average drop cookie, the payoff is absolutely worth it.
If you try this brownie cookies recipe, I’d love to hear how it turned out for you. Did you stick with the classic version or try a variation? Let me know in the comments – especially if you discover a twist that works amazingly well. I’m always looking to make these even better (though honestly, they’re pretty darn perfect as is).
Fudgy Brownie Cookies
These fudgy brownie cookies have crackly tops and gooey centers, offering the rich chocolate intensity of a brownie in a convenient cookie form.